Workspace Source Data Management
This chapter describes how to add data source tables to a workspace.
Add a table
Step 1: Open the workspace page
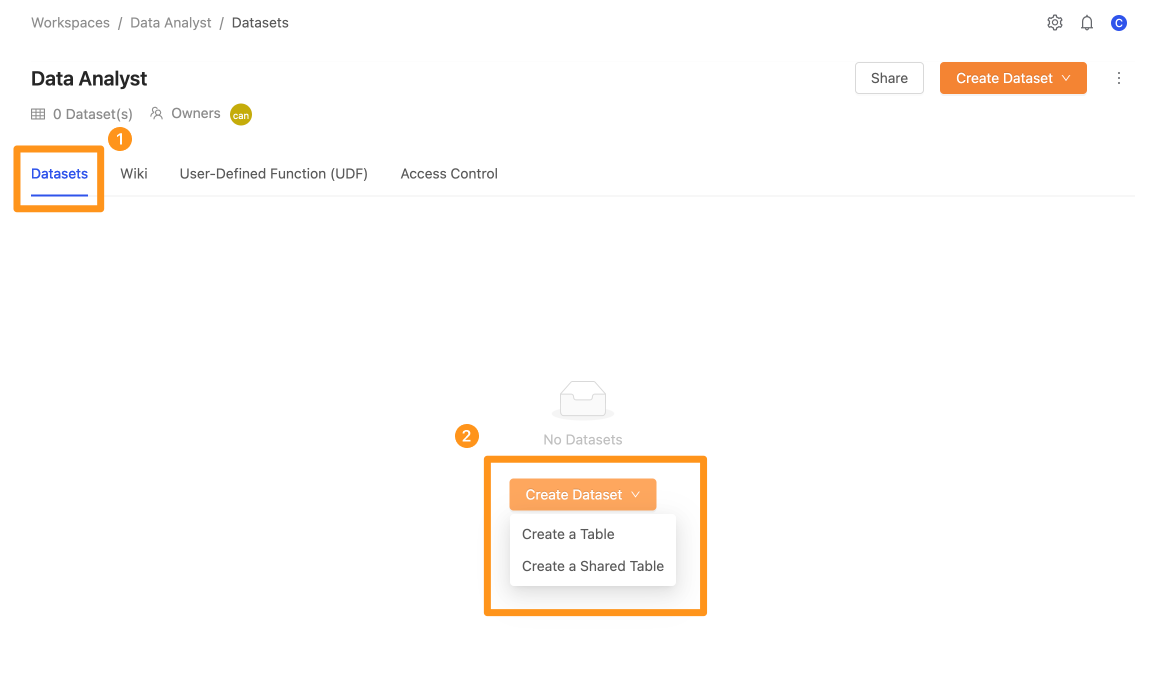
On the Datasets tab, click the Create Dataset button, then select Create a Table from the drop-down menu.
Step 2: Choose data from a data source
After selecting Create a Table, the following dialog opens, where you choose the data source, table, and columns to import.
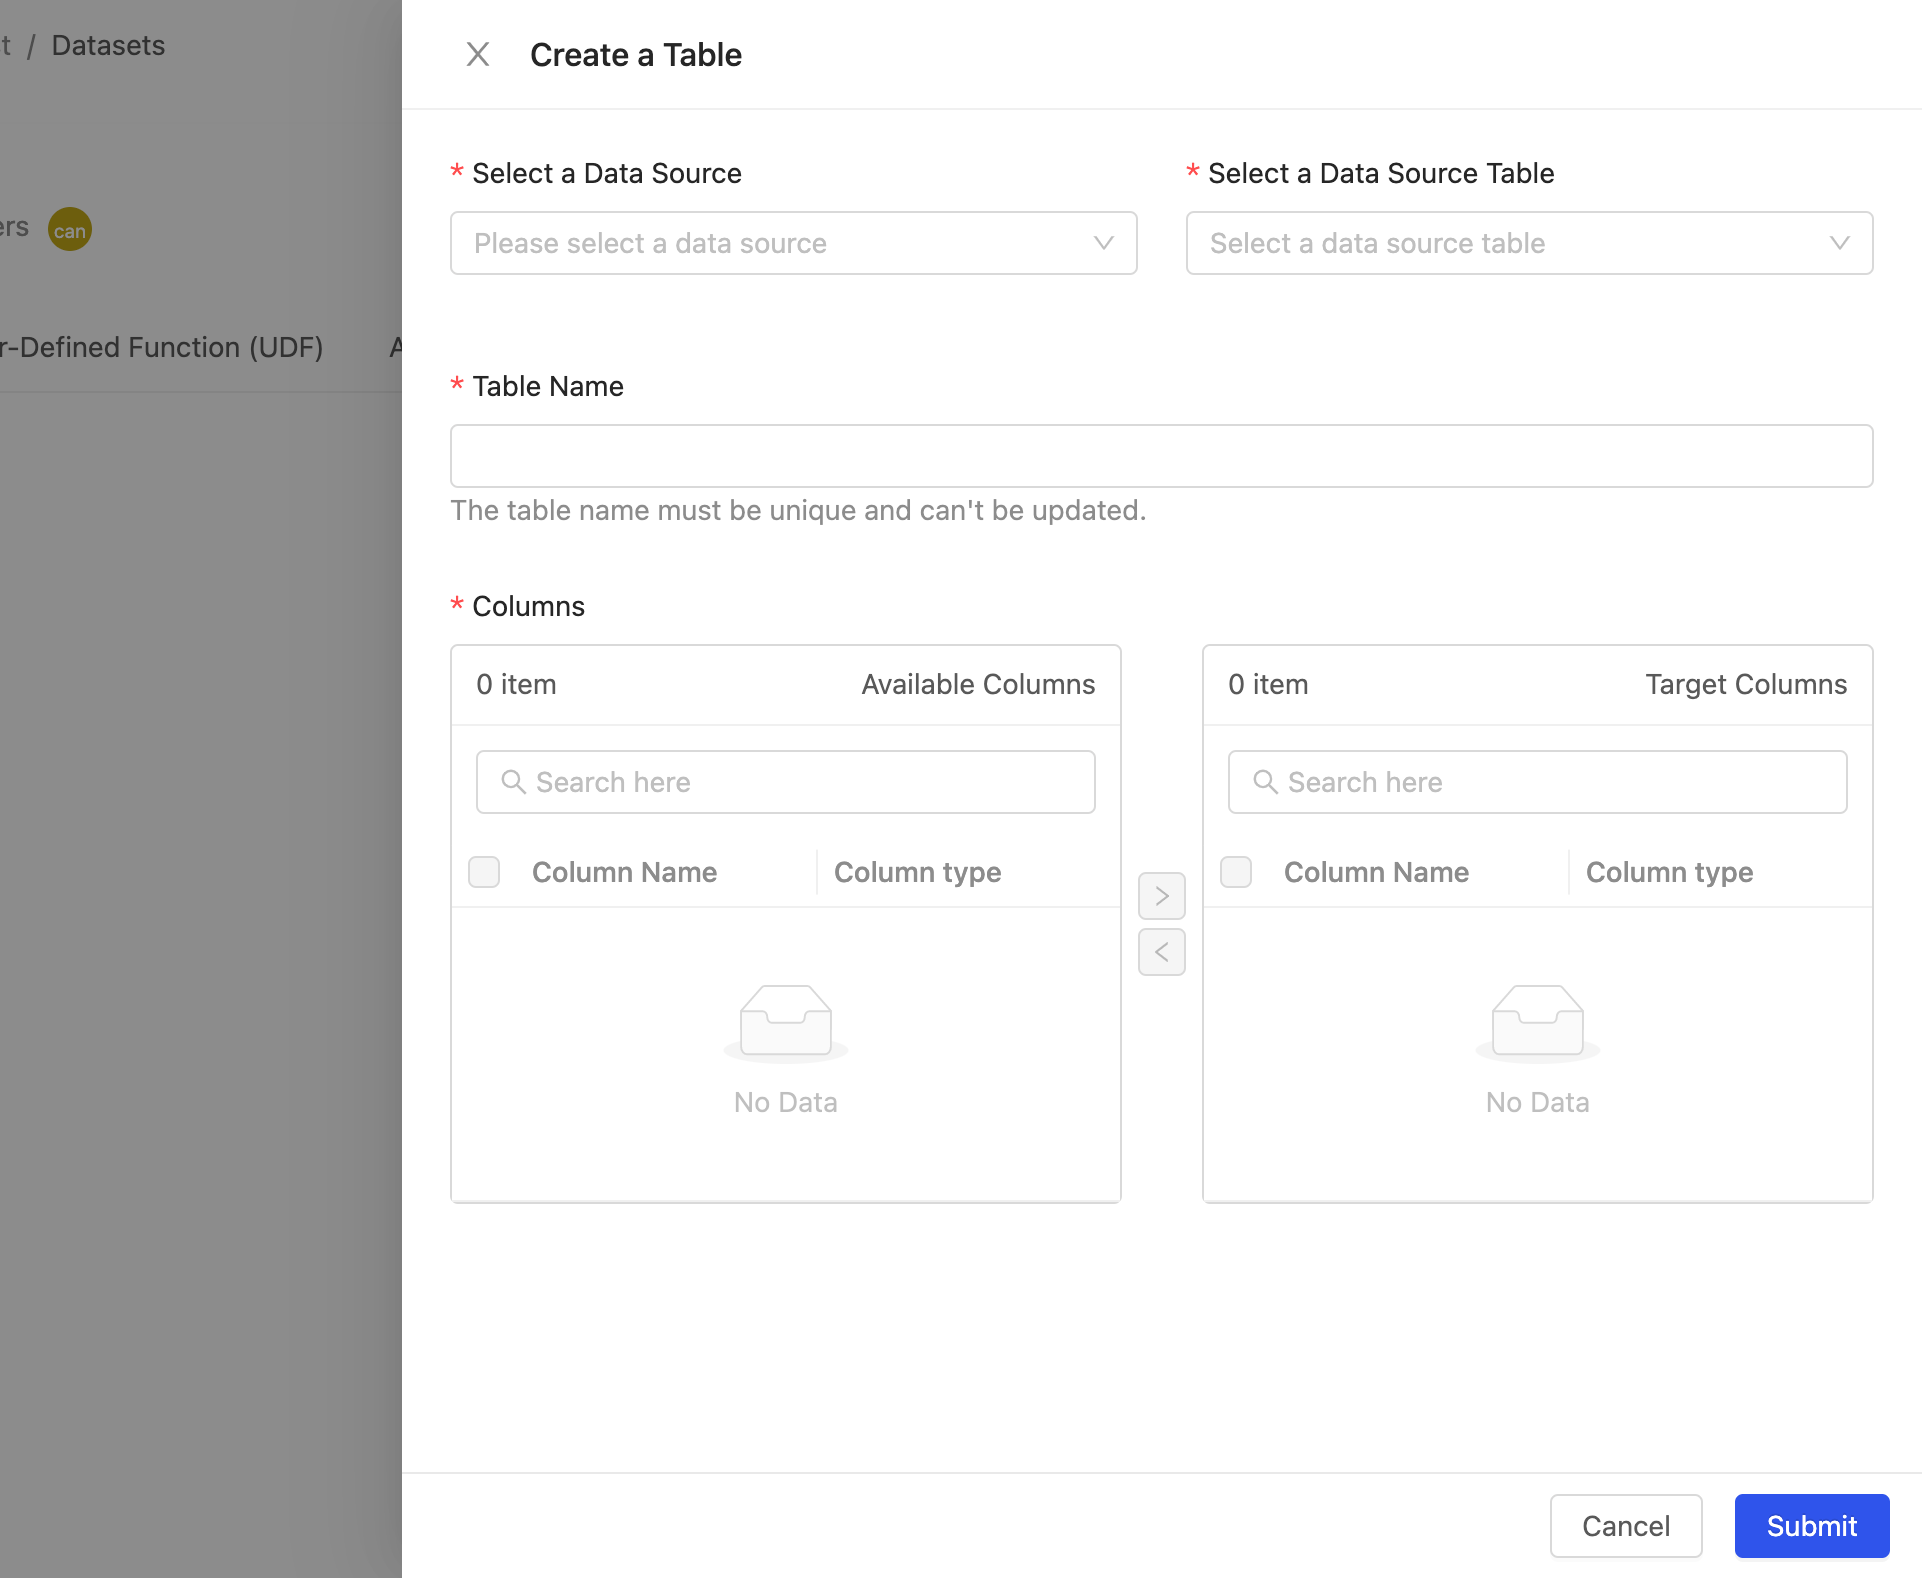
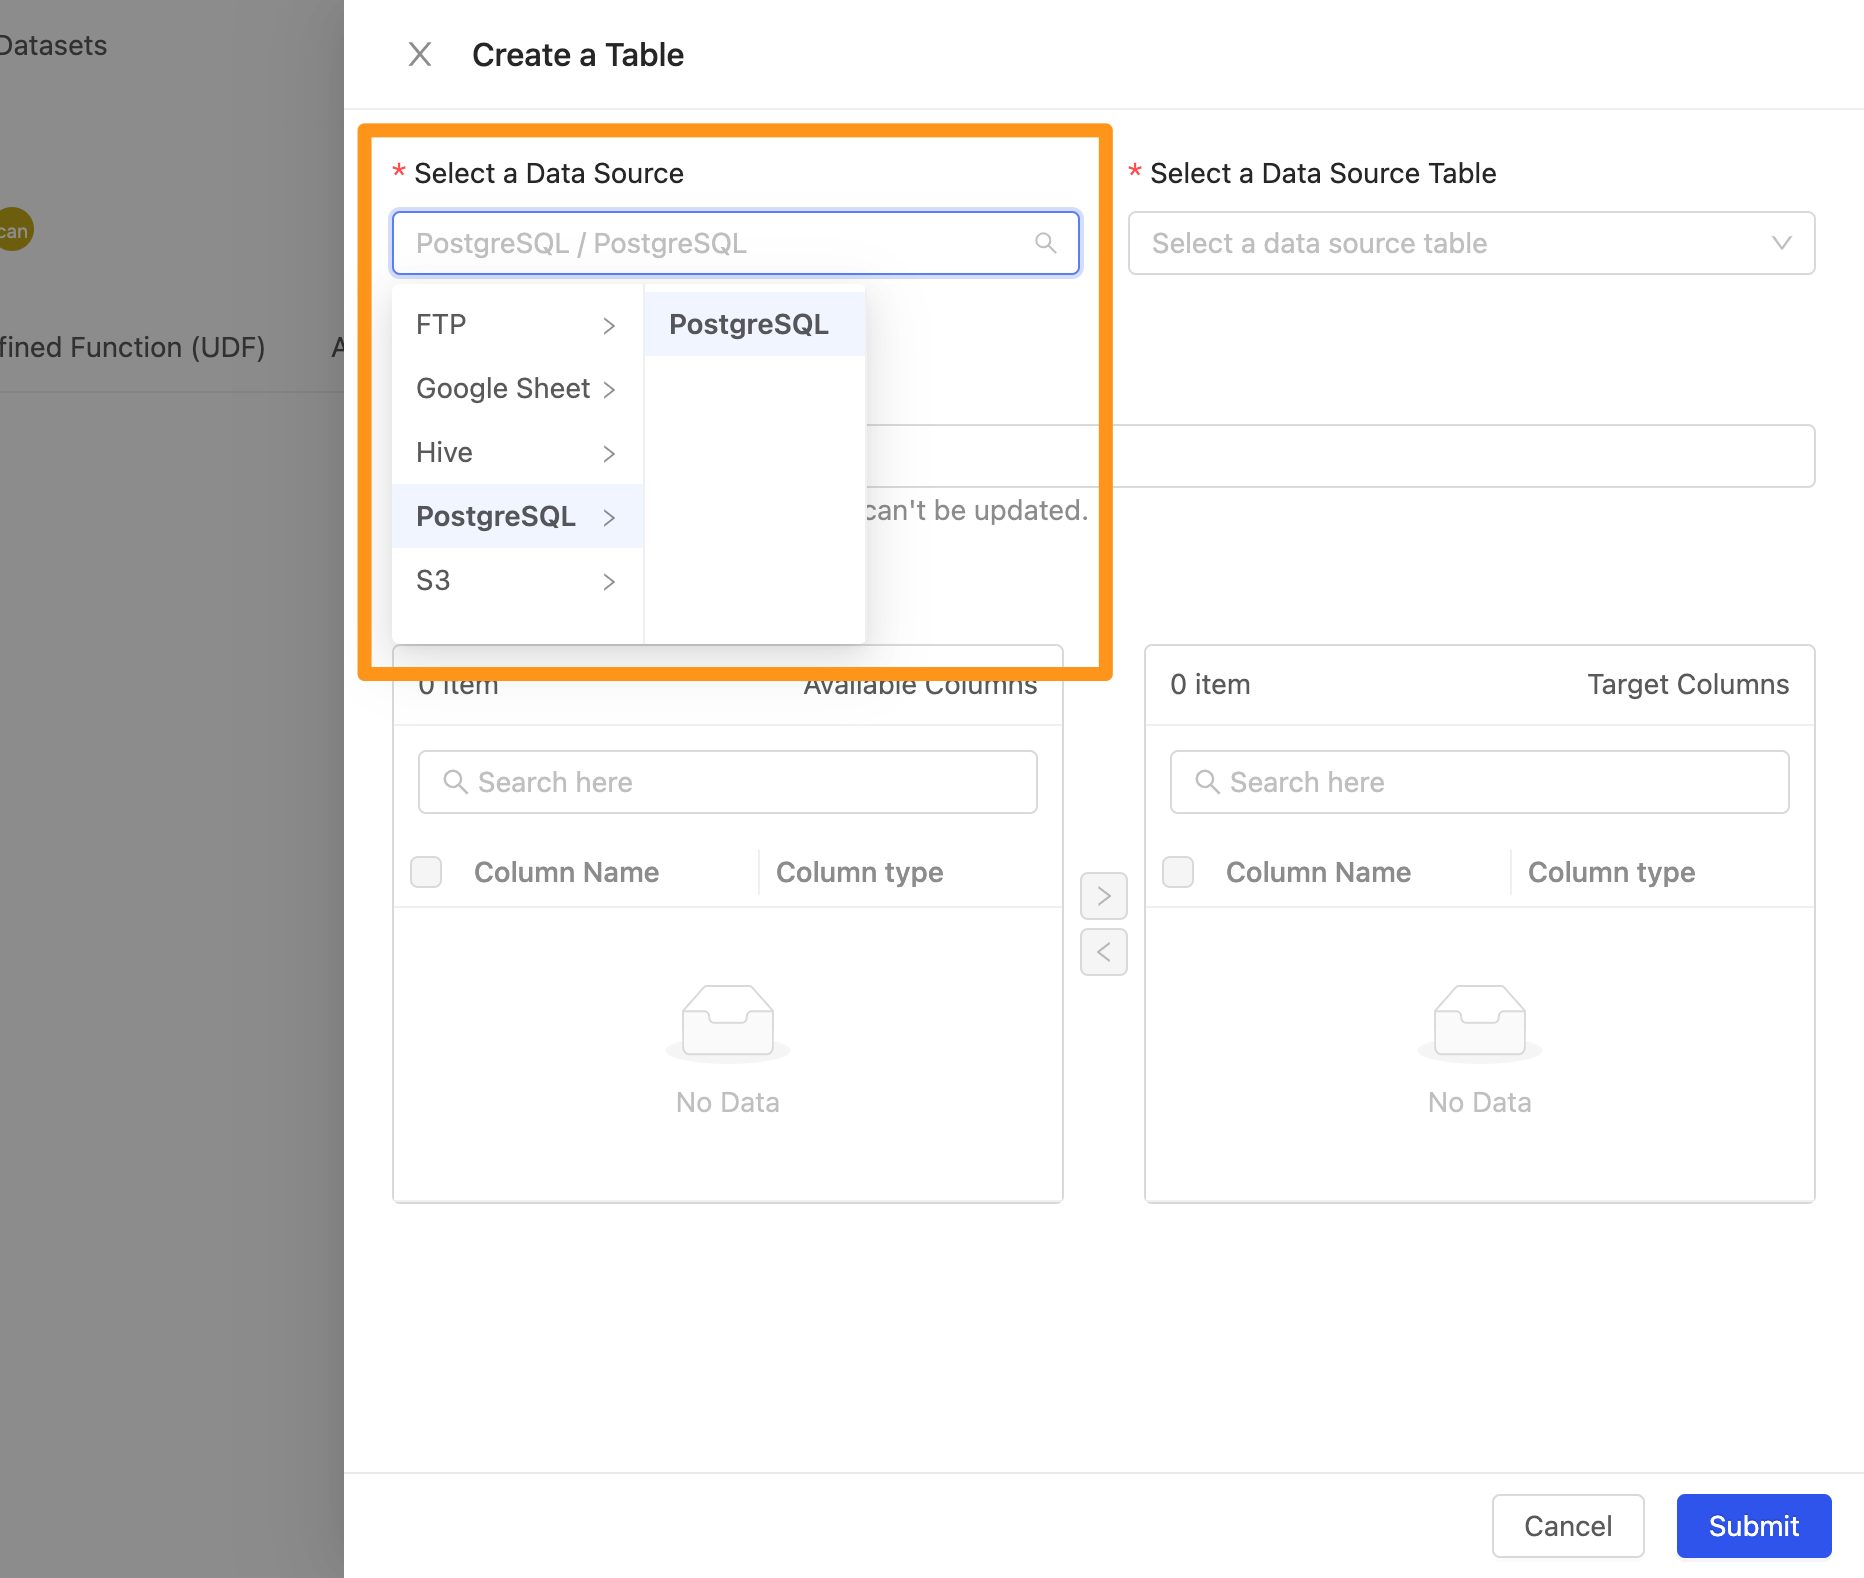
- Select a Data Source: Select the data source
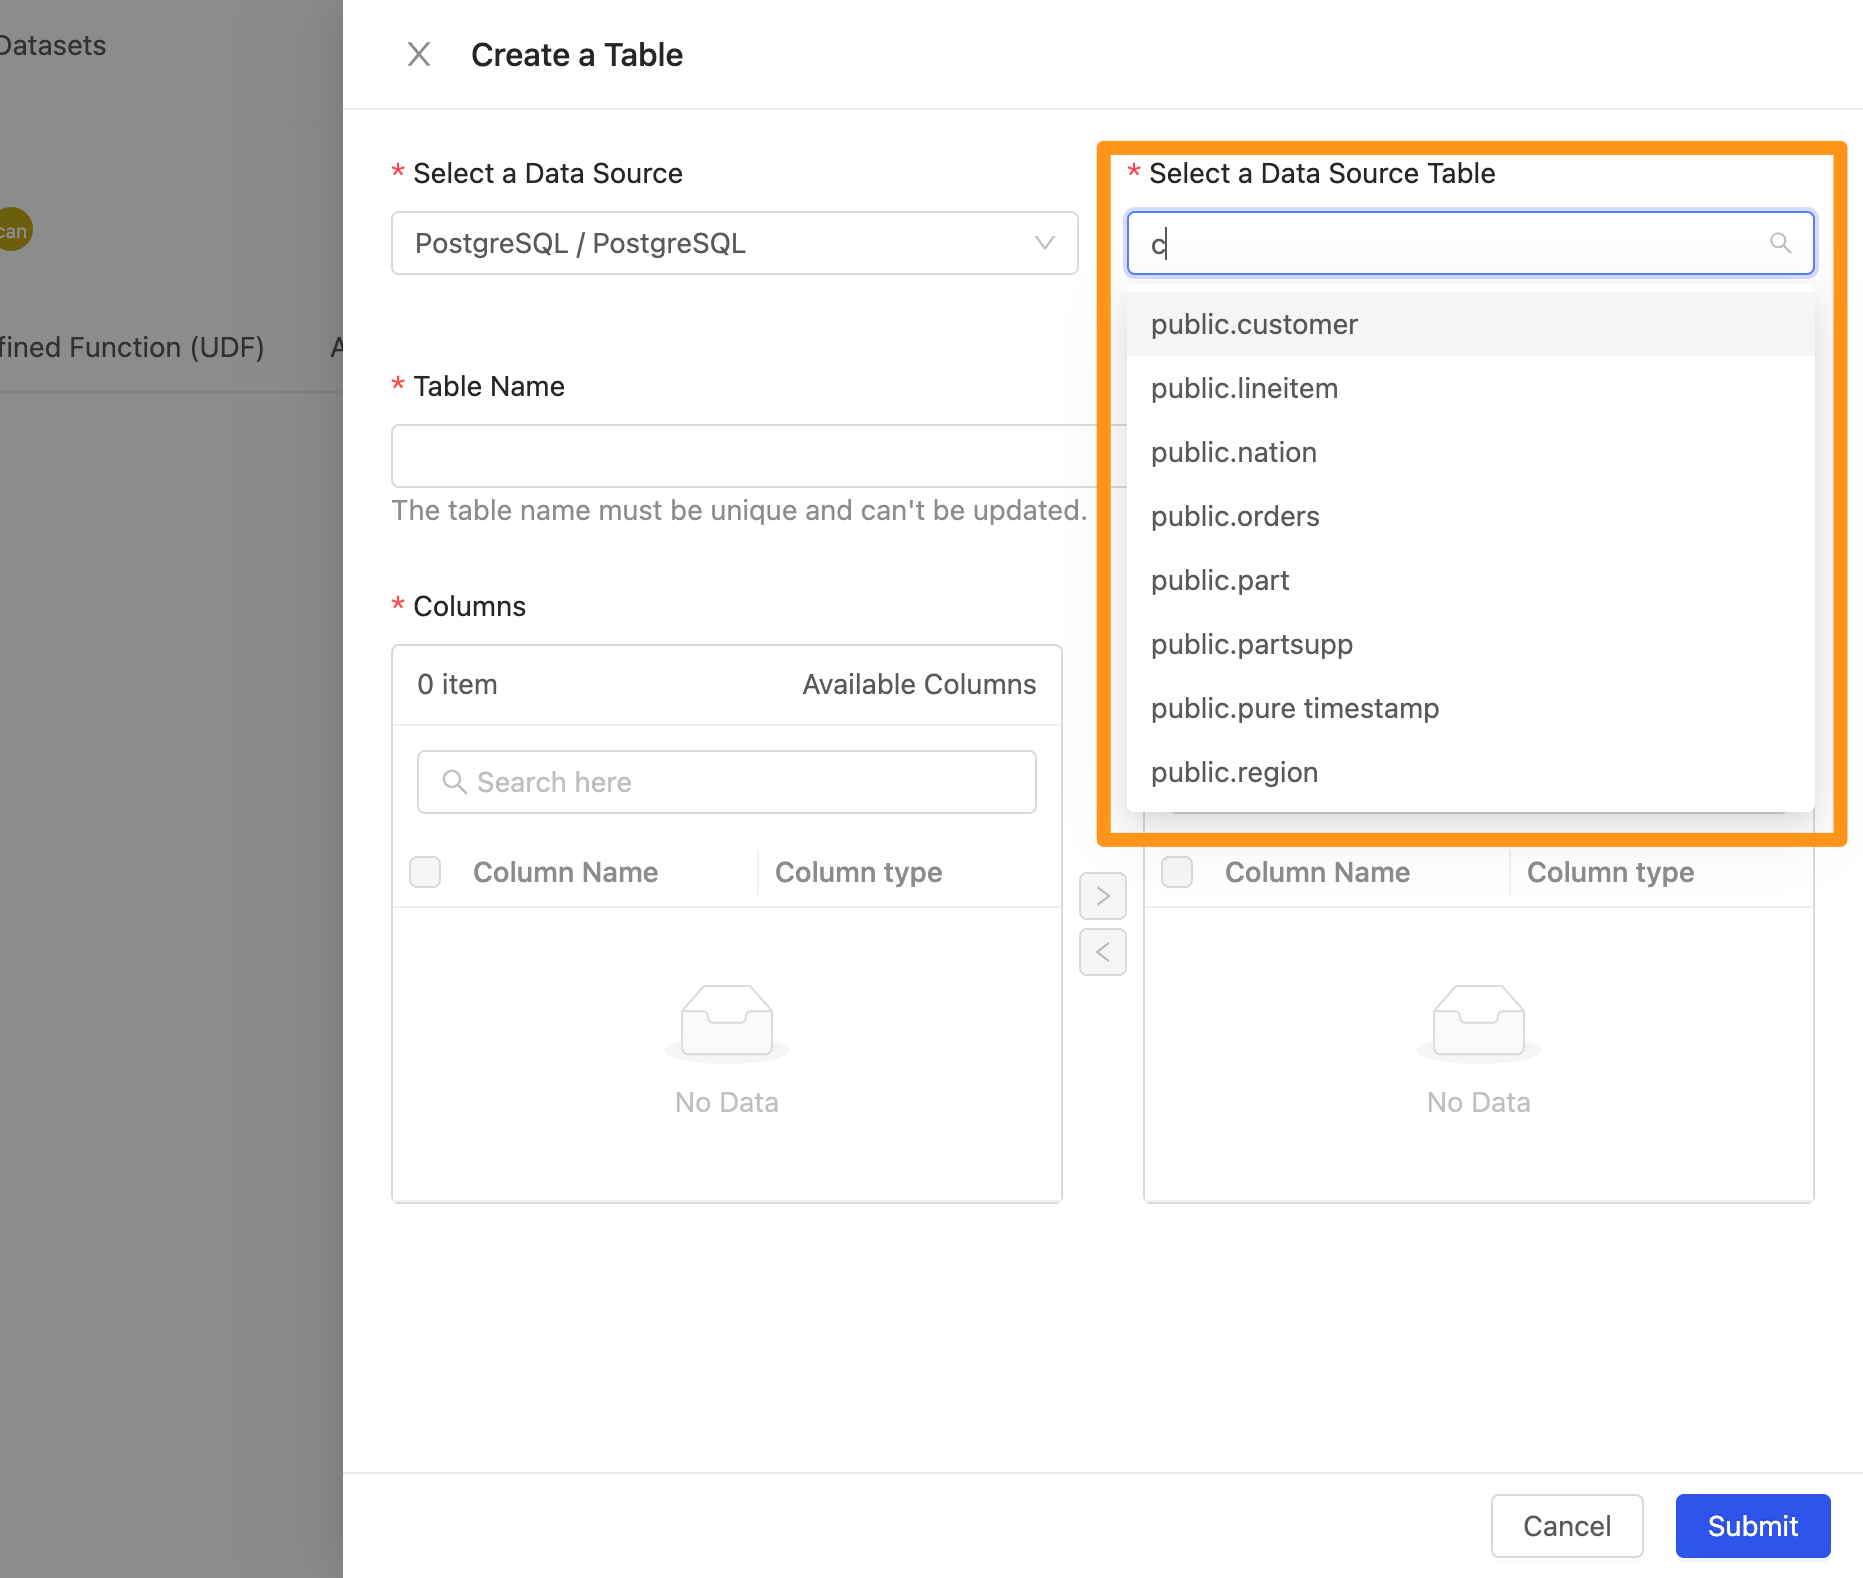
- Select a Data Source Table: Select a table in this data source. You can browse the list or type keywords to search for the table to import.
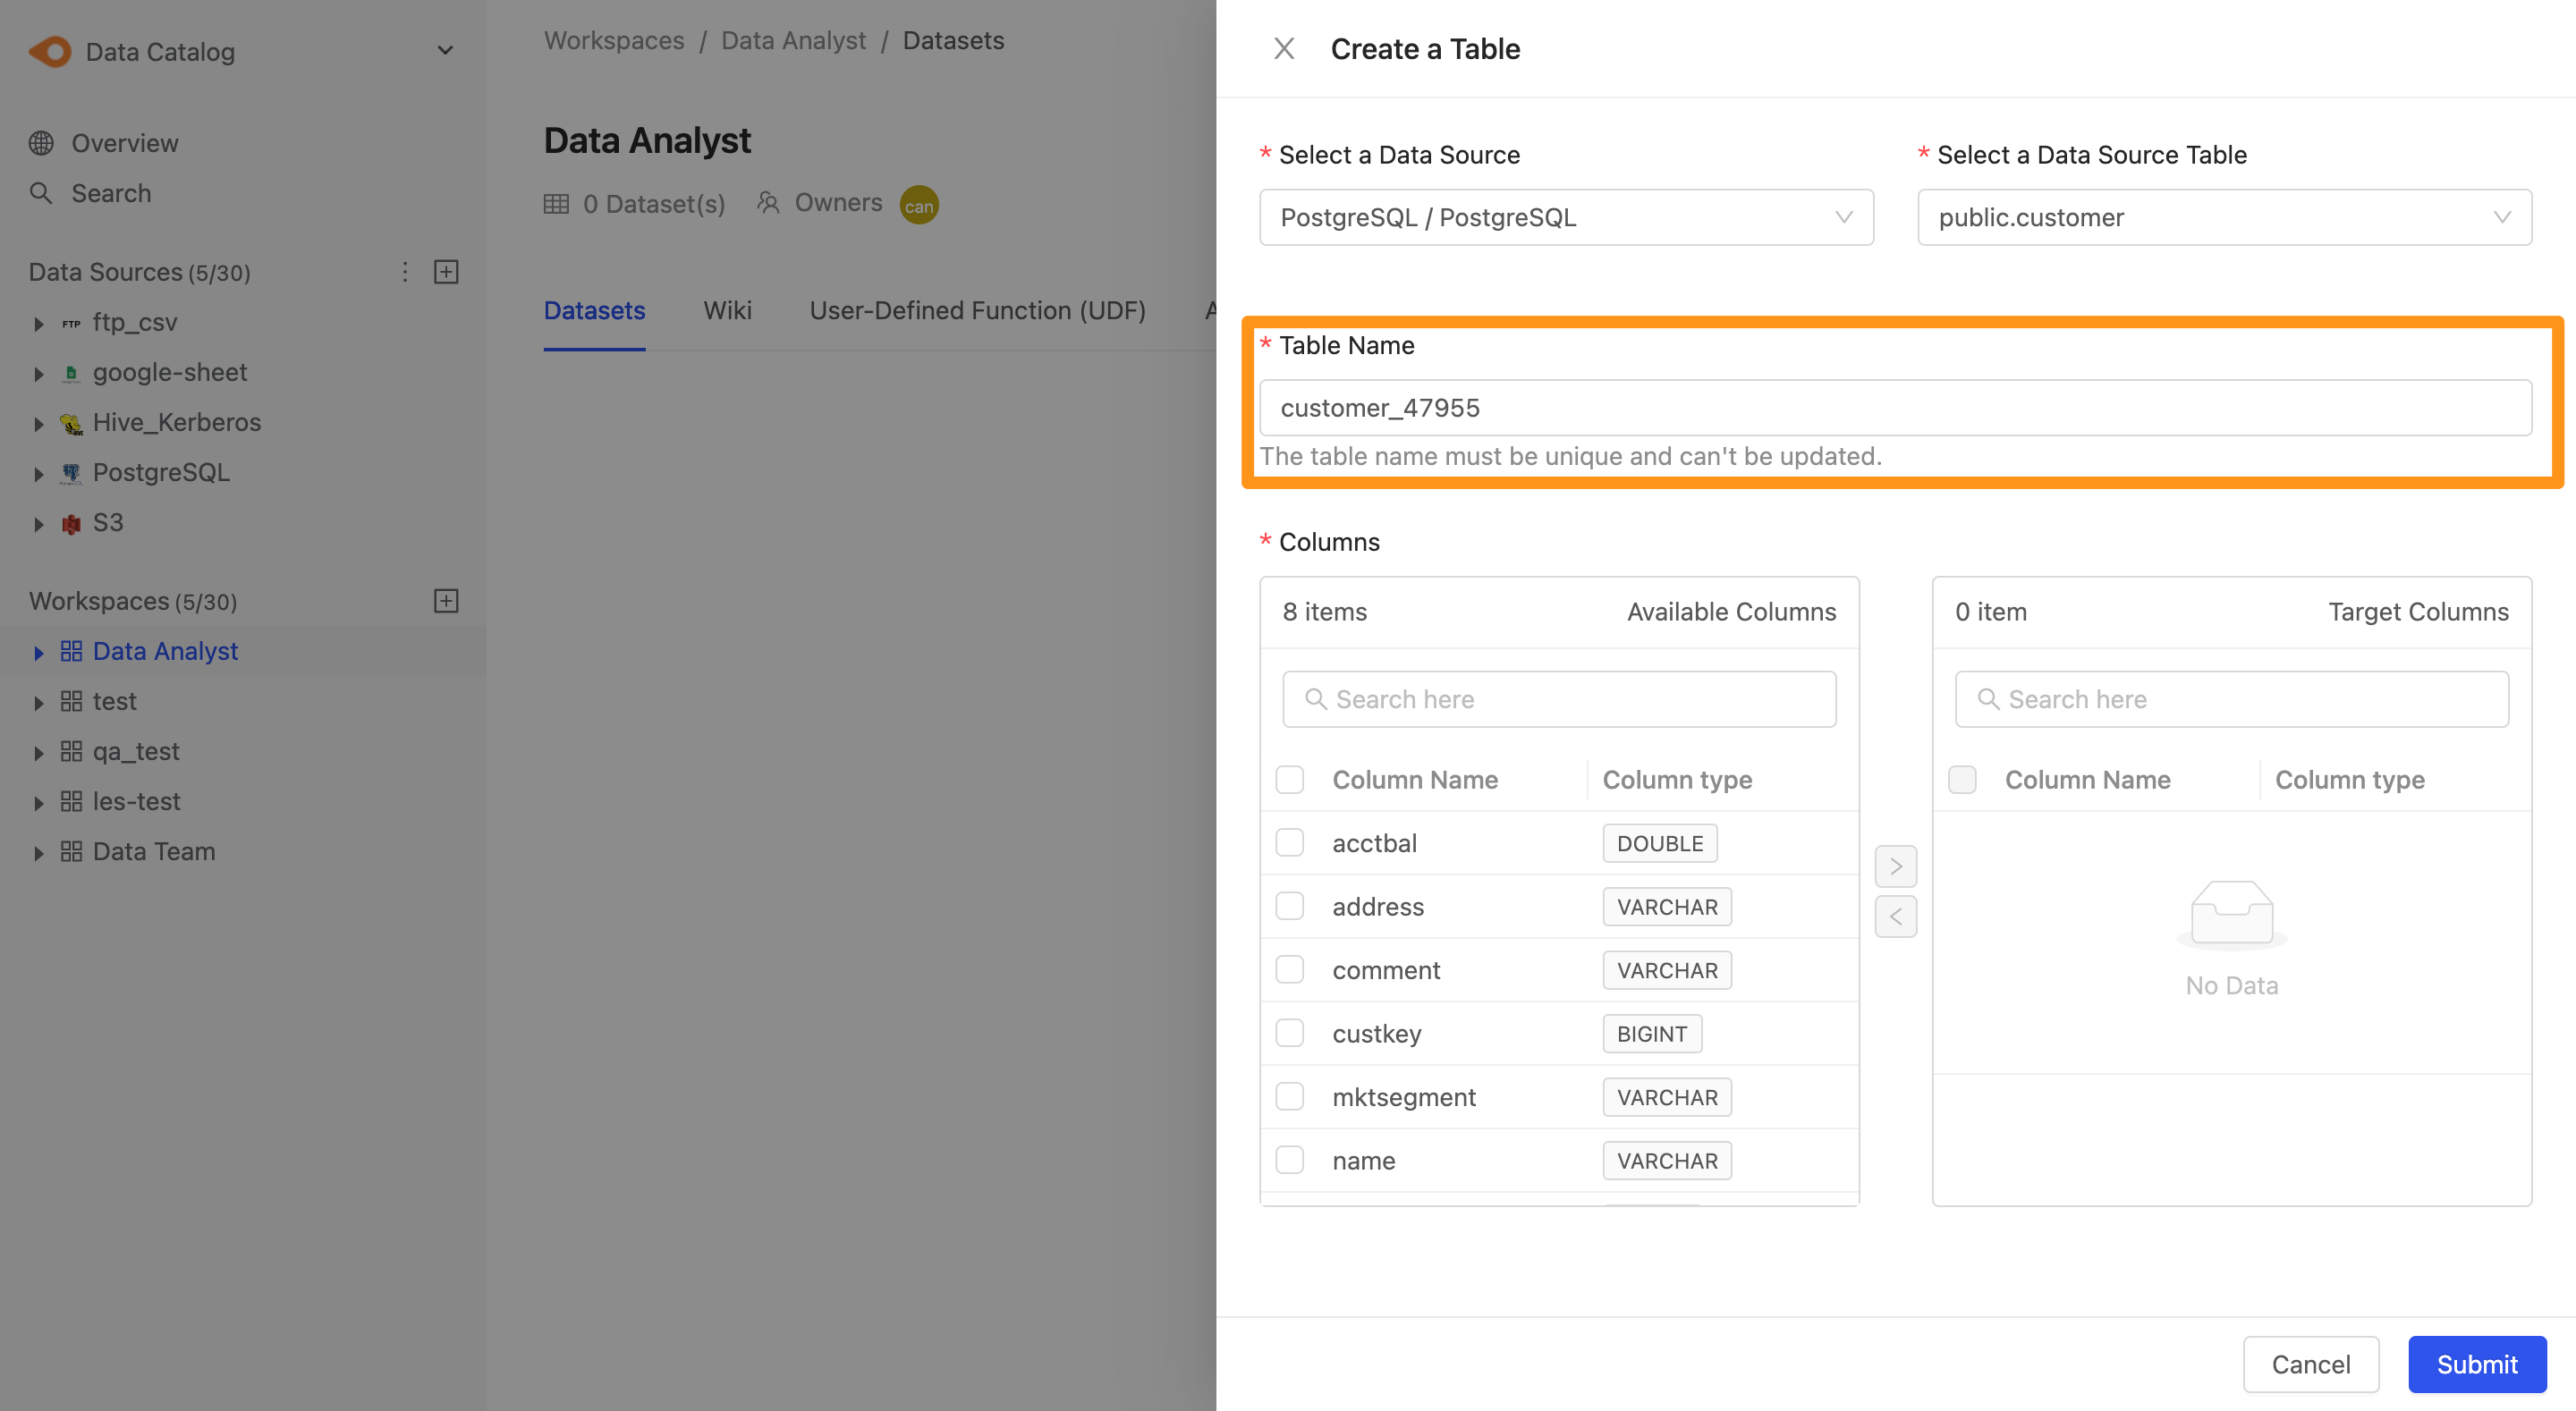
- Table Name: When you add a table, the system automatically generates a unique name based on the table's name, to avoid name collisions with other tables.
The Table Name cannot be changed later.
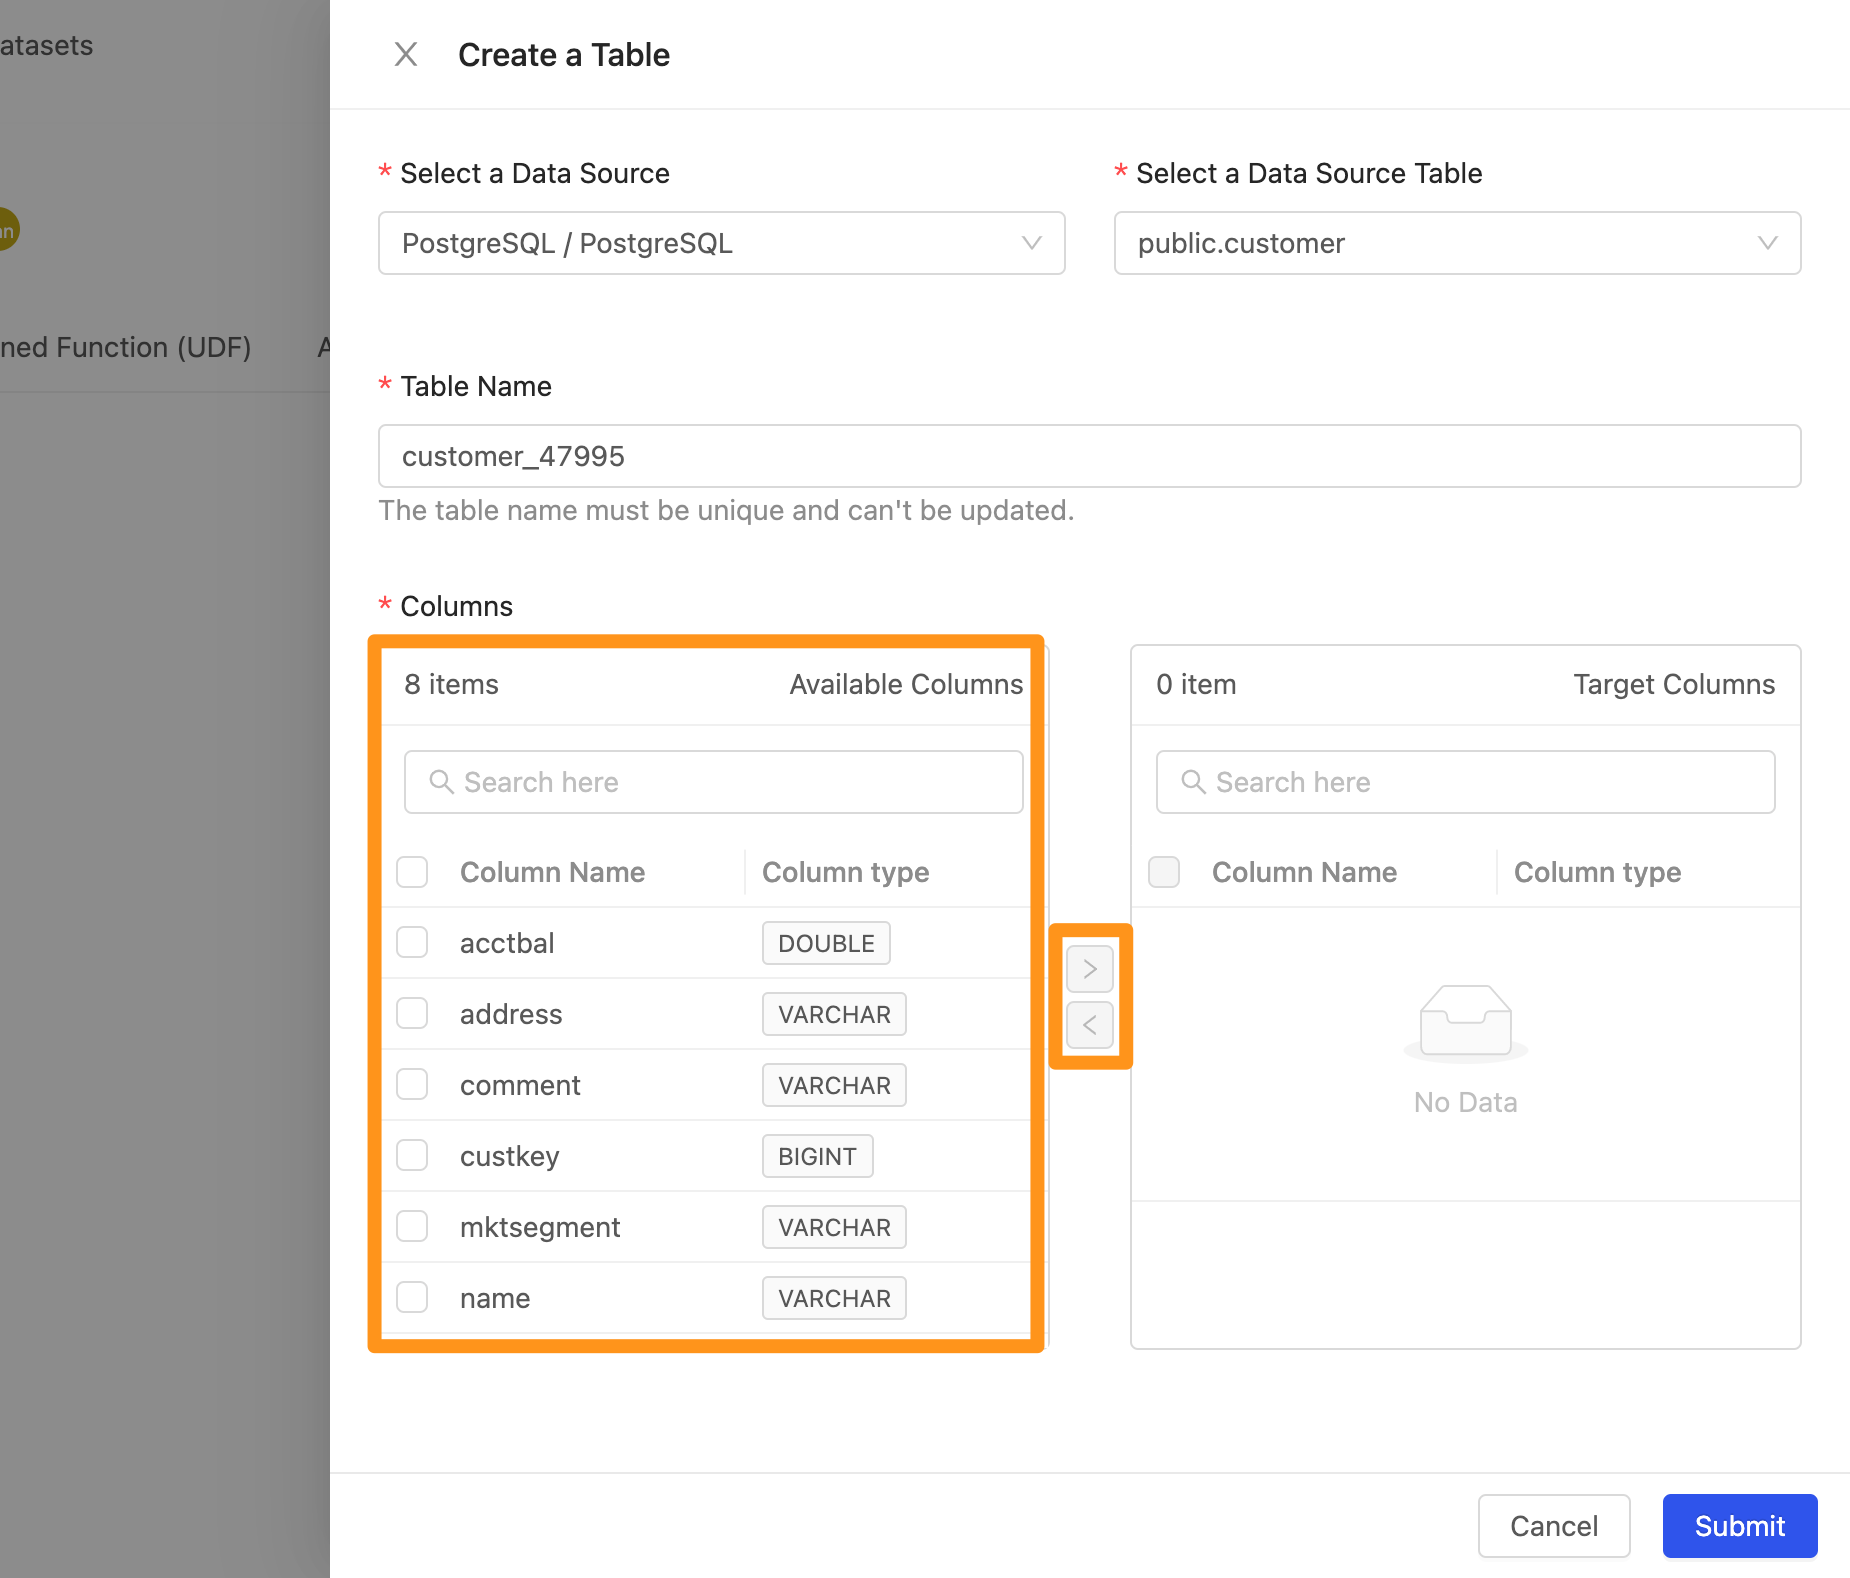
- Columns: Select columns. Available Columns on the left are the columns in this table; Target Column on the right are the columns to import into the workspace. Use
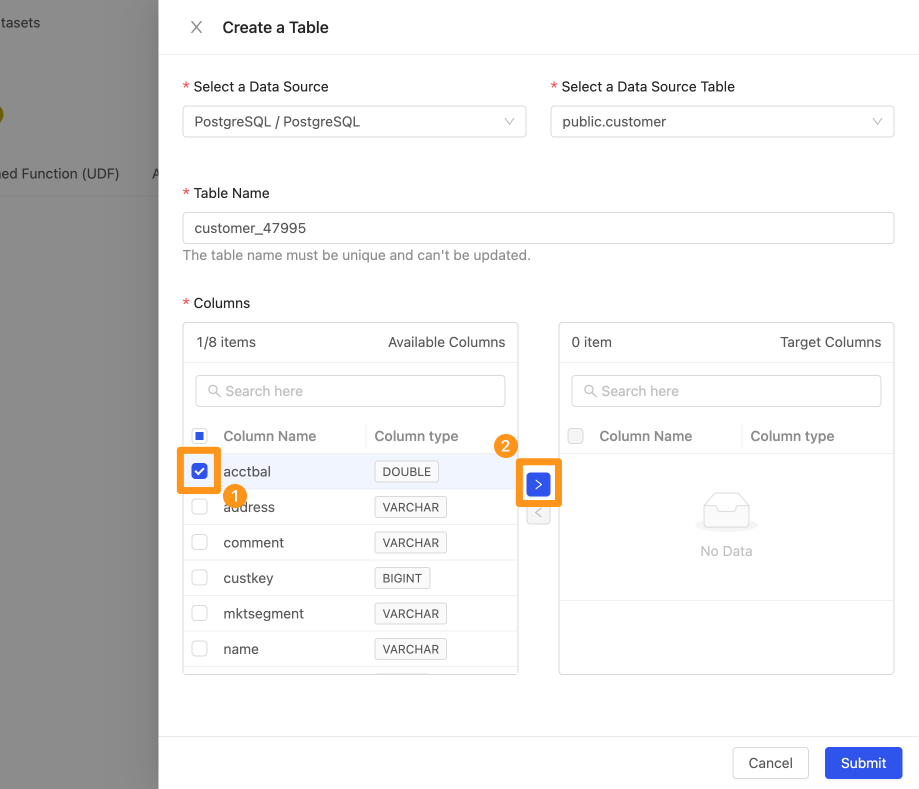
>and<to add and remove columns.
- Select a column and click >, and the column moves to the right, meaning it will be imported into the workspace.
Step 3: Finish
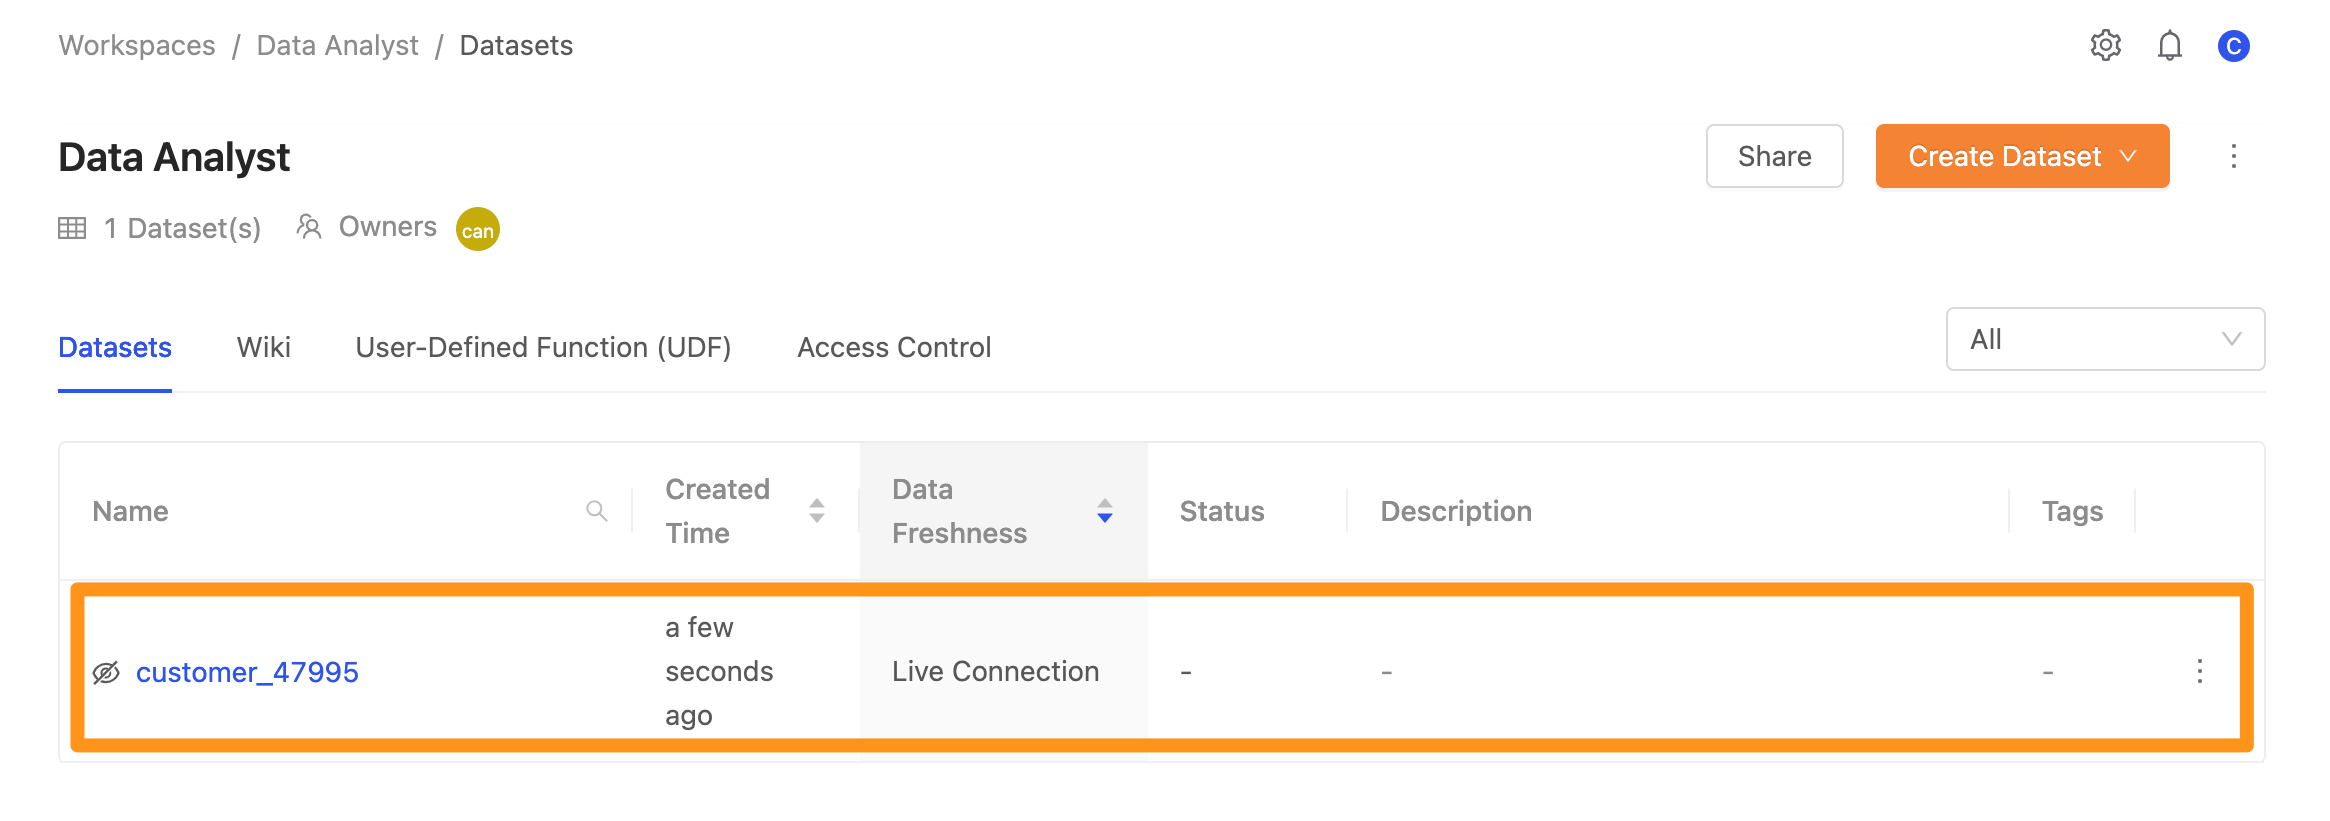
Click Submit to finish. The imported data is shown on the page.
Edit a table
Add or remove columns of a data source table already linked to the workspace.
Step 1:
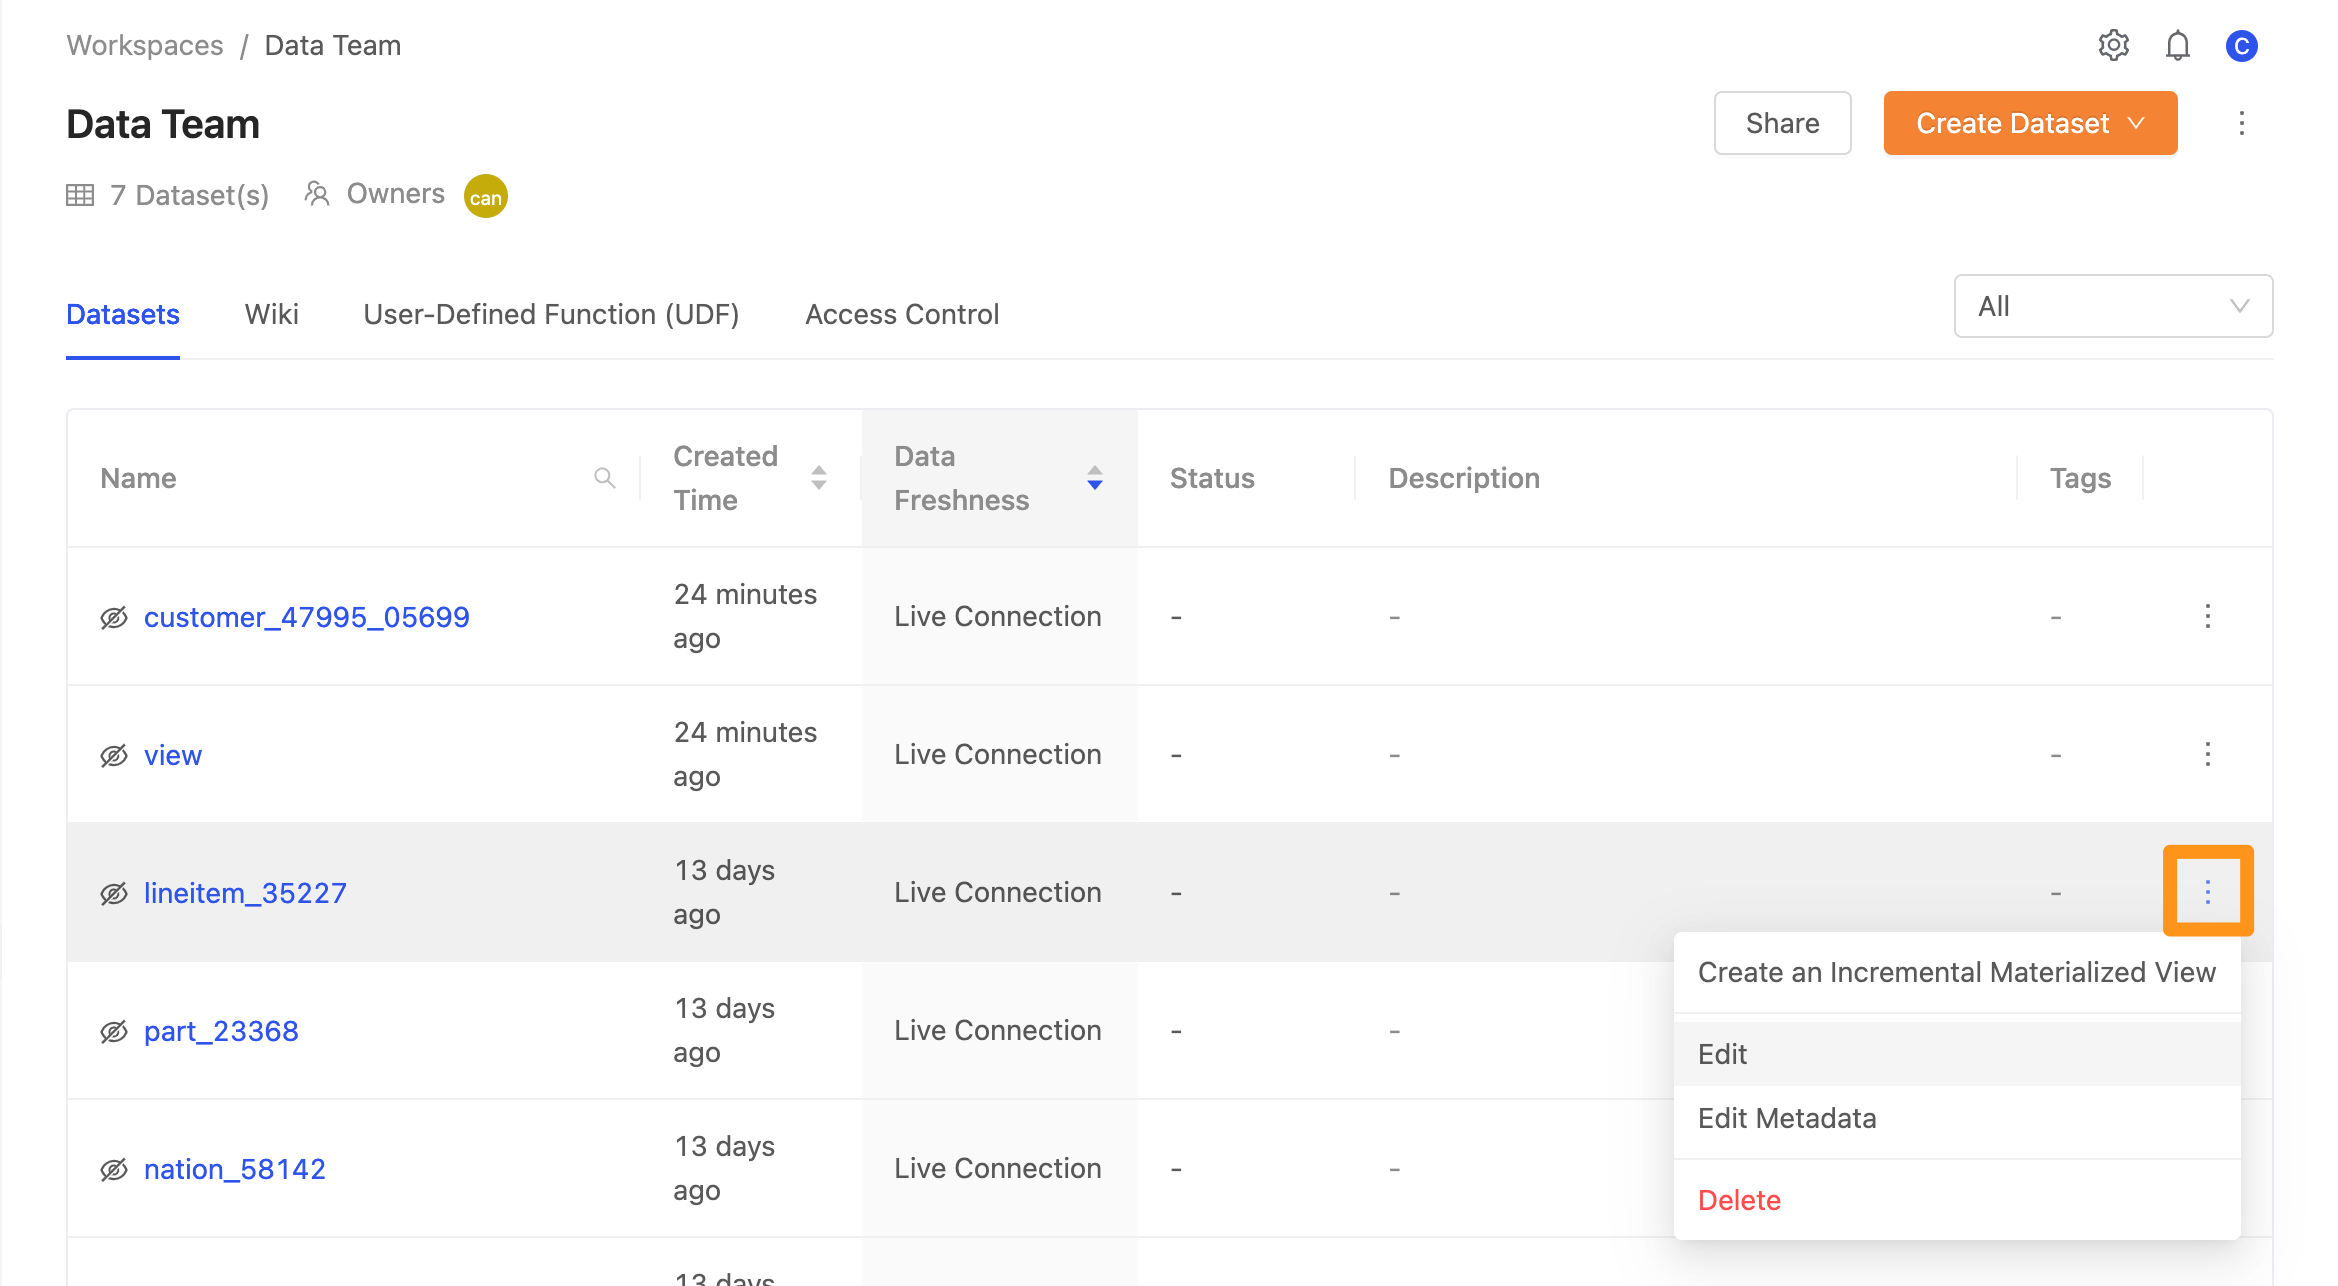
On the Datasets tab of the workspace page, click the three-dot icon to the right of the table you want to edit, and select Edit to open the editing page.
Step 2:
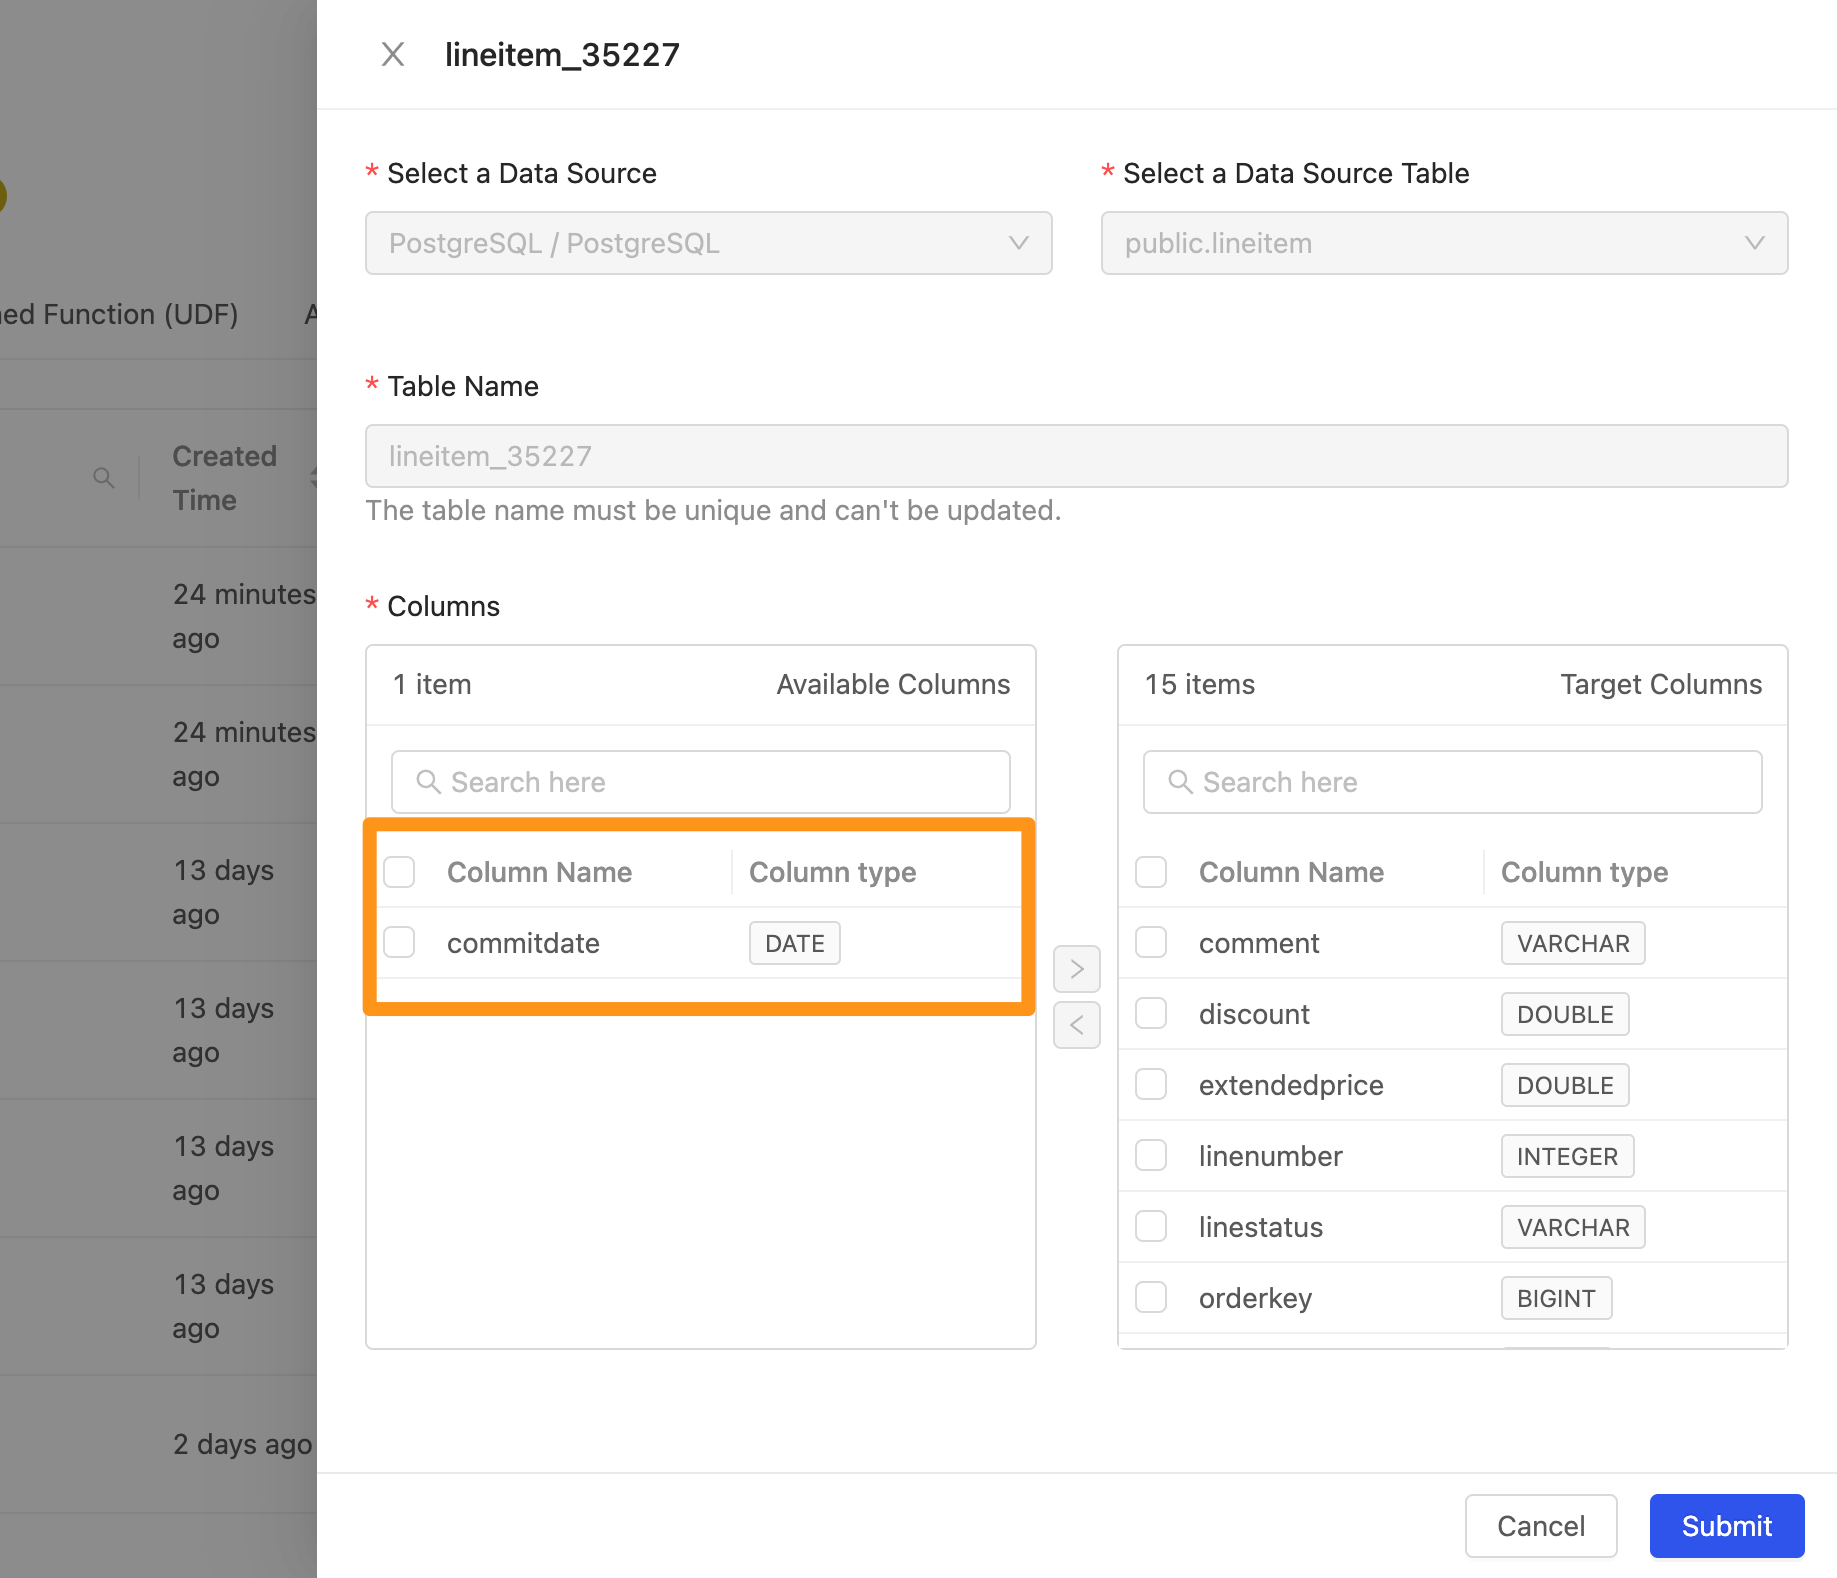
In the dialog, the right side shows the columns already imported into the workspace, and the left side shows the columns in the data source. Use > and < to add and remove columns.
Step 3:
Click Submit to finish editing.
Editing only lets you adjust columns; nothing else can be changed.
Delete a table
Step 1:
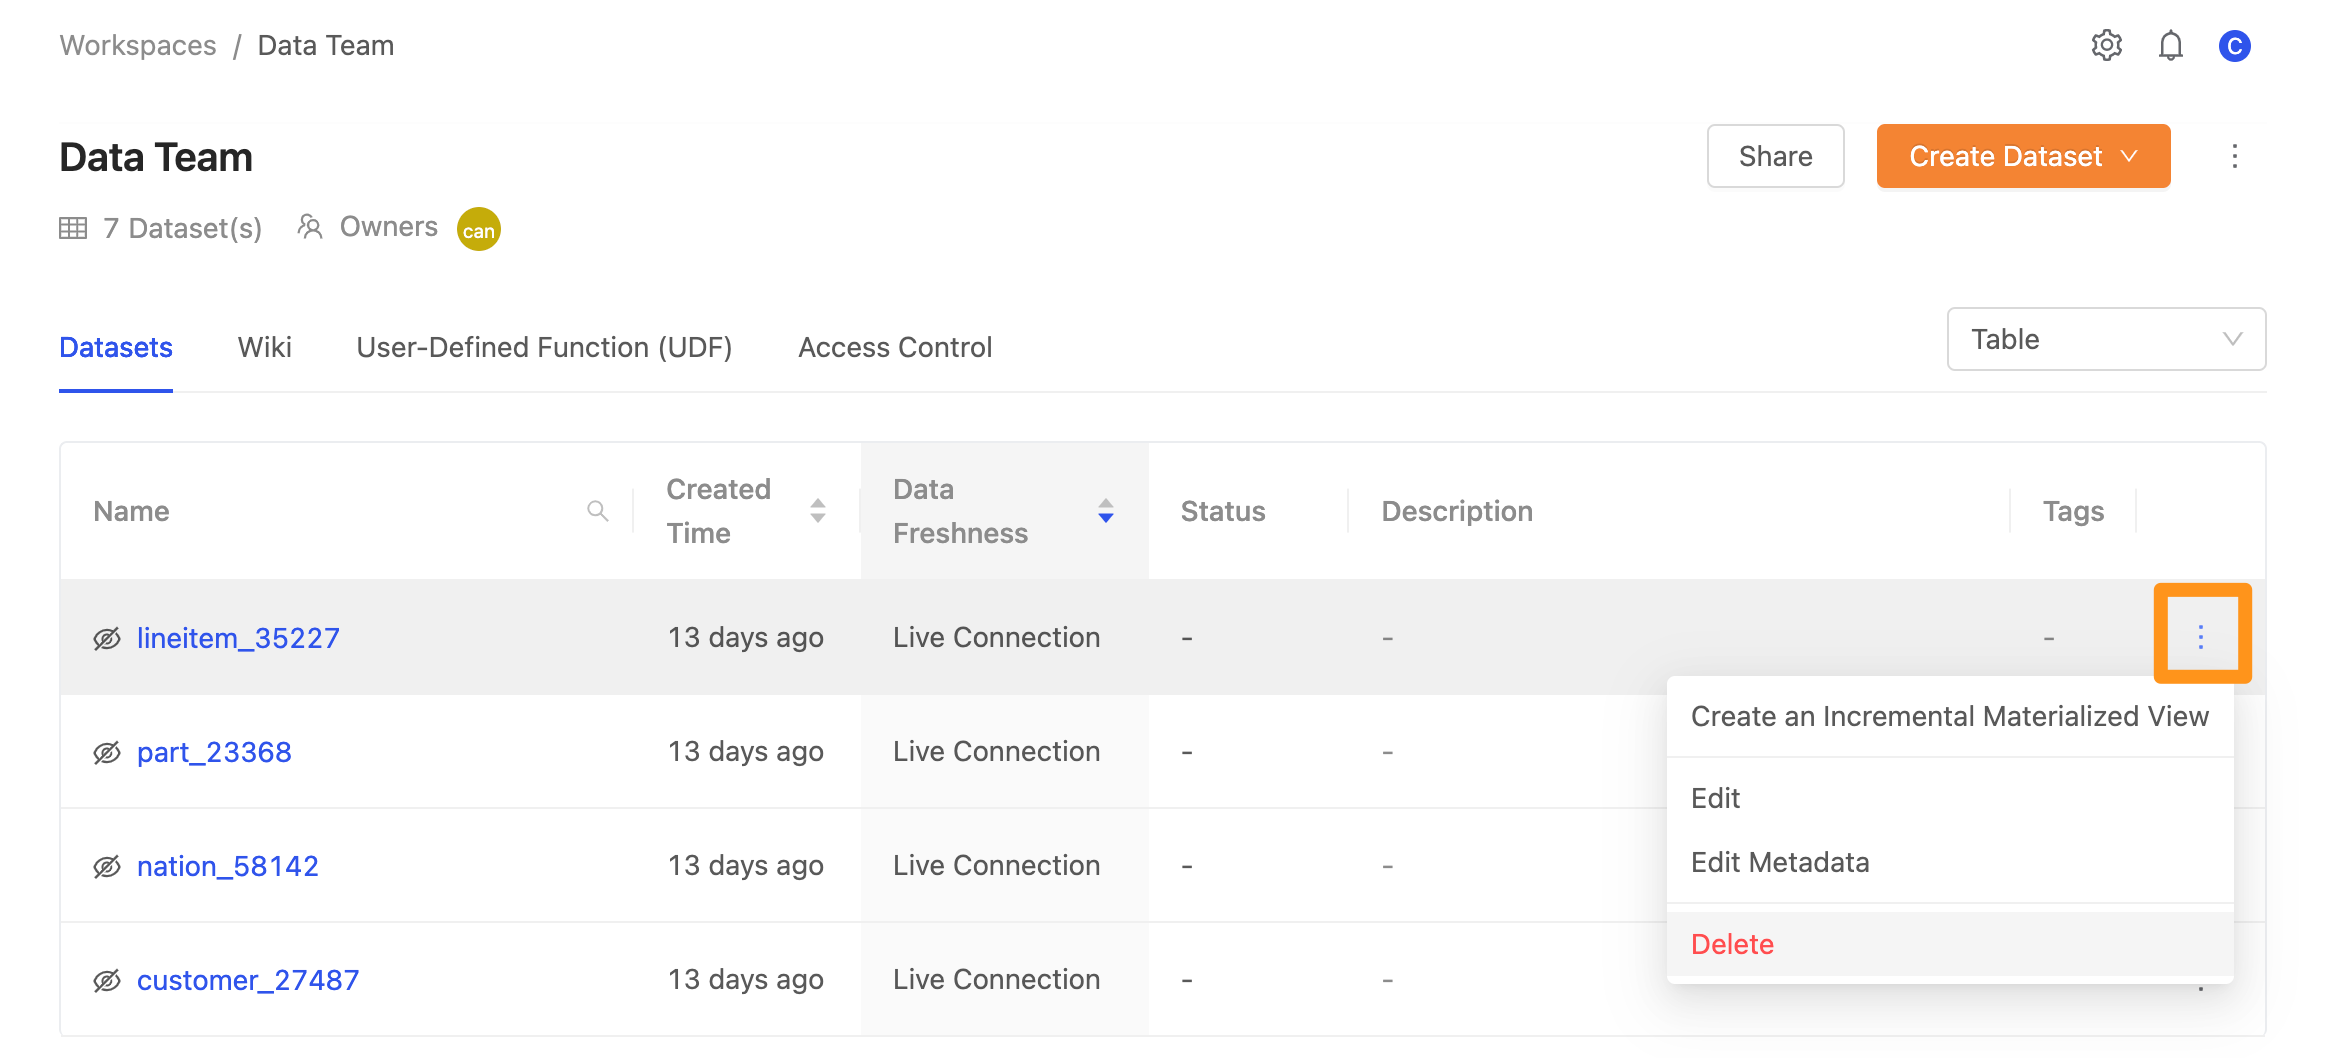
On the Datasets tab of the workspace page, click the three-dot icon to the right of the table, and select Delete.
Step 2:
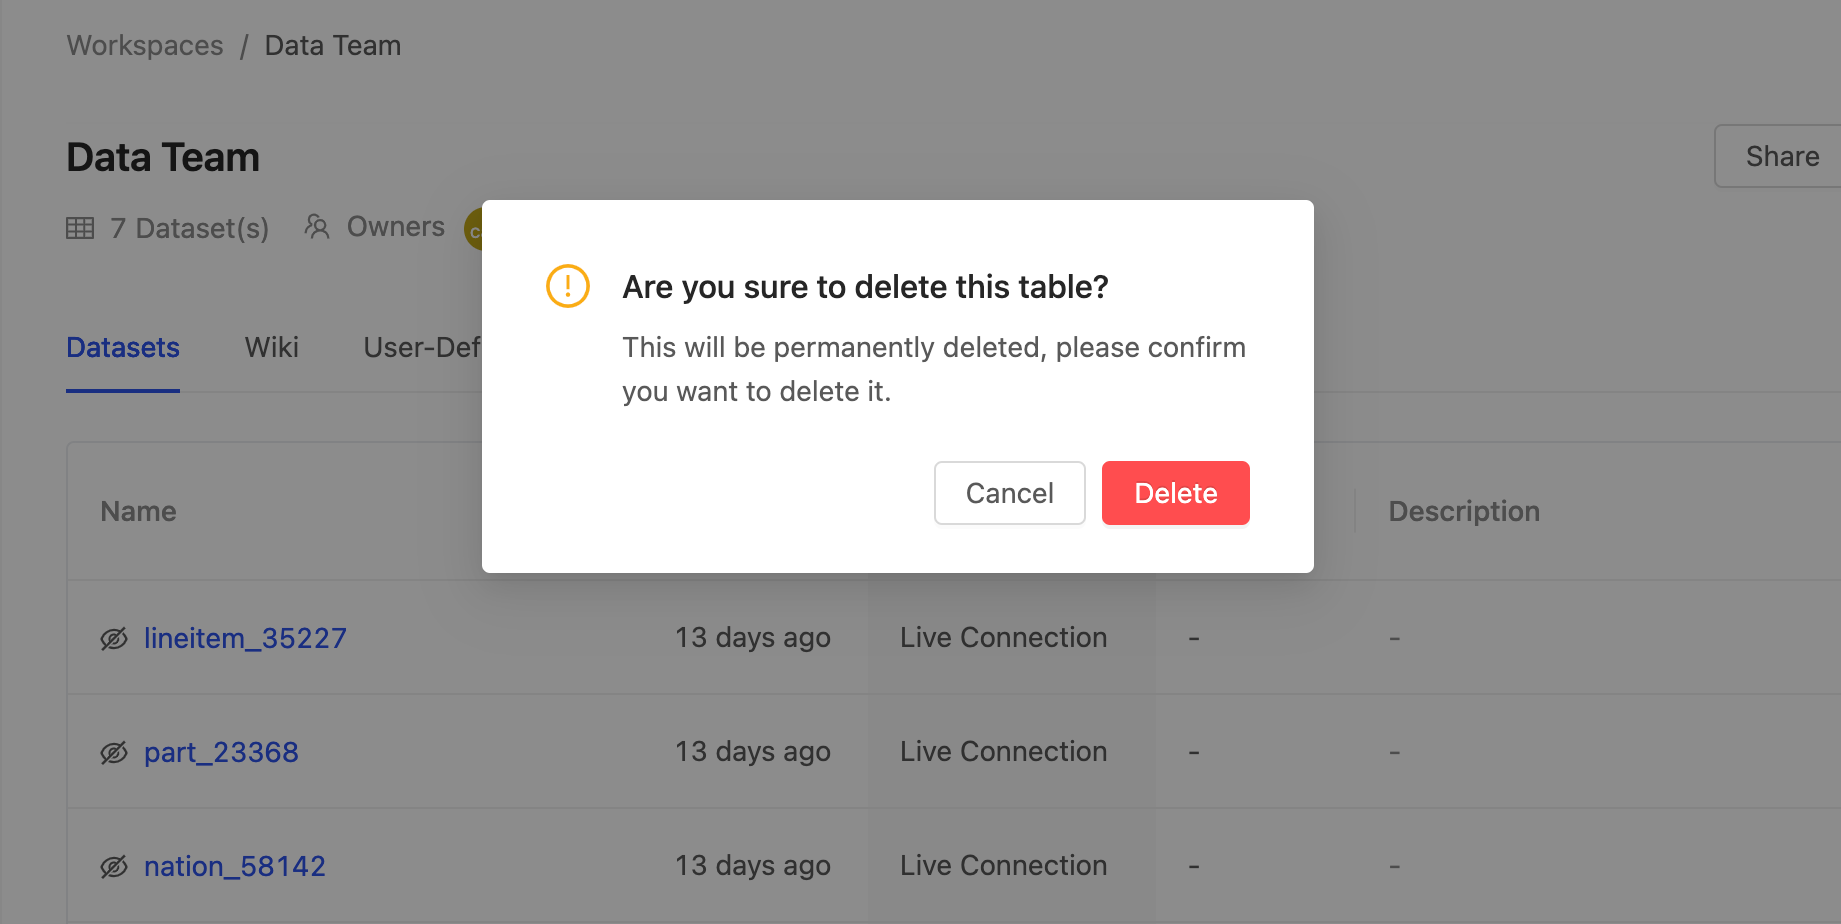
After you select Delete, a dialog asks you to confirm the deletion.
Step 3:
Click Delete to finish.