2.5 Data Push Module
This chapter describes how to design a Data Push after switching to the Data Push module. Data Push is used with the BI tool Tableau.
Unlike the usual approach of connecting to a data warehouse or database through a connector, Canner Enterprise lets users first integrate heterogeneous data sources, build pre-computed Materialized Views, and automatically convert them to Hyper format and push them to the corresponding Site and Project in Tableau Server, so Tableau users can use the data directly.
Hyper is Tableau's in-memory data engine technology, optimized for fast data caching and analytical query processing on large or complex datasets; see the Tableau documentation for details. Previously, data processing and Hyper conversion relied on Tableau's own resources. Now this work can be moved to Canner Enterprise, which solves the problem of insufficient compute resources.
- Version support: Data Push supports Tableau 2018.1 and later.
- Using CALCULATED FIELD: Hyper files pushed to Tableau Server with Canner Enterprise Data Push cannot have calculated fields added. If you need this, use the Tableau Canner Connector. See Data Sharing - Third-Party Applications.
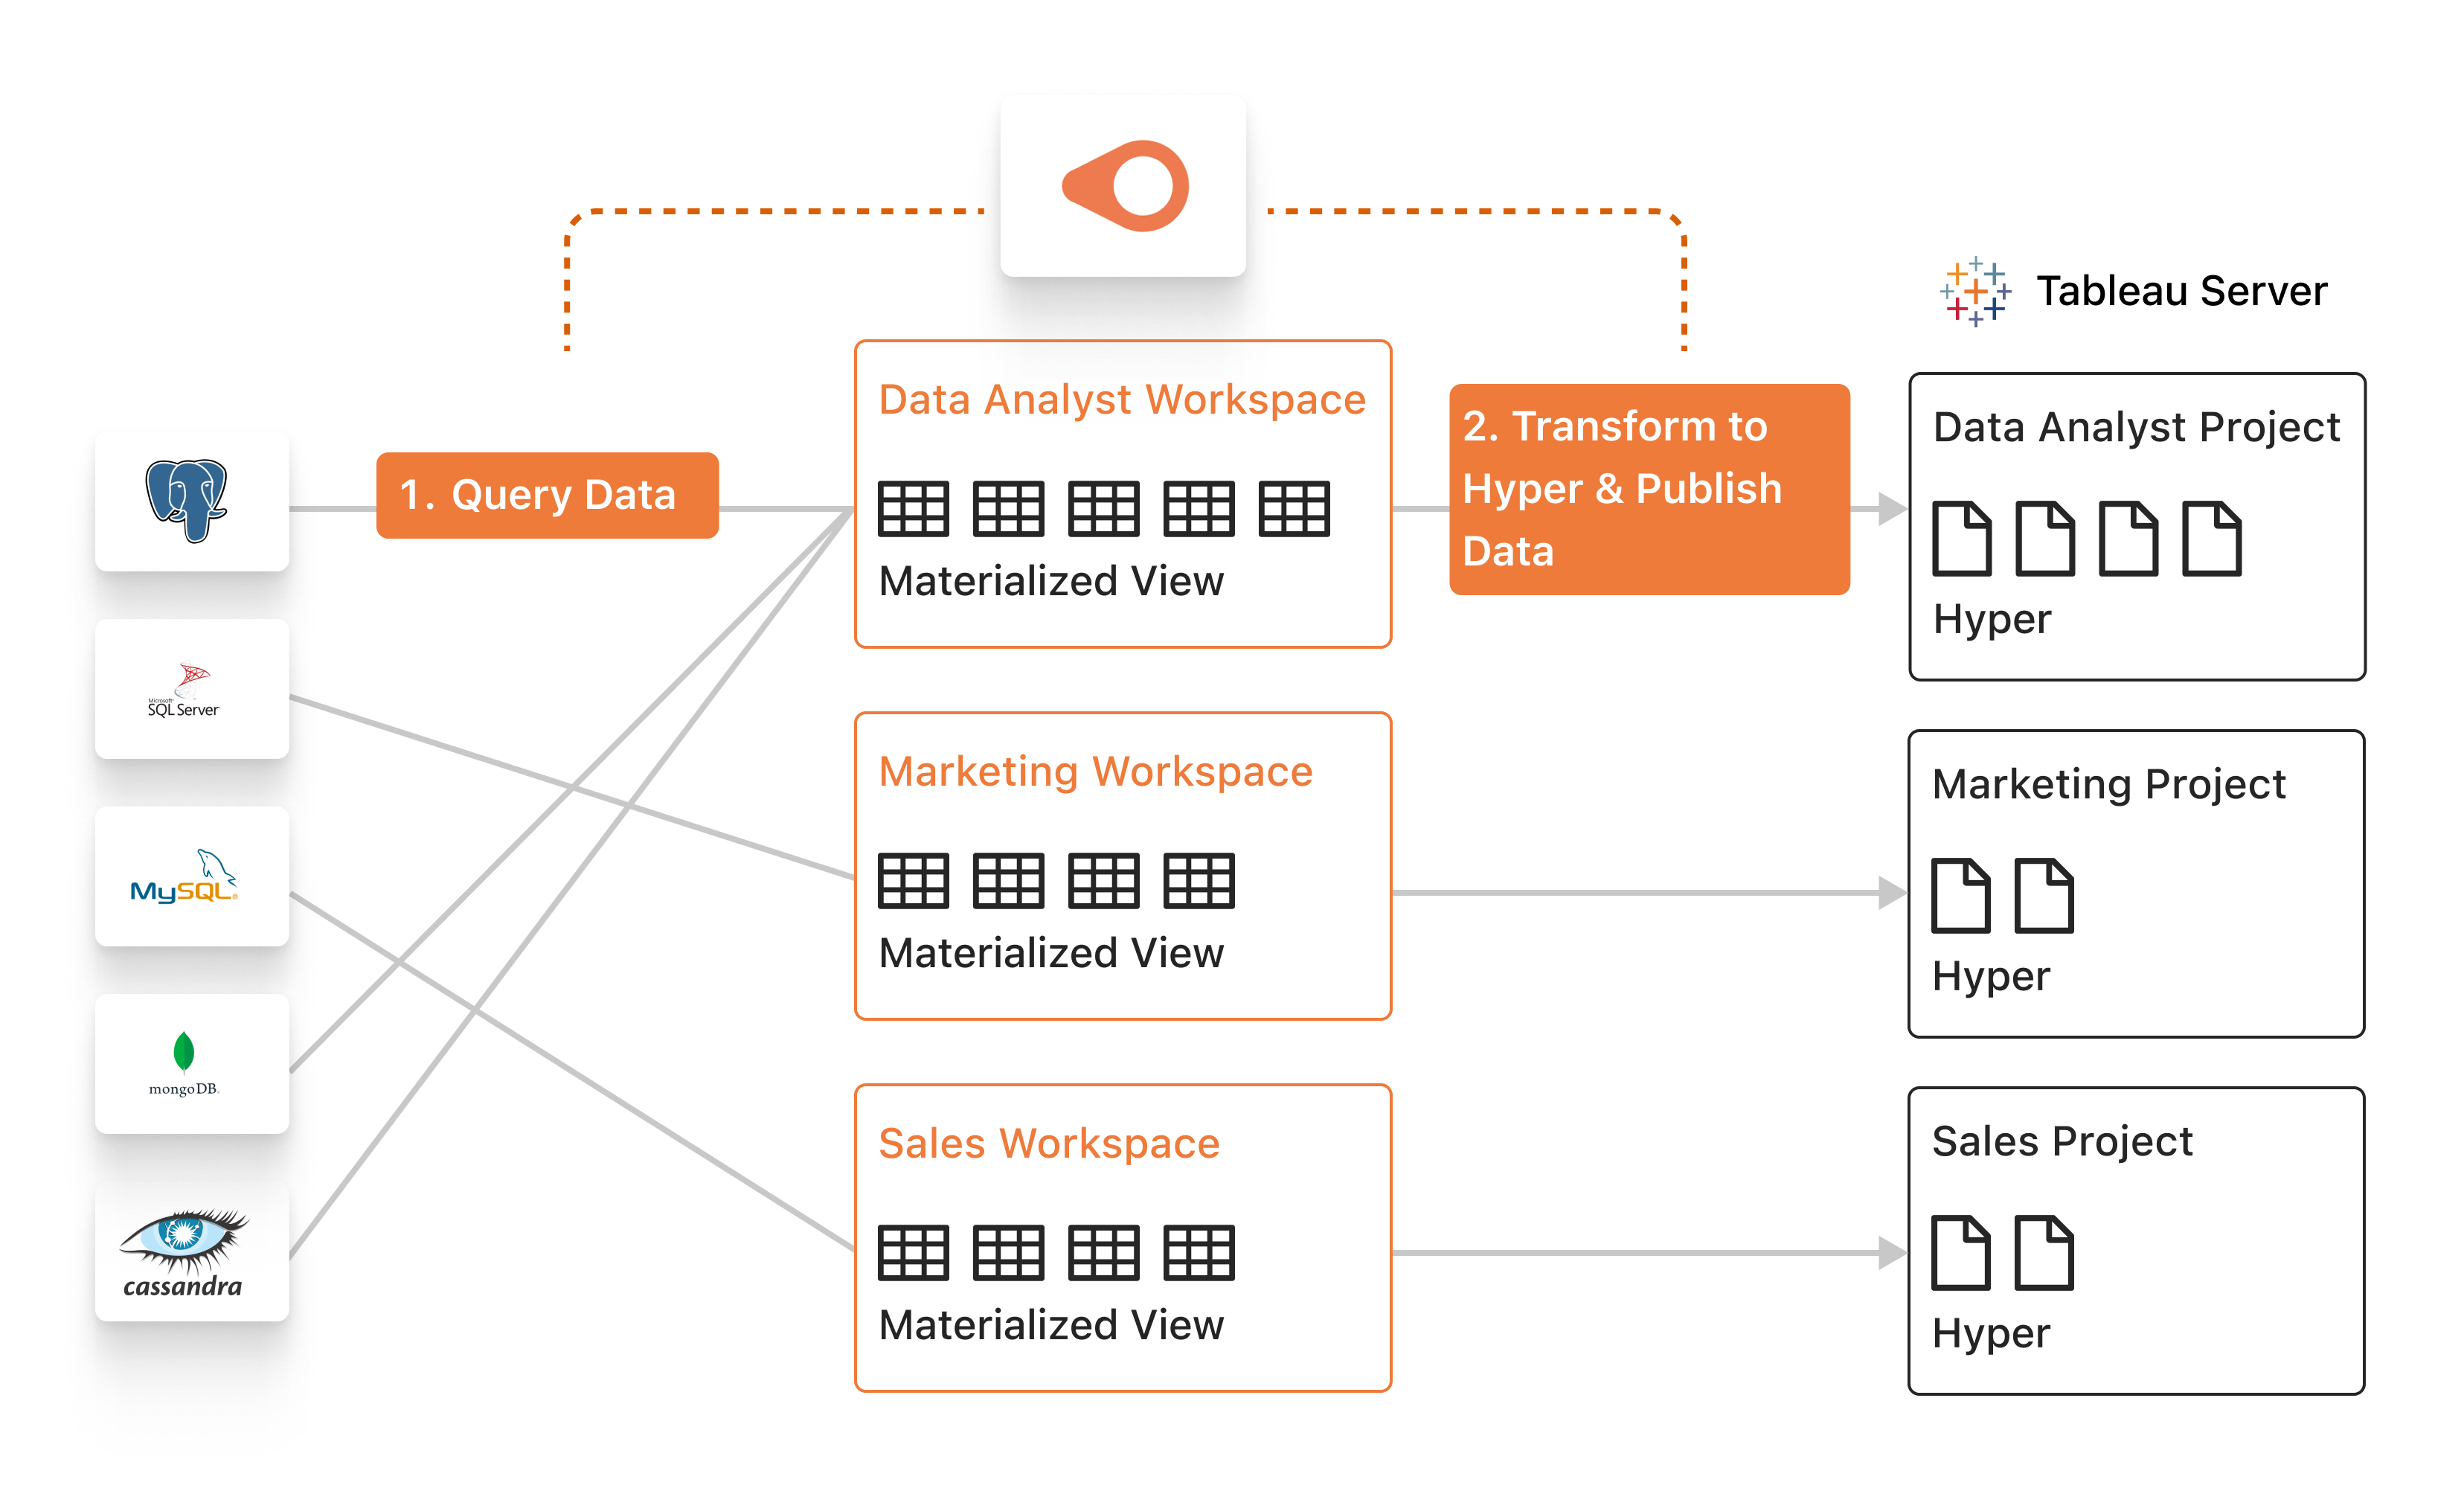
Before configuring datasets to publish to Tableau on the Data Push page, make sure you have configured your Tableau Server credentials in Canner Enterprise. See 2.8 System Administration & Settings / System Settings / Credentials.
The credentials must first be generated in Tableau and then configured in Canner Enterprise. For how to generate credentials in Tableau, see Create a Credential in Tableau in this chapter.
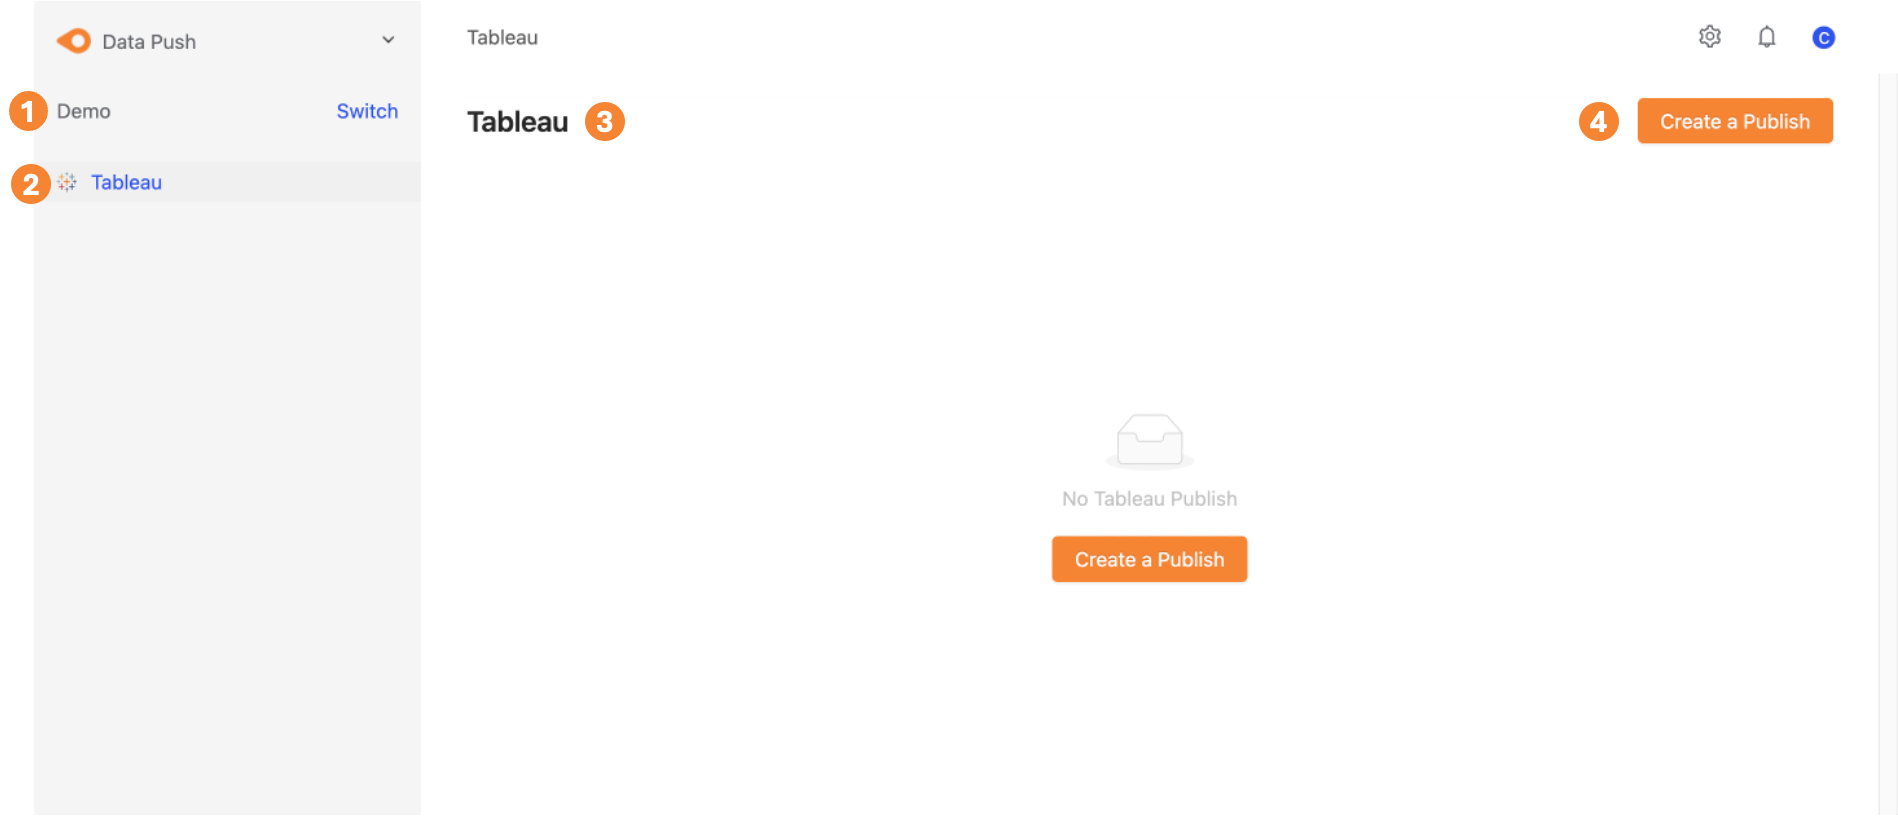
Data Push page
- The current workspace; click the Switch button to change workspaces.
- Tableau: The tools that Canner Enterprise Data Push supports; currently only Tableau.
- All existing Data Push configurations are listed. If none exist, a Create a Publish button is shown.
- Create a Publish: Publish a new Tableau Data Push configuration. The new item appears in the sidebar after publishing, and the system then pushes the dataset to Tableau according to the configuration.
Create a Publish
To publish a dataset to Tableau, you first need a Materialized View / Incremental Materialized View dataset.
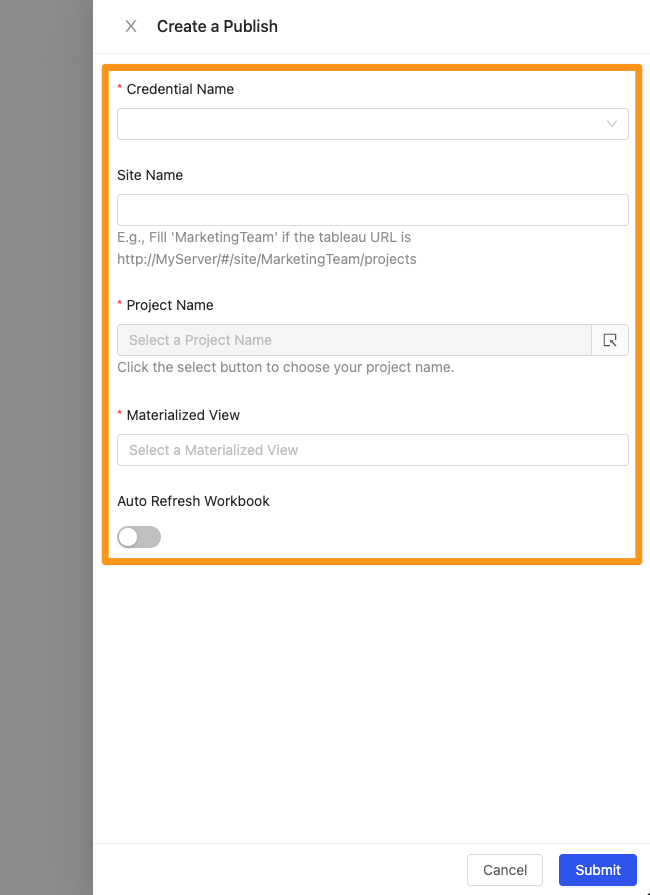
Click the Create a Publish button and fill in the following.
- Credential Name: The Tableau Server credential to use. The menu lists all credentials configured in 2.8 System Administration & Settings / System Settings / Credentials.
- Site Name: Your Tableau Server site. If Tableau only has the Default Site, leave this empty. If Tableau has multiple sites, go to the Tableau Settings page (Settings > Site Name and ID), choose the site, and paste its ID (Seen in URL) value here.
- Project Name: Based on the Credential Name, the system shows a Project menu. Choose the Project where Canner Enterprise pushes the dataset (the data is placed in this Tableau Project).
- Materialized View: The dataset to push to Tableau. The menu includes all Materialized View / Incremental Materialized View datasets in the same workspace that have the semantic layer enabled.
- Auto Refresh Workbook (off by default): When enabled, each time the dataset is published to Tableau Server, the Tableau workbooks that use it are refreshed too. When off, only the Tableau data source that uses this dataset is refreshed.
- Click Submit to finish.
- In the Tableau section of the Data Push sidebar, a status of Synced means the data was successfully published to Tableau Server. A new Publish takes a little while to sync the first time; check back later, or click the Refresh button to update the status.
Create a Credential in Tableau
The following steps are done in Tableau Server. After completing them, you can configure Set Up Tableau Credentials in Canner Enterprise.
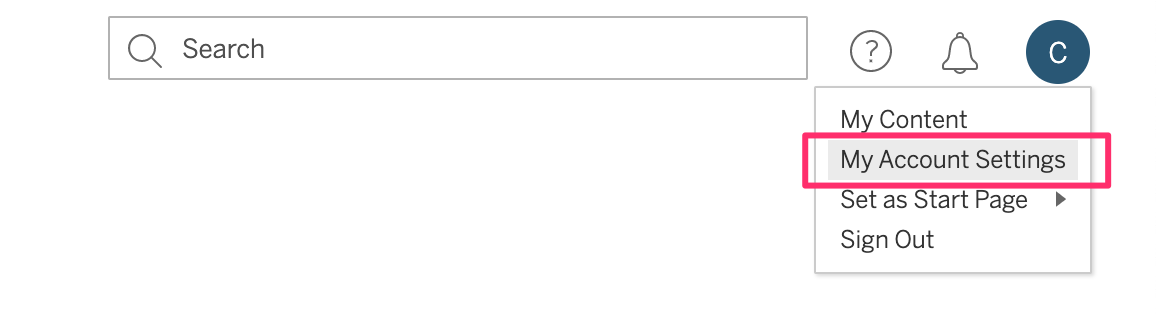
- Select My Account Settings from the drop-down menu in the upper-right corner
- In the Personal Access Tokens section, add a Personal Access Token: enter a Token Name and click the create new token button
Make sure the token name contains no invalid characters (such as !@#.&) and no spaces

- In the dialog that opens, click Copy to clipboard to copy the token secret
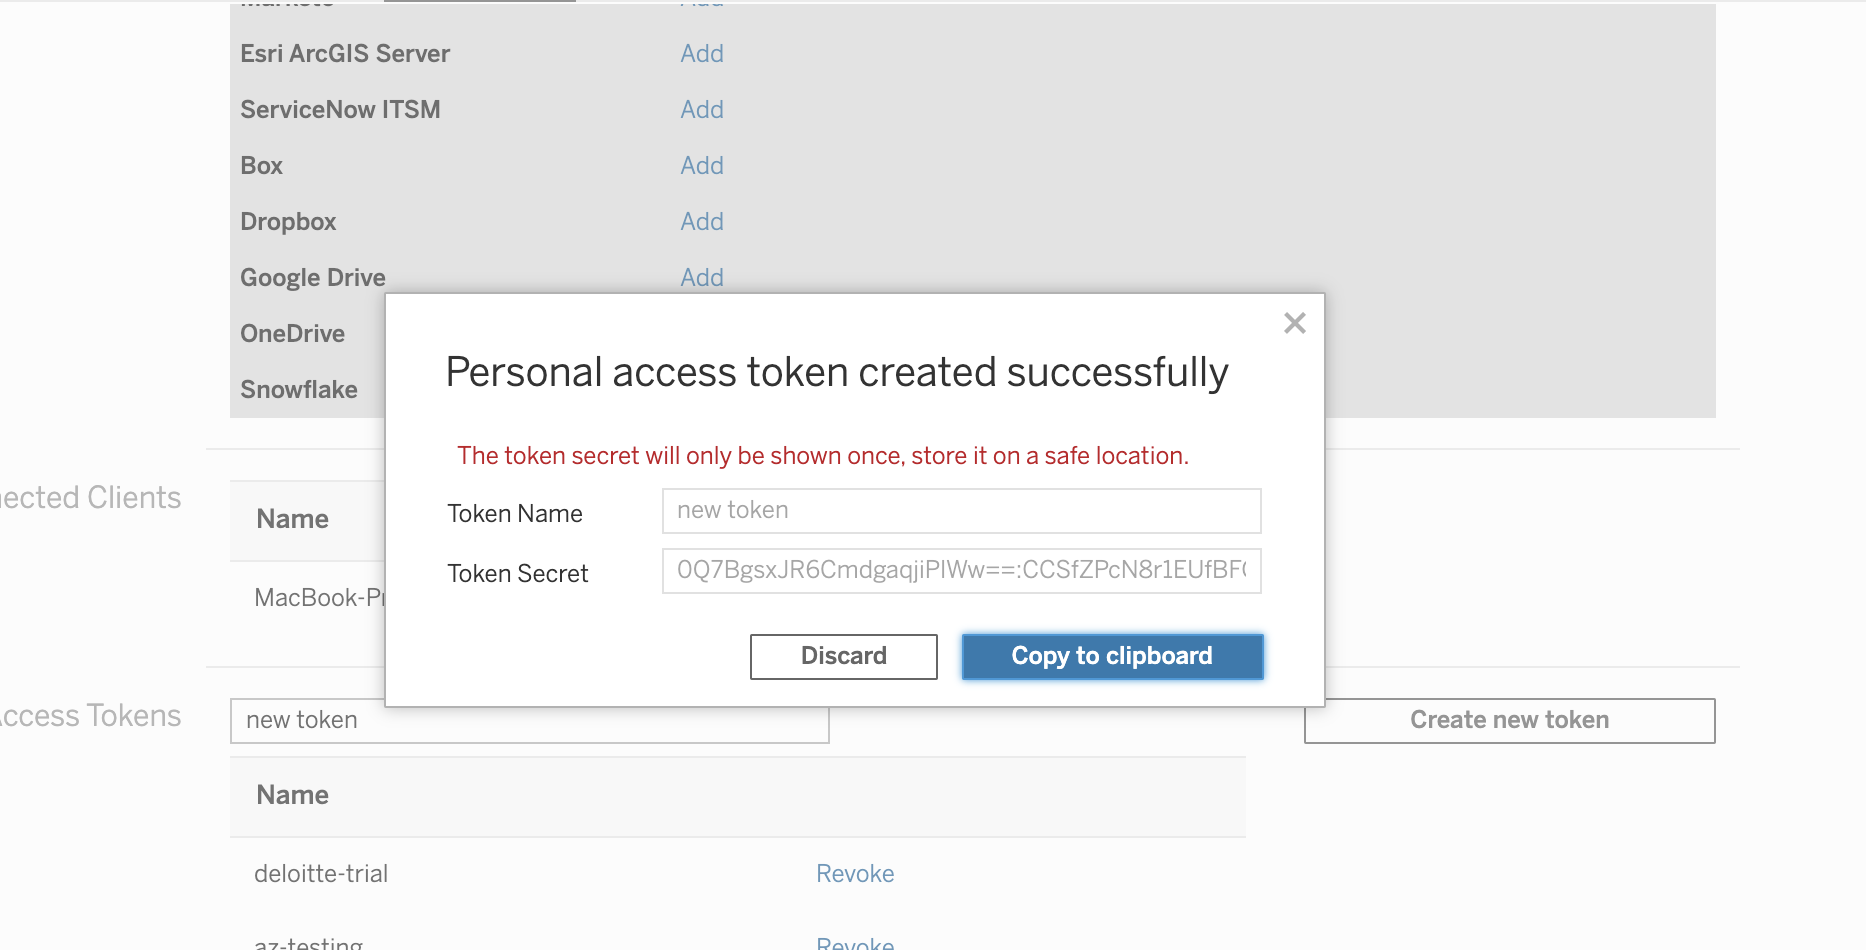
Tableau limitations: (1) 2019.4 and later can authenticate with a Personal Access Token or a username and password (2) versions earlier than 2019.4 can only authenticate with a username and password
Permission management in Tableau
Canner Enterprise publishes datasets to the corresponding Project, so the Tableau administrator should use Projects to control which users or groups can see which data. This is configured in the Data Source section of Project Permissions.
Viewing data refresh history in Tableau
When the Canner Enterprise publish status is Synced, the dataset has been successfully updated on Tableau Server. In Tableau Server, click Revision History to see the data source's refresh history.
In Tableau Server, the published Canner Enterprise datasets appear under the corresponding Site > Project.
In Tableau Desktop, click Search for Data > Tableau Server to see the datasets published from Canner Enterprise and connect them to a workbook.