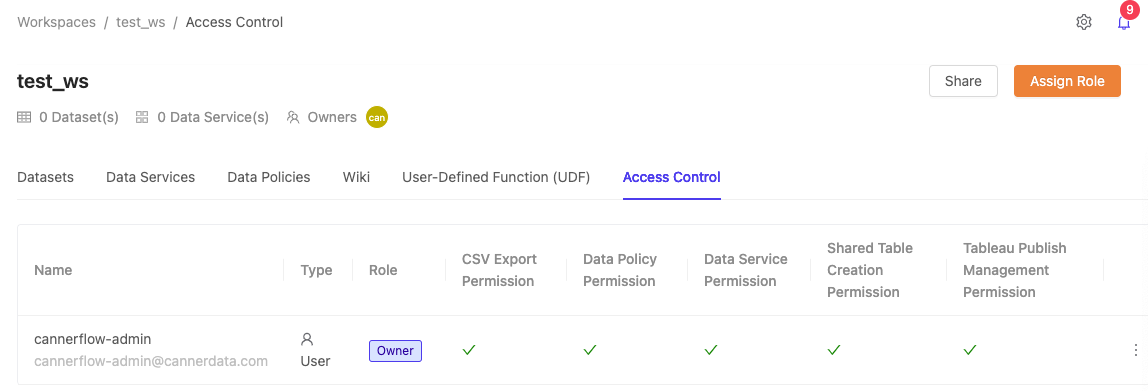
Workspace Access Control
On the workspace page, you can control data usage permissions, managing who can view, compute, export, and share data. The roles are Owner, Data Analyst, and Data Consumer.
Ownerowns the workspace and has the highest permission in it; usually a department head or project lead.Data Analystcan create and process data in the workspace and share it with other users; usually a data analyst or data scientist.Data Consumercan only access data shared with them by anOwnerorData Analyst; usually a business unit or domain expert.
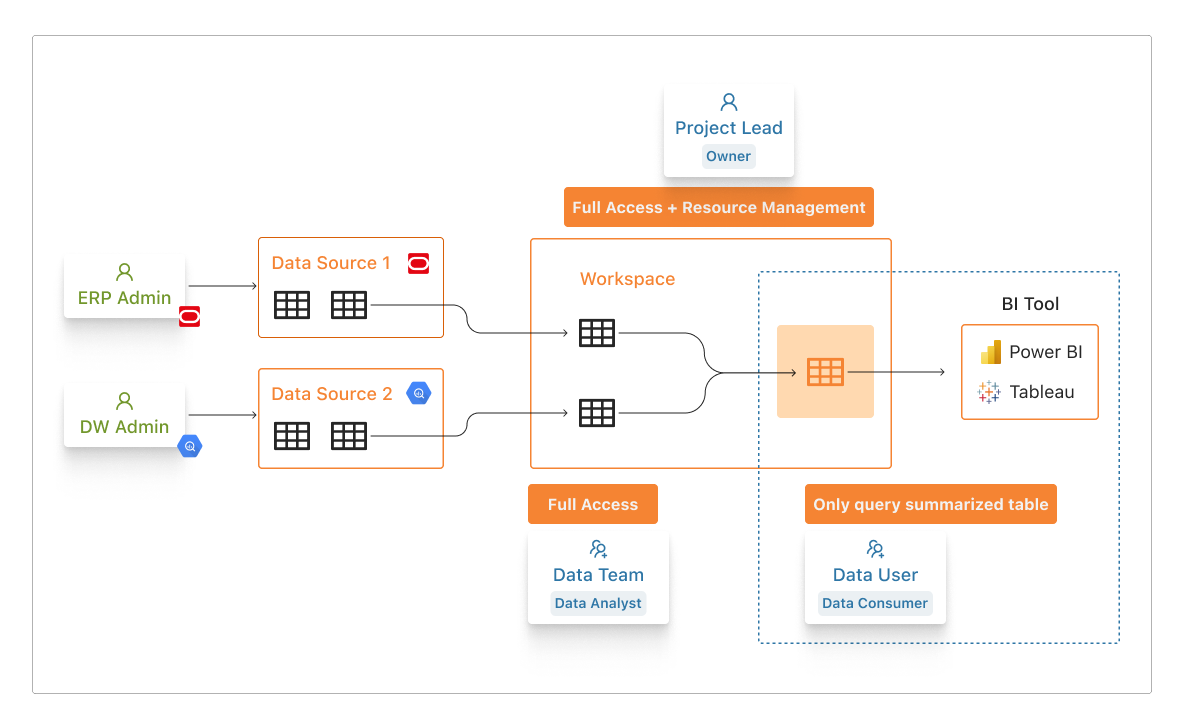
In the example below, the project lead, as Owner, controls which team members join the workspace and manages the workspace's resource limits. The data team, as Data Analyst, pulls data from data sources into the workspace and processes it. The operations team, as Data Consumer, can only access the data prepared by the data team and use it in BI tools.
Role permissions
| Owner | Data Analyst | Data Consumer | |
|---|---|---|---|
| Create/delete workspaces | ✅ | ⛔ | ⛔ |
| Assign workspace roles | ✅ | ⛔ | ⛔ |
| Set workspace resource limits (Network/ Resource Limitation) | ✅ | ⛔ | ⛔ |
| Set the Semantic Layer (mark data as Semantic, meaning it is processed and can be used by all workspace members) | ✅ | ✅ | ⛔ |
| Set metadata for workspace datasets | ✅ | ✅ | (read only) |
| Query/use workspace datasets | ✅ | ✅ | (only data marked as Semantic) |
| SQL Editor (Analysis module) | ✅ | ✅ | ✅ |
| Data Push | ✅ | ✅ | ✅ |
| Apply Data Policy | ✅ | ⛔ (requires Workspace Owner authorization) | ⛔ (requires Workspace Owner authorization) |
| Create Data Service | ✅ | ⛔ (requires Workspace Owner authorization) | ⛔ (requires Workspace Owner authorization) |
| Create Shared Table | ✅ | ⛔ (requires Workspace Owner authorization) | ⛔ (requires Workspace Owner authorization) |
| Export data (CSV) | ✅ | ⛔ (requires Workspace Owner authorization) | ⛔ (requires Workspace Owner authorization) |
| Manage Tableau Publish | ✅ | ⛔ (requires Workspace Owner authorization) | ⛔ (requires Workspace Owner authorization) |
For example: User A is assigned Data Analyst, and User A's Group A is assigned Data Consumer.
When permissions overlap, the higher permission applies, so User A has the Data Analyst role in this case.
Assign roles
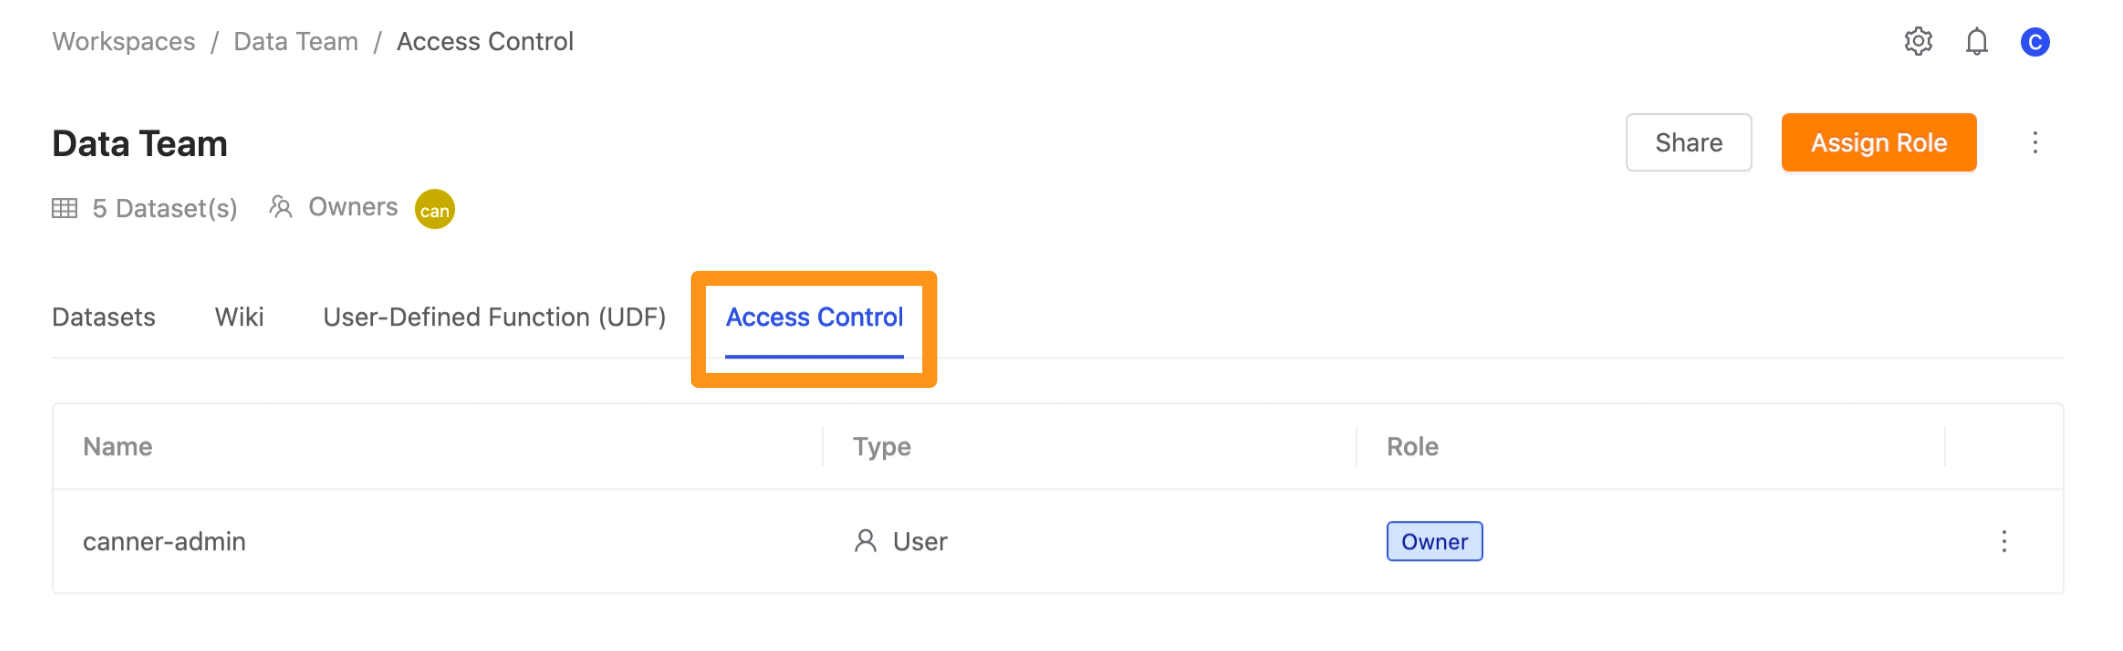
Step 1: Open the Access Control page
Go to the workspace and switch to the Access Control page.
Step 2: Choose a role
Click the Assign Role button.
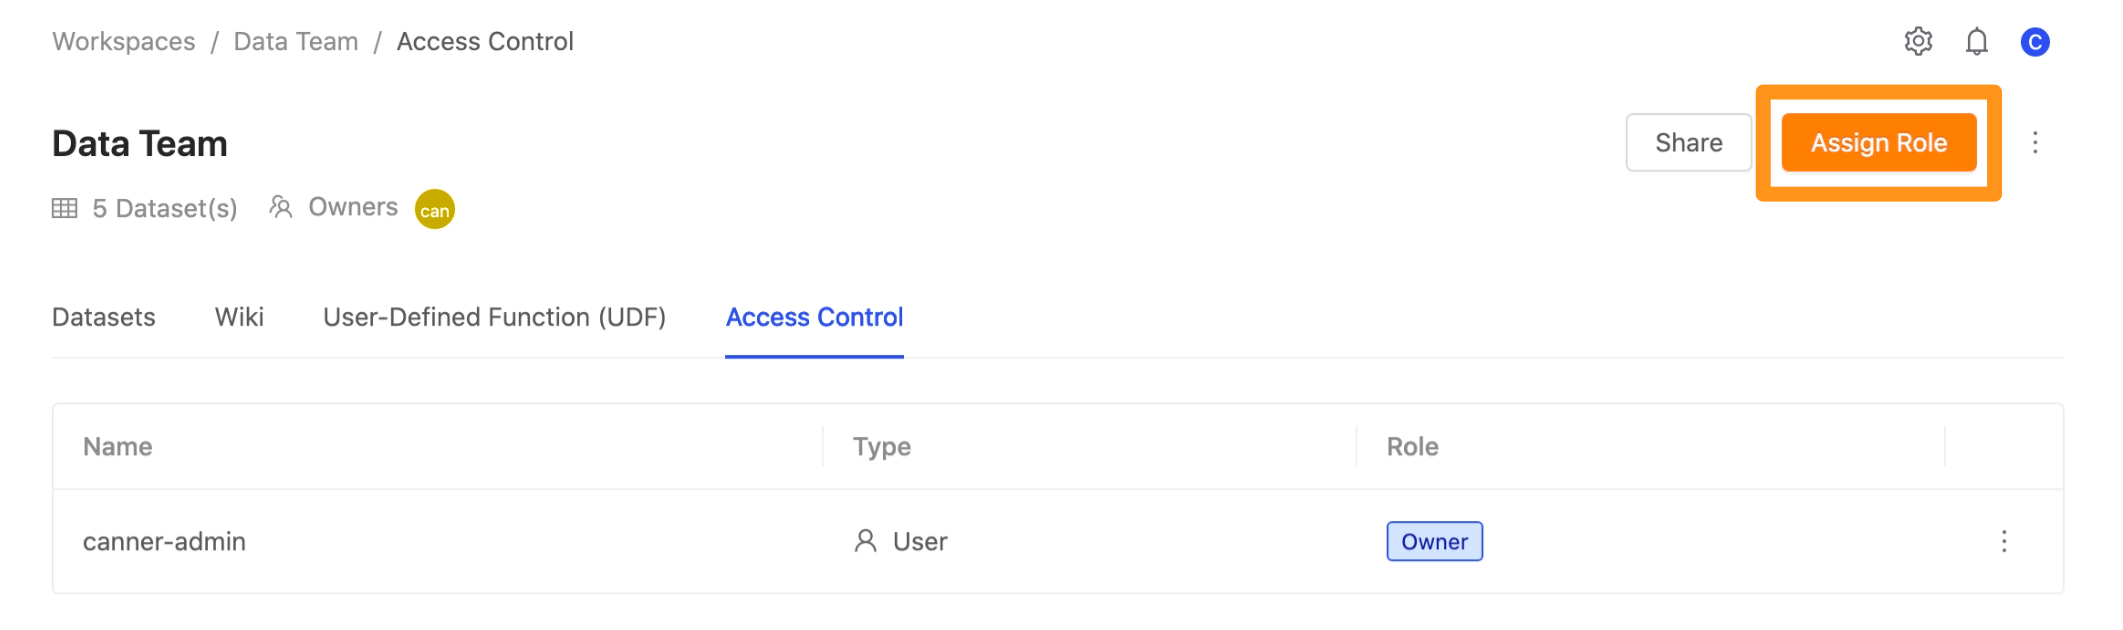
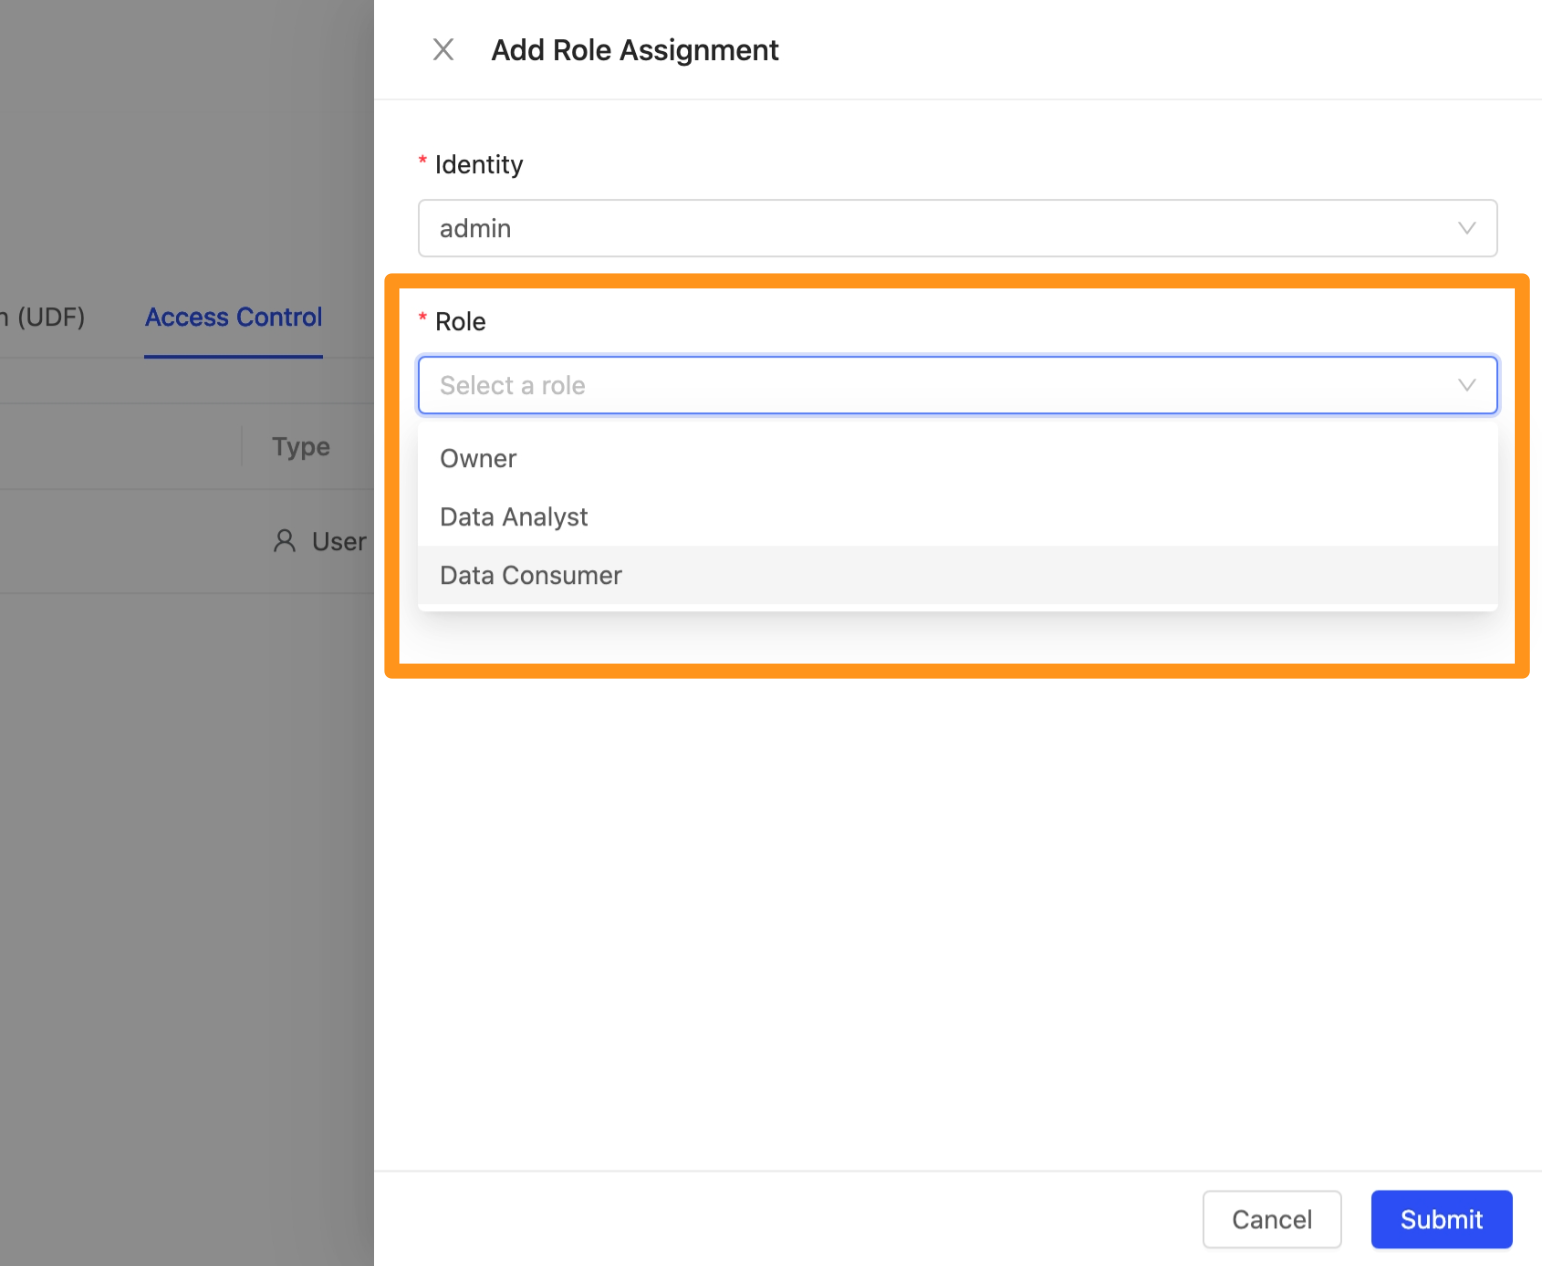
In the dialog, click Role to open the drop-down, where you can set the role to Data Analyst or Data Consumer.
Step 3: Choose the permissions to grant
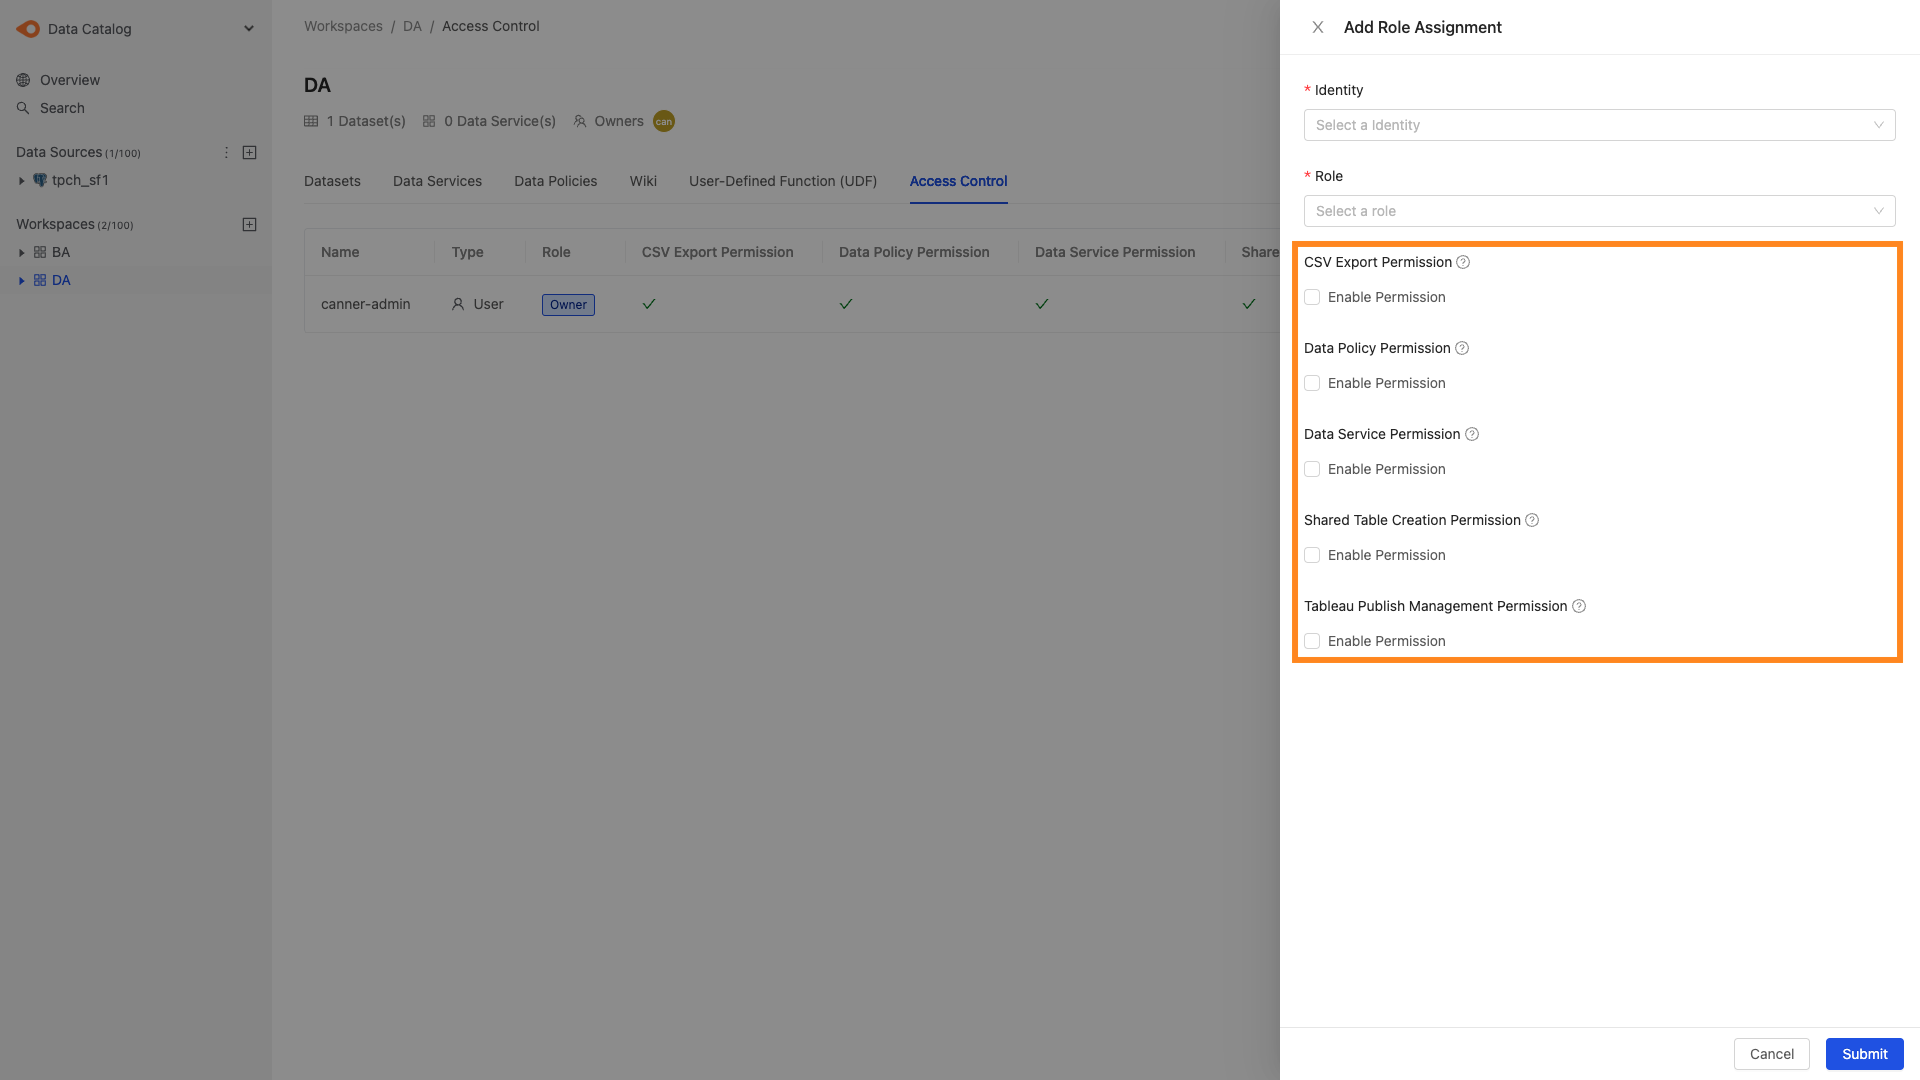
Configure the following in the dialog.
- Identity: Select a user or group.
- Role: Click Role to open the drop-down, where you can set the role to Owner, Data Analyst, or Data Consumer.
- Export data (CSV): When checked, the user can export workspace tables.
- Apply Data Policy: When checked, the user can apply Data Policies to columns in the workspace.
- Create Data Service: When checked, the user can use the workspace's Data Service feature to create custom APIs.
- Create Shared Table: When checked, the user can share tables by creating Shared Tables in other workspaces.
- Manage Tableau Publish: When checked, the user can create and delete Tableau Publishes and edit all Tableau Publish fields.
Step 4: Finish
After you click Submit, the assigned roles are shown on the page.