Data Sharing - Across Workspaces
With the Create Shared Table permission in a workspace, you can share datasets from your workspace with other workspaces.
Basic flow
The Create Shared Table permission is granted per workspace: the workspace Owner grants it to workspace users in workspace access control. Even with this permission, every new Shared Table must be approved by the workspace Owner before it takes effect (see 2.3.5 Approvals).
How to share a dataset
Step 1: Create a Shared Table
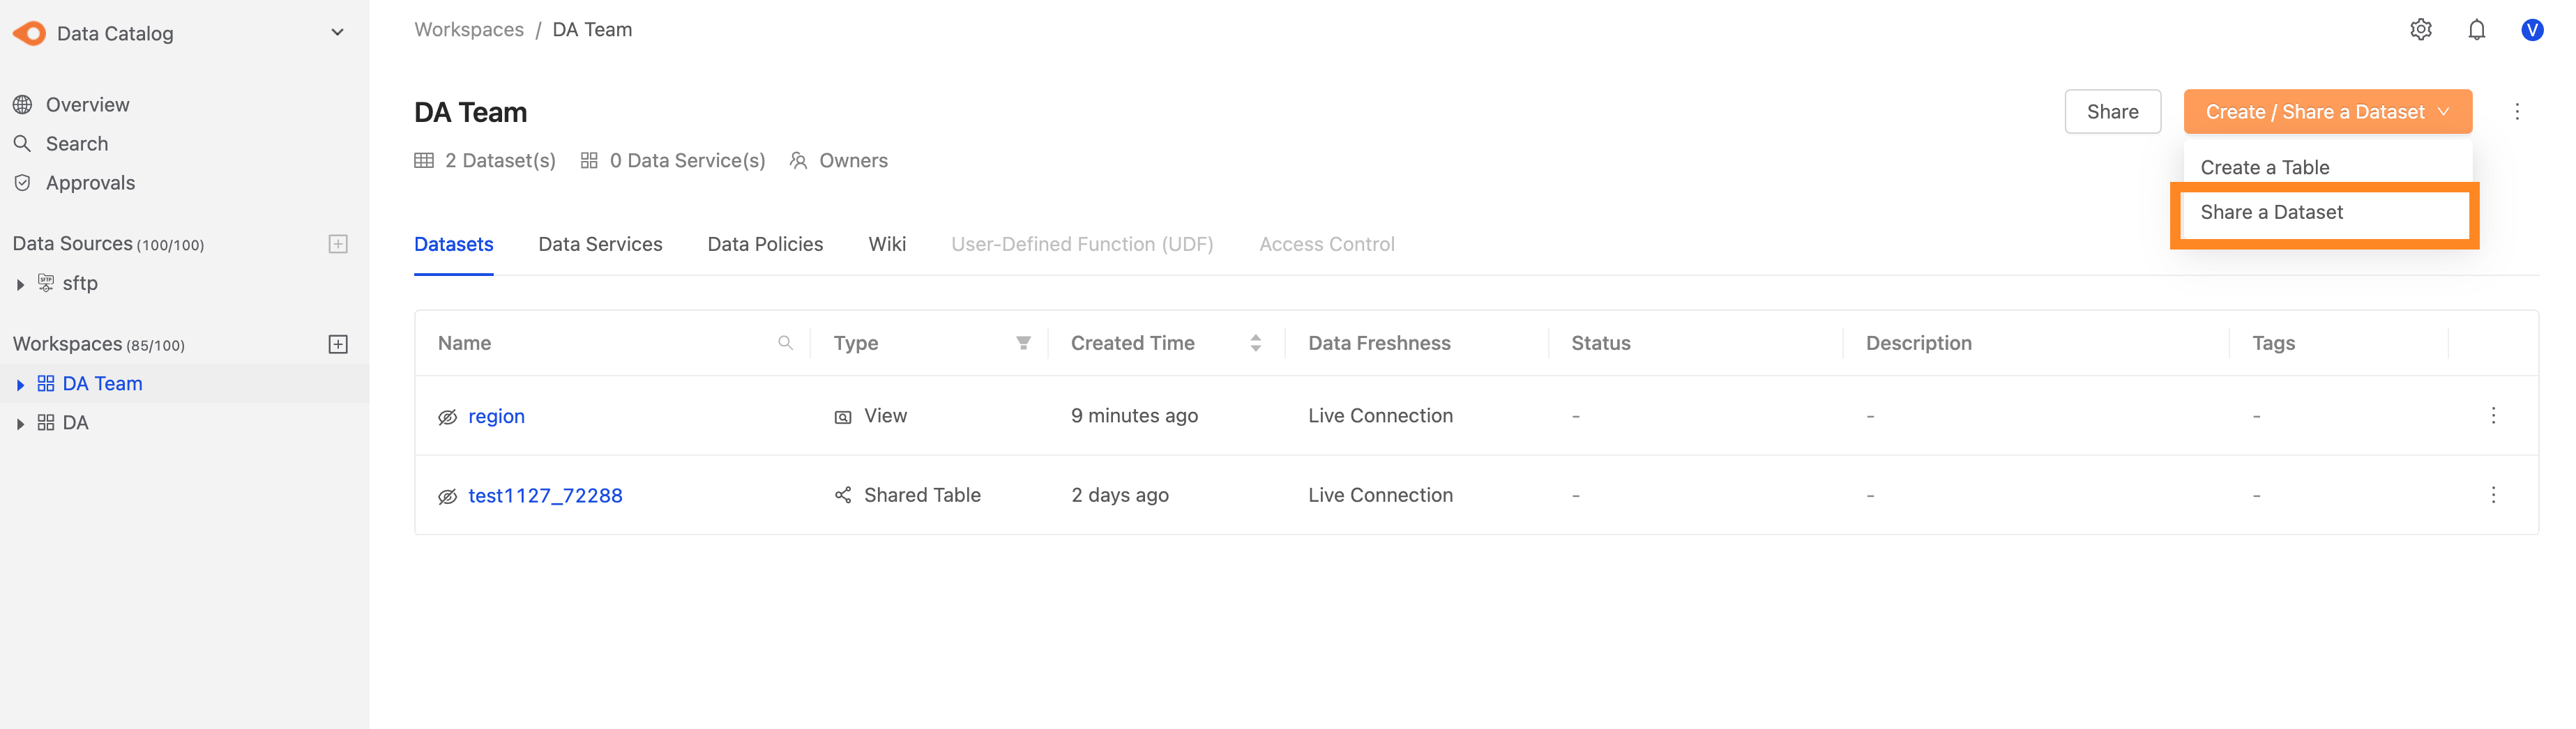
On the workspace page, click Create/ Share a Dataset in the upper right and select Share a Dataset from the menu to open the settings page.
Step 2: Configure the dataset to share
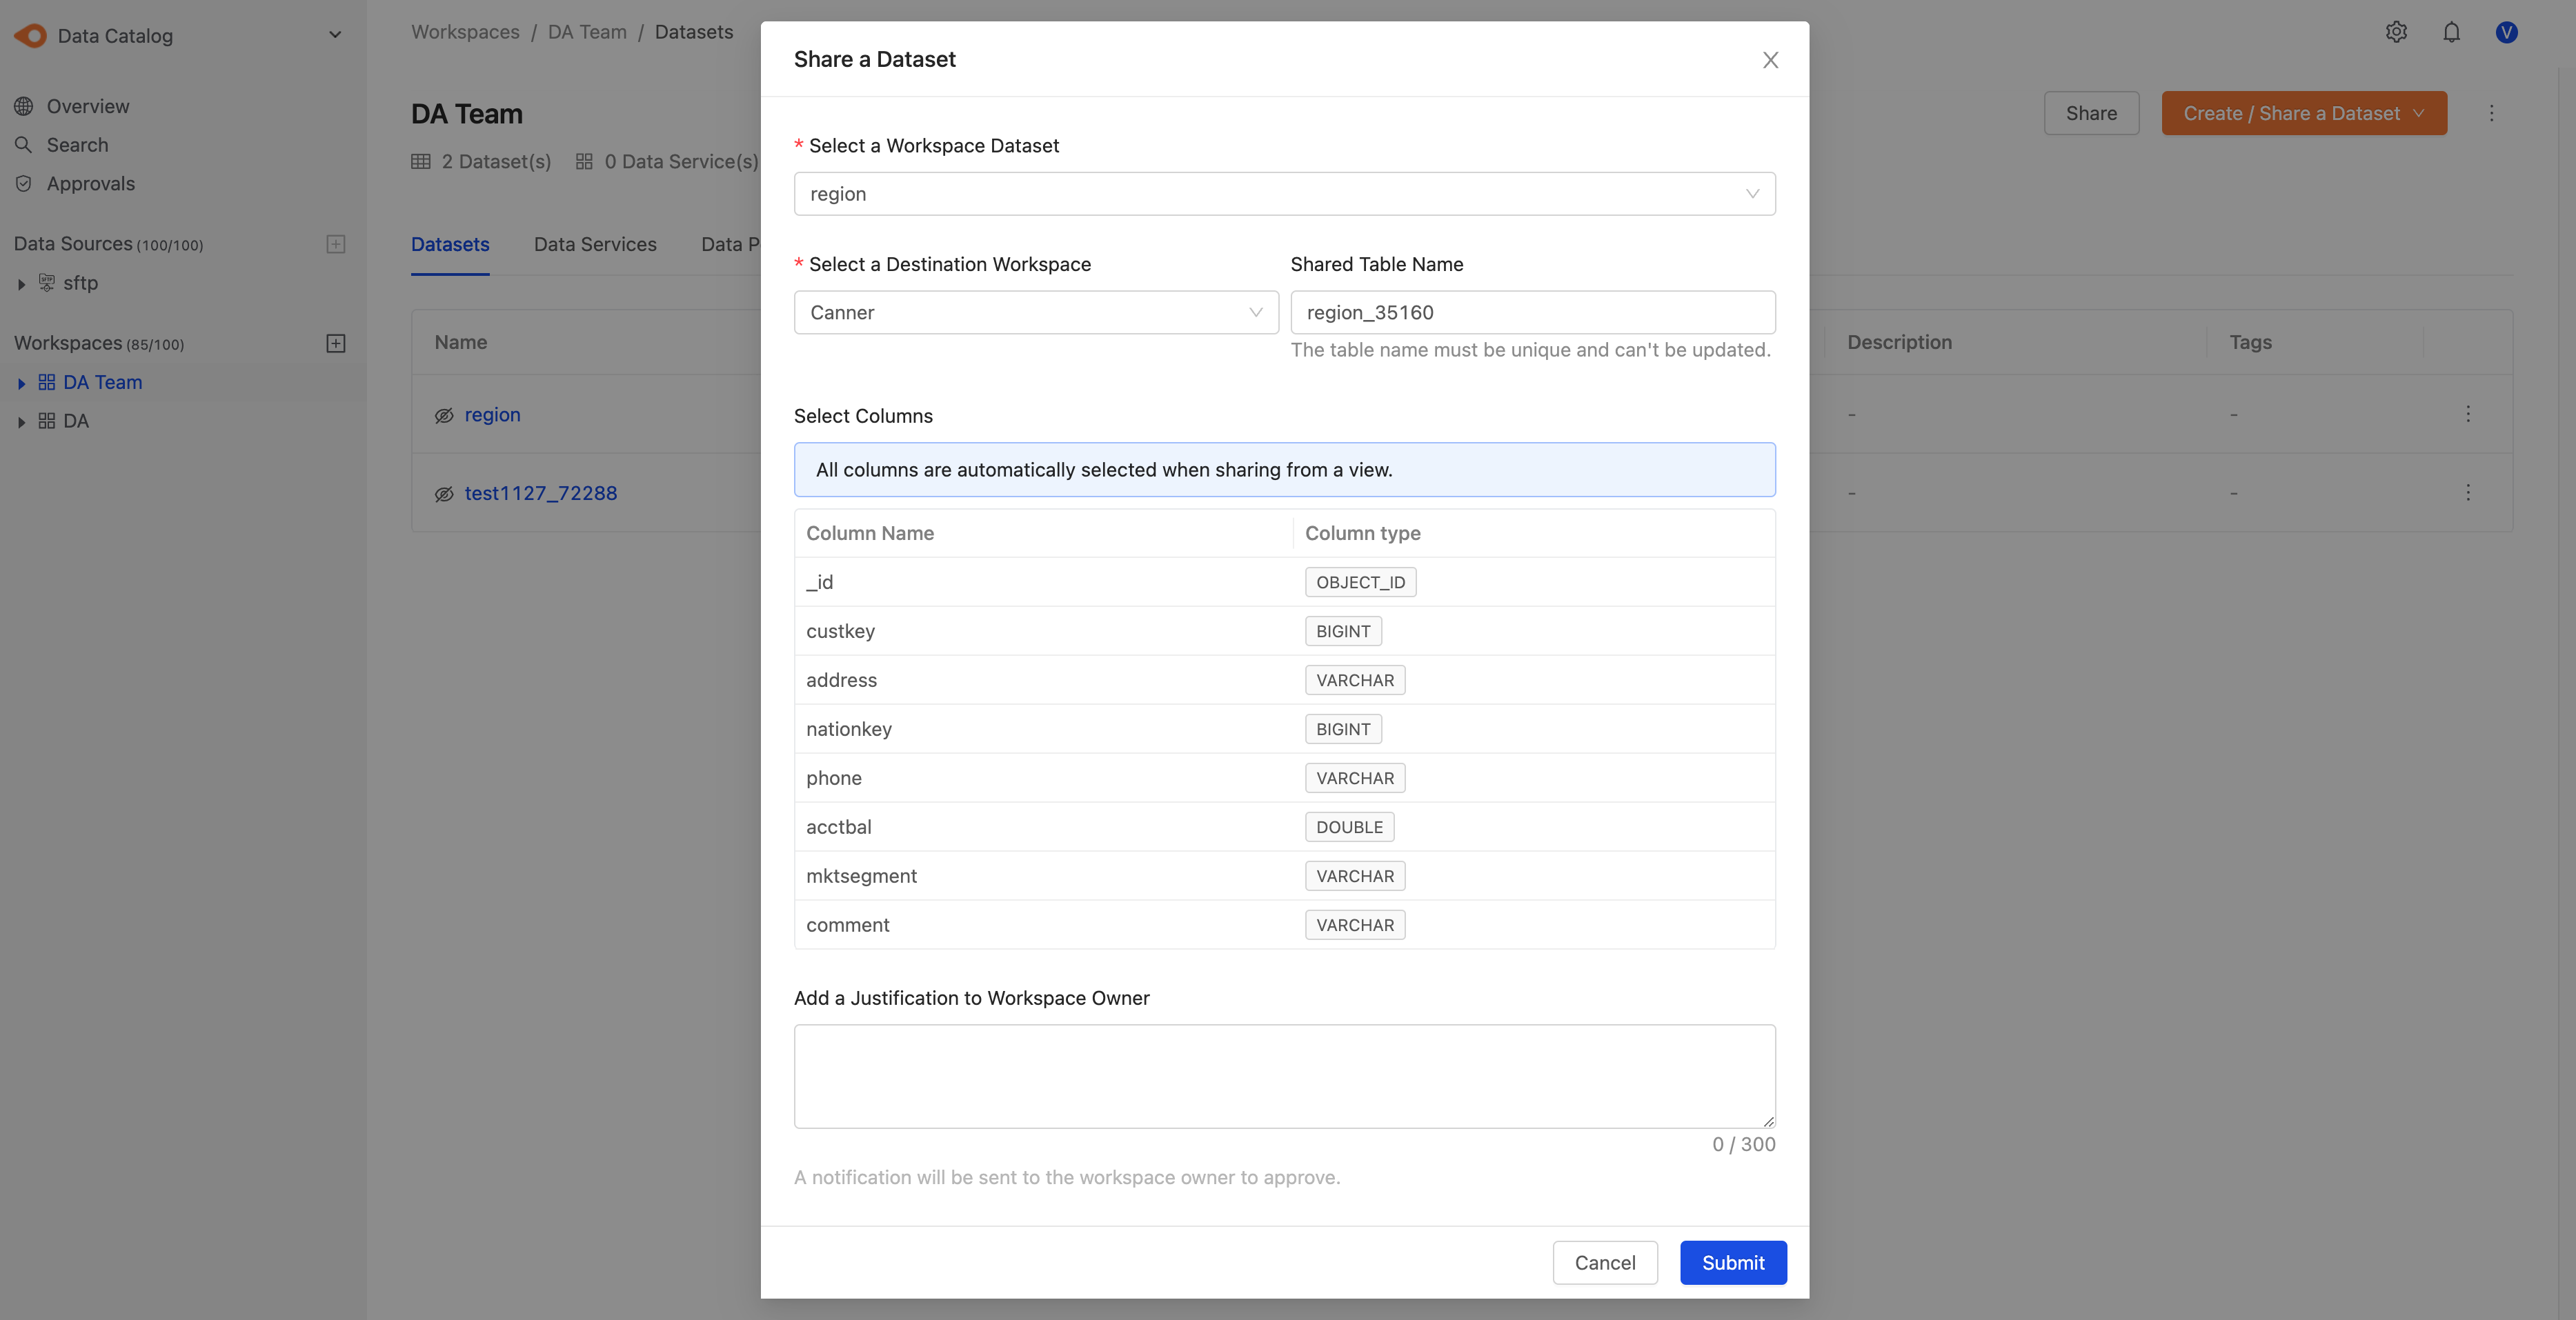
- Select a Workspace Dataset: Select the dataset to share.
- Select a Destination Workspace: Select the workspace to share with. You can share datasets with workspaces you don't have access to; sharing a dataset does not give you access to the other workspace.
- Shared Table Name: The Shared Table name, shown on the datasets page of the destination workspace. Note that the Shared Table name cannot be changed later.
- Select Columns: Available Columns on the left are the columns of the selected dataset; Target Columns on the right are the columns to share. Use
>and<to add and remove columns. - Add a Justification to Workspace Owner: Optional. A reason for the request, shown to the workspace Owner.
Once the Shared Table columns are submitted, they cannot be changed; to add or remove columns, create a new Shared Table. However, if a column is removed from the Shared Table's source dataset, it is also removed from the Shared Table.
Step 3: Click Submit
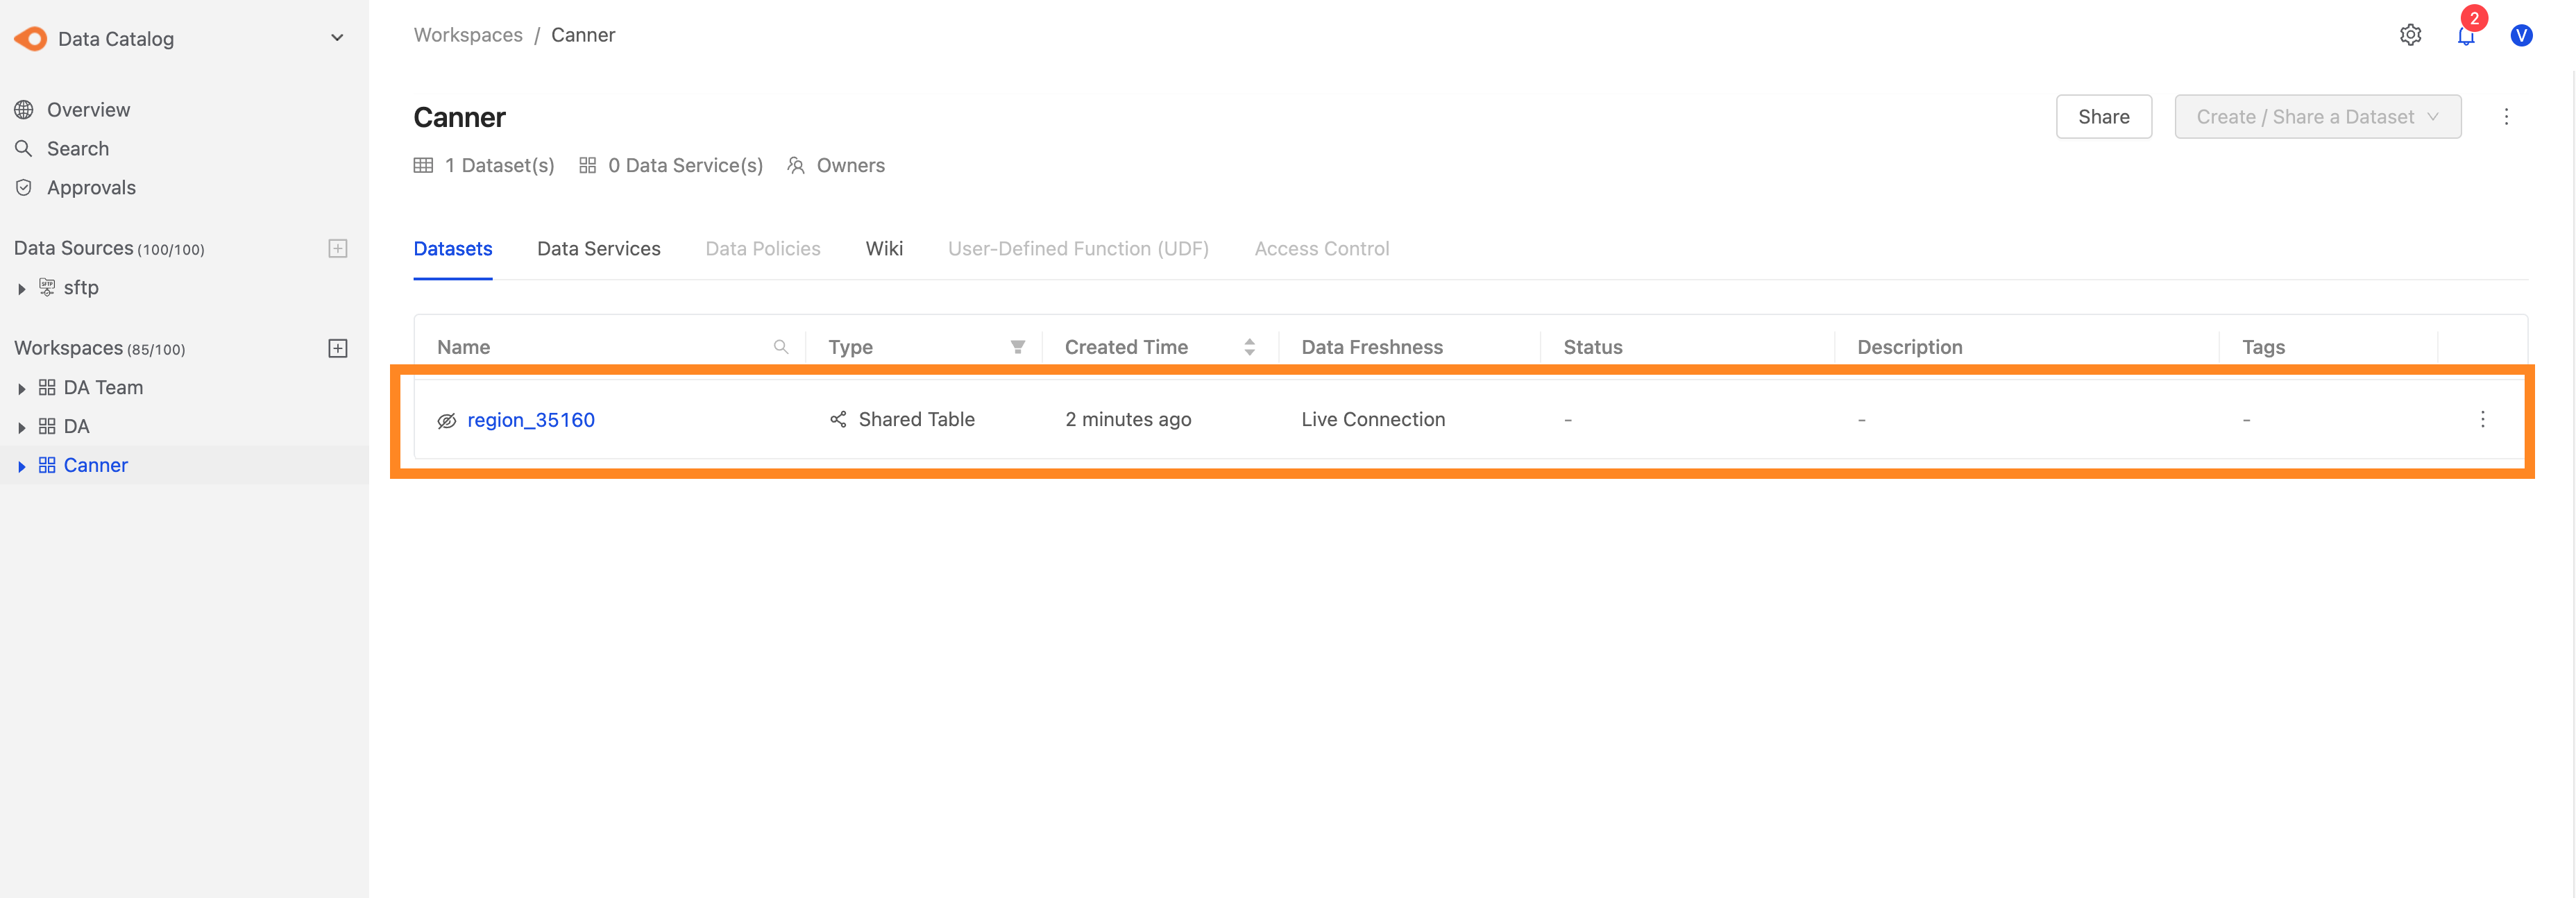
After you submit, you can see your request on the Approvals page. The workspace Owner is notified and can review the request on the Approvals page. Once approved, the Shared Table is shared to the destination workspace, and a Shared Table dataset appears on that workspace's Datasets tab.
How to revoke a shared dataset
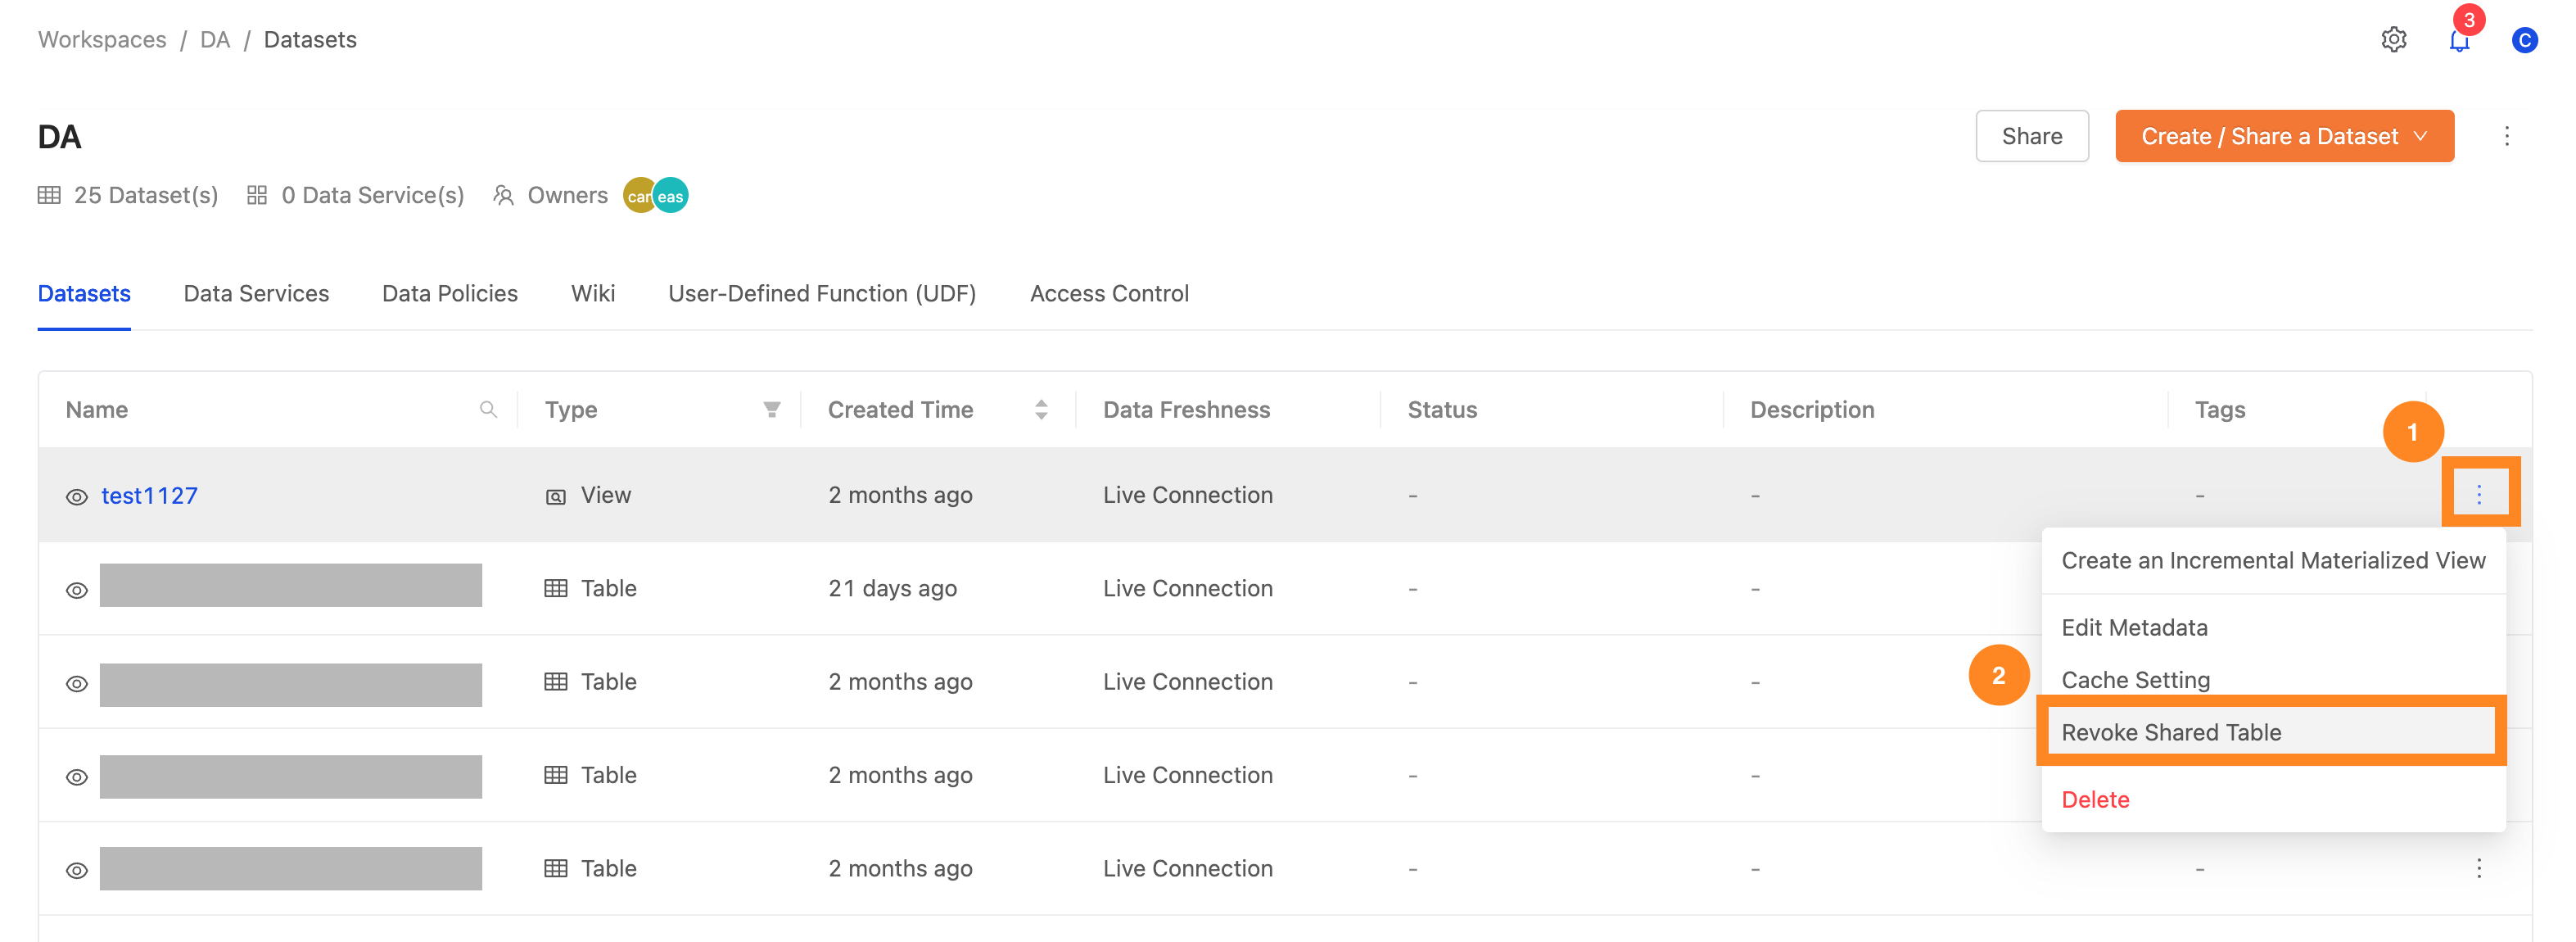
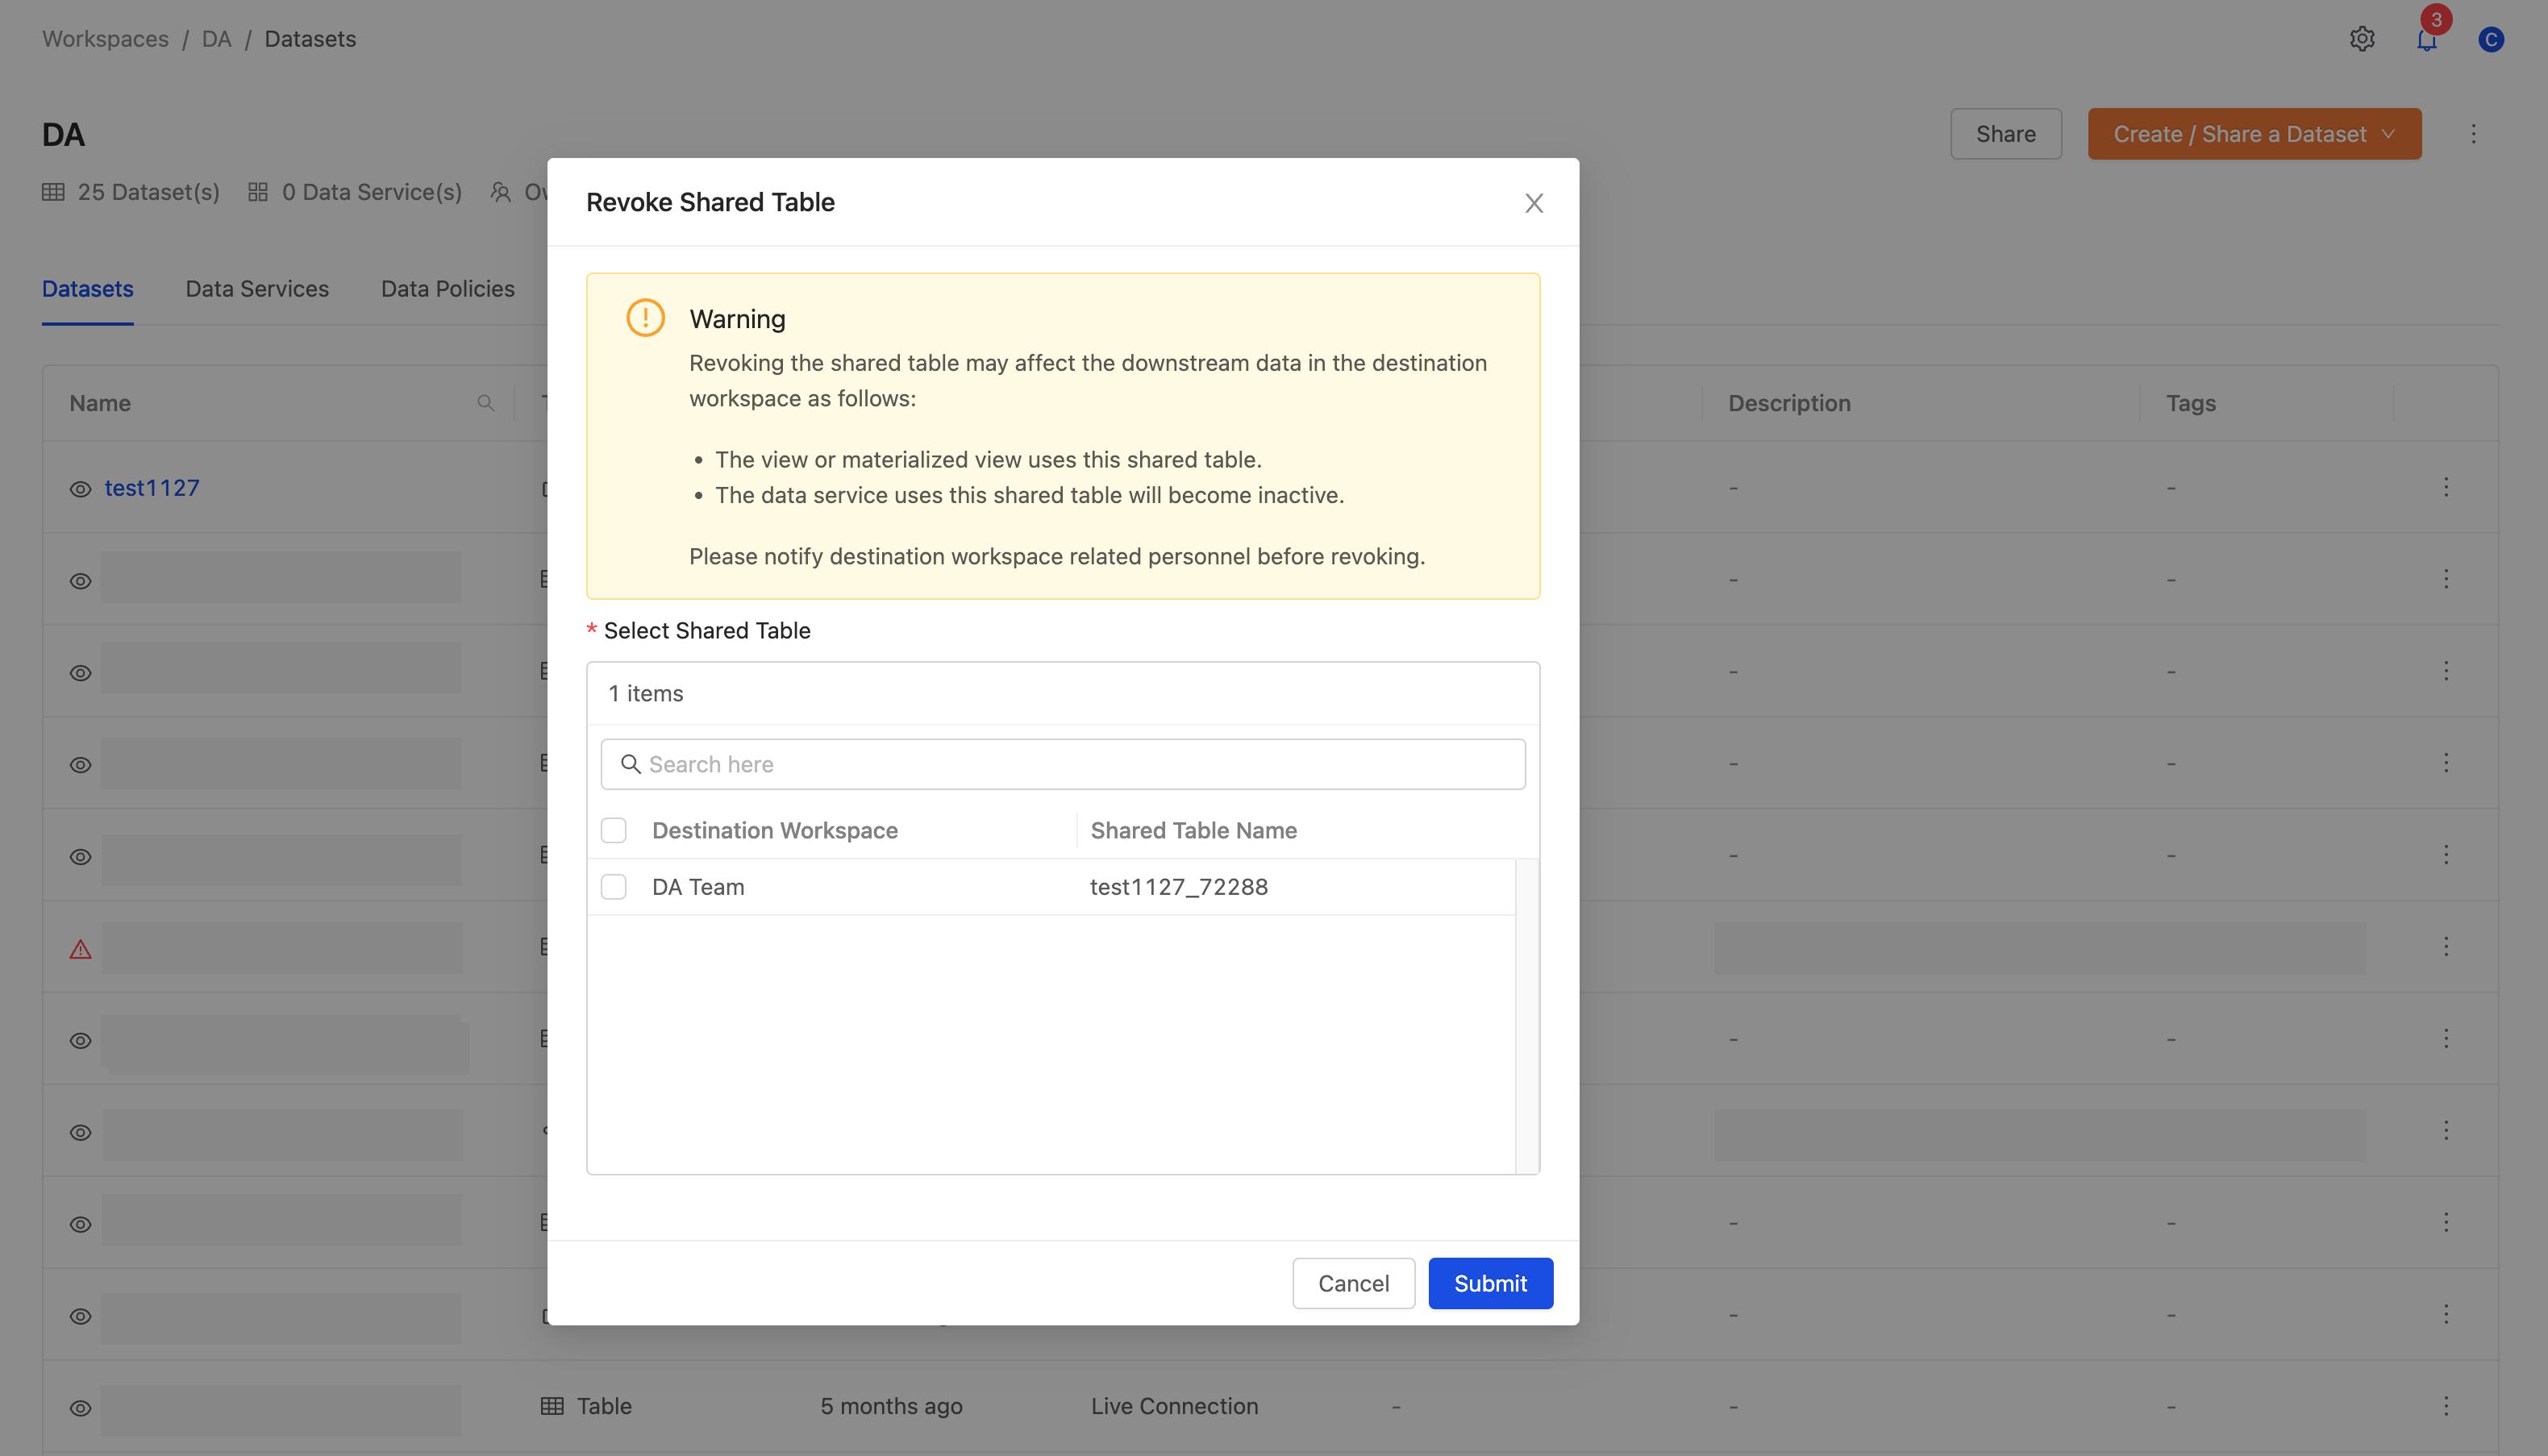
Step 1: On the source workspace page, click the vertical three-dot icon to the right of the shared dataset and select Revoke Shared Table.
Step 2: Selecting Revoke Shared Table opens the Revoke Shared Table page.
The page lists every Shared Table shared from this dataset and the workspace it is in. Select the items to revoke and click Submit; the change takes effect immediately. Revoked items are removed from the destination workspace right away, and any data and services in that workspace that use the revoked Shared Table stop working.
Editing and deleting shared datasets
A Shared Table can only be revoked, not deleted. The destination workspace cannot delete a Shared Table itself, unless it deletes the whole workspace.
When a Shared Table's source workspace is deleted, all datasets shared from it are revoked as well.
Shared Table settings cannot be edited. To add or remove columns, or change the destination workspace or the shared dataset, create a new Shared Table.
However, a Shared Table's metadata can be edited. To edit metadata in the source workspace, see 2.3.4 Workspace / Datasets / Dataset Metadata. In the destination workspace, the Edit Metadata option only lets you Disable (default) / Enable the Semantic layer.