ElasticSearch
Step 1: Create a data source
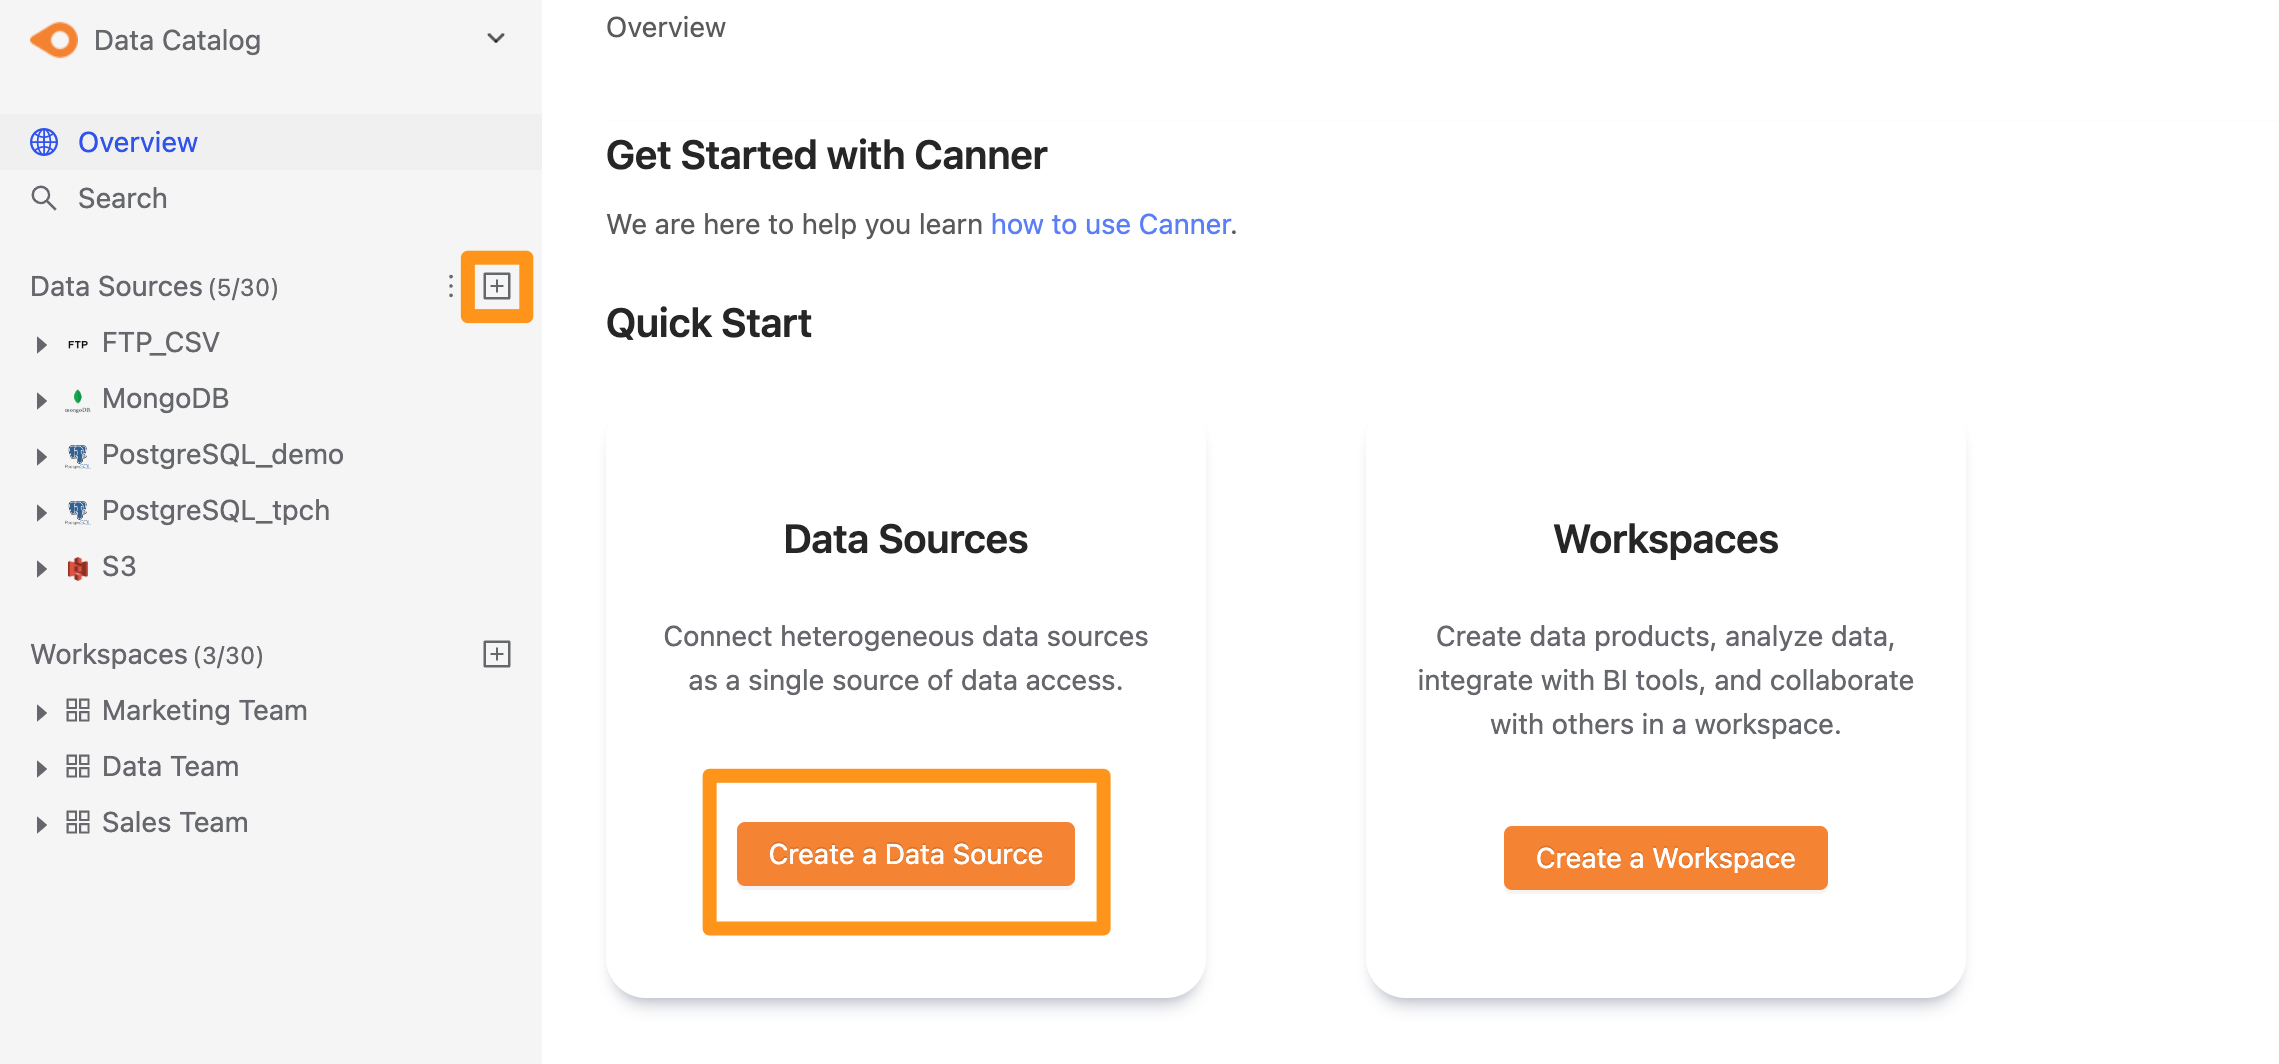
There are two ways to create a data source: click the "+" button next to Data Source in the sidebar, or click the Create a Data Source button on the Overview page.
Step 2: Configure the connection
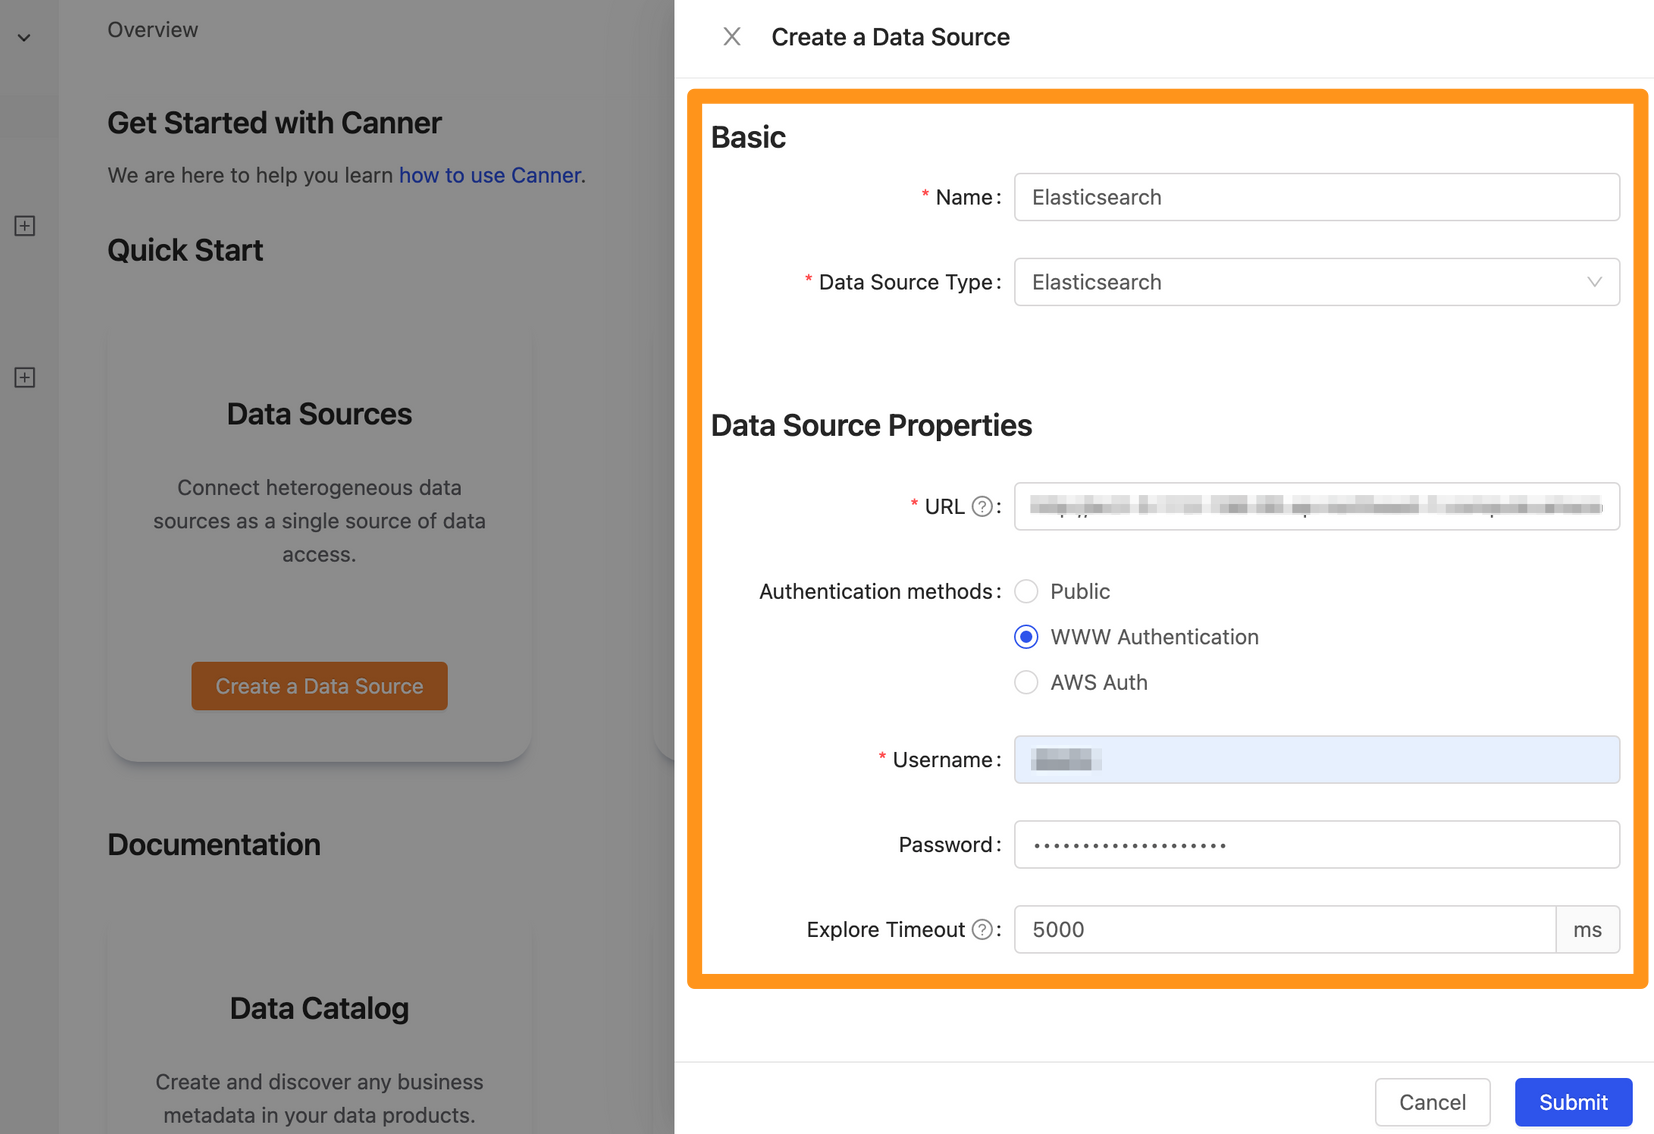
In the dialog form, fill in the connection information and click Submit.
Basic
- Name: The display name of the database in Canner Enterprise. You can change it later.
- Data Source Type: The database type. Select
Elasticsearch.
Data Source Properties
- URL: The database address, in the format
<protocol>://<hostname>:<port>. - Authentication methods:
Public: Select this if you have not enabledx-packwith user passwords.WWW Authentication: Select this if you have enabledx-packwith user passwords.Username: The username.Password: The password.
AWS Auth: Select this if you use AWS Elasticsearch Service with access granted to an AWS user.AWS Region: The AWS region.AWS Access Key: The AWS user access key.AWS Secret Key: The AWS user secret key.
- Ignore Public Address (off by default): When enabled, the system uses the configured address instead of the public address returned by the Elasticsearch API.
- Explore Timeout: The timeout for connecting to the data source. If connecting takes longer than this, the system stops and shows a connection error. The default timeout is
10000 ms. If the database you are connecting to has many tables, consider increasing this timeout.
Step 3: Finish
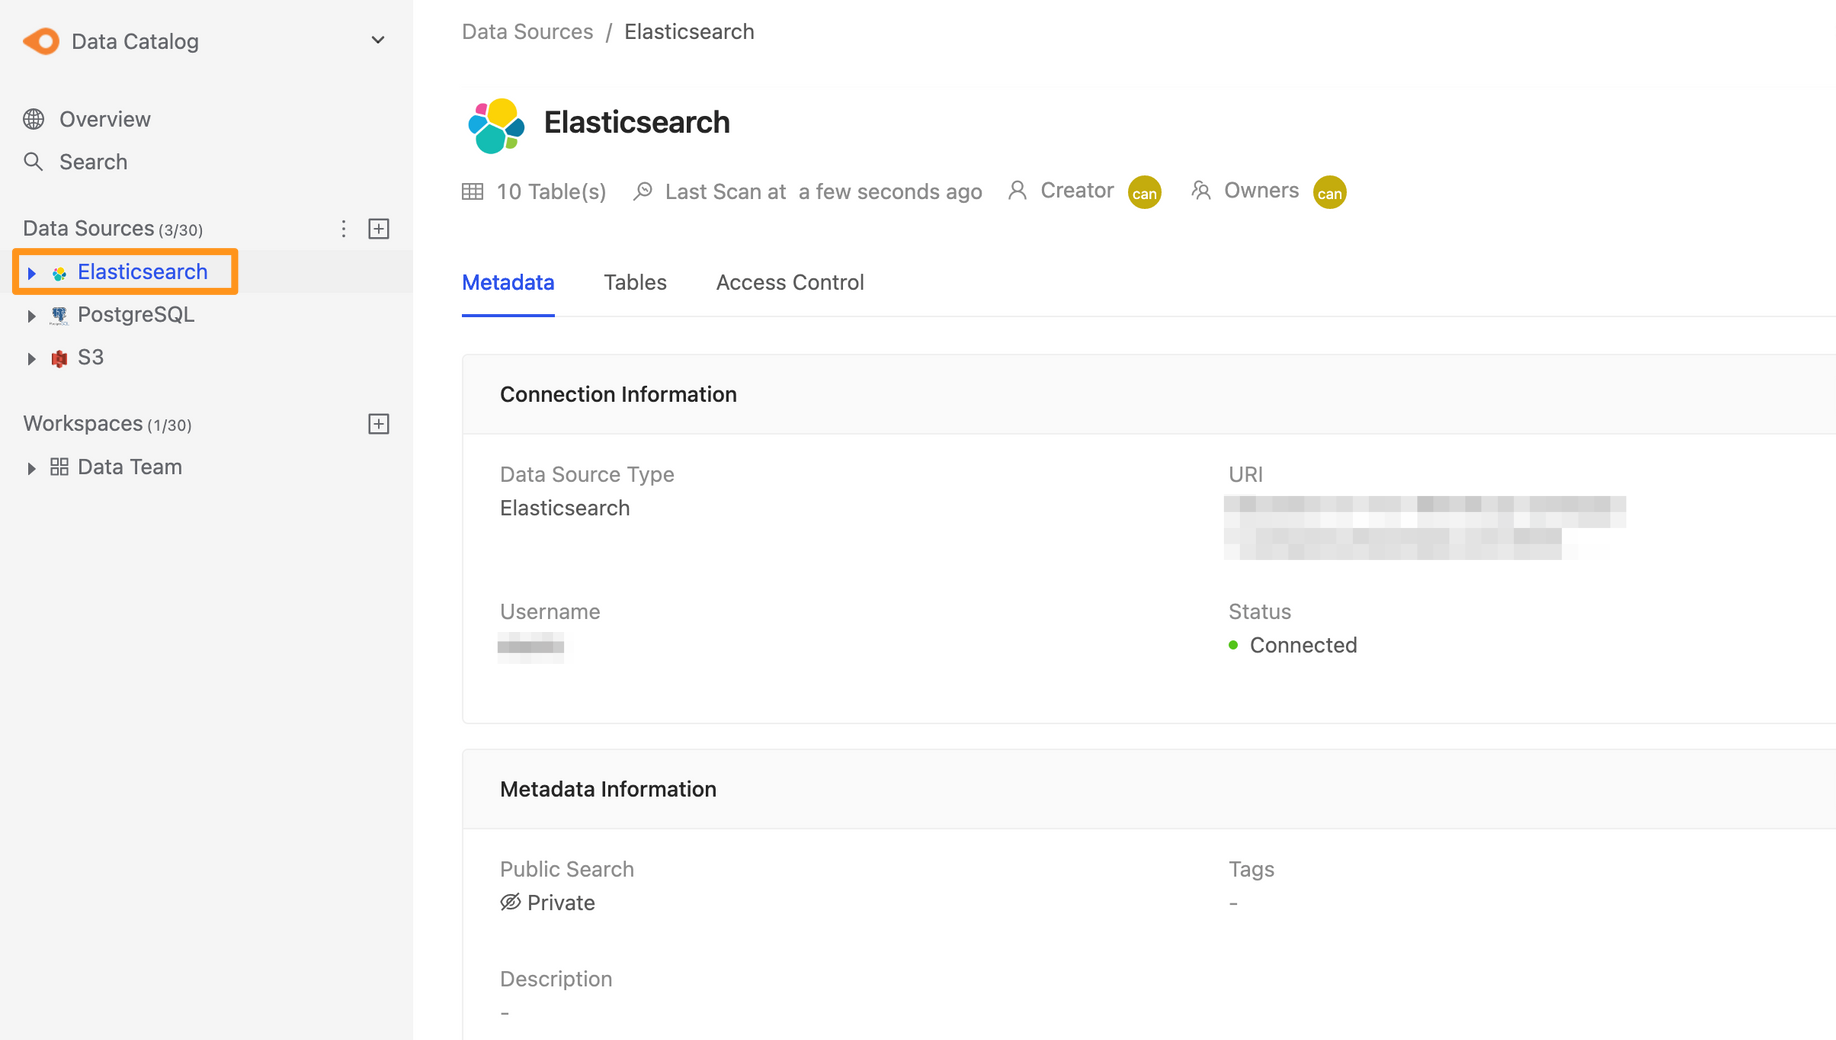
After you submit, the Elasticsearch data source appears in the sidebar shortly. Click it to open the data source details page.