Using Workspaces
In this tutorial, you'll learn how to use Canner Enterprise's Workspace to collaborate with team members on data access.
Before starting this tutorial, you must complete Connecting Data Sources in Canner Enterprise.
Workspace is where users manage datasets in Canner Enterprise. You can go to Workspace Overview to learn more about workspace design concepts and functional details.
Add new workspace
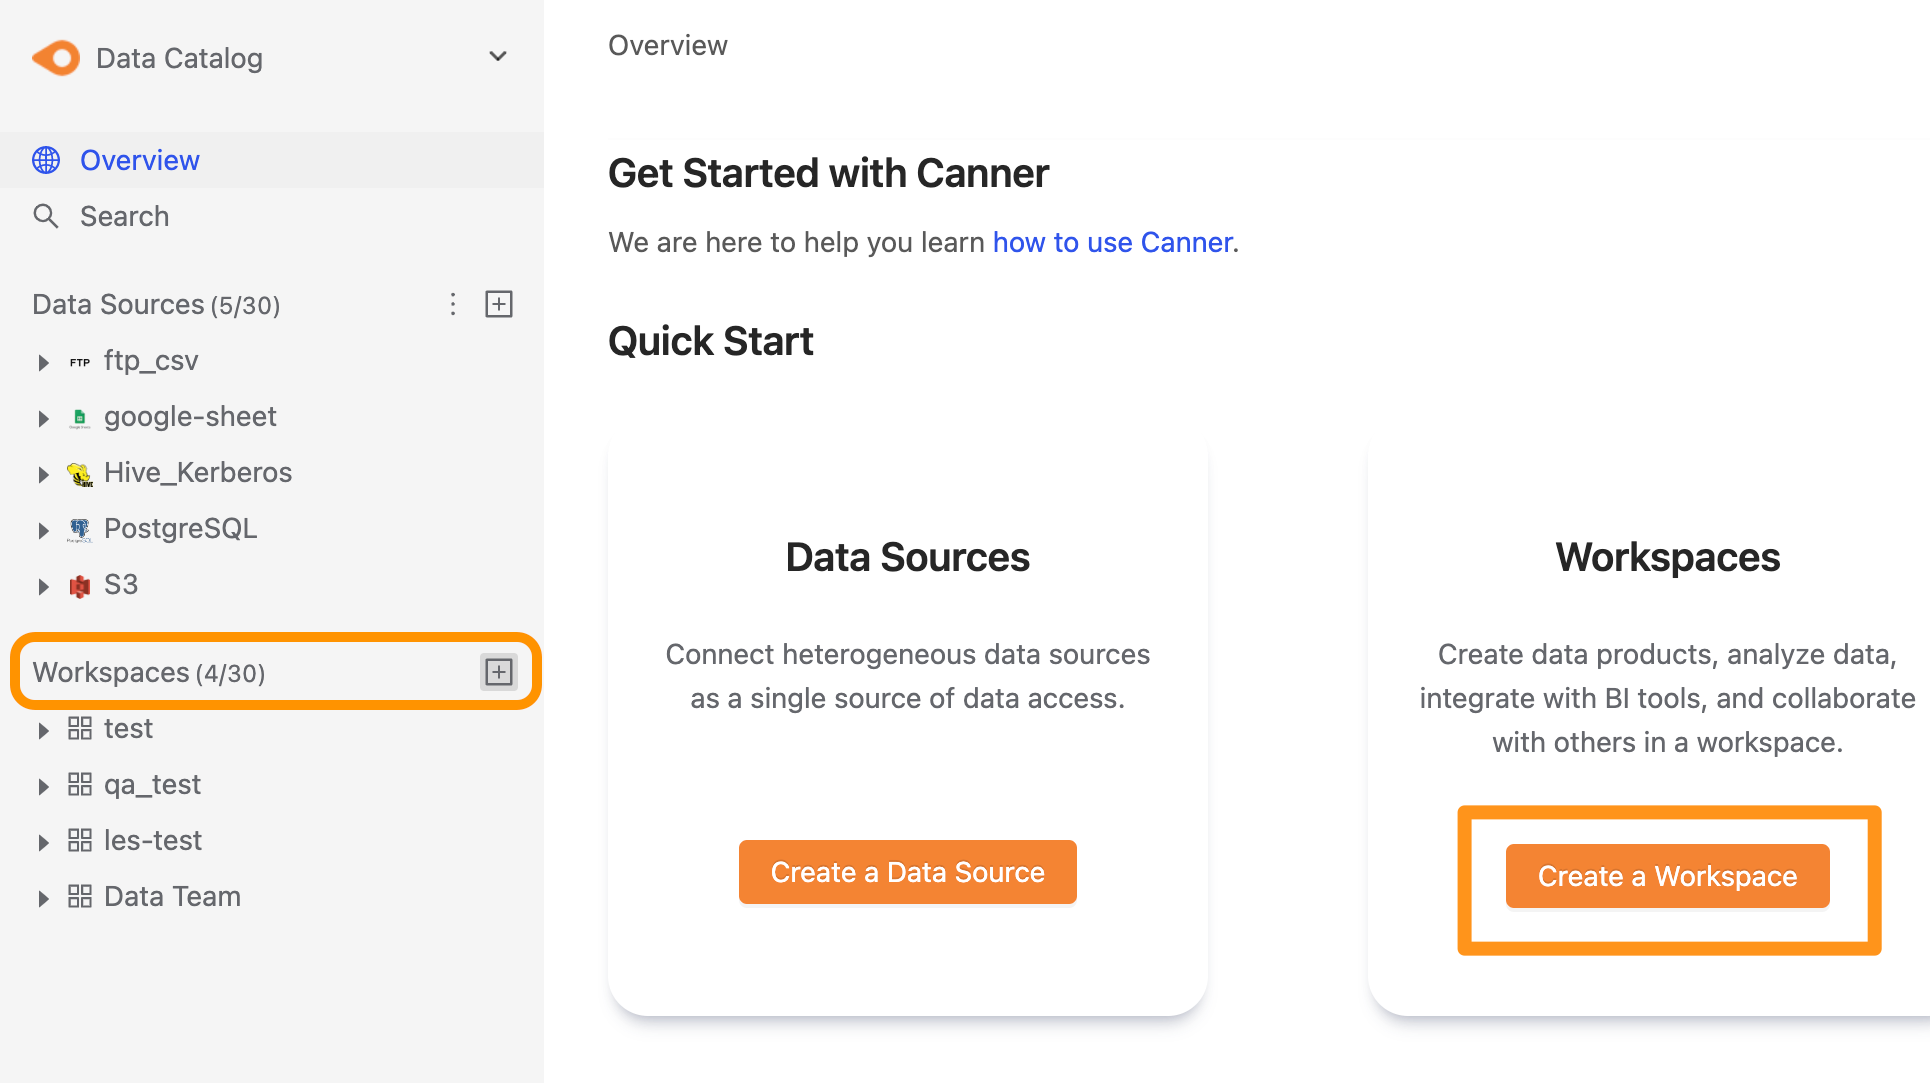
You can create a data source through the following two operations. The first is to click the "+" button on the sidebar Workspace or click the Create a Workspace button on the Overview page.
After clicking Create, a form pops up where you can set the workspace's name.
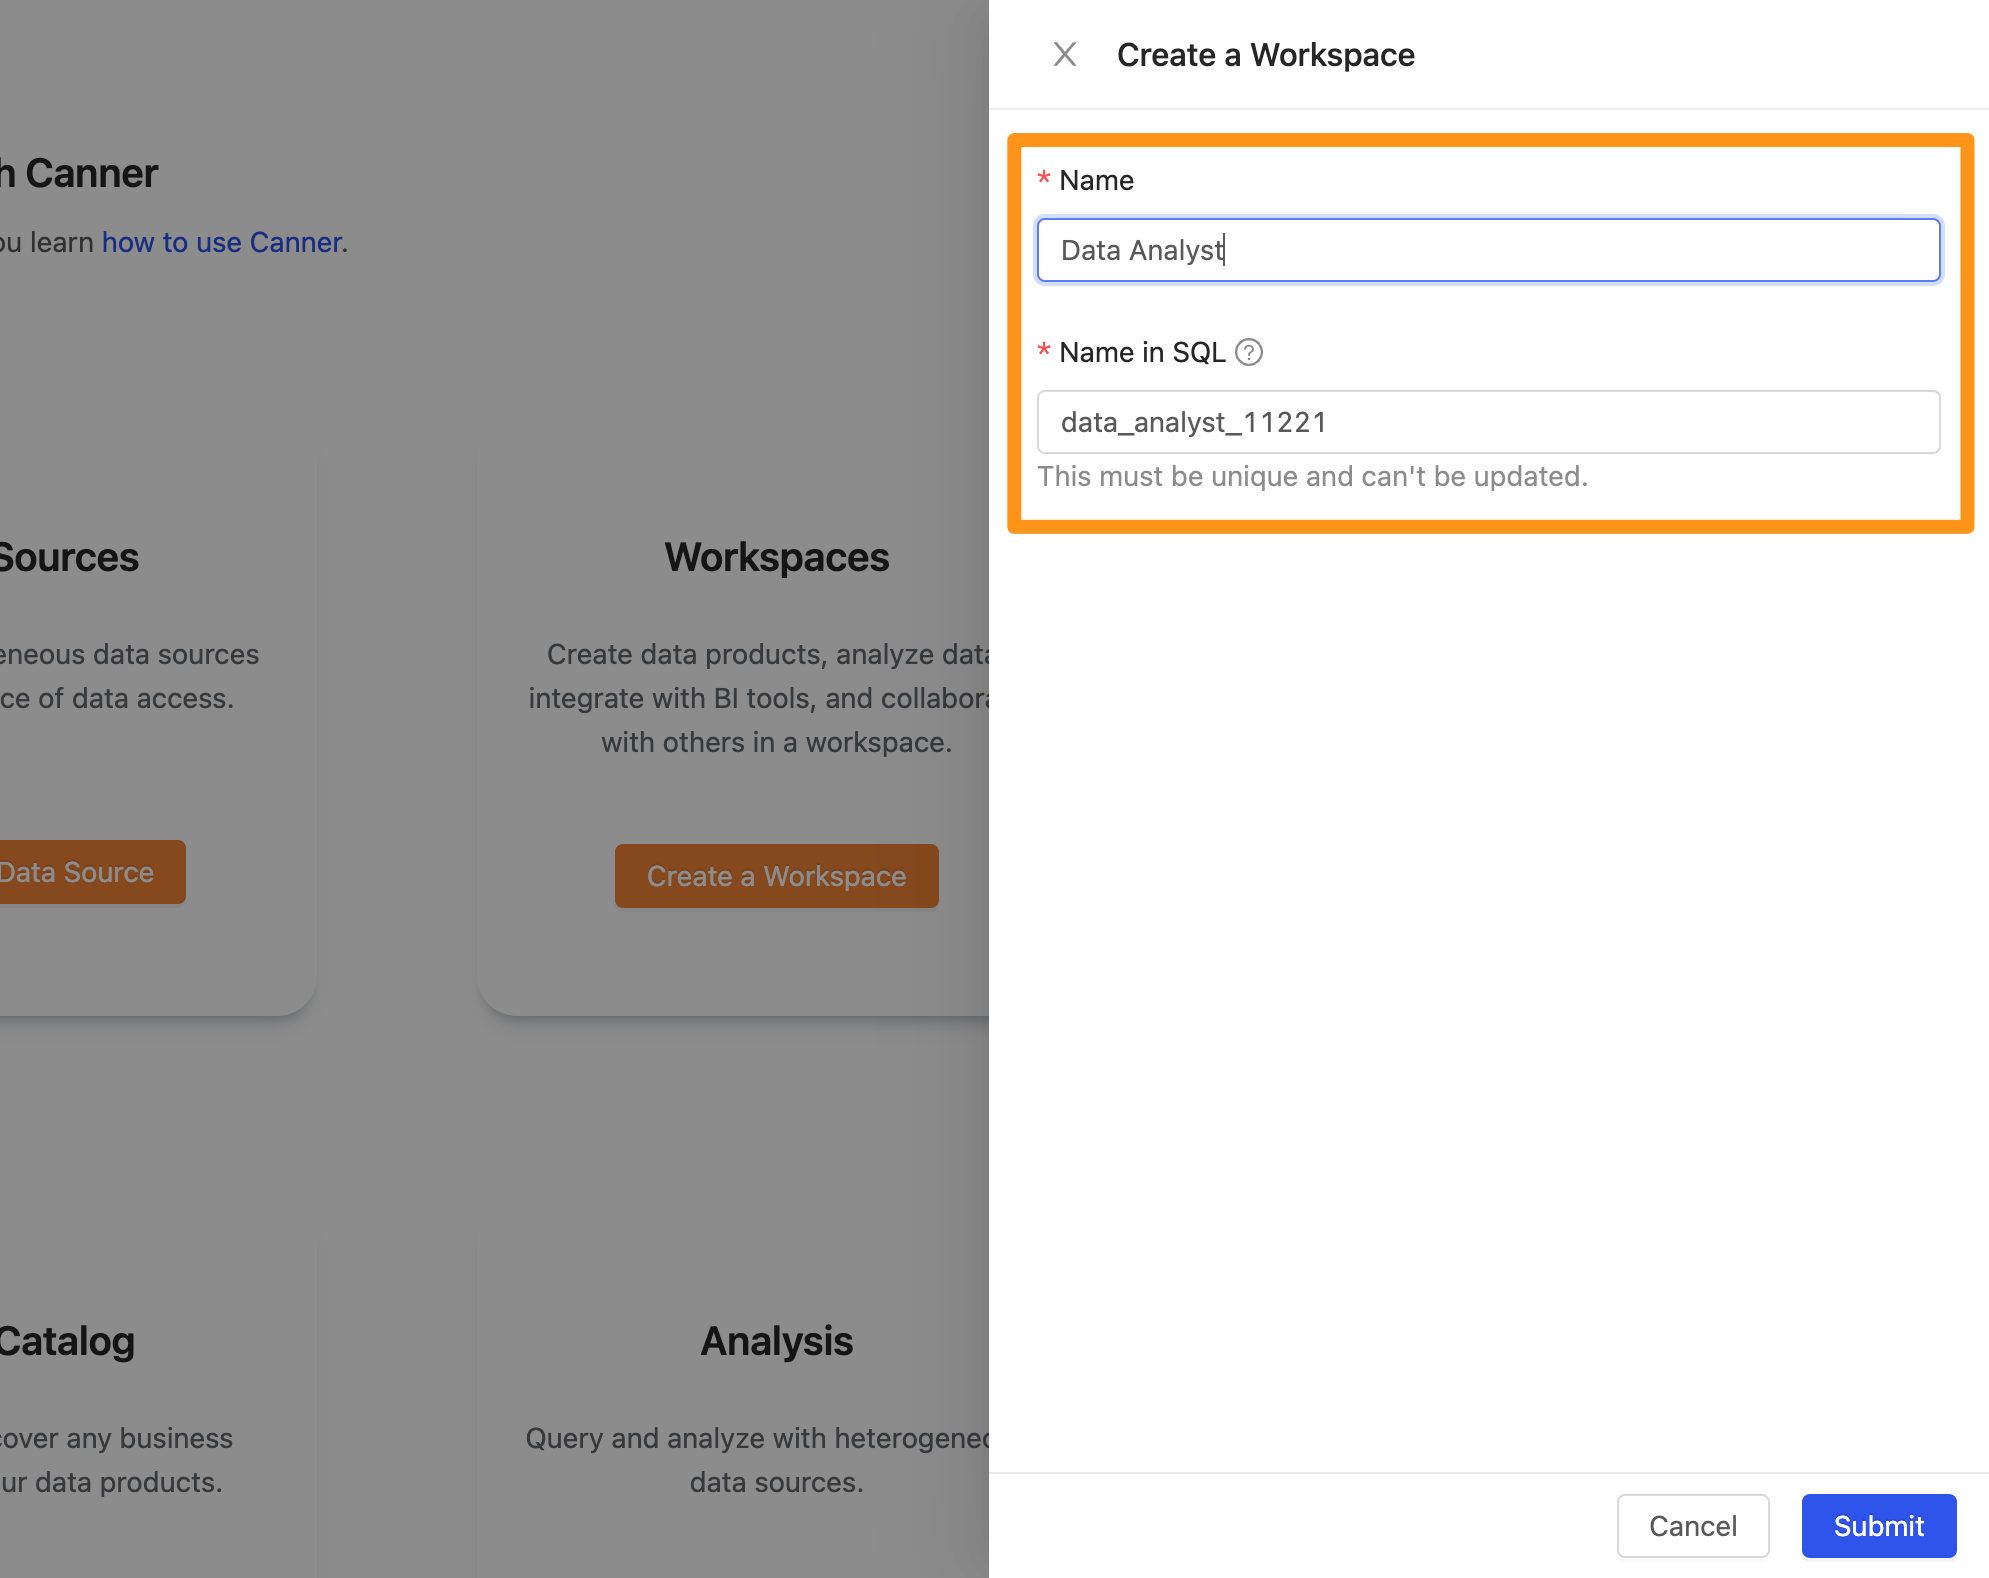
- Name: Enter the name of your workspace
- Name in SQL: Automatically generate an independent ID. The information required to connect to this workspace via API / Driver / PostgreSQL Wire Protocol.
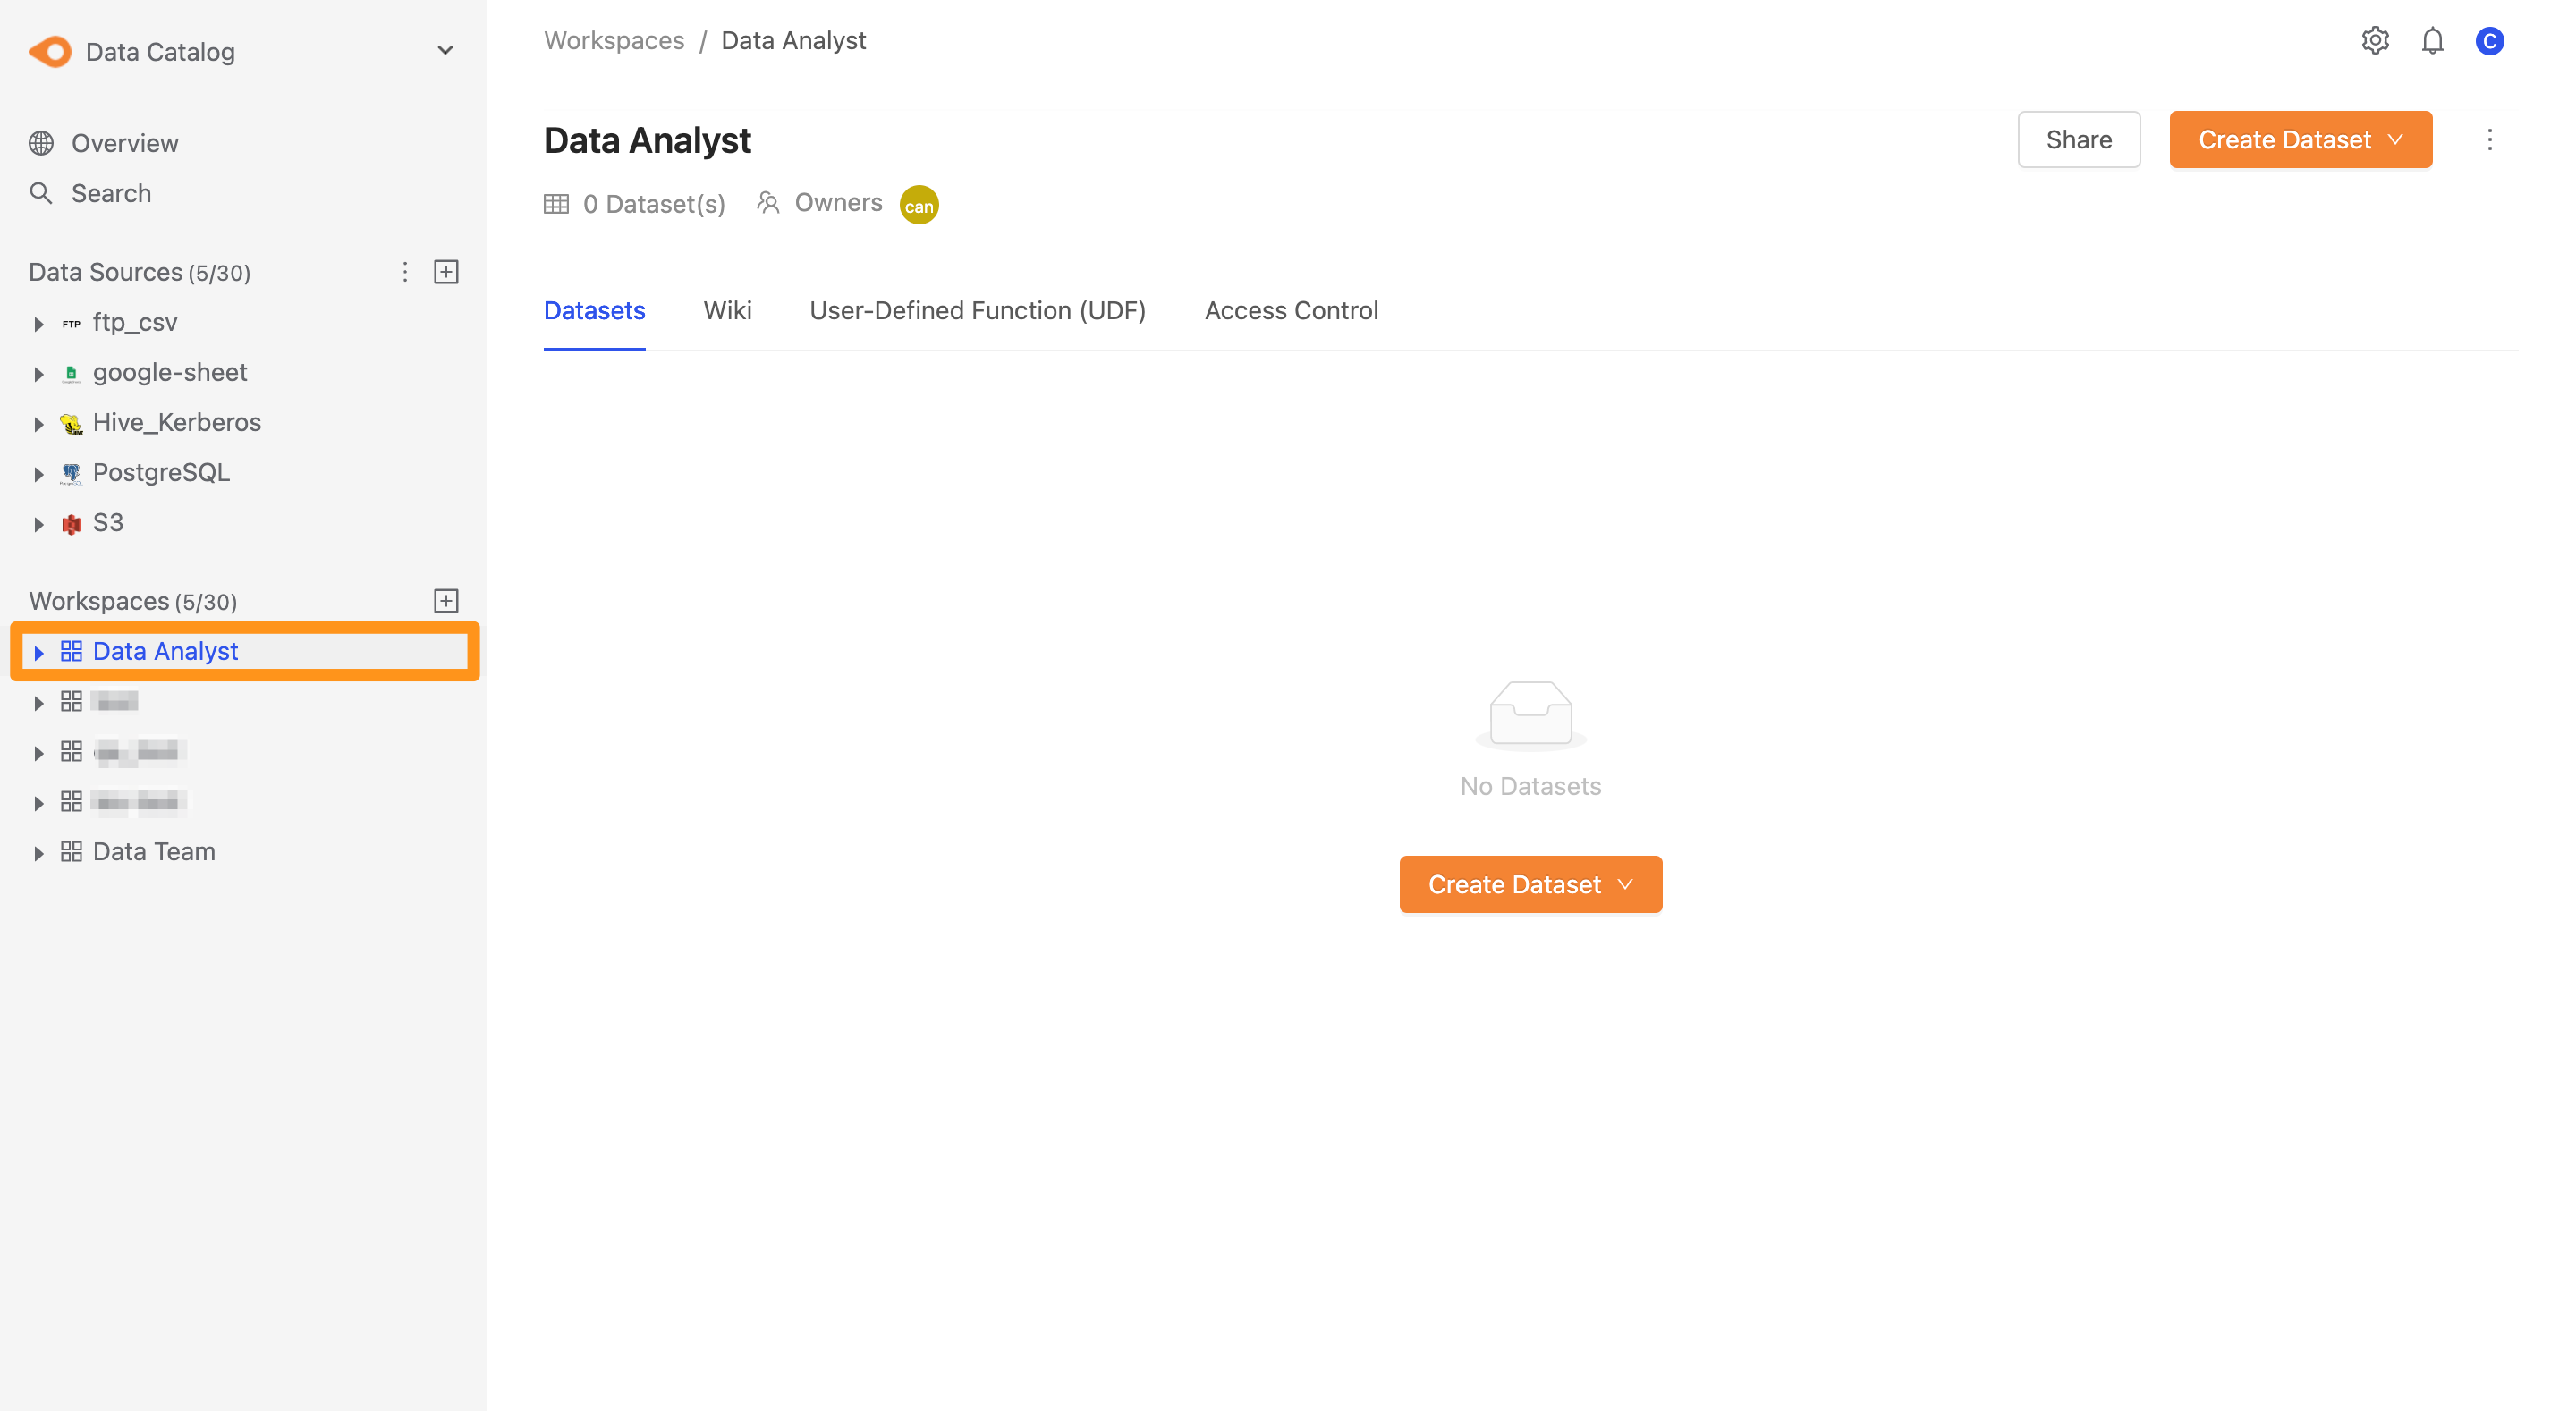
Click Submit. After completing the creation, you can see the workspace in the sidebar. After clicking, you can go to the workspace screen, as shown below.
Add team members to the workspace
Go to the workspace and switch to the Access Control page.
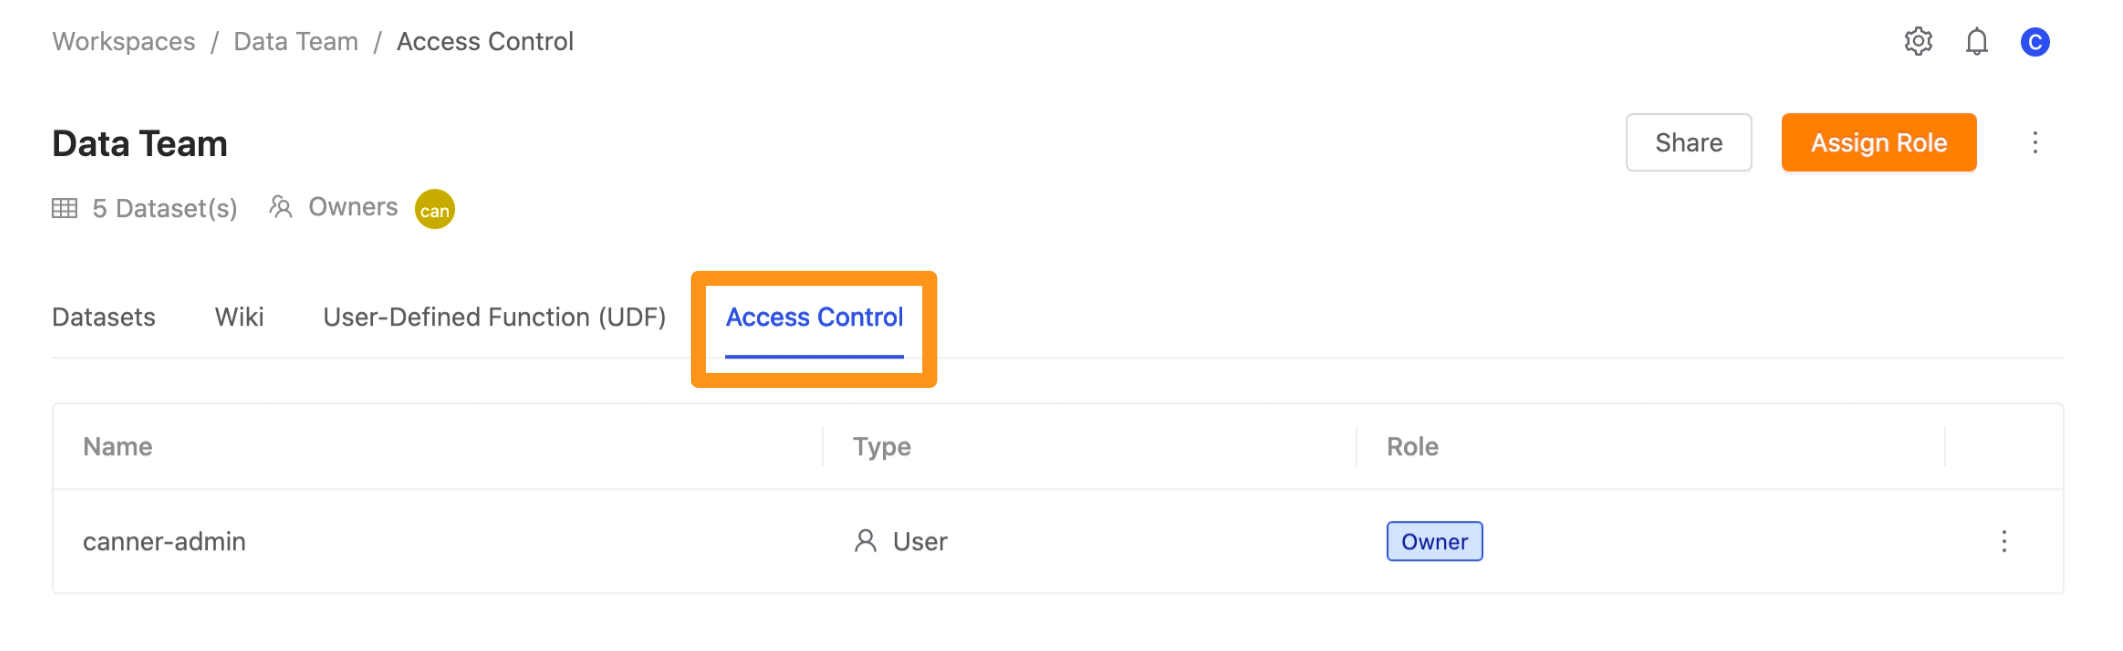
Click the Assign Role button; a window will pop up. Click Identity and Role to expand the drop-down menu to add team members and set their role permissions.
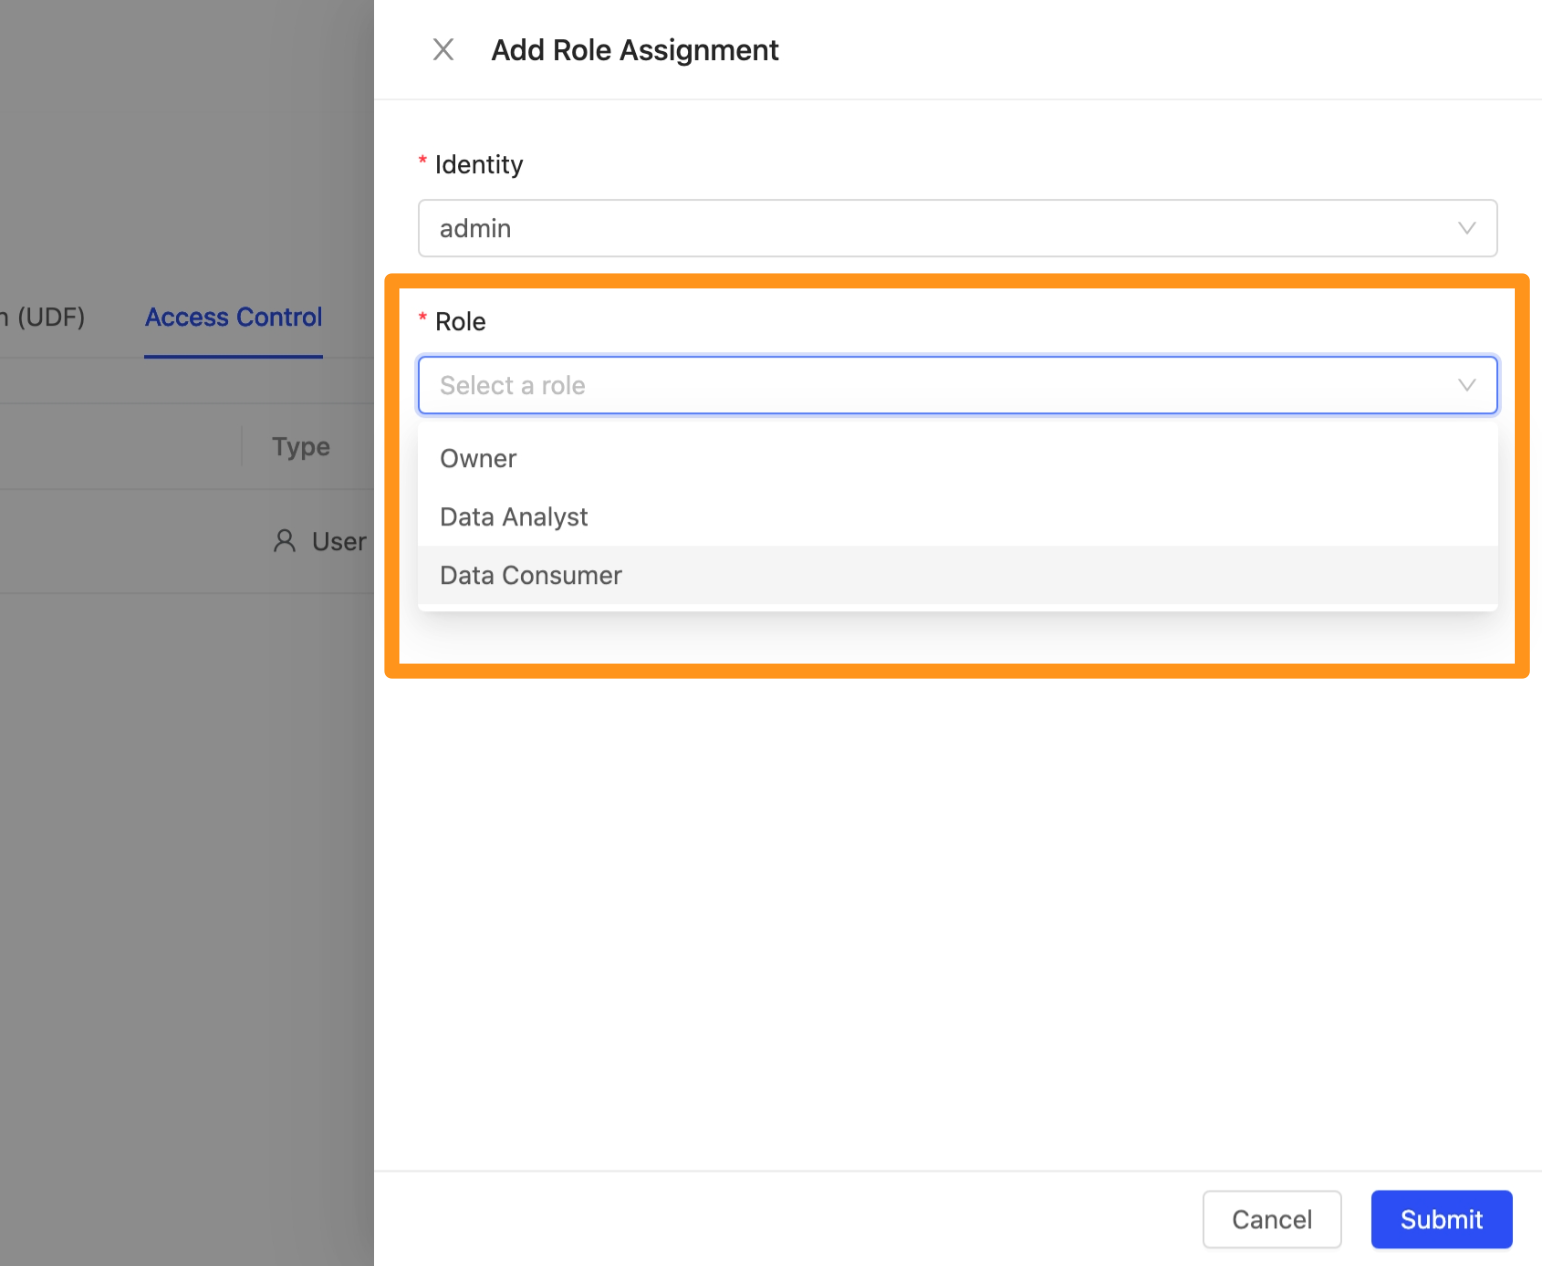
- 【Identity】 Select the specific user or group you want to join;
- 【Role】 Select the user or group in this authority role in the workspace.
Use the workspace wiki to record work notes
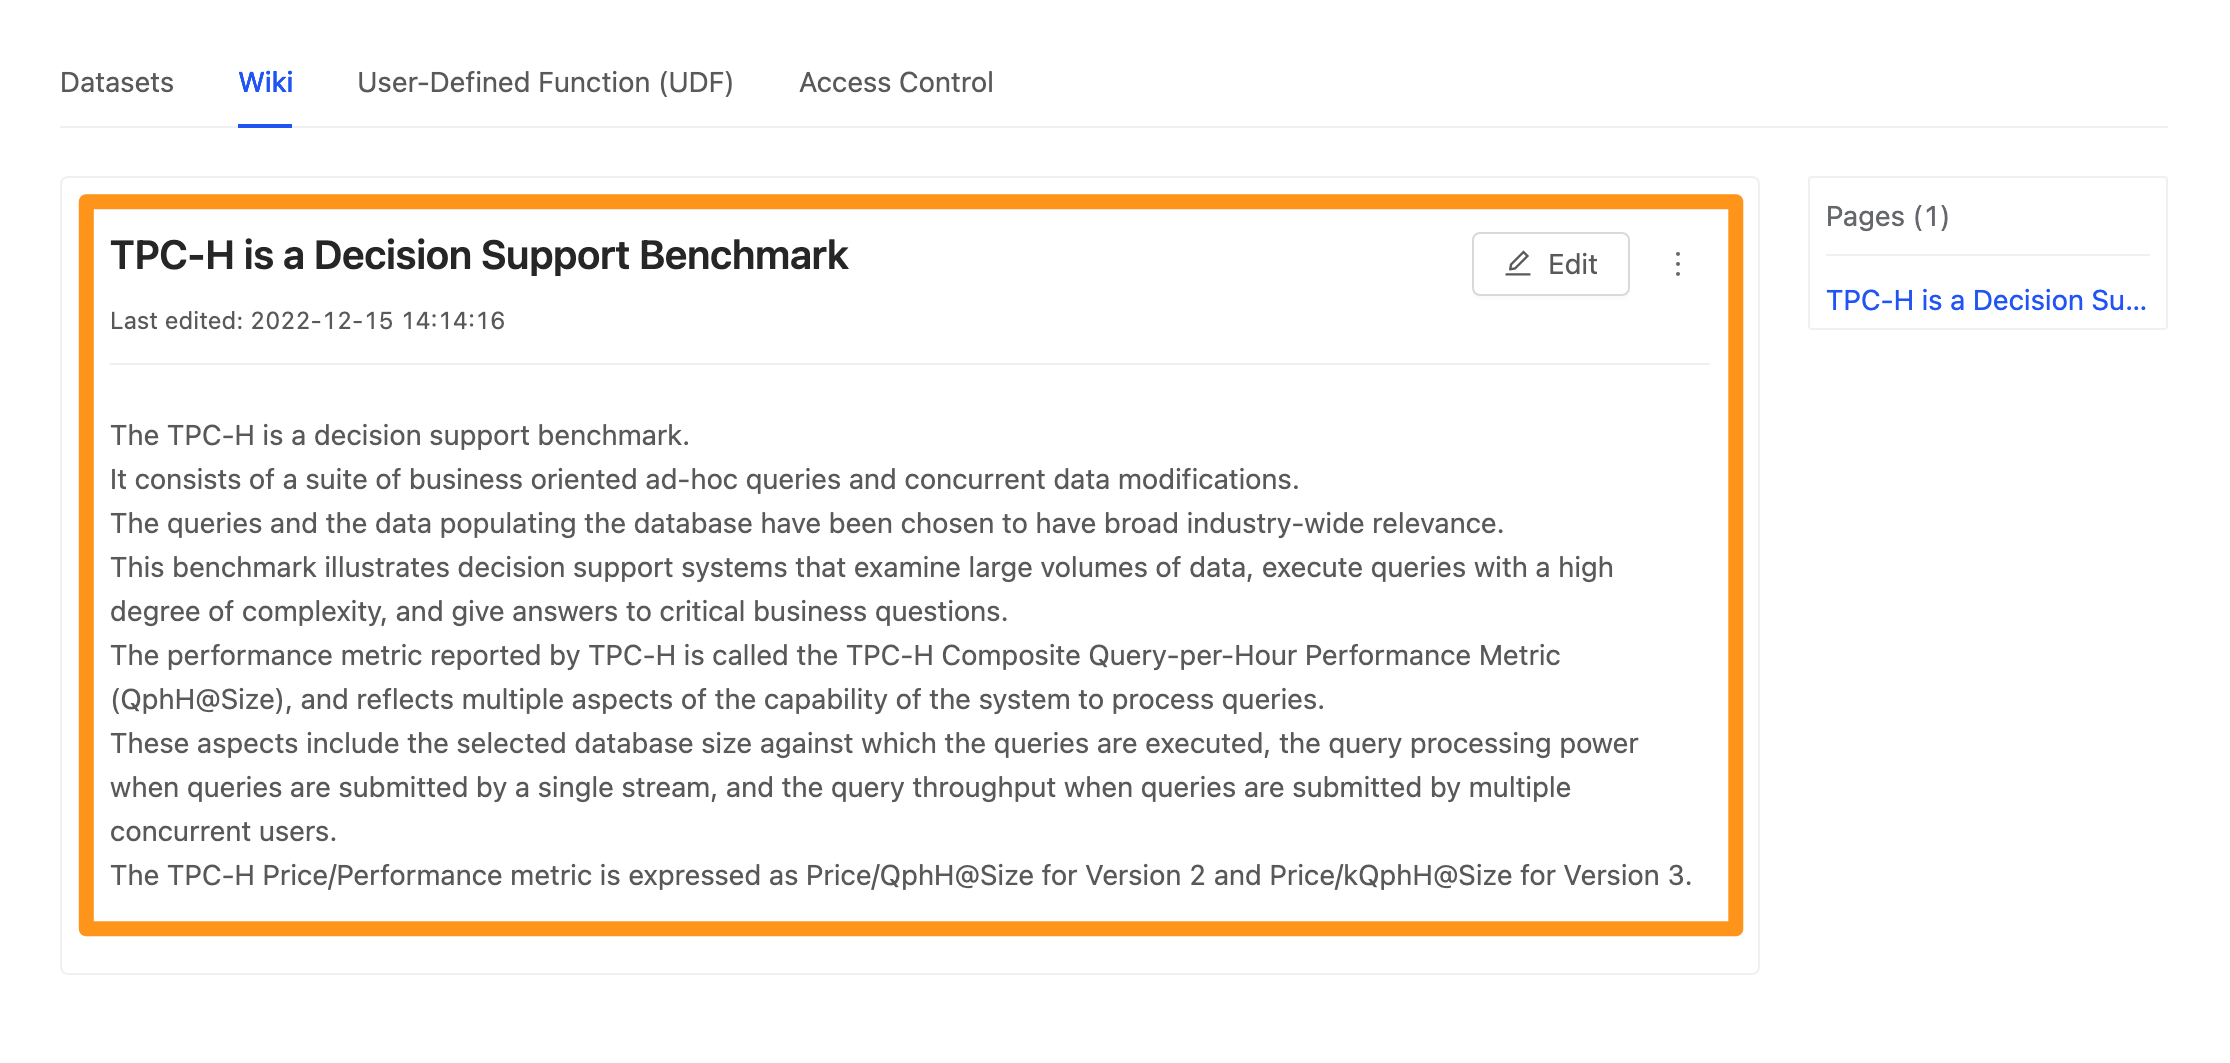
After adding all team members, switch to the Wiki tab; your team can create multiple Wiki Pages here and use Markdown to record some notes on data work, such as:
- Records of meeting discussions
- Algorithm Research and Discussion
- Analysis process record
- Result discussion and tracking Different teams can have other uses.
Import data into the workspace
Then, you can start accessing data from different data sources in the workspace and processing and output according to your needs. The new workspace will not add any data by default. You must first enter the workspace by a member of the Owner or Data Analyst role and switch to the Datasets tab to import the data for access.
Method 1: Import from the data source
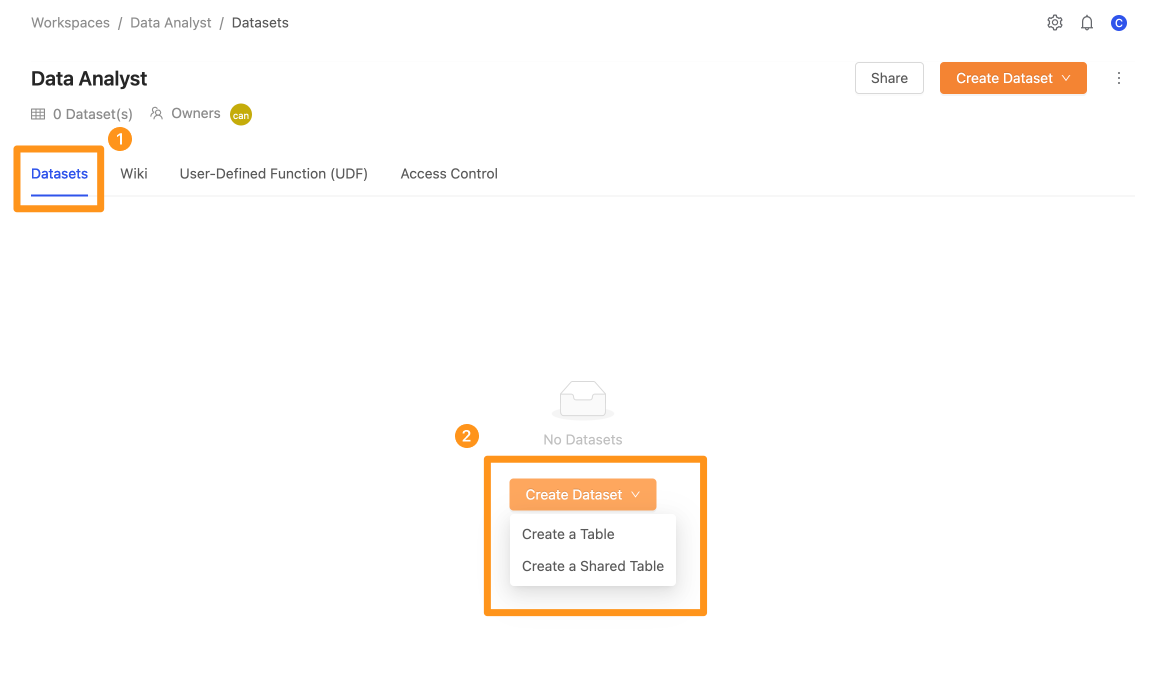
Step 1: Enter the workspace page
In the Datasets tab, click the Create Dataset button. After clicking, a drop-down menu will appear; select the Create a Table button.
Step 2: Set import data from the data source
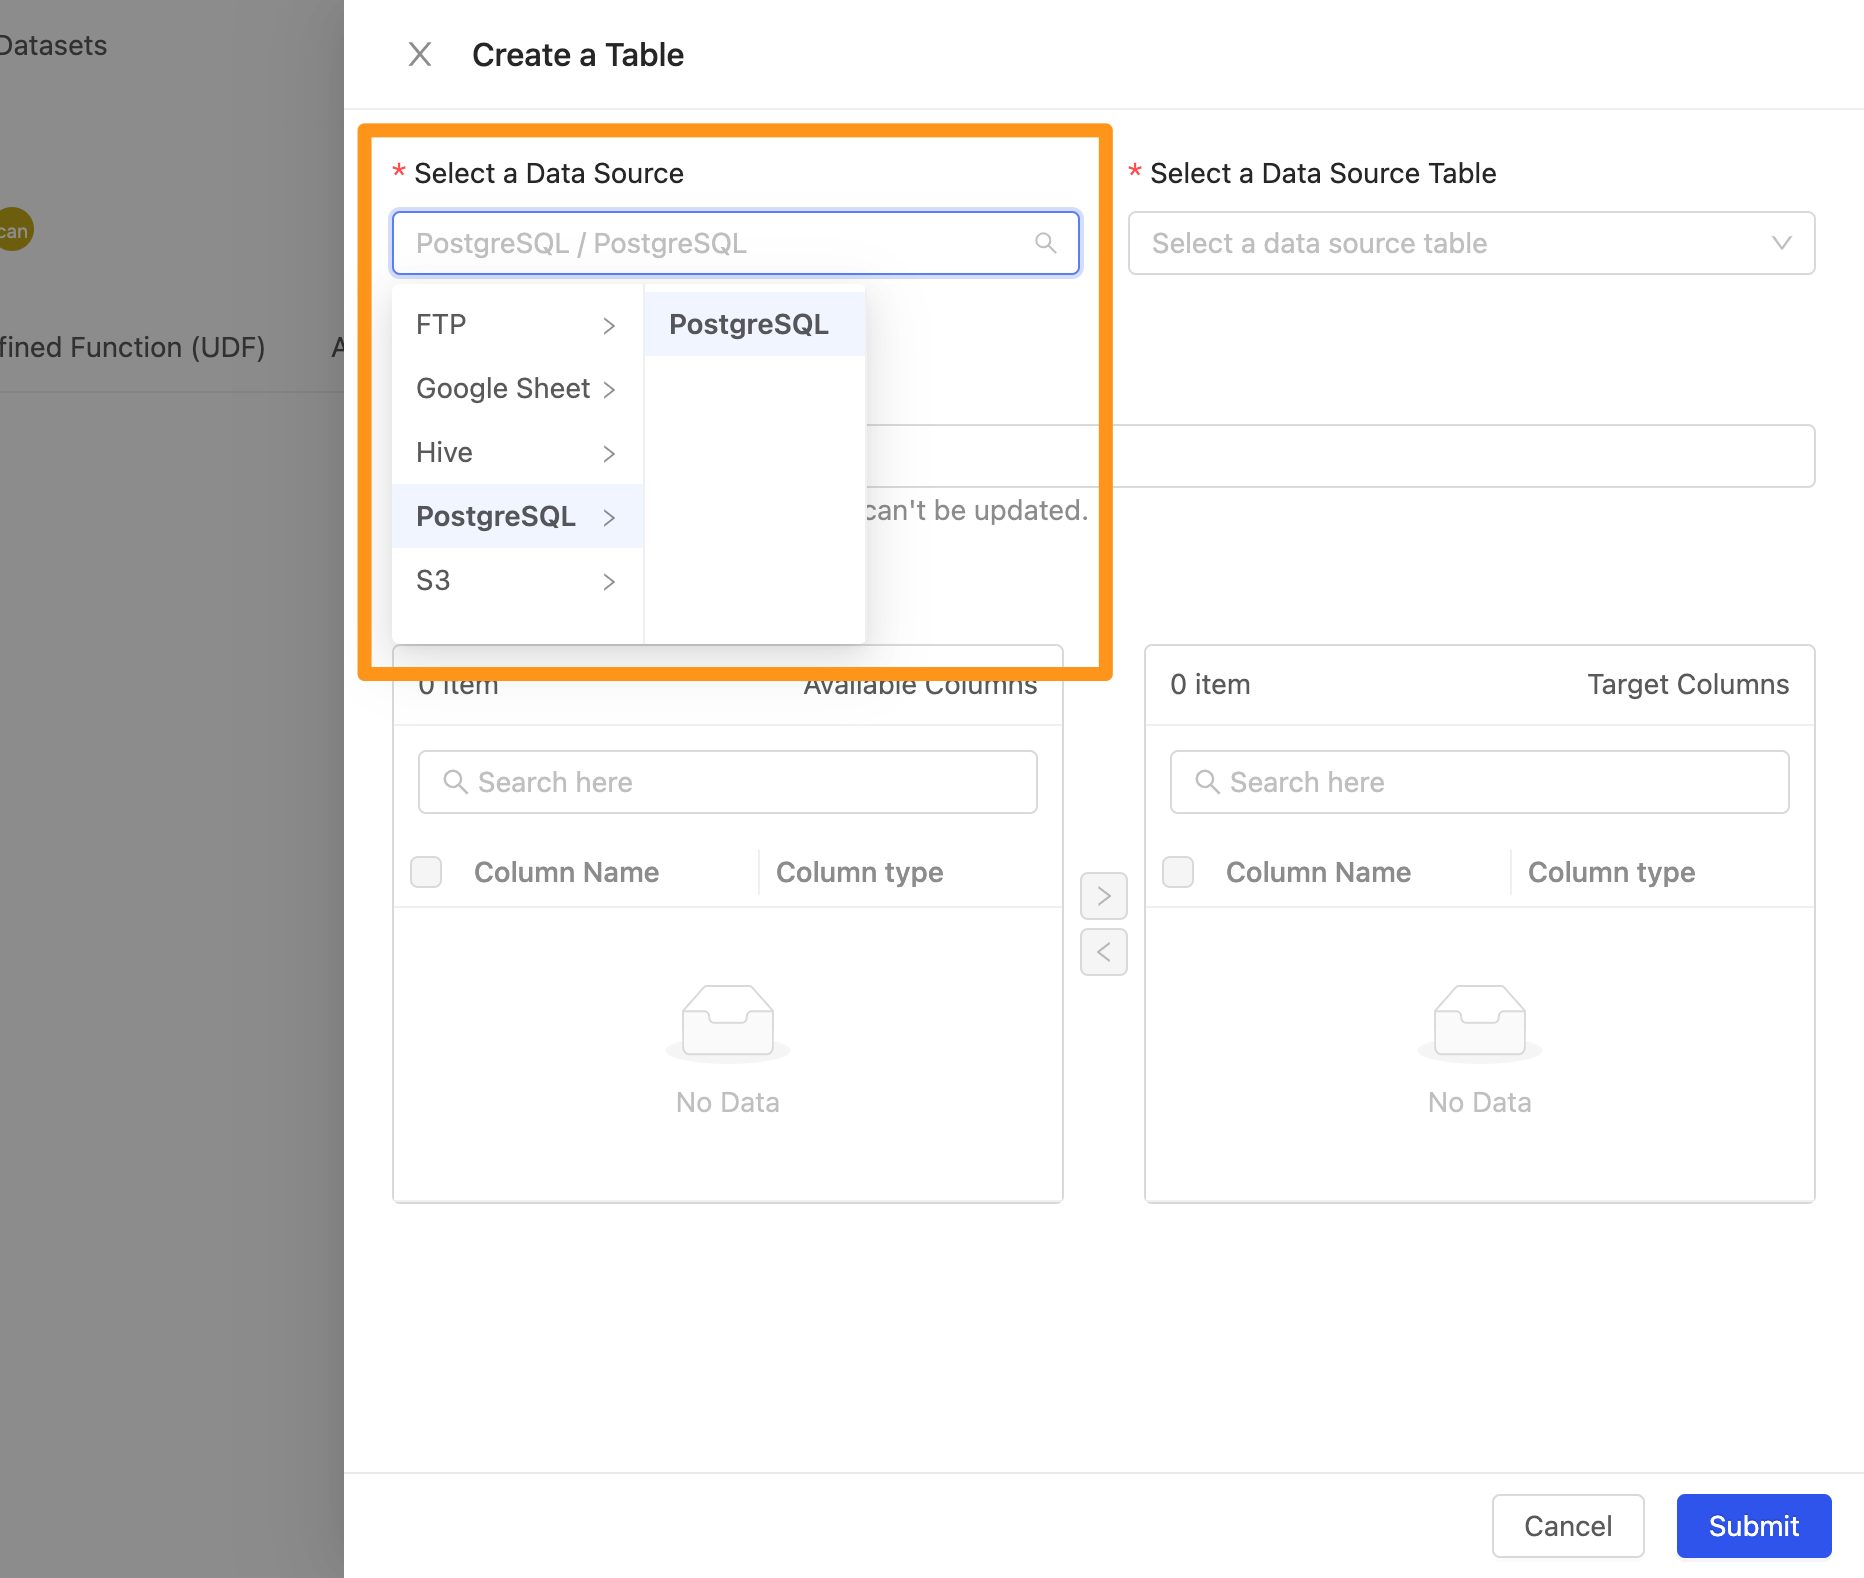
Select the Create a Table button, and this window will appear on the screen.
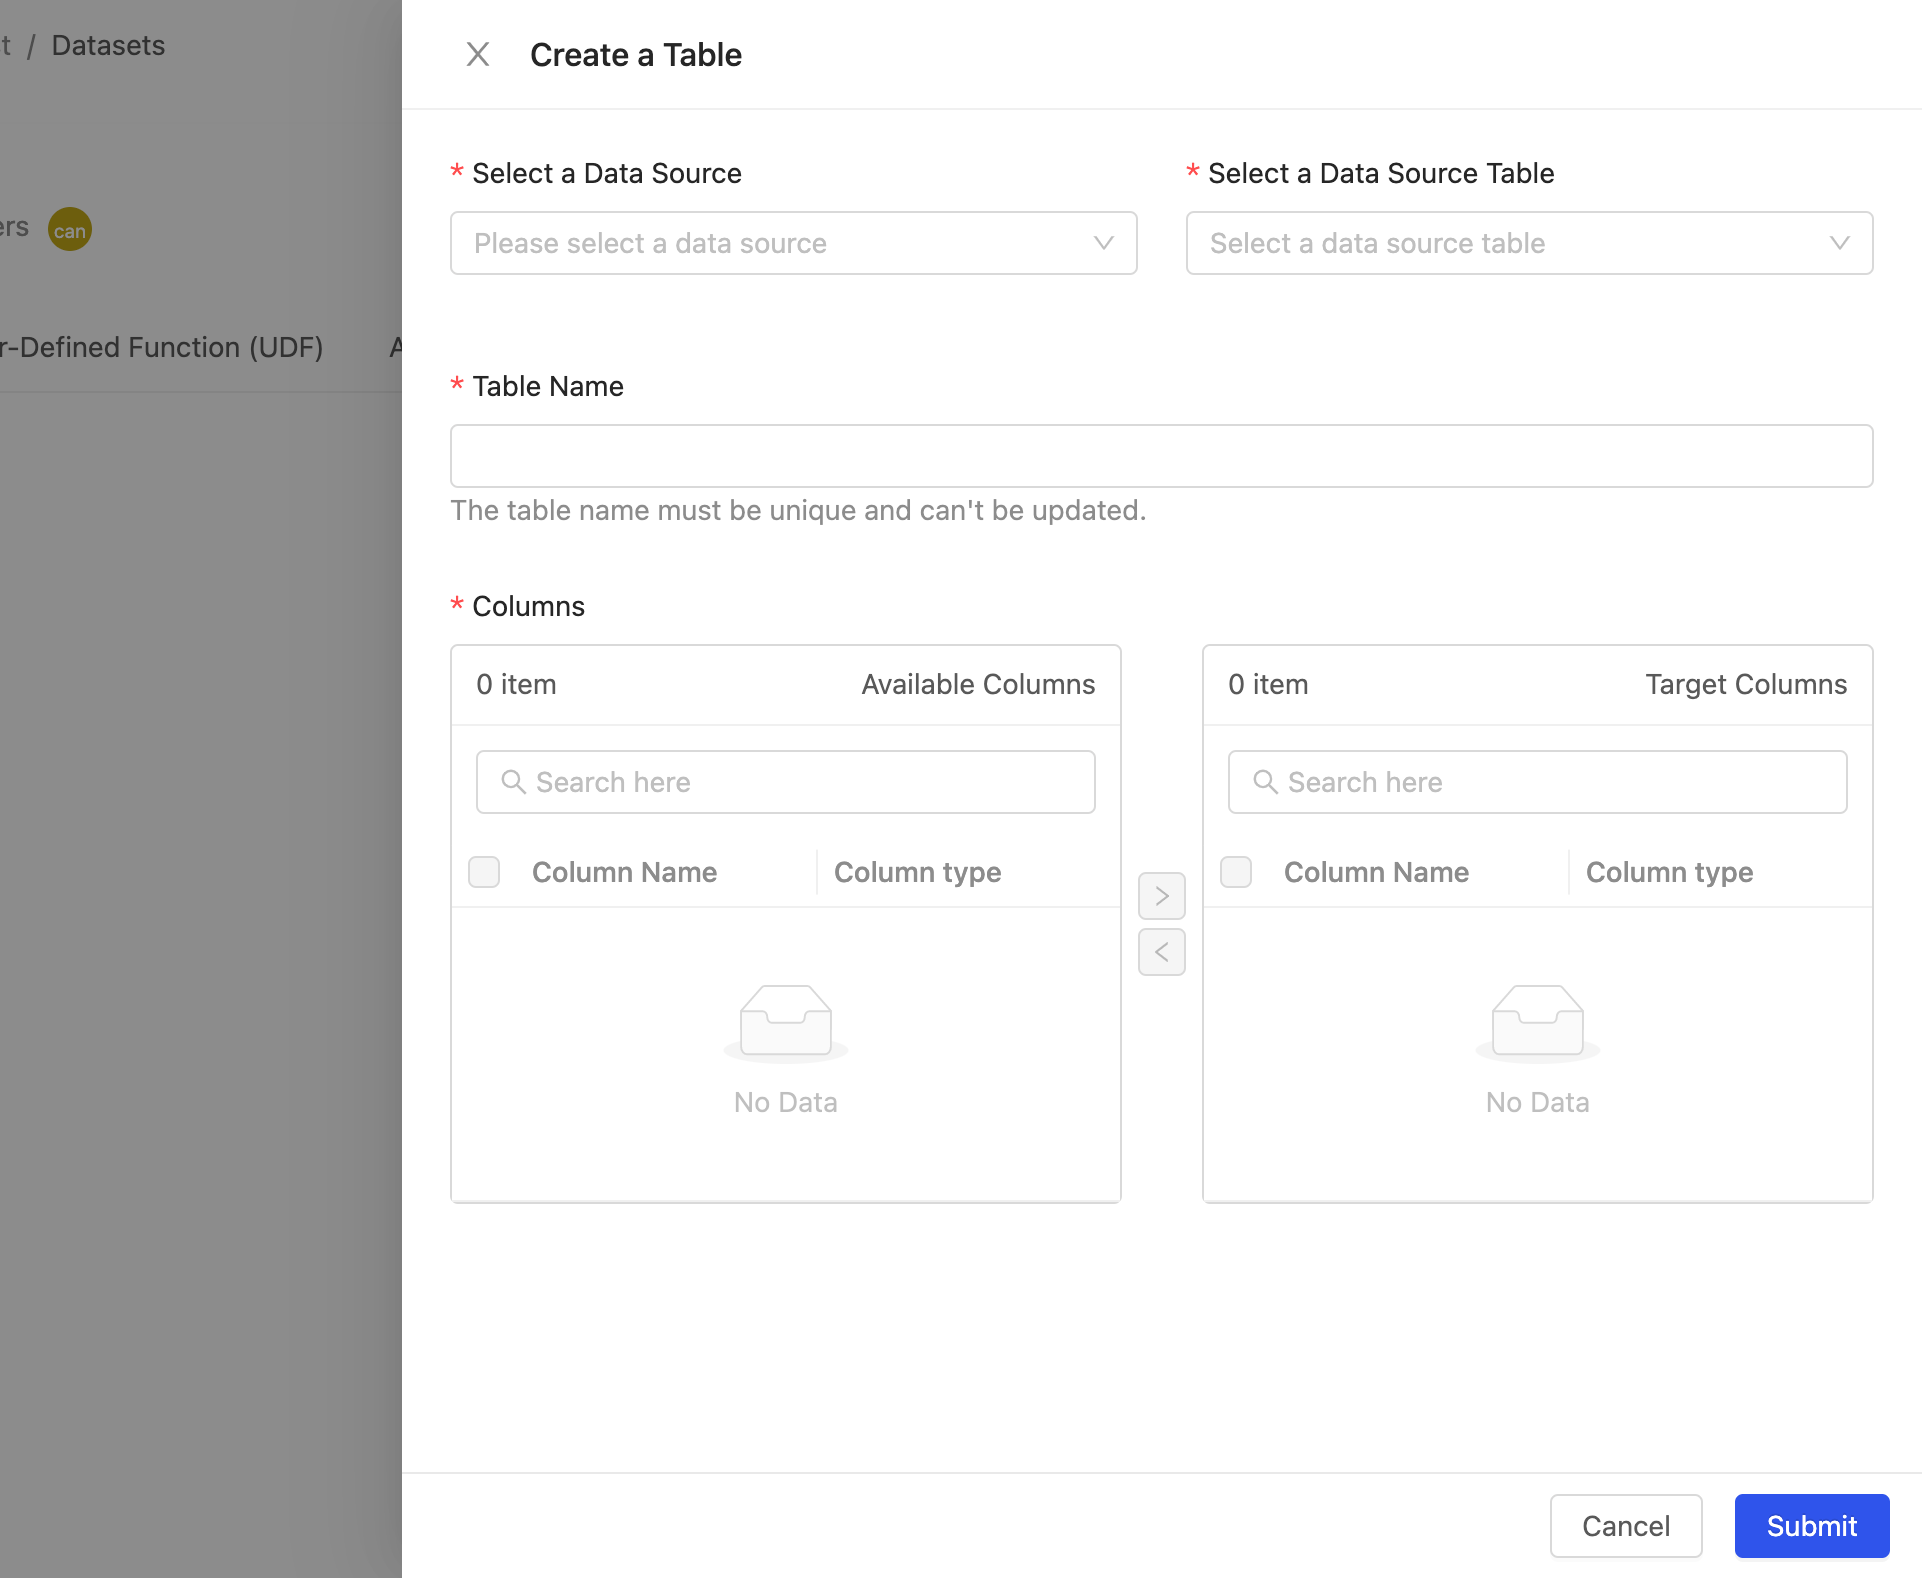
Here you can choose which data source to import, along with its tables and columns
- Select a Data Source : Select a data source
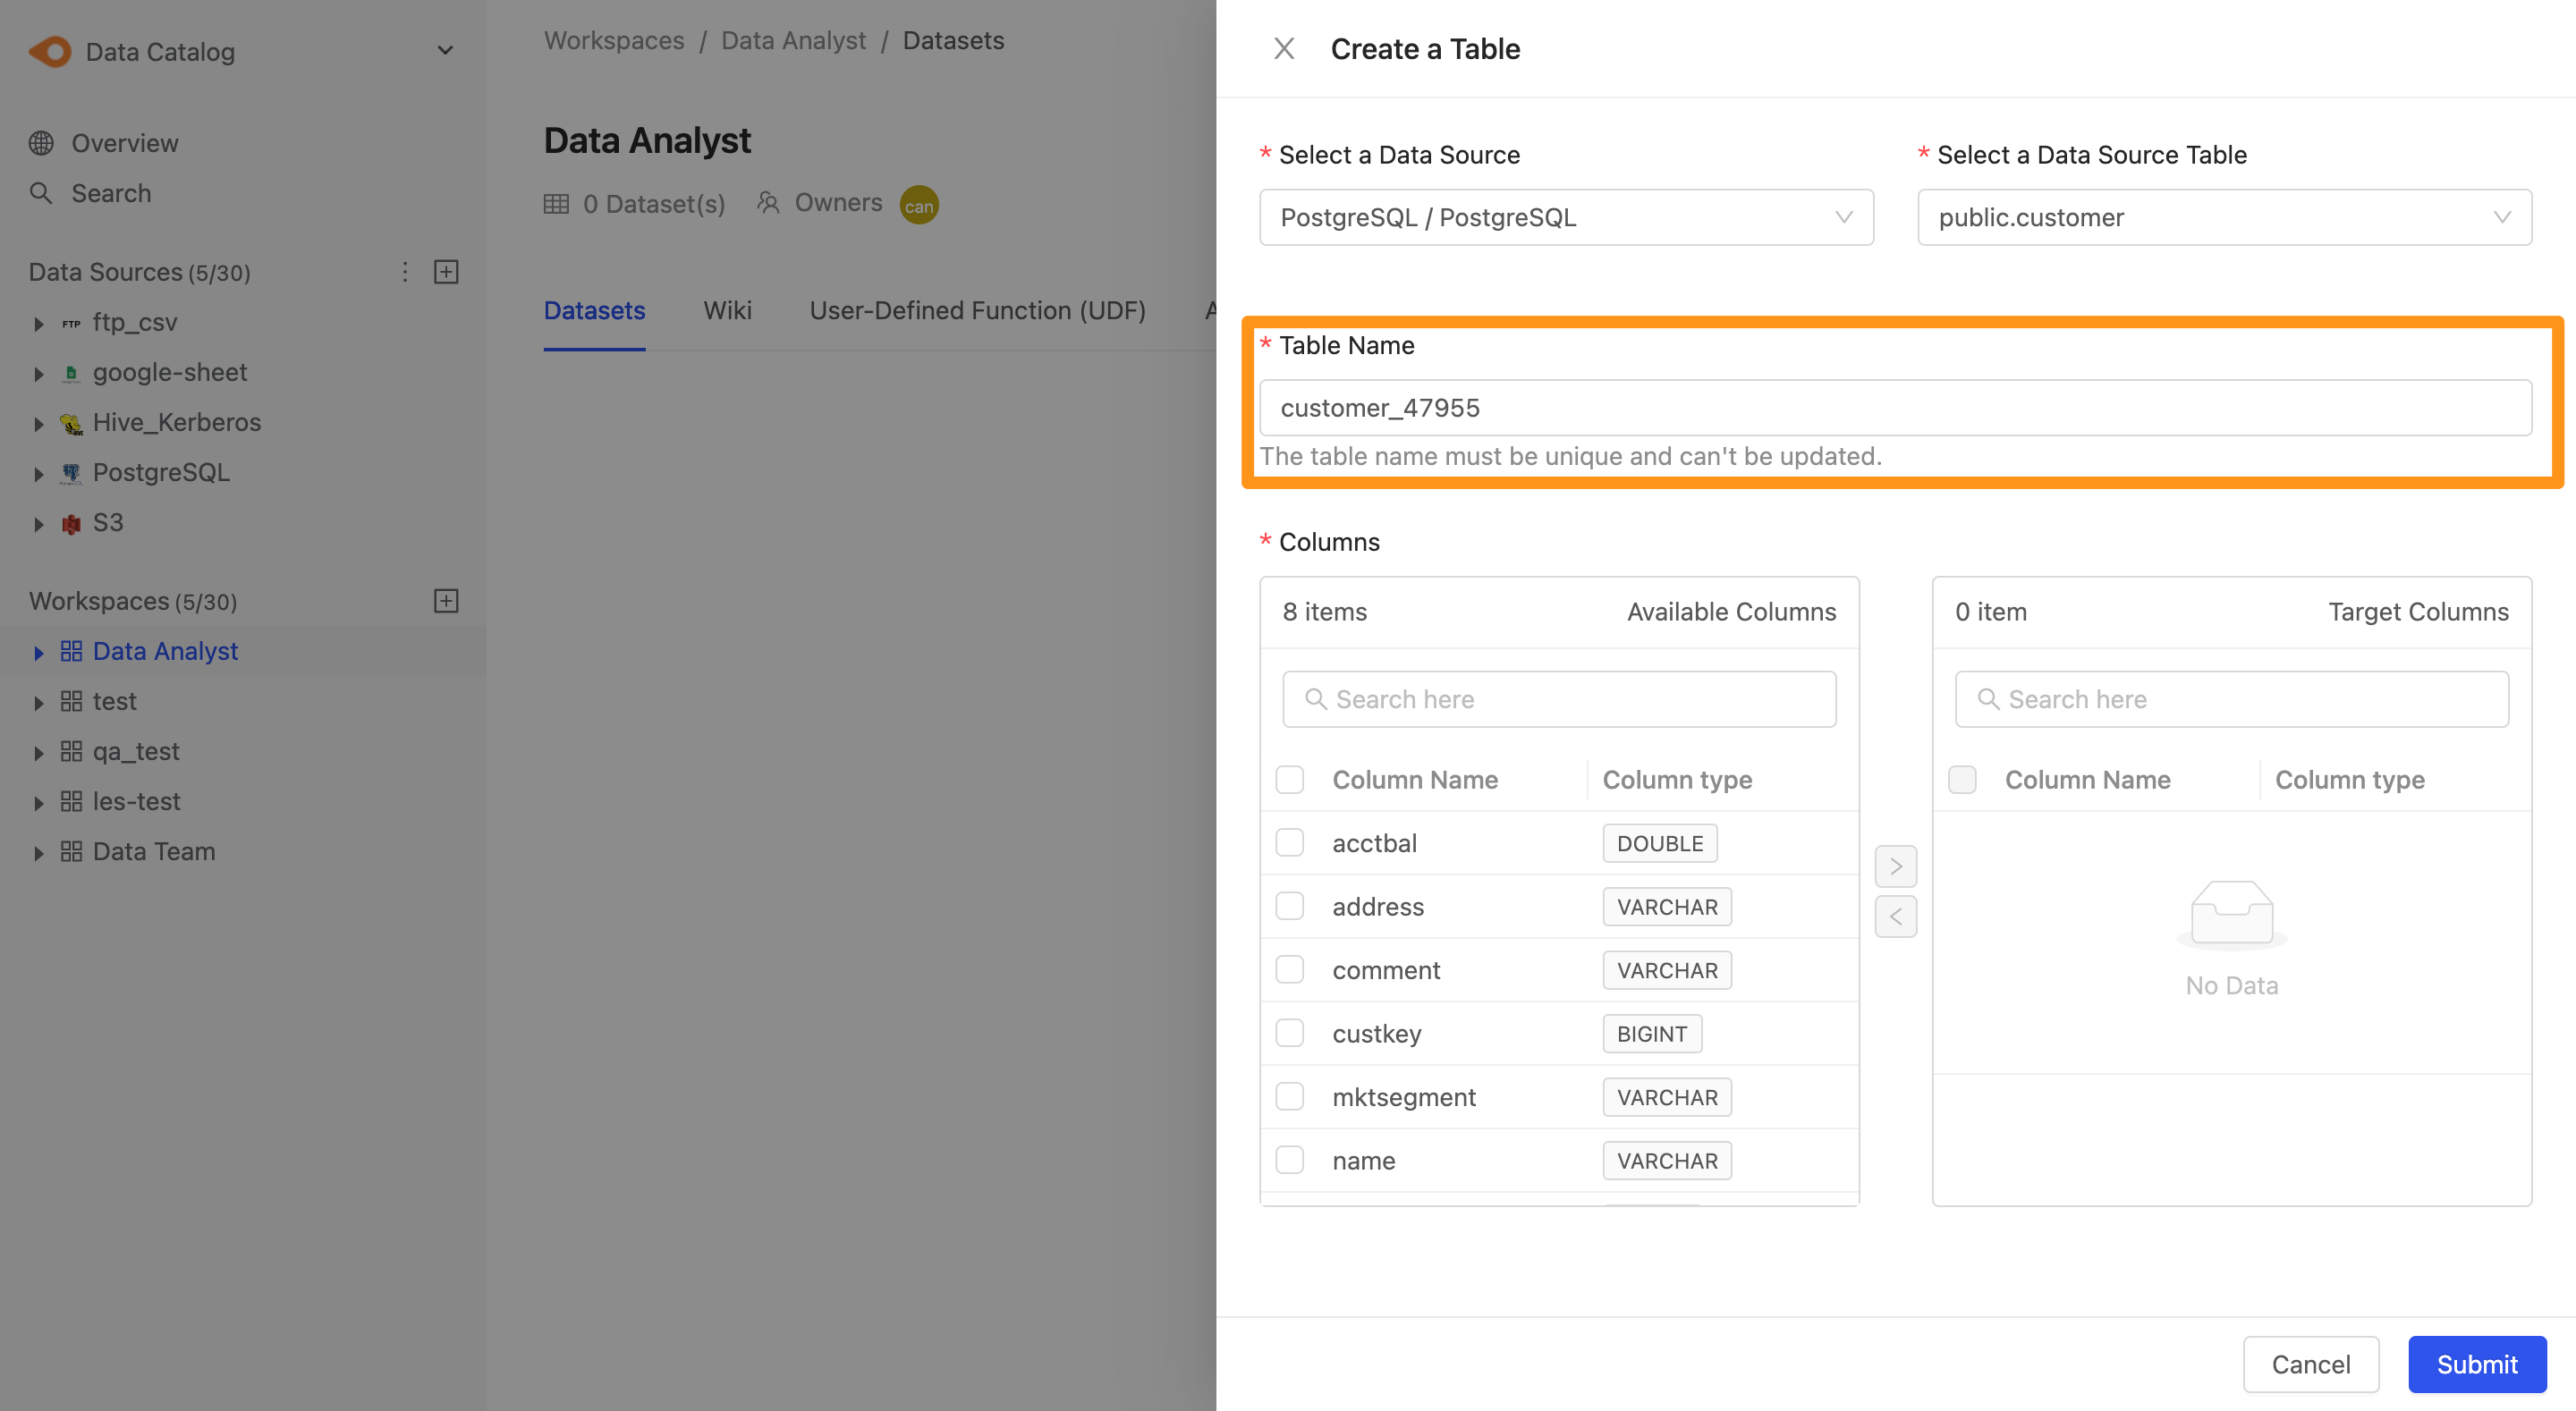
- Select a Data Source Table: Select the Table in this data source; here, you can browse through the menu or enter keywords to query the name of the Table to be imported

- Table Name: When adding a Table, the system will automatically generate a unique value name based on the name of the data table to avoid duplication of table names with other names.
- Columns : Select the column. The Available Columns on the left represent the columns currently available in this Table, and the Target Column on the right represents the columns you can import into your workspace. You can use
>and<to select the desired columns. Which columns to add and remove.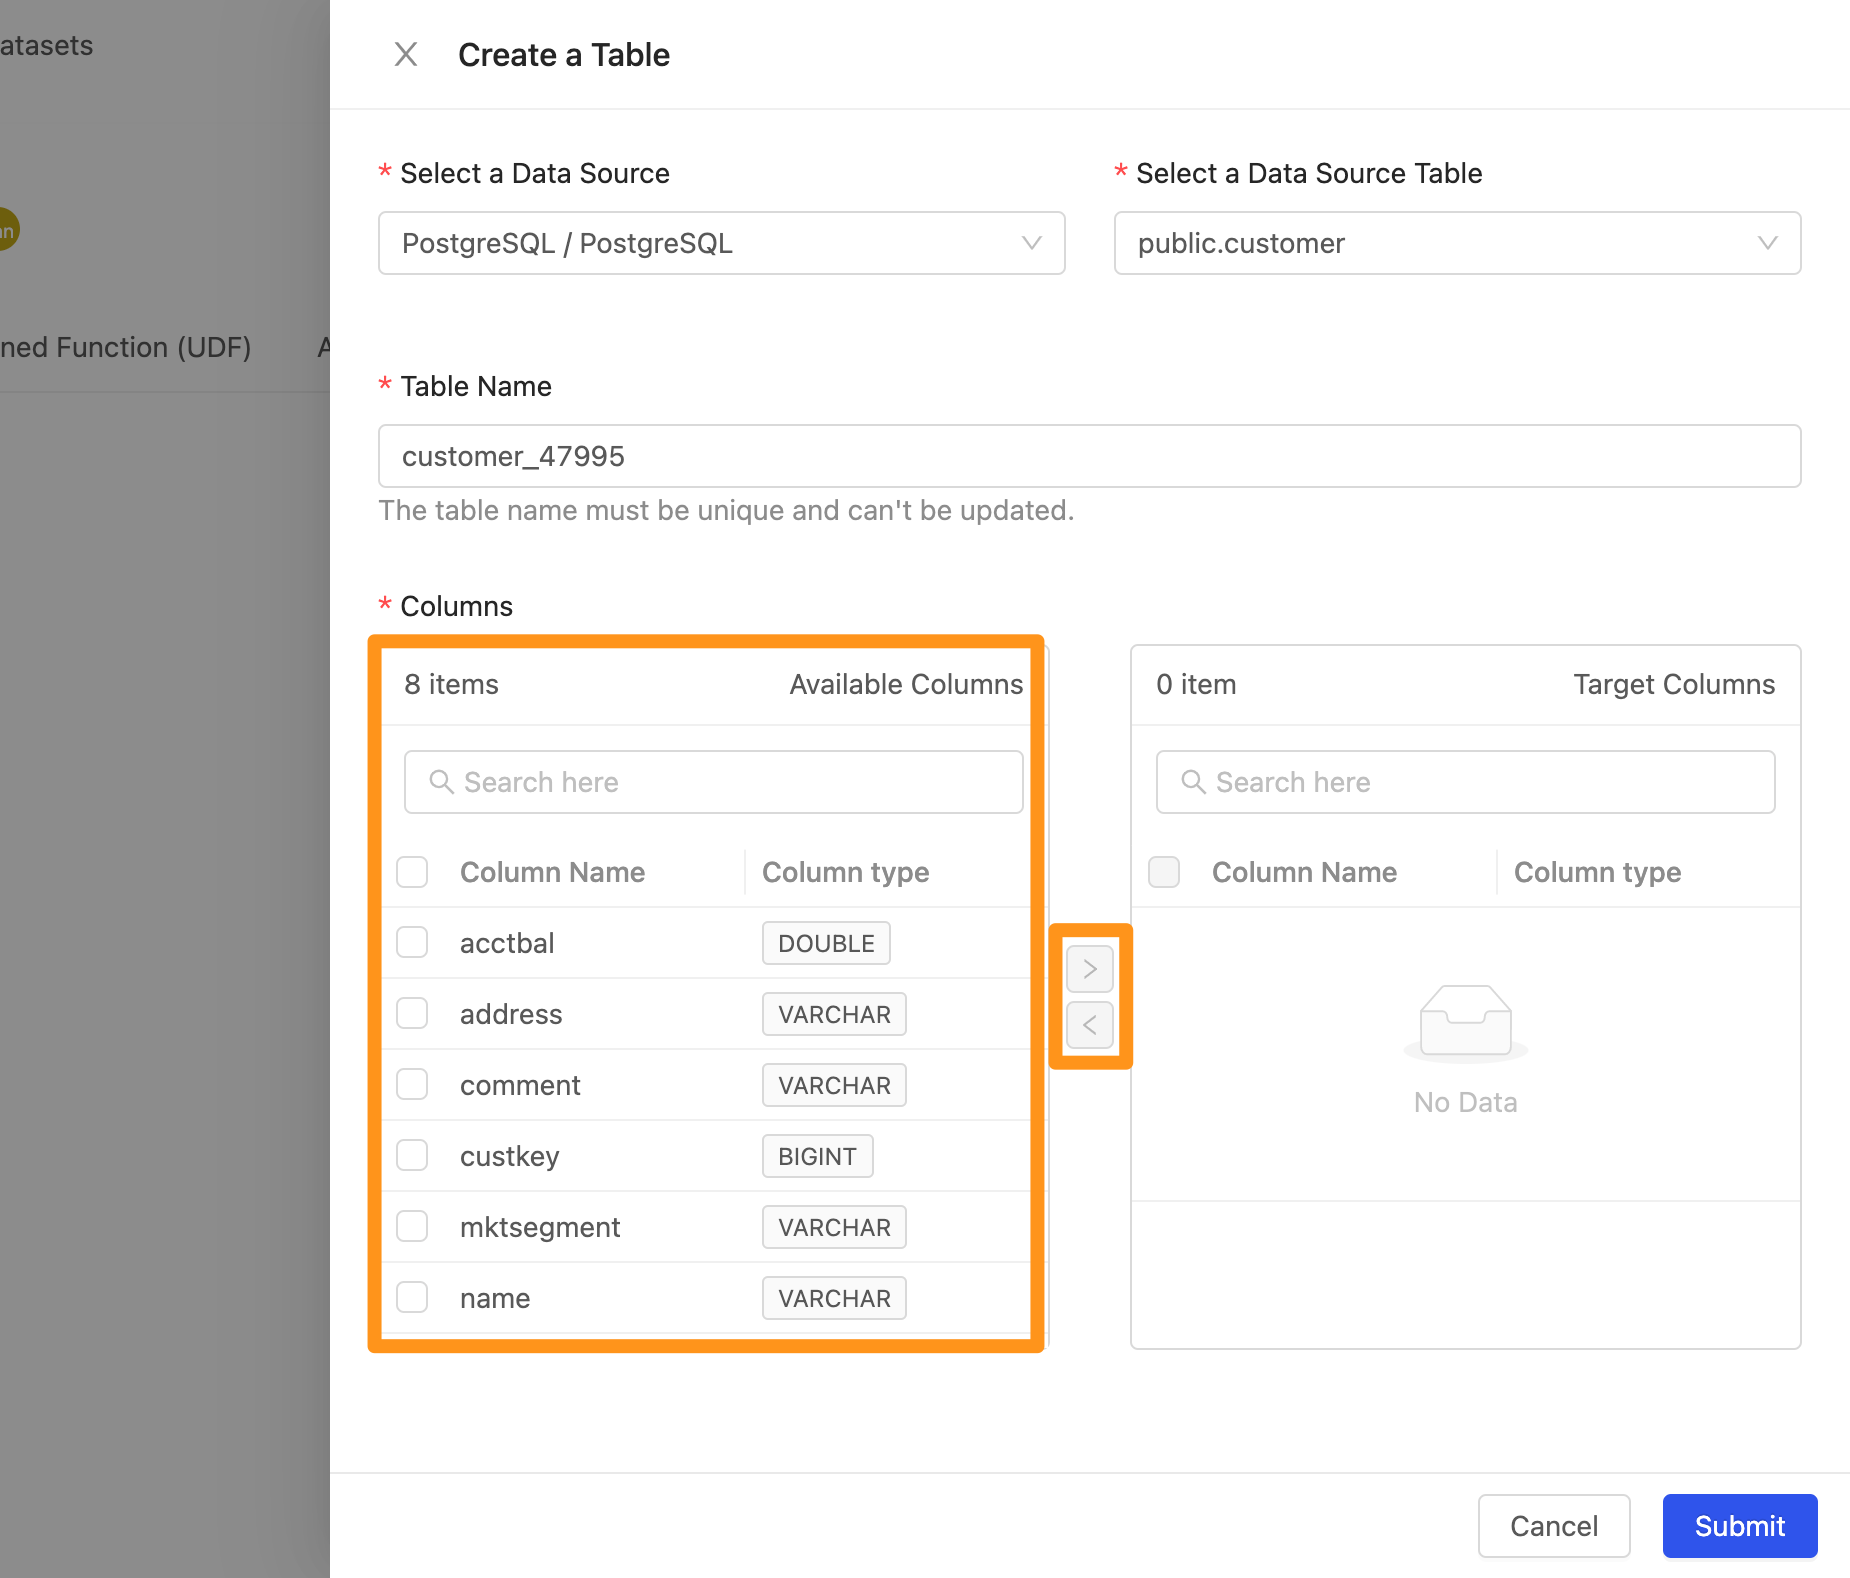
- Select a column, and click
>; the Column will move to the right, indicating that this is the data column is imported into the workspace.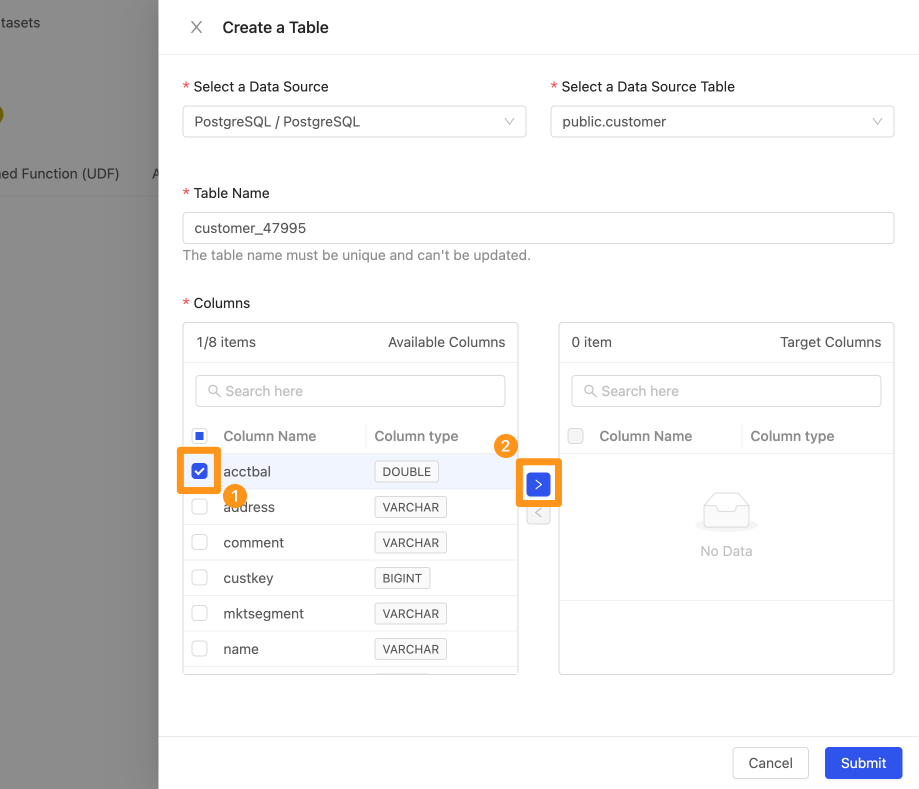

- Select a column, and click
Step 3: Complete the build
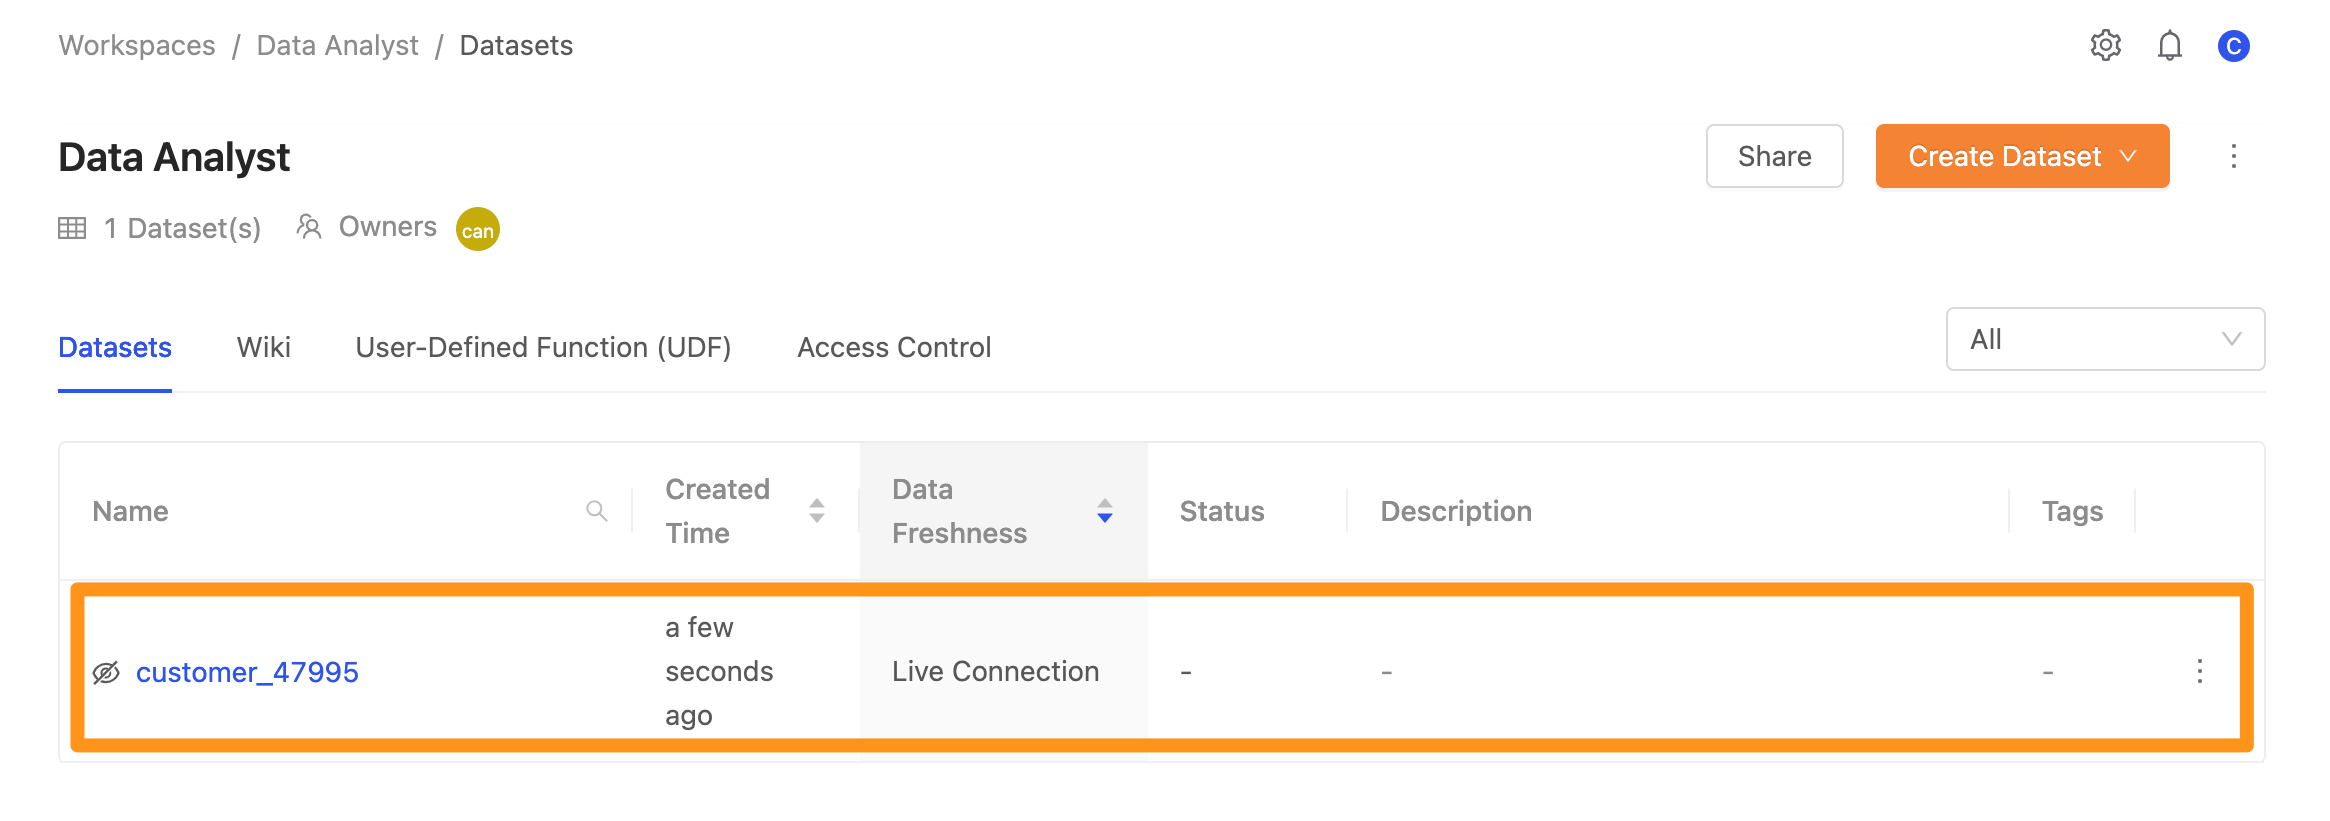
Click Submit to complete the creation, and you will see the imported data on the screen.
Method 2: Import from other workspaces
When using this method to import, the user must be permitted to use the two workspaces simultaneously.
Step 1: Enter the workspace page
In the Datasets tab, click the Create Dataset button. After clicking, a drop-down menu will appear; select the Create a Shared Table button.
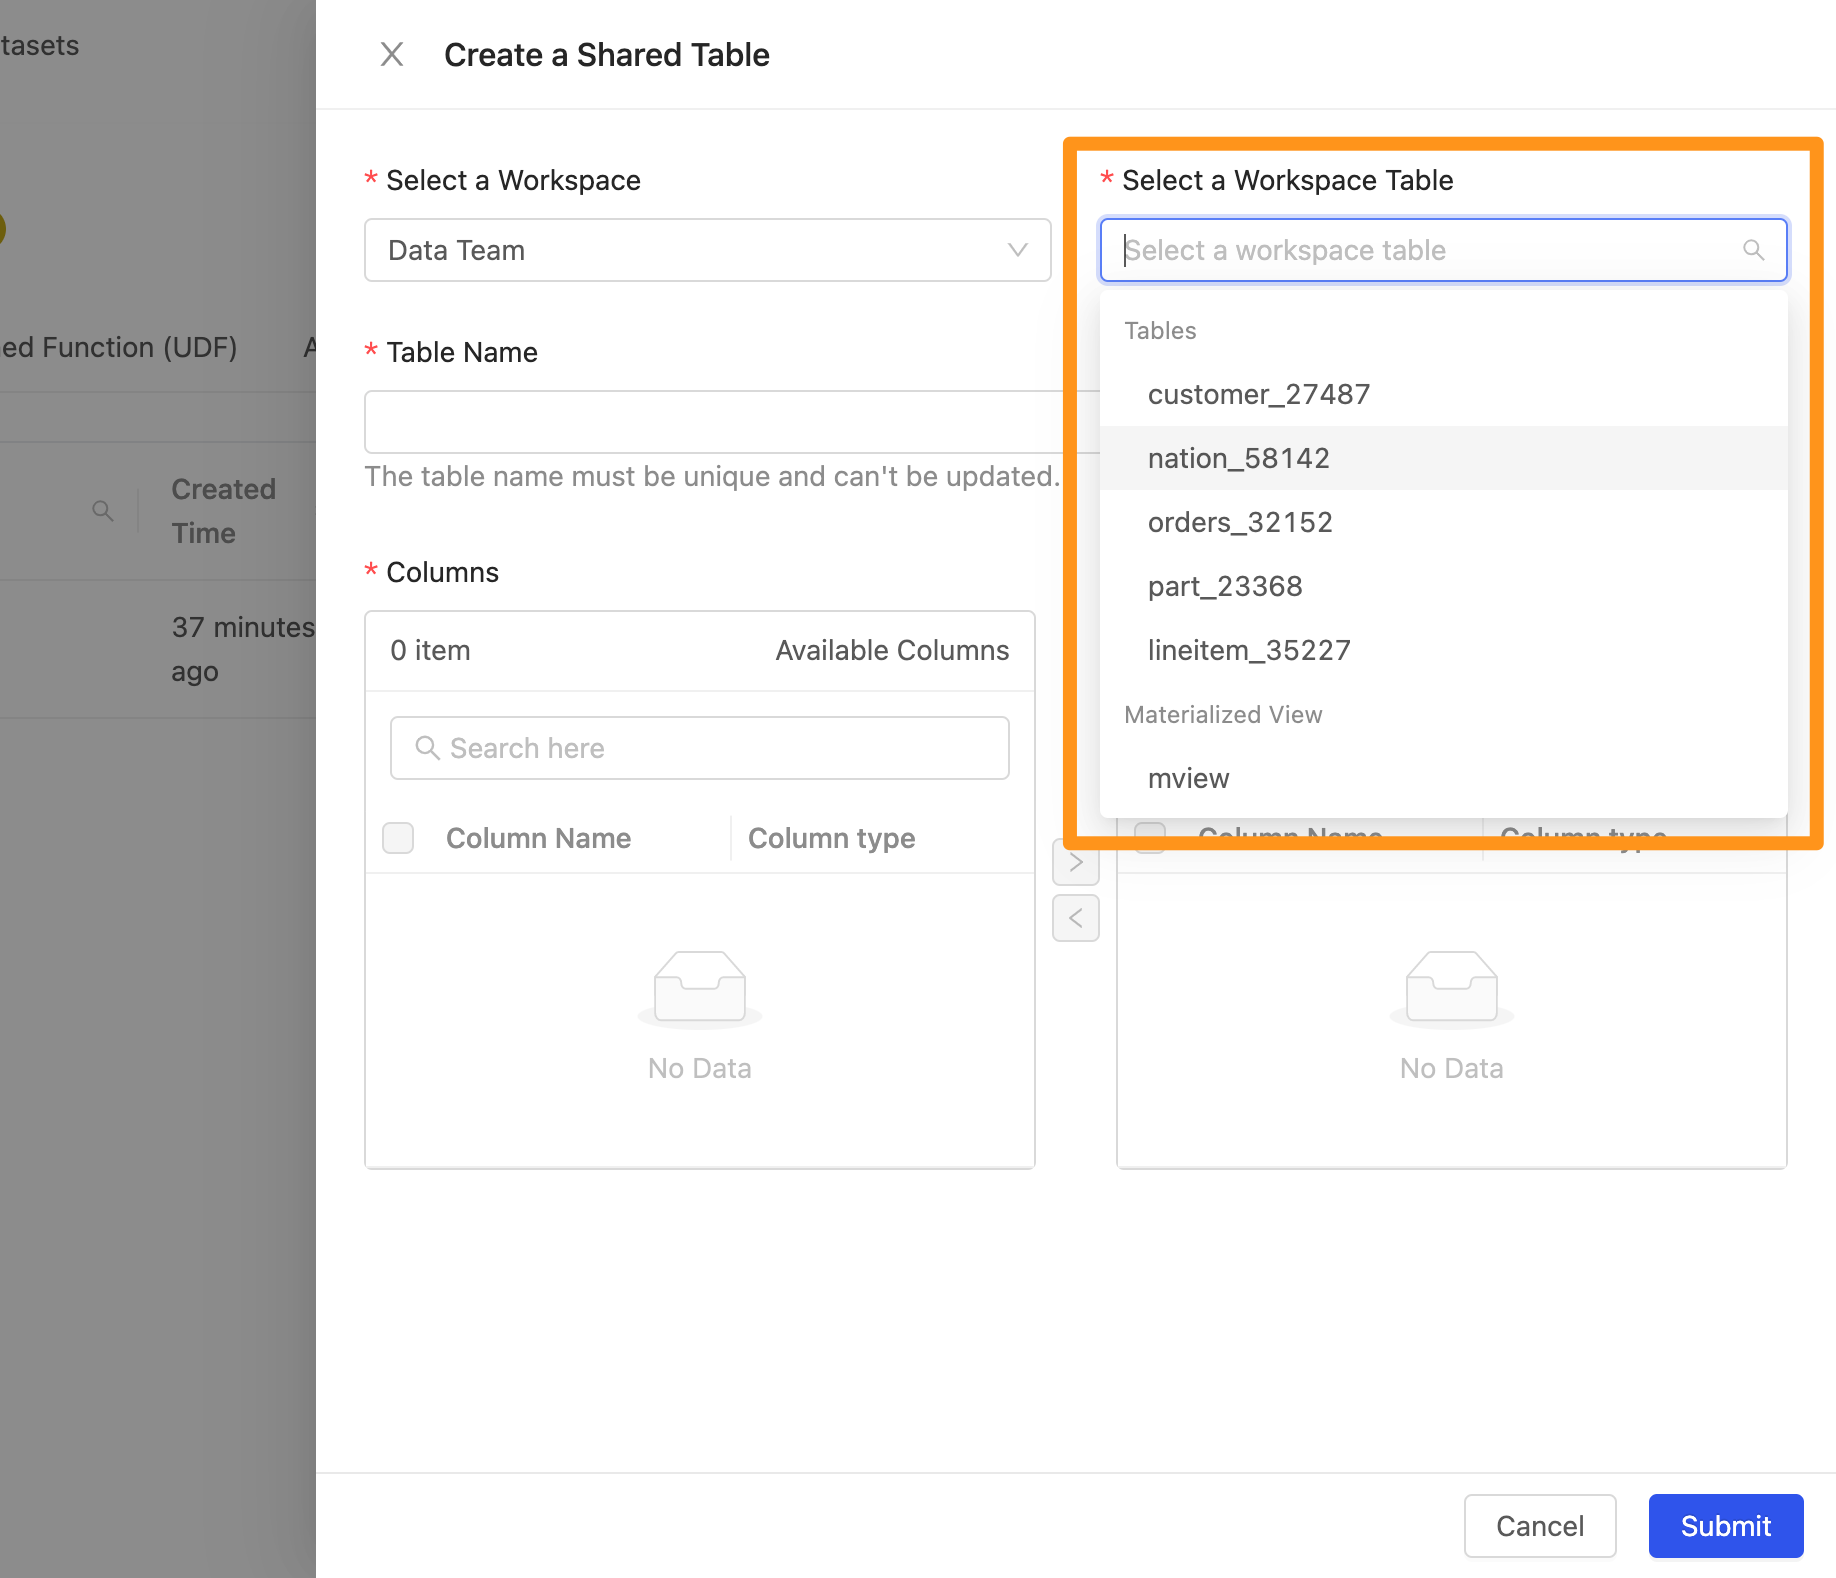
Step 2: Set import data from the workspace
Select which data source and its tables and fields to import from which workspace.
- Select a Workspace : Select a workspace

- Select a Workspace Table: Select the data in the workspace
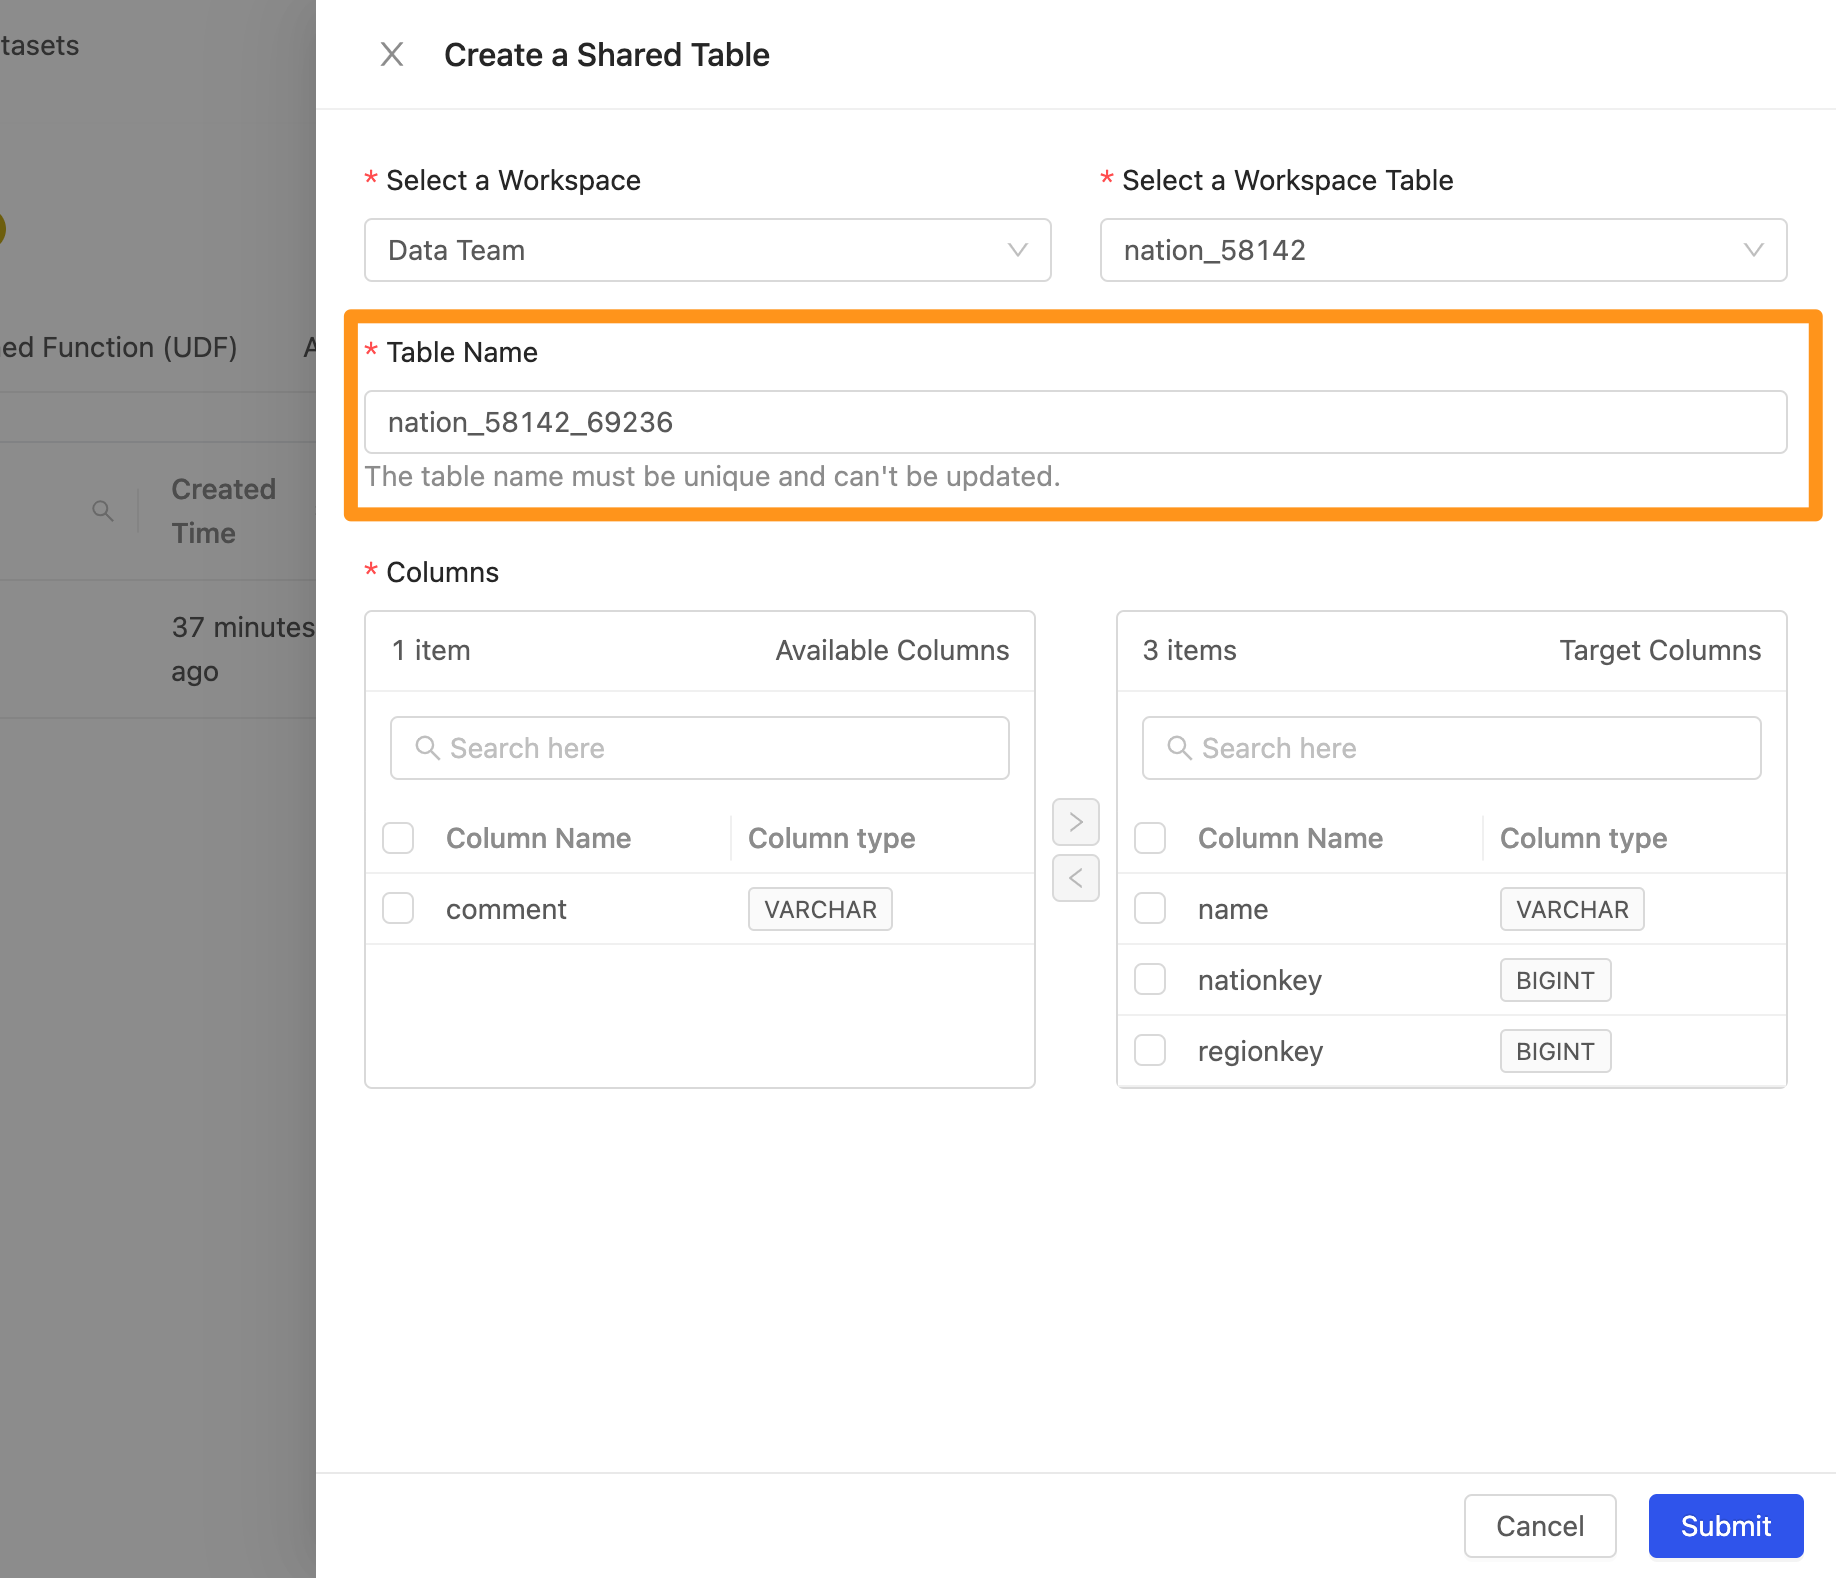
- Table Name: When adding a Table, the system will automatically generate a unique value name based on the name of the data table to avoid duplication of table names with other names.
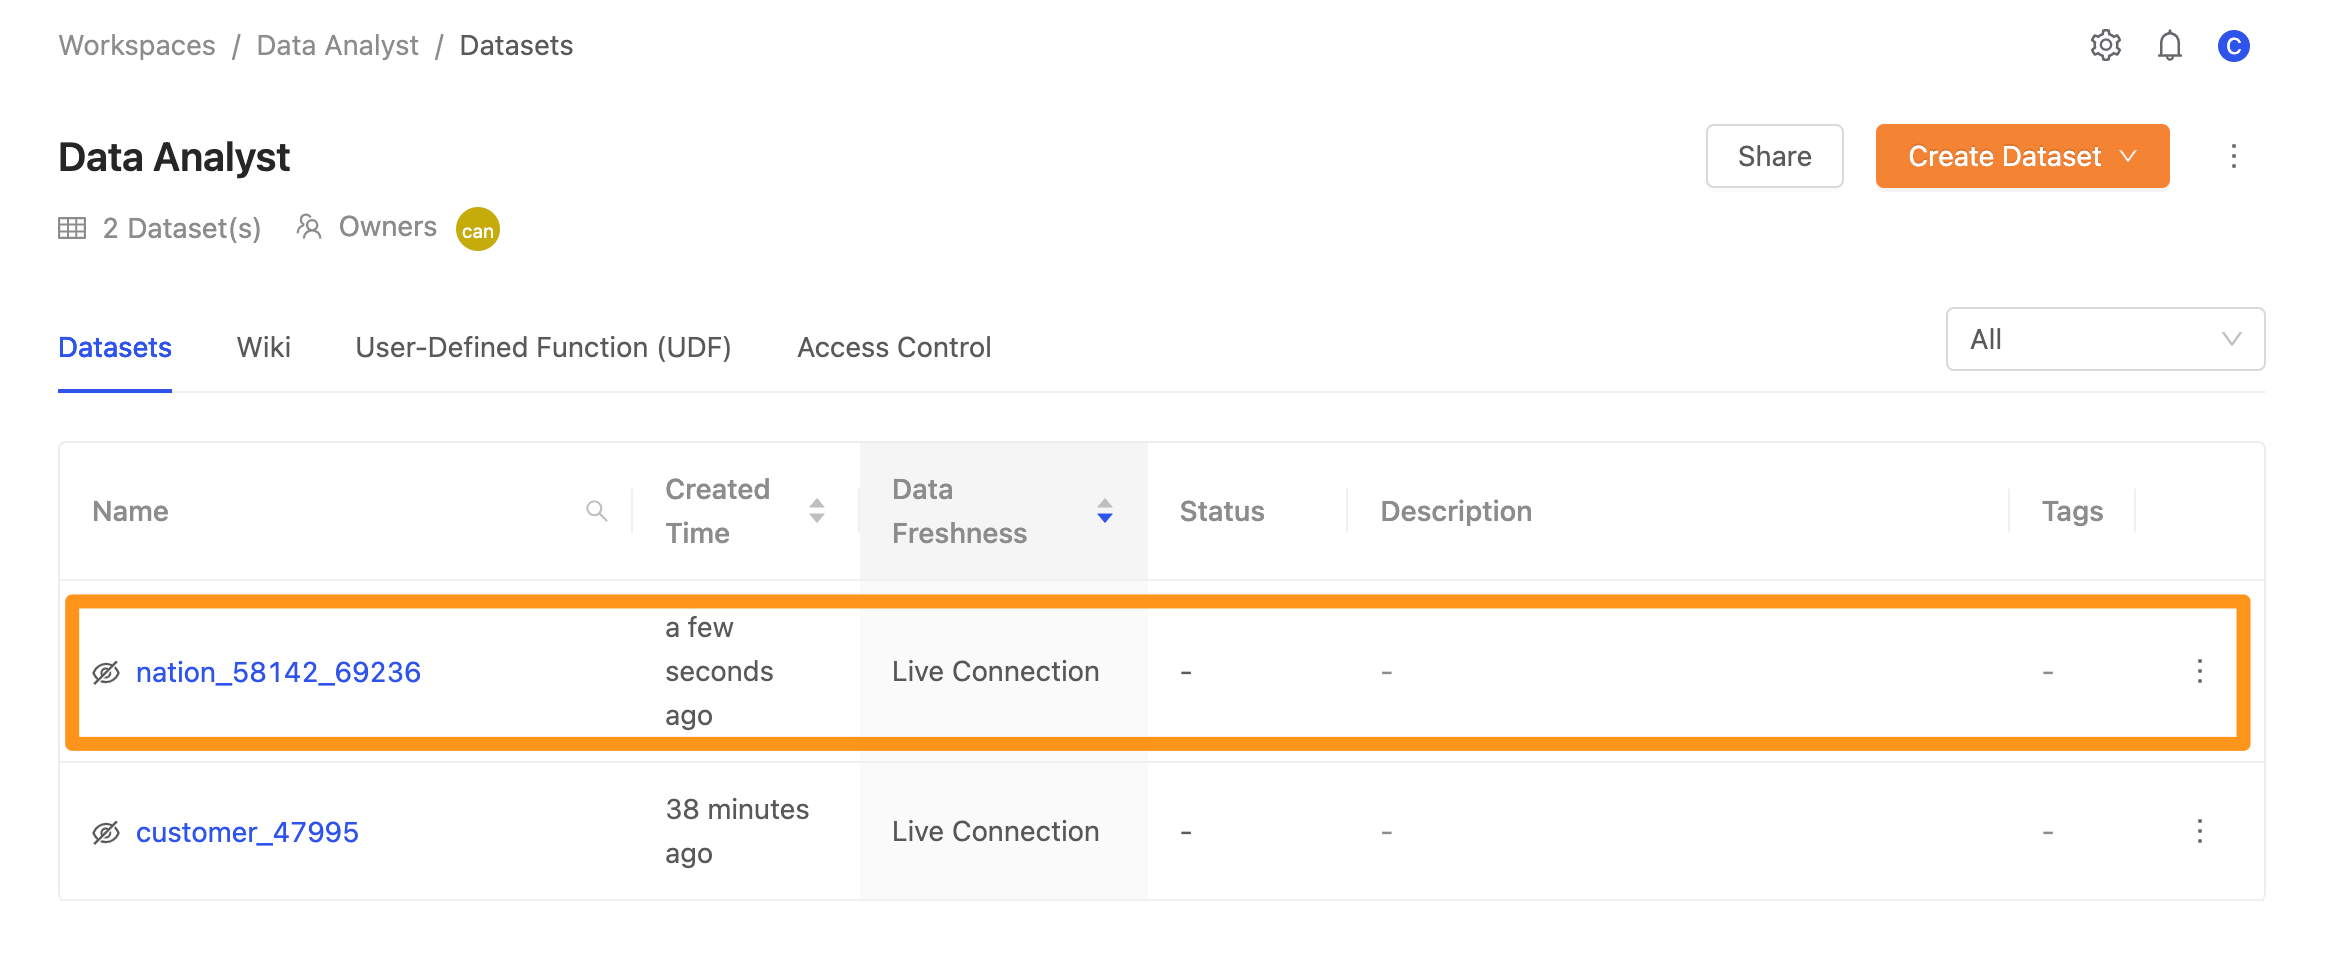
Step 3: Complete the build
Click Submit to complete the creation, and you will see the imported data on the screen.
You can learn more about managing data usage rights of different member roles in the workspace through the Canner Enterprise access control in Using Semantic Layers to Manage Data Semantics.
Use SQL Editor to analyze data
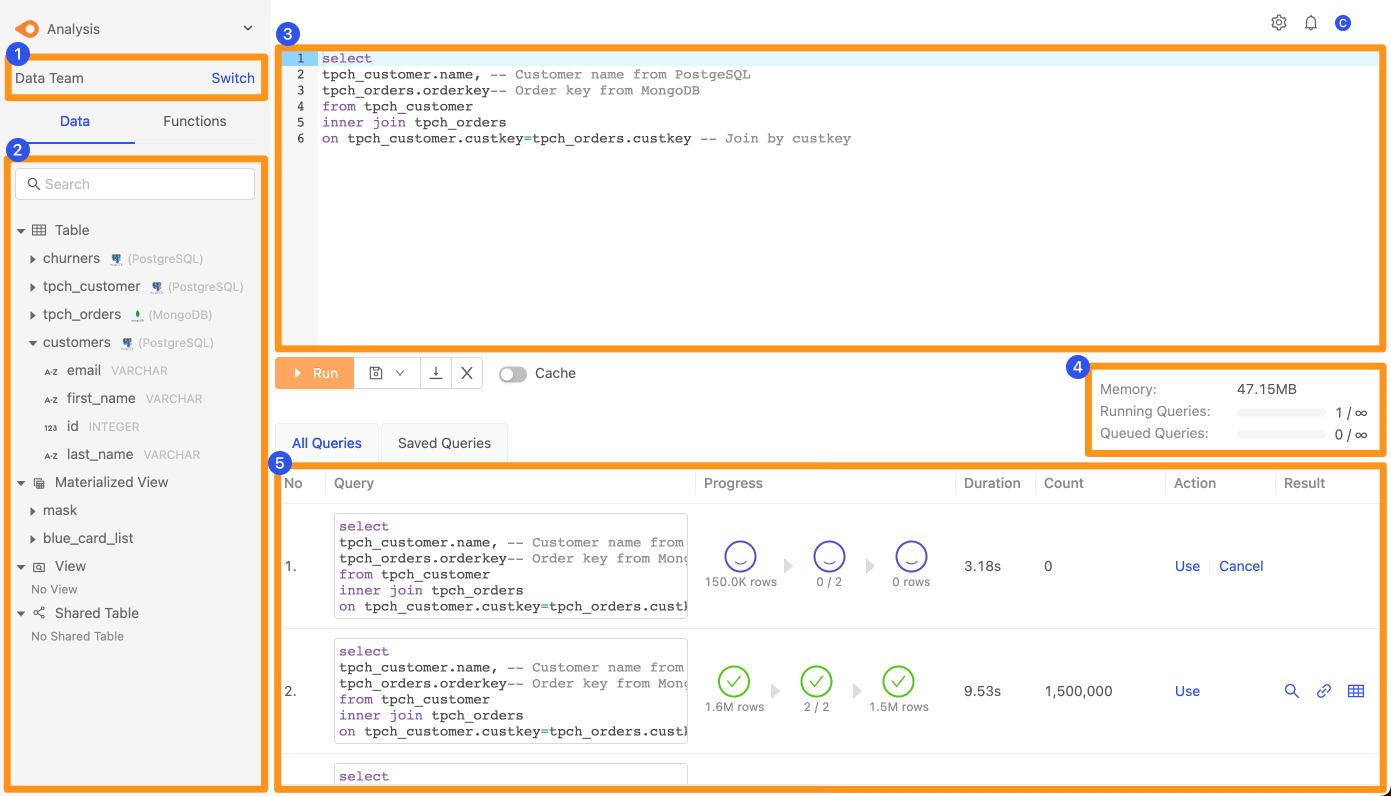
After the data is successfully imported into the workspace, you can click the upper left switch menu and select Analysis to enter the SQL Editor screen. When making SQL queries, Canner Enterprise uses standard ANSI SQL queries to perform the required data processing.
The following is the screen introduction of SQL Editor as follows.
- It represents the current workspace, and you can click the Switch button to switch.
- Represents all available datasets, and you can find them by searching
- Area for writing SQL Statement
- Status of SQL execution and resources used
- SQL records during execution and historical execution
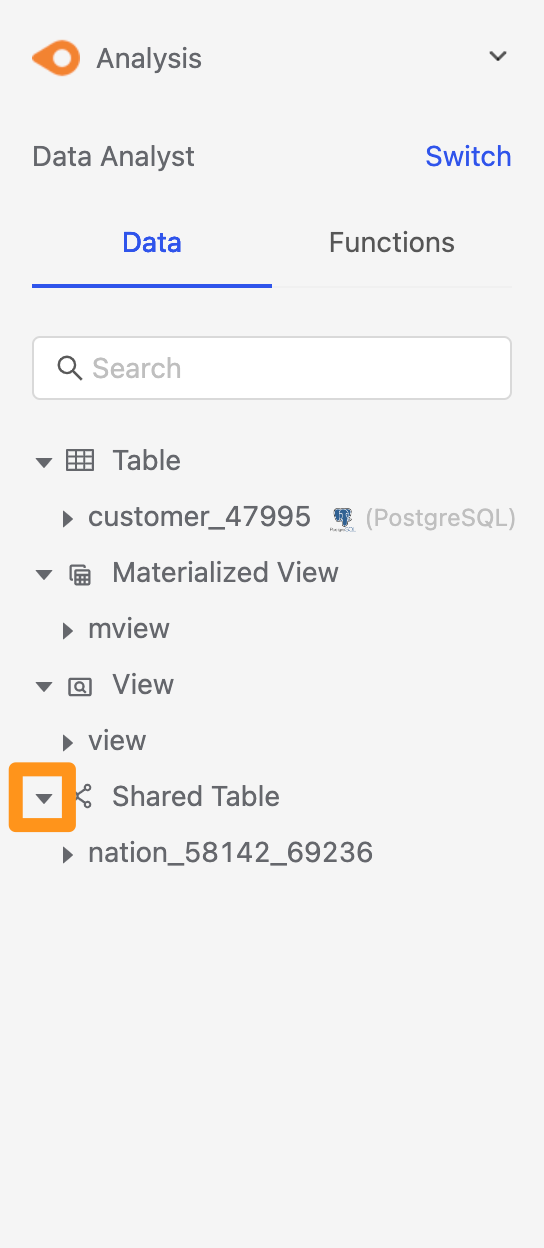
Available Datasets
In the left column, you can see the Datasets you can use in this workspace. Click the triangle Icon to expand and view which Datasets are available.
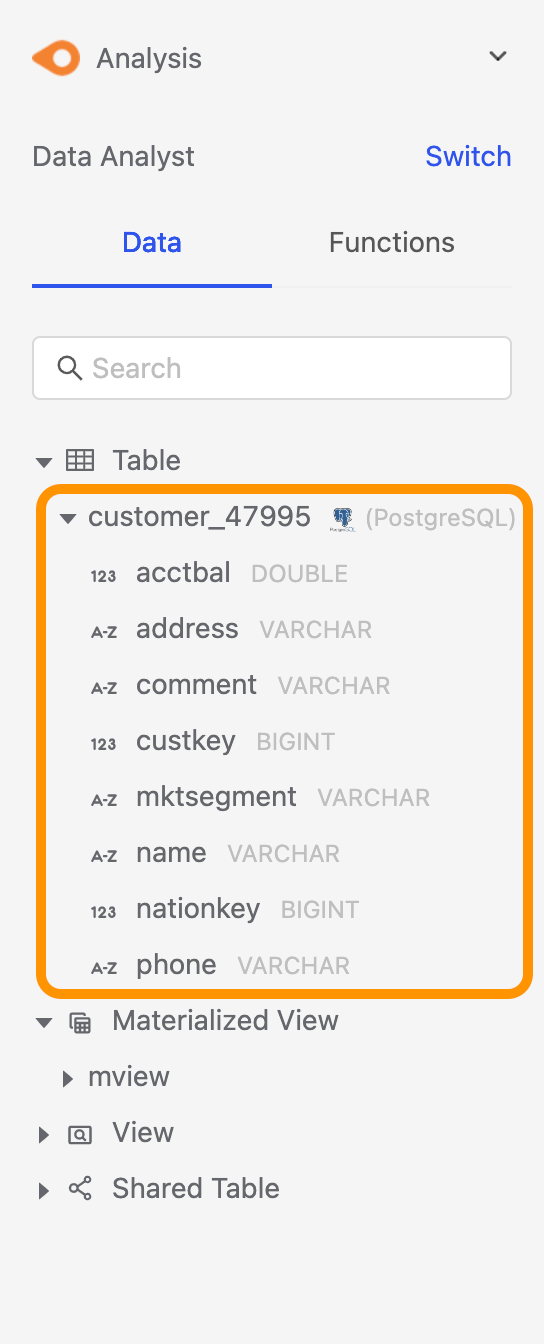
For the Dataset, click the triangle Icon to expand and view the shape of each column.
Execute SQL
You can query SQL immediately in SQL Editor, just like operating a database. The following describes the relevant fields.
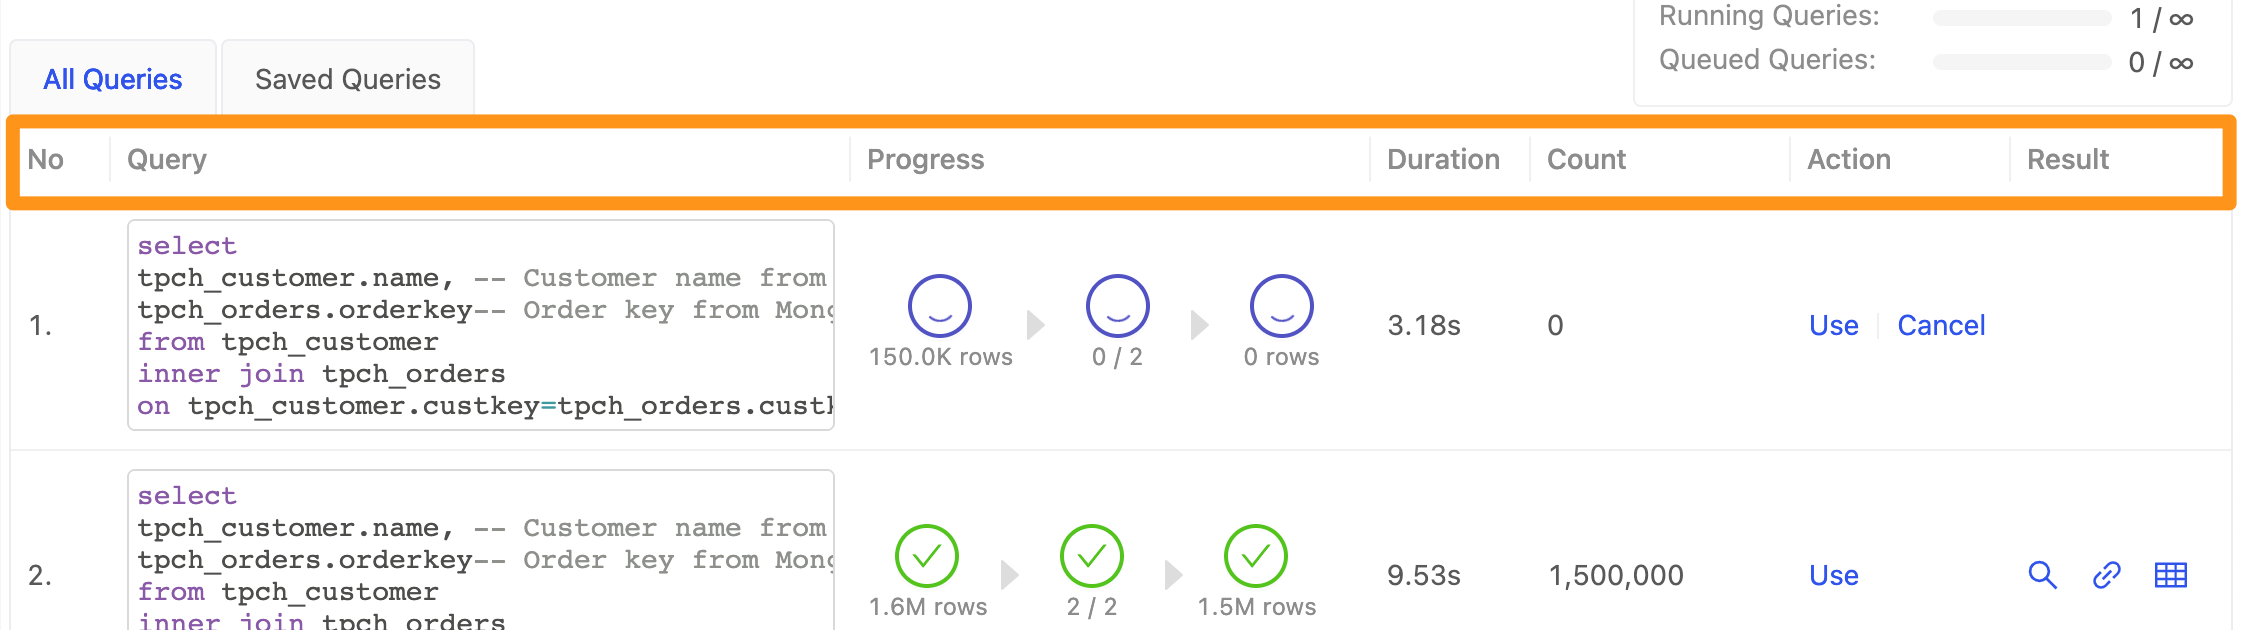
No: Represents the index number of executing SQLQuery: SQL for each executionProgress: Execution progressThe first blue circle: The number of input datasecond blue circle: Processing stageThe third blue circle: The number of output data
Duration: Execution timeCount: The number of query resultsAction: The executable actionUse: Use the SQL statement. When clicked, the SQL Statement will insert into the EditorCancel: Cancel the executing query
Result: Perform the following actions on the execution result- View Query execution results
- Download data as CSV
- Dump query results into Materialized View
SQL complete
When you get your data results, you will see the following screen. And you can click three different Icons in the picture to perform the following actions

- magnifying glass: View the execution result of the query.
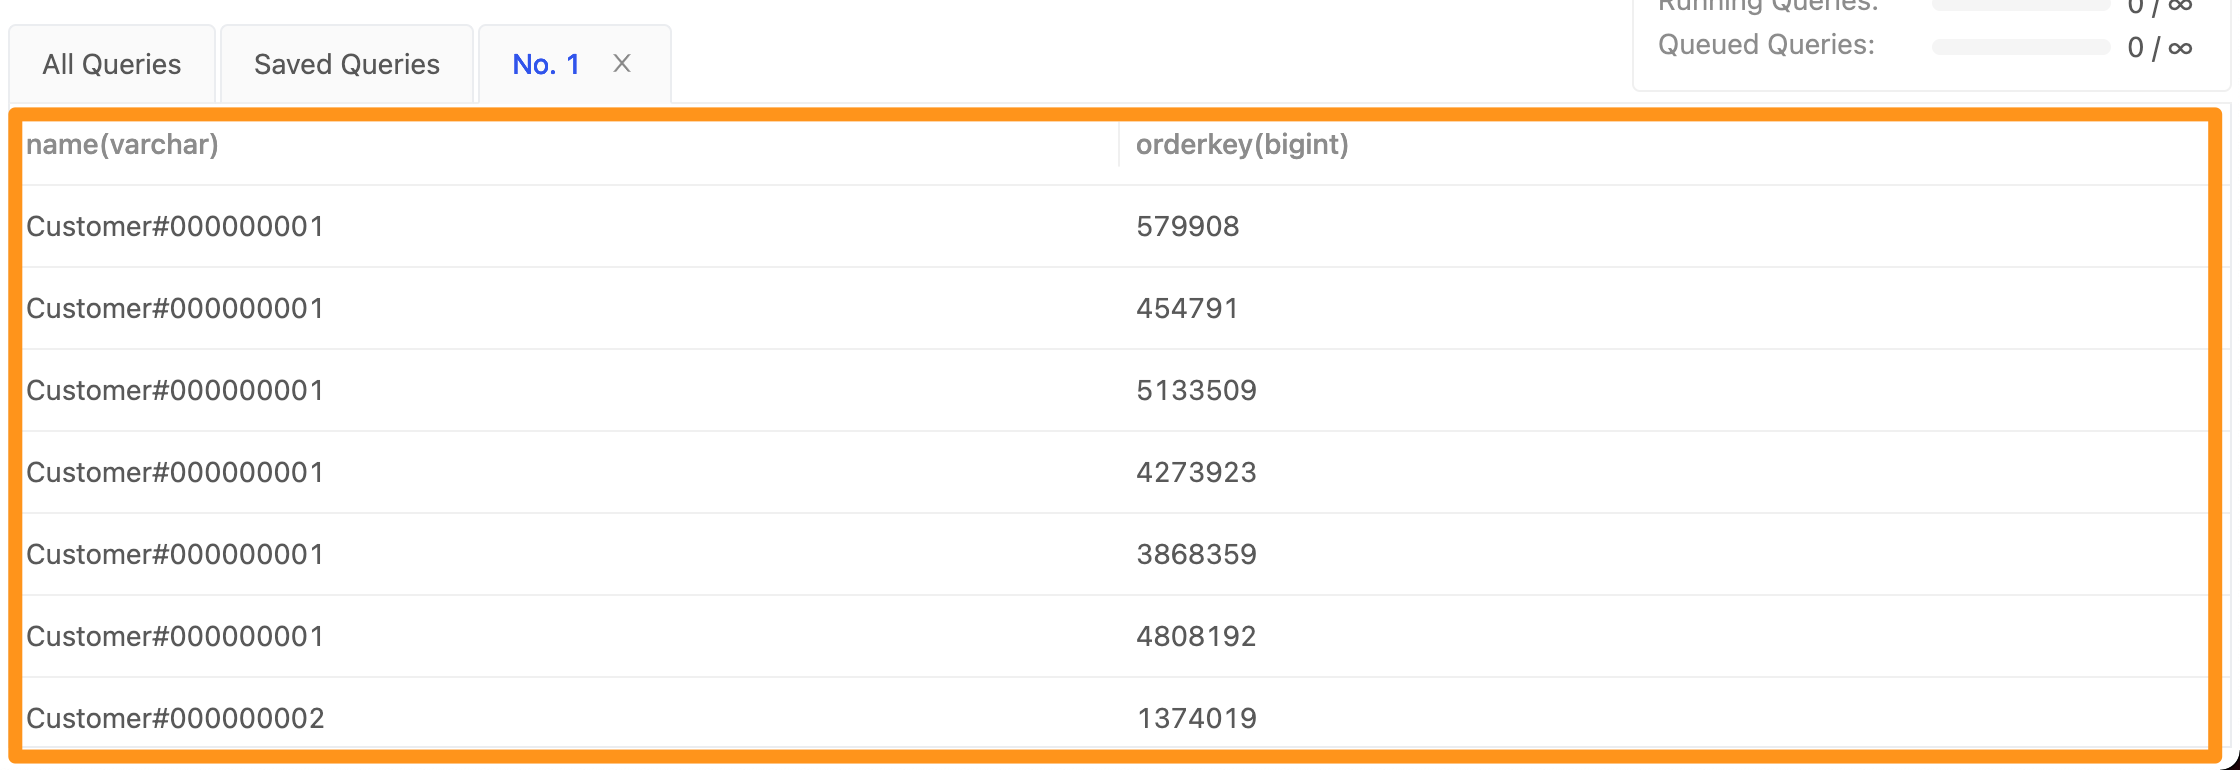
- Download: After clicking the download button, the results will be packaged and downloaded as CSV.
- Form: Save the query result dump as a Materialized View.
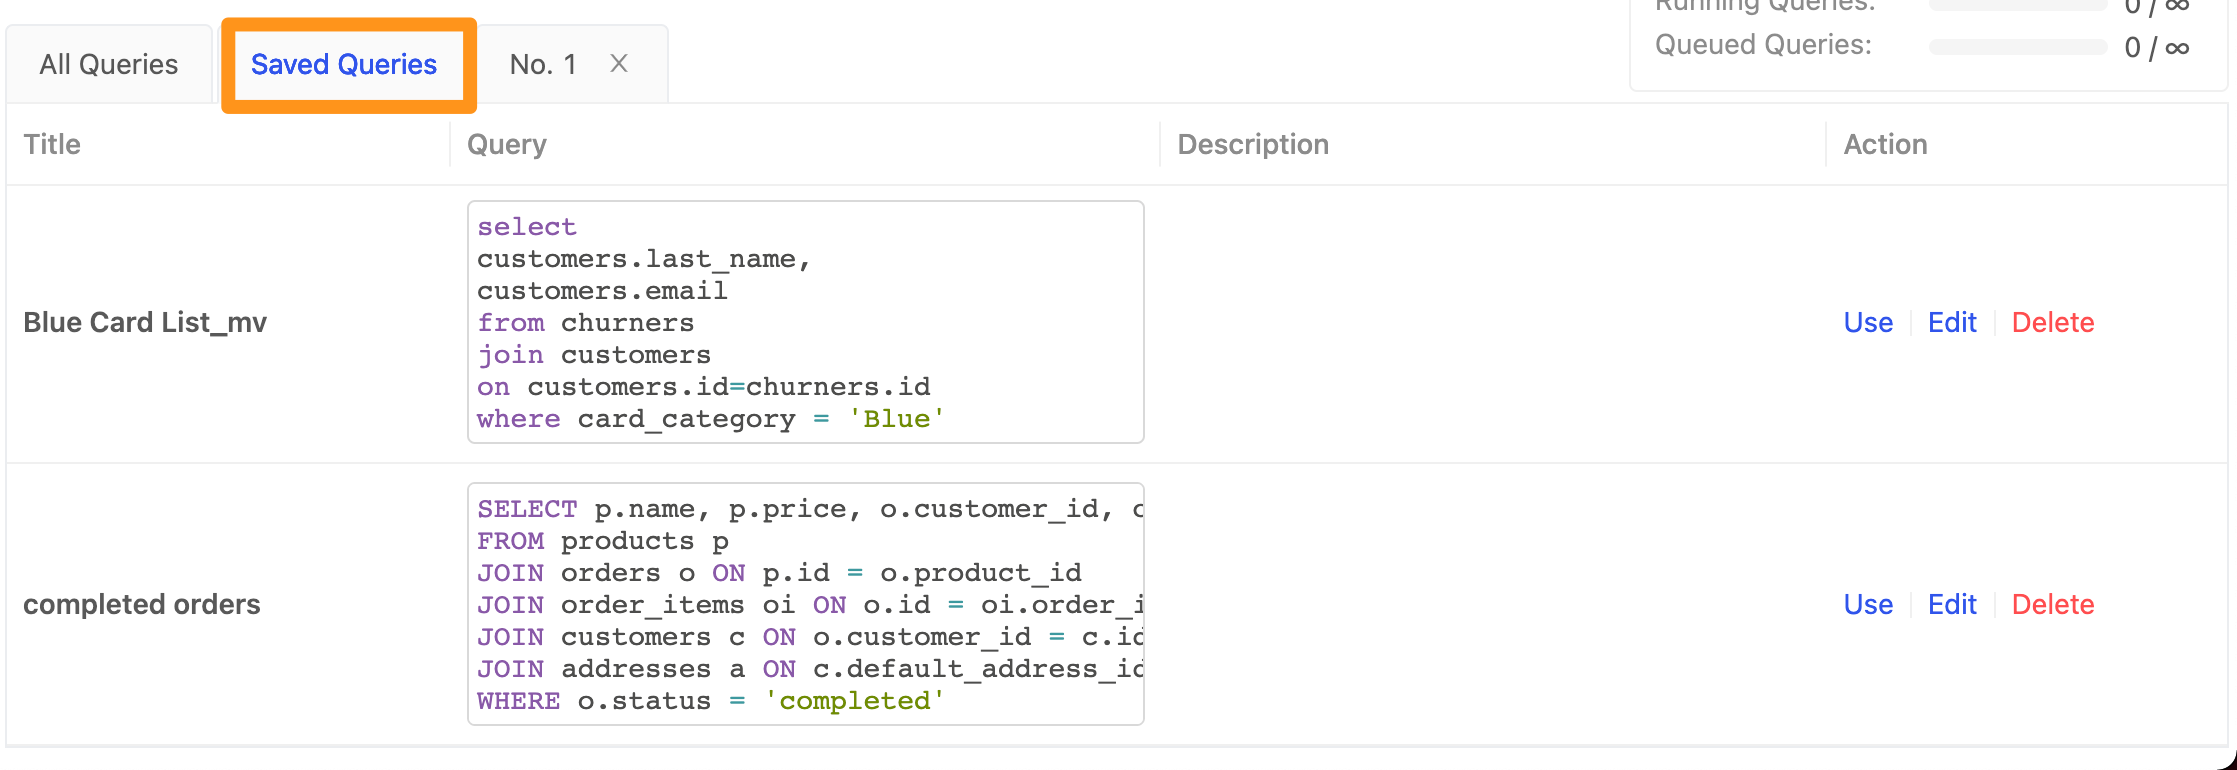
Save your SQL
You can save the commonly used SQL within the organization for use by people in the same workspace. Note that other people cannot see the content executed by each of your SQL Editors in the same workspace. SQL, but other people in the same workspace will see the Saved Queries!
How to save your SQL
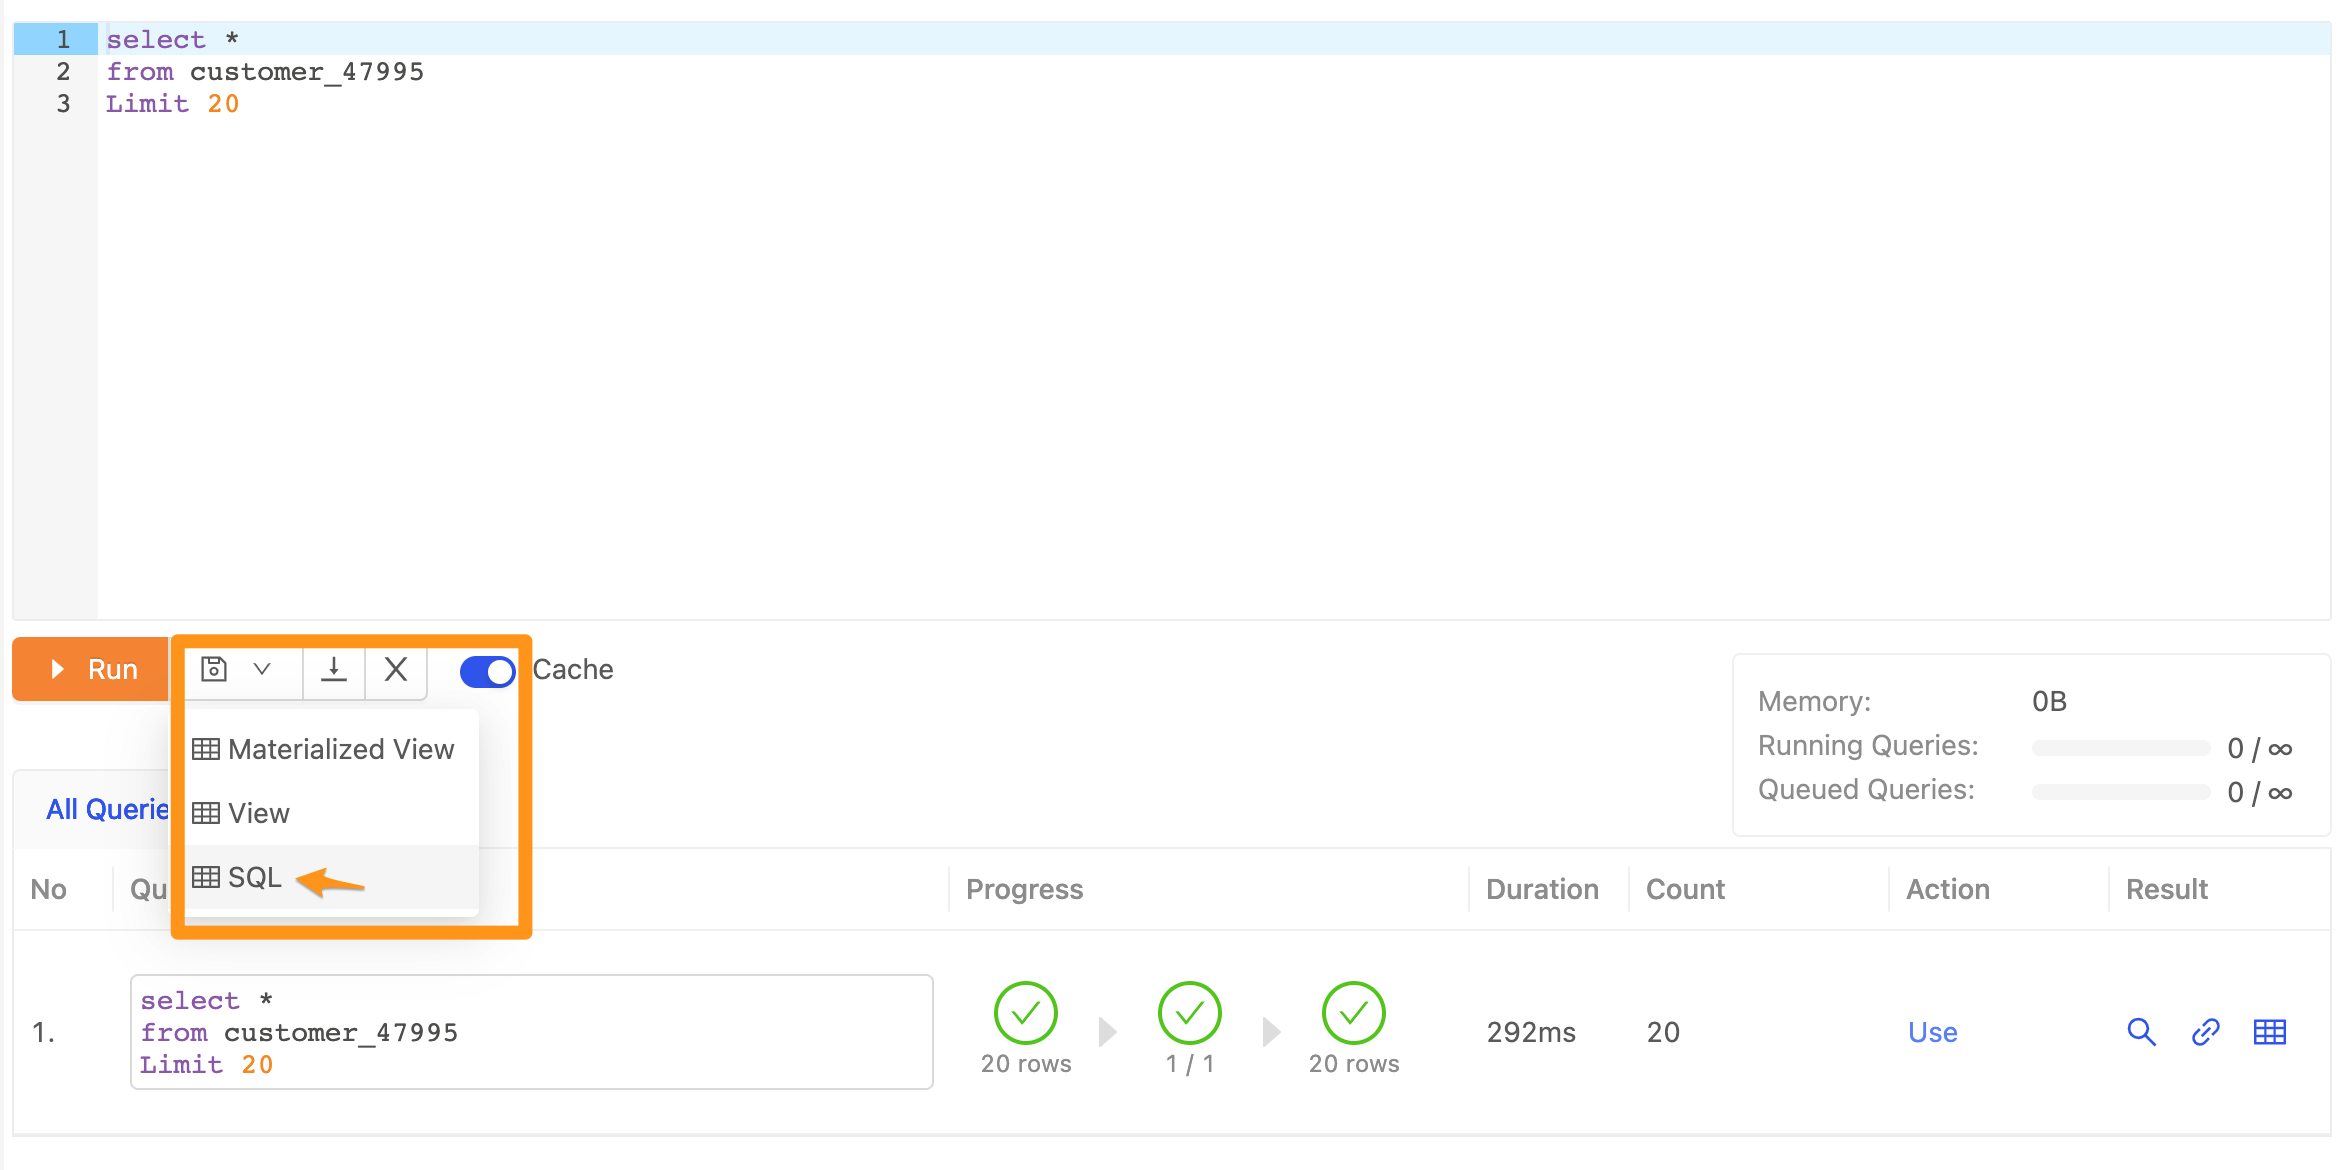
Click the Save button below the SQL Editor and select SQL.
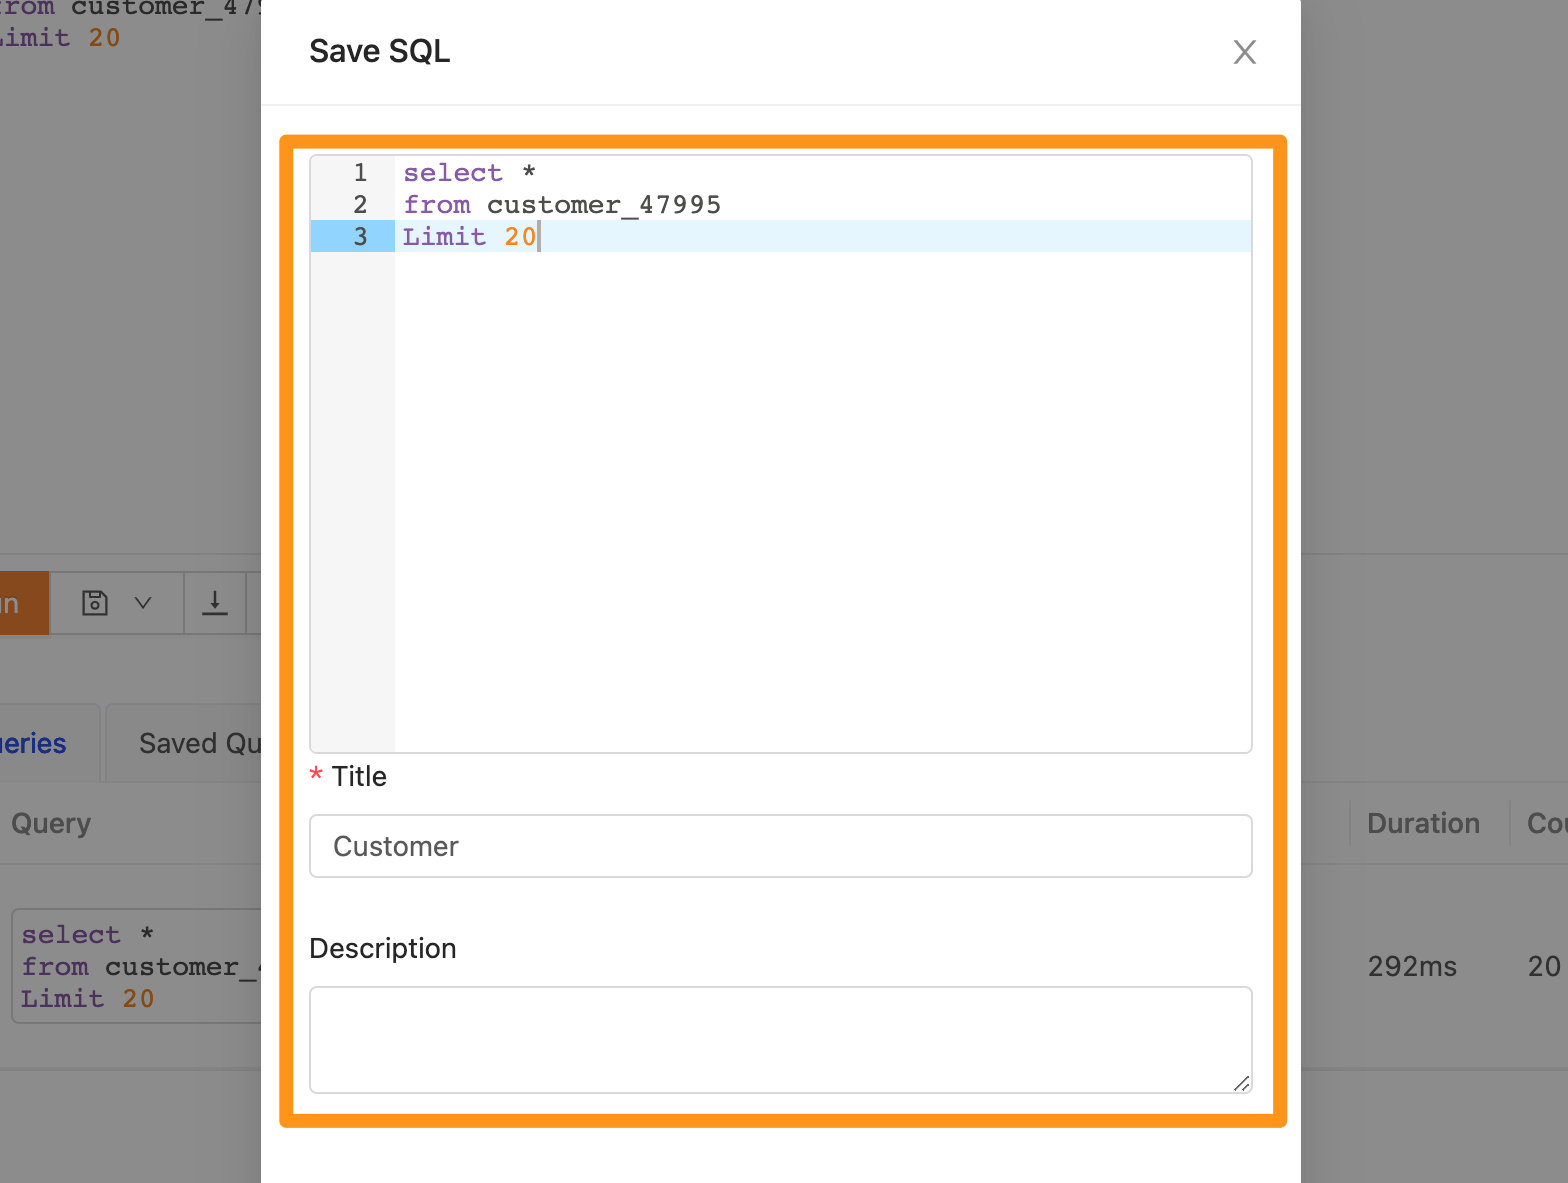
In the saved form, fill in the SQL Statement and press Save to complete.
Output data to the applications
After processing the data in the workspace, Canner Enterprise provides a variety of outputs, allowing you to optimize the data docking method for different applications:
- Output download as CSV file
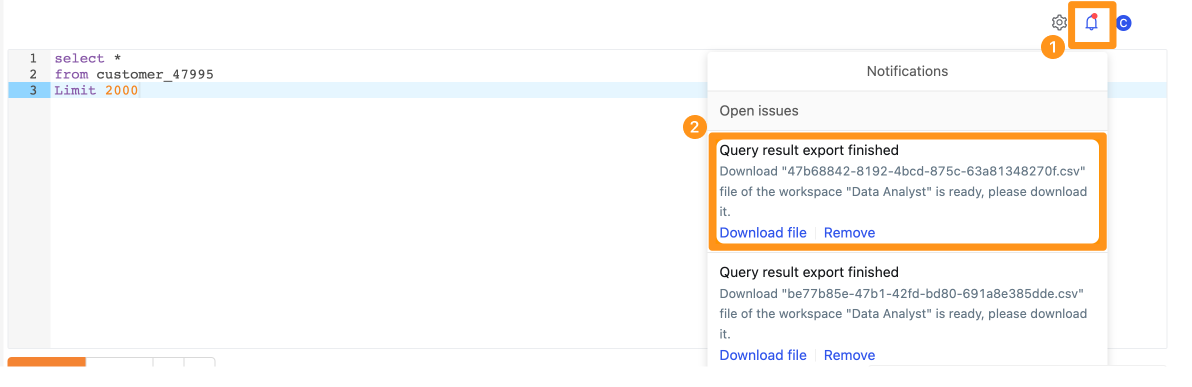
When you want to download the result of the query in SQL Editor into CSV, you can press Download CSV in the result column in the figure below, and the system will start to package the original result into a CSV file.

- When the packaging is complete, you need to press the small bell icon in the upper right corner, and you can see the ready download file. Click "Download" to start downloading, as shown below.
- Link BI tools
- Restful API output
- Python SDK output
- Scala SDK output
- JDBC output
- ODBC output
- PostgresSQL Wire Protocol output