Output to Tableau
In this tutorial, you will learn how to use Canner Enterprise to output data to Tableau for report application.
Before starting this tutorial, you will need to have completed Connecting Data Sources in Canner Enterprise and Import data in your Workspace.
Integration Method
Canner Enterprise currently supports two ways to integrate with Tableau, the first is Tableau Data Push, and the second is Tableau Canner Connector.
Tableau Data Push
Different from the Data Warehouse / Database through Connector, we allow users to integrate various heterogeneous data sources first, create a Materialized View for the calculated data, and automatically convert it into Hyper format and push it to the corresponding Site and Project in Tableau Server so that Tableau users can directly access the data.
Hyper is Tableau's in-memory data engine technology, which has been optimized for fast data ingestion and analytical query processing of large or complex data sets. Please refer to [Tableau Documentation Data Engine](https://help.tableau.com/ current/server/zh-tw/data_engine2_intro.htm) introduction. Previously, computation such as data calculation and conversion Hyper file needed to rely on Tableau. Still, now these tasks can be optimized by Canner Enterprise to solve the problem of insufficient computing resources.
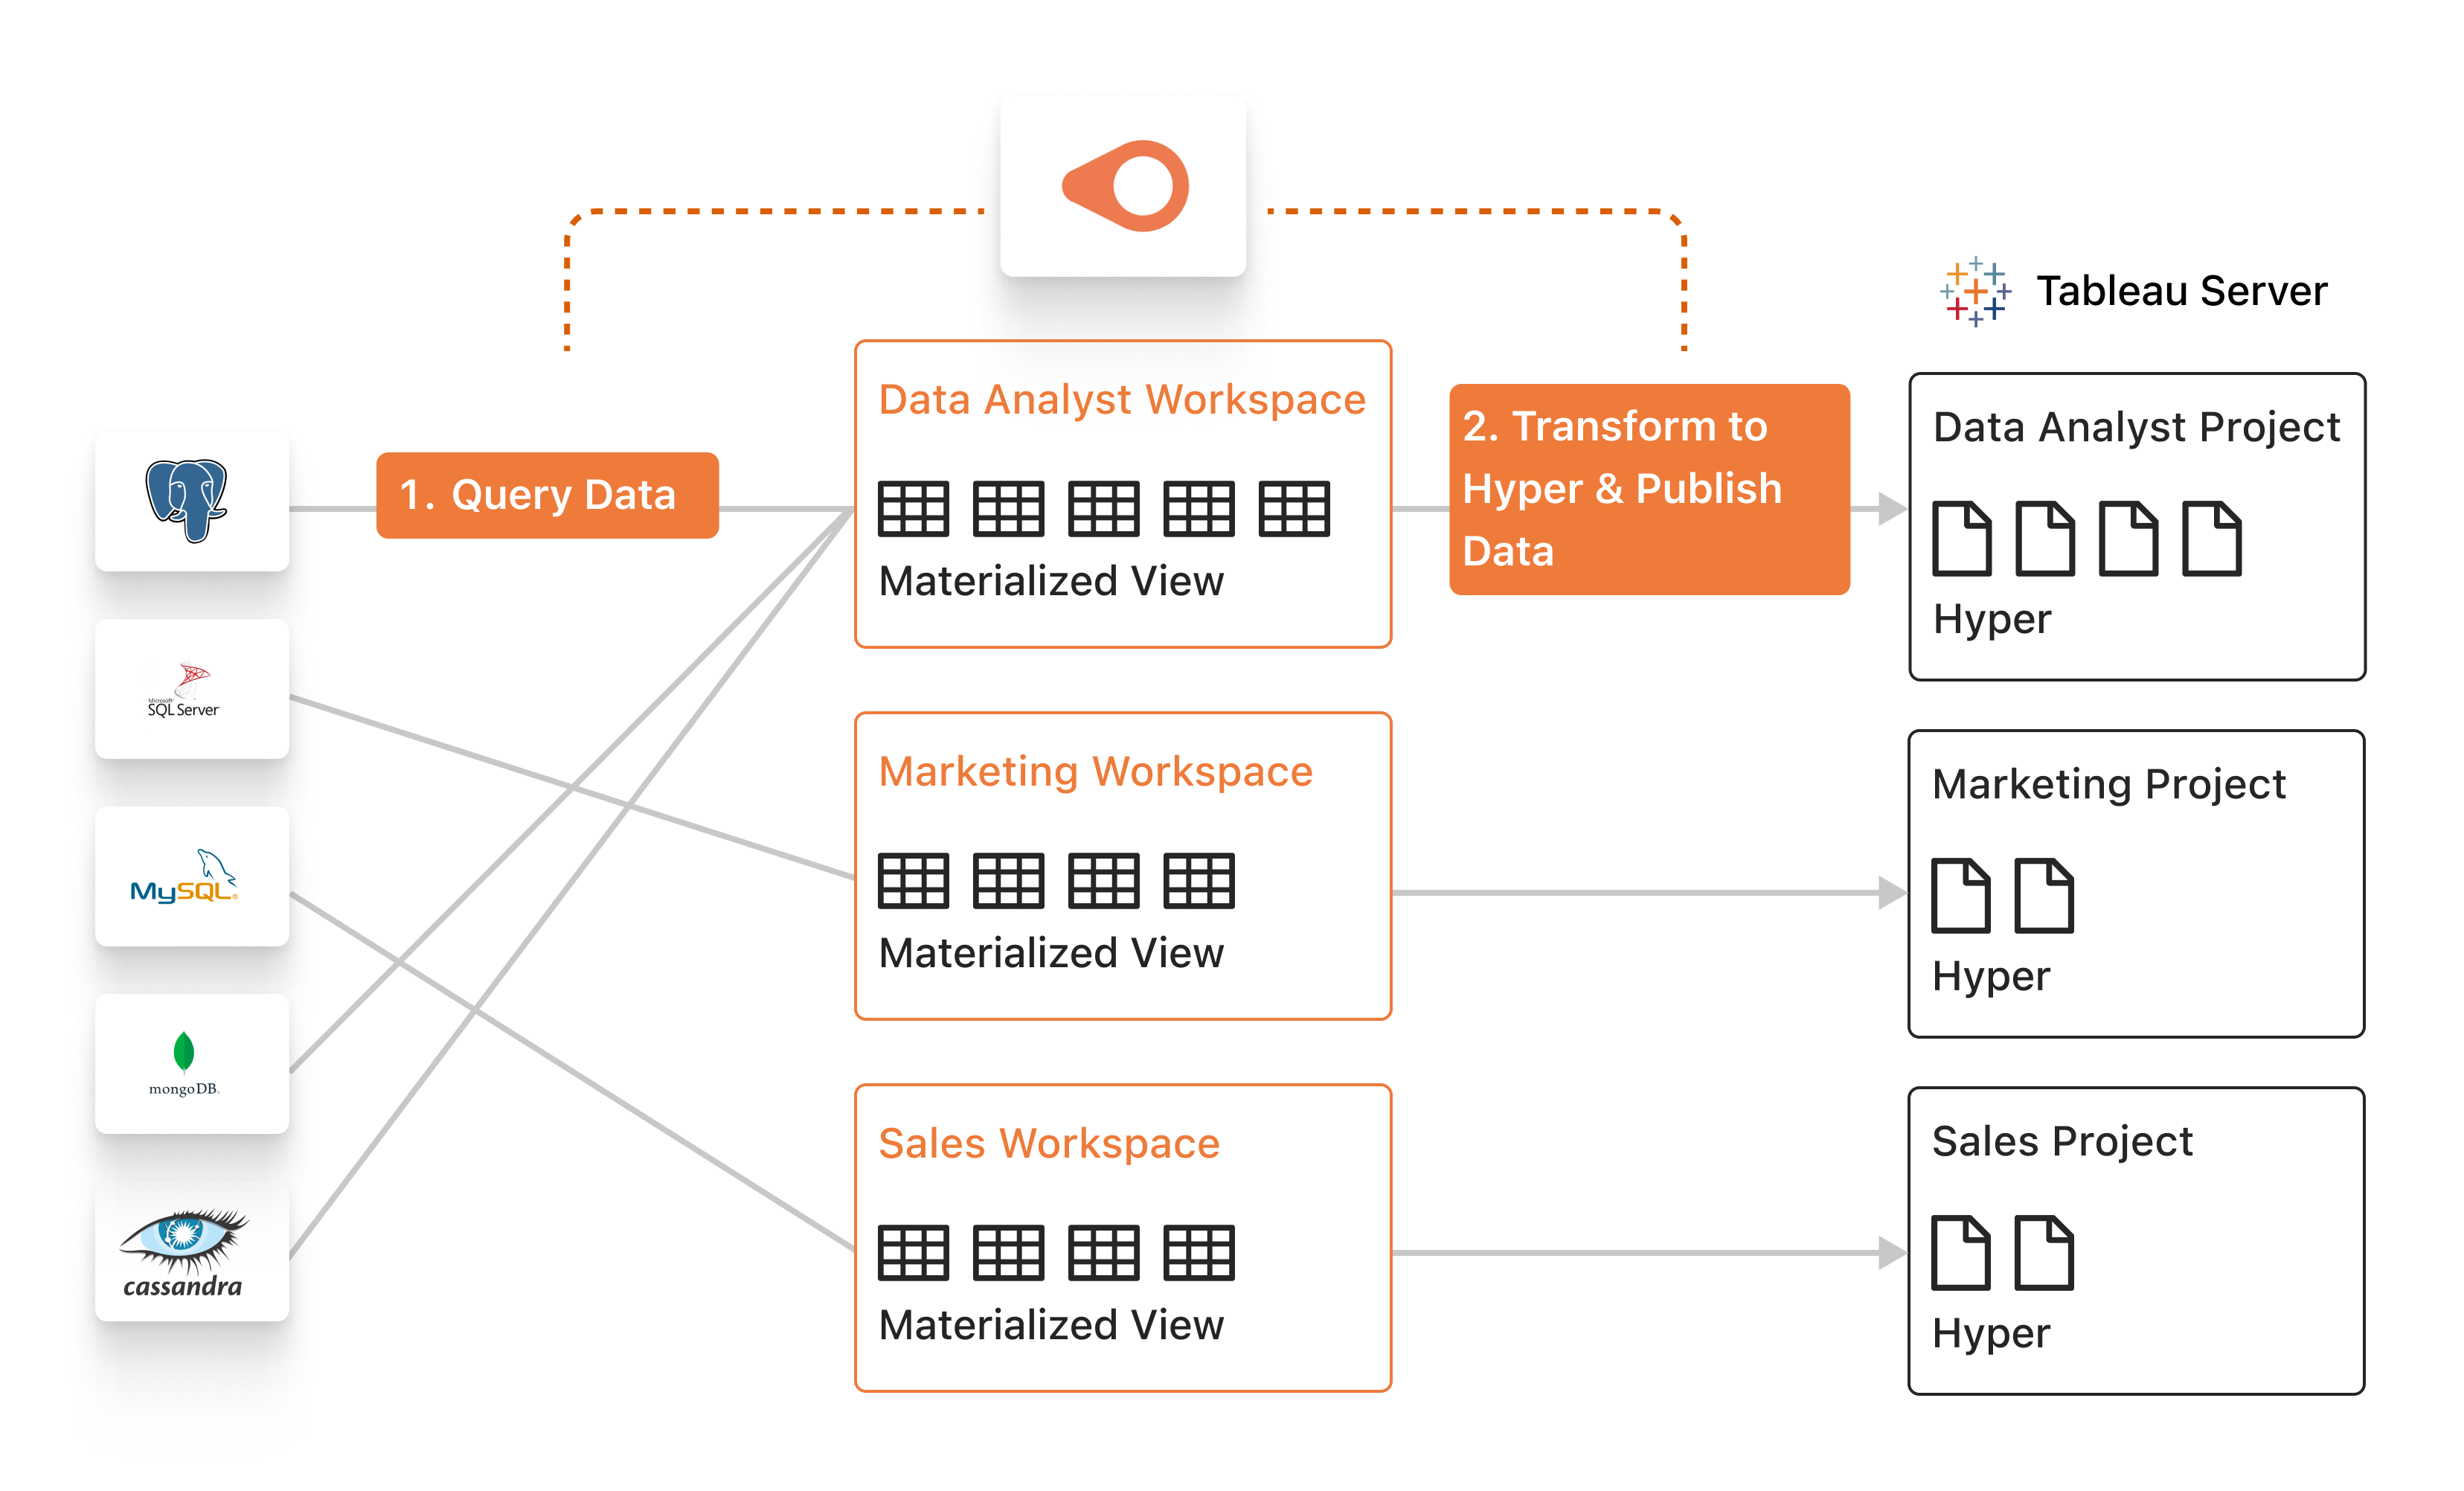
Tableau Canner Connector
After Tableau version 2020.2, providing partners can develop custom connectors, and the usage of connectors is the same as that of other database connectors (Connector).
Usage scenarios
Tableau Data Push
Suppose the data is regularly updated once in a period, and Tableau Extract often fails due to insufficient resources and other issues. In that case, it is recommended to use Tableau Data Push, the calculation and generation of Hyper file will be generated on Canner Enterprise, and Tableau only handles the presentation of the report. Can.
Tableau Canner Connector
It is suitable for situations where many ad-hoc queries/ direct queries are executed.
Use the Calculated Field function
Using Tableau Data Push to push to the Hyper file on the Tableau server, it is impossible to query data in an ad-hoc way. If you need this function, use Tableau Canner Connector (Tableau Canner Connector).
Version support
Tableau Data Push (Data Push)supports2018.1and later versions.Tableau Canner Connector (Tableau Canner Connector)supports2020.2and later versions.
Setting up Tableau Data Push
Publish data to Tableau Server
Step 1: Create Credential on Tableau Server
- Versions above
2019.4can usePersonal Access TokenorAccount Passwordfor authentication - Versions below
2019.4can only useaccount passwordfor authentication
- Use Personal Access Token (above 2019.4)
- Use account password (2018.1 and above)
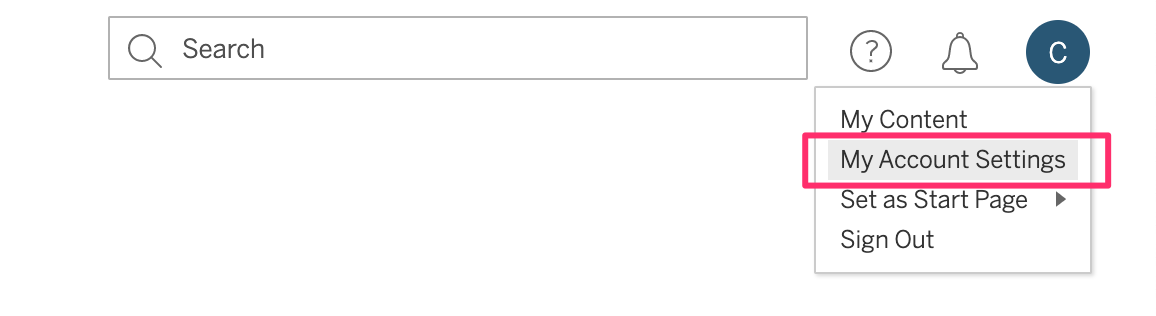 Please select My Account Settings from the drop-down menu in the upper right corner.
 And go to the Personal Access Tokens block, add a Personal Access Token, enter the Token name, and click the create new token button
Please note that the Token name does not contain illegal characters (characters such as !@#.&) and blank spaces.
 Then a window will pop up, and click Copy to clipboard to copy the secret Token.
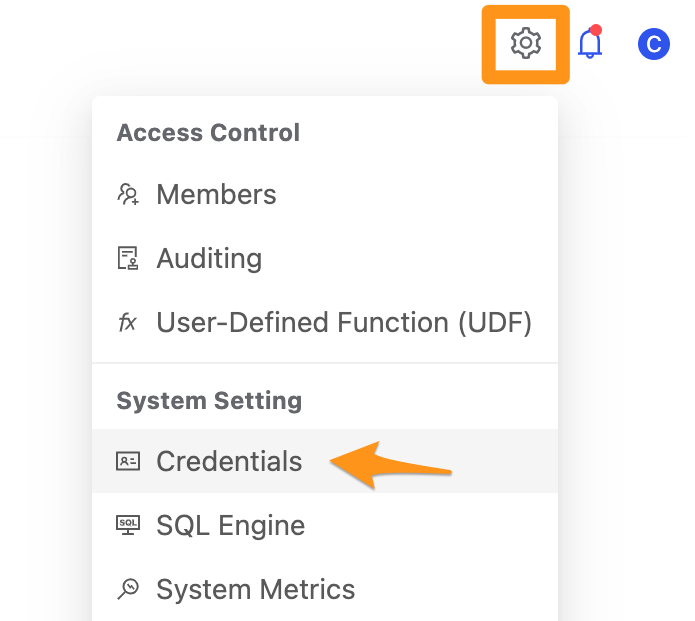
Go to the Canner Enterprise page, click the gear icon in the upper right corner, expand the menu, and select Credentials.
Once in, click Create a Credential.
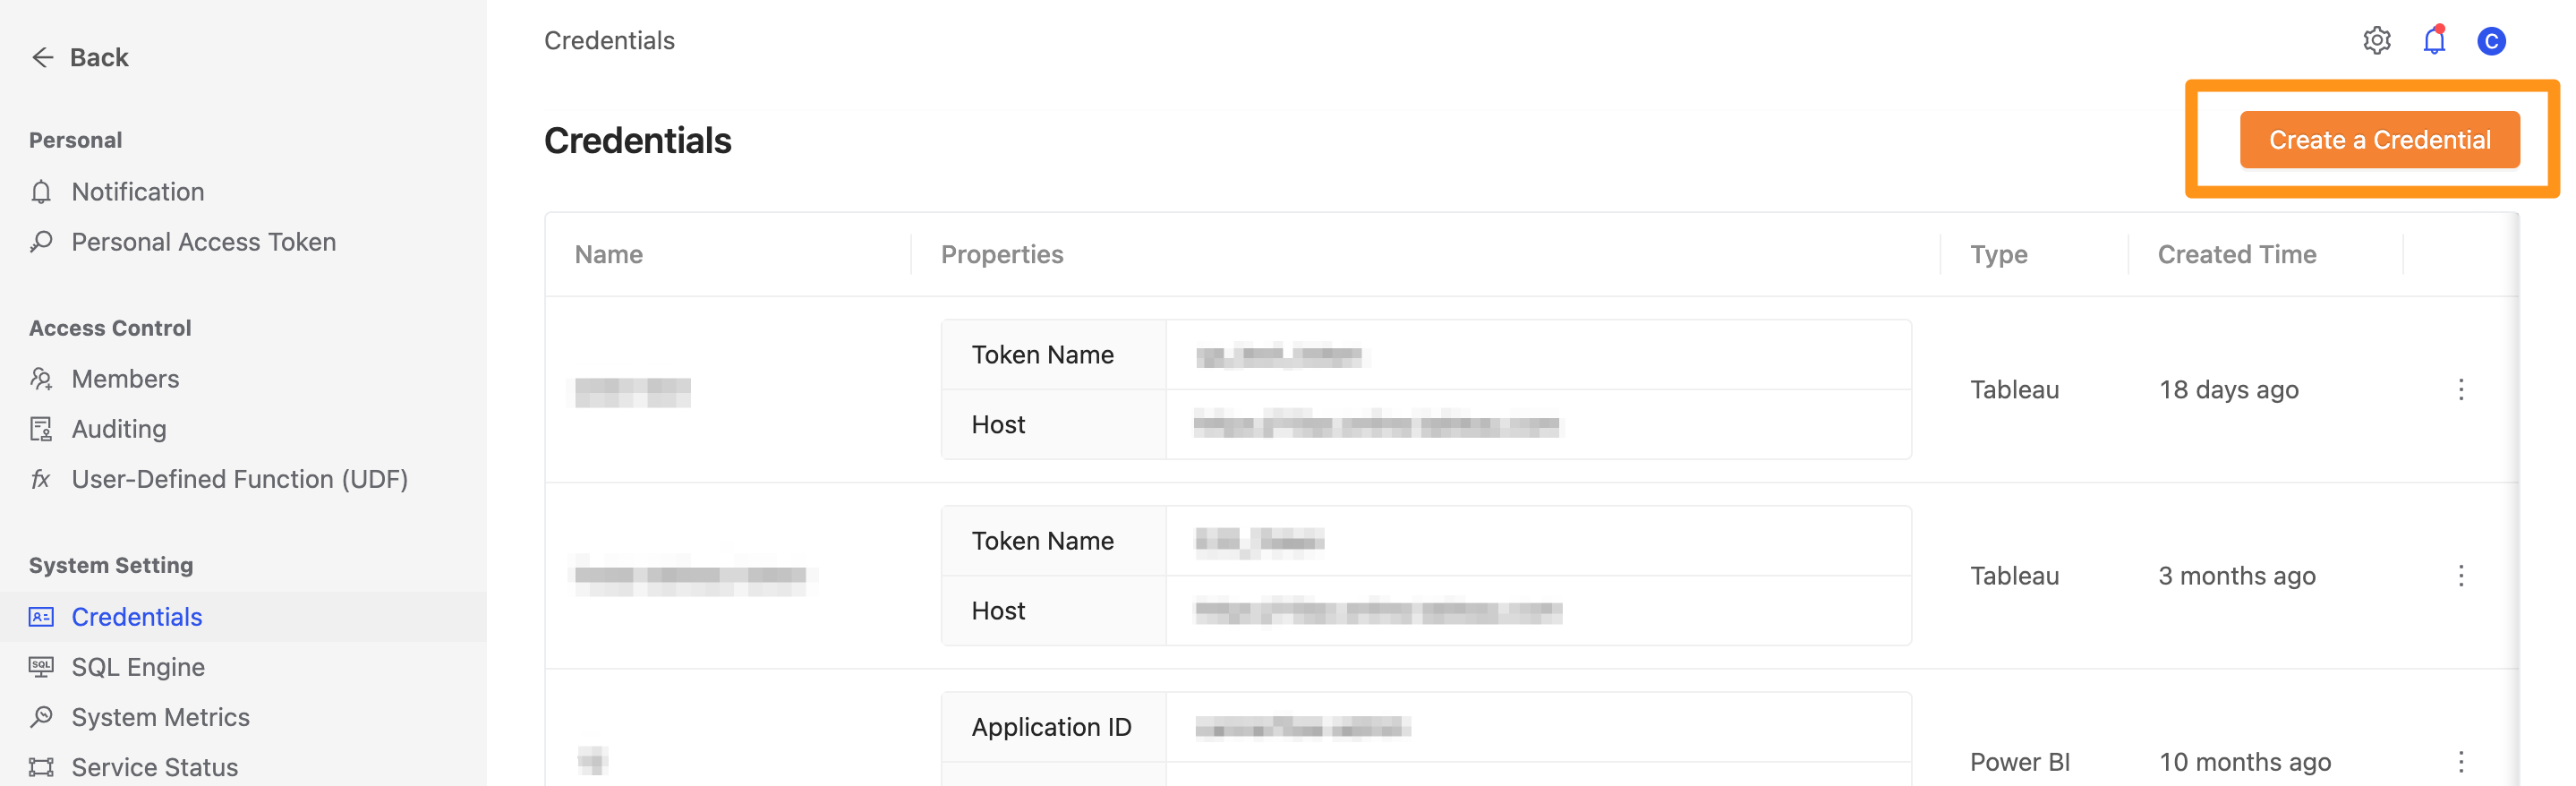
Select Tableau Token, enter the following information.
1. Credential Name: This name is used for your convenience to identify the Credential in subsequent steps
2. Token Name: Enter the Token Name of the Personal Access Token in the previous step
3. Token Secret: Enter the Token Secret copied from the Personal Access Token in the previous step
4. Host: Enter the URL of the tableau server, enter https://canner-test.online.tableau.com in a format similar to this

Here you will use your user account password on Tableau as authorization.
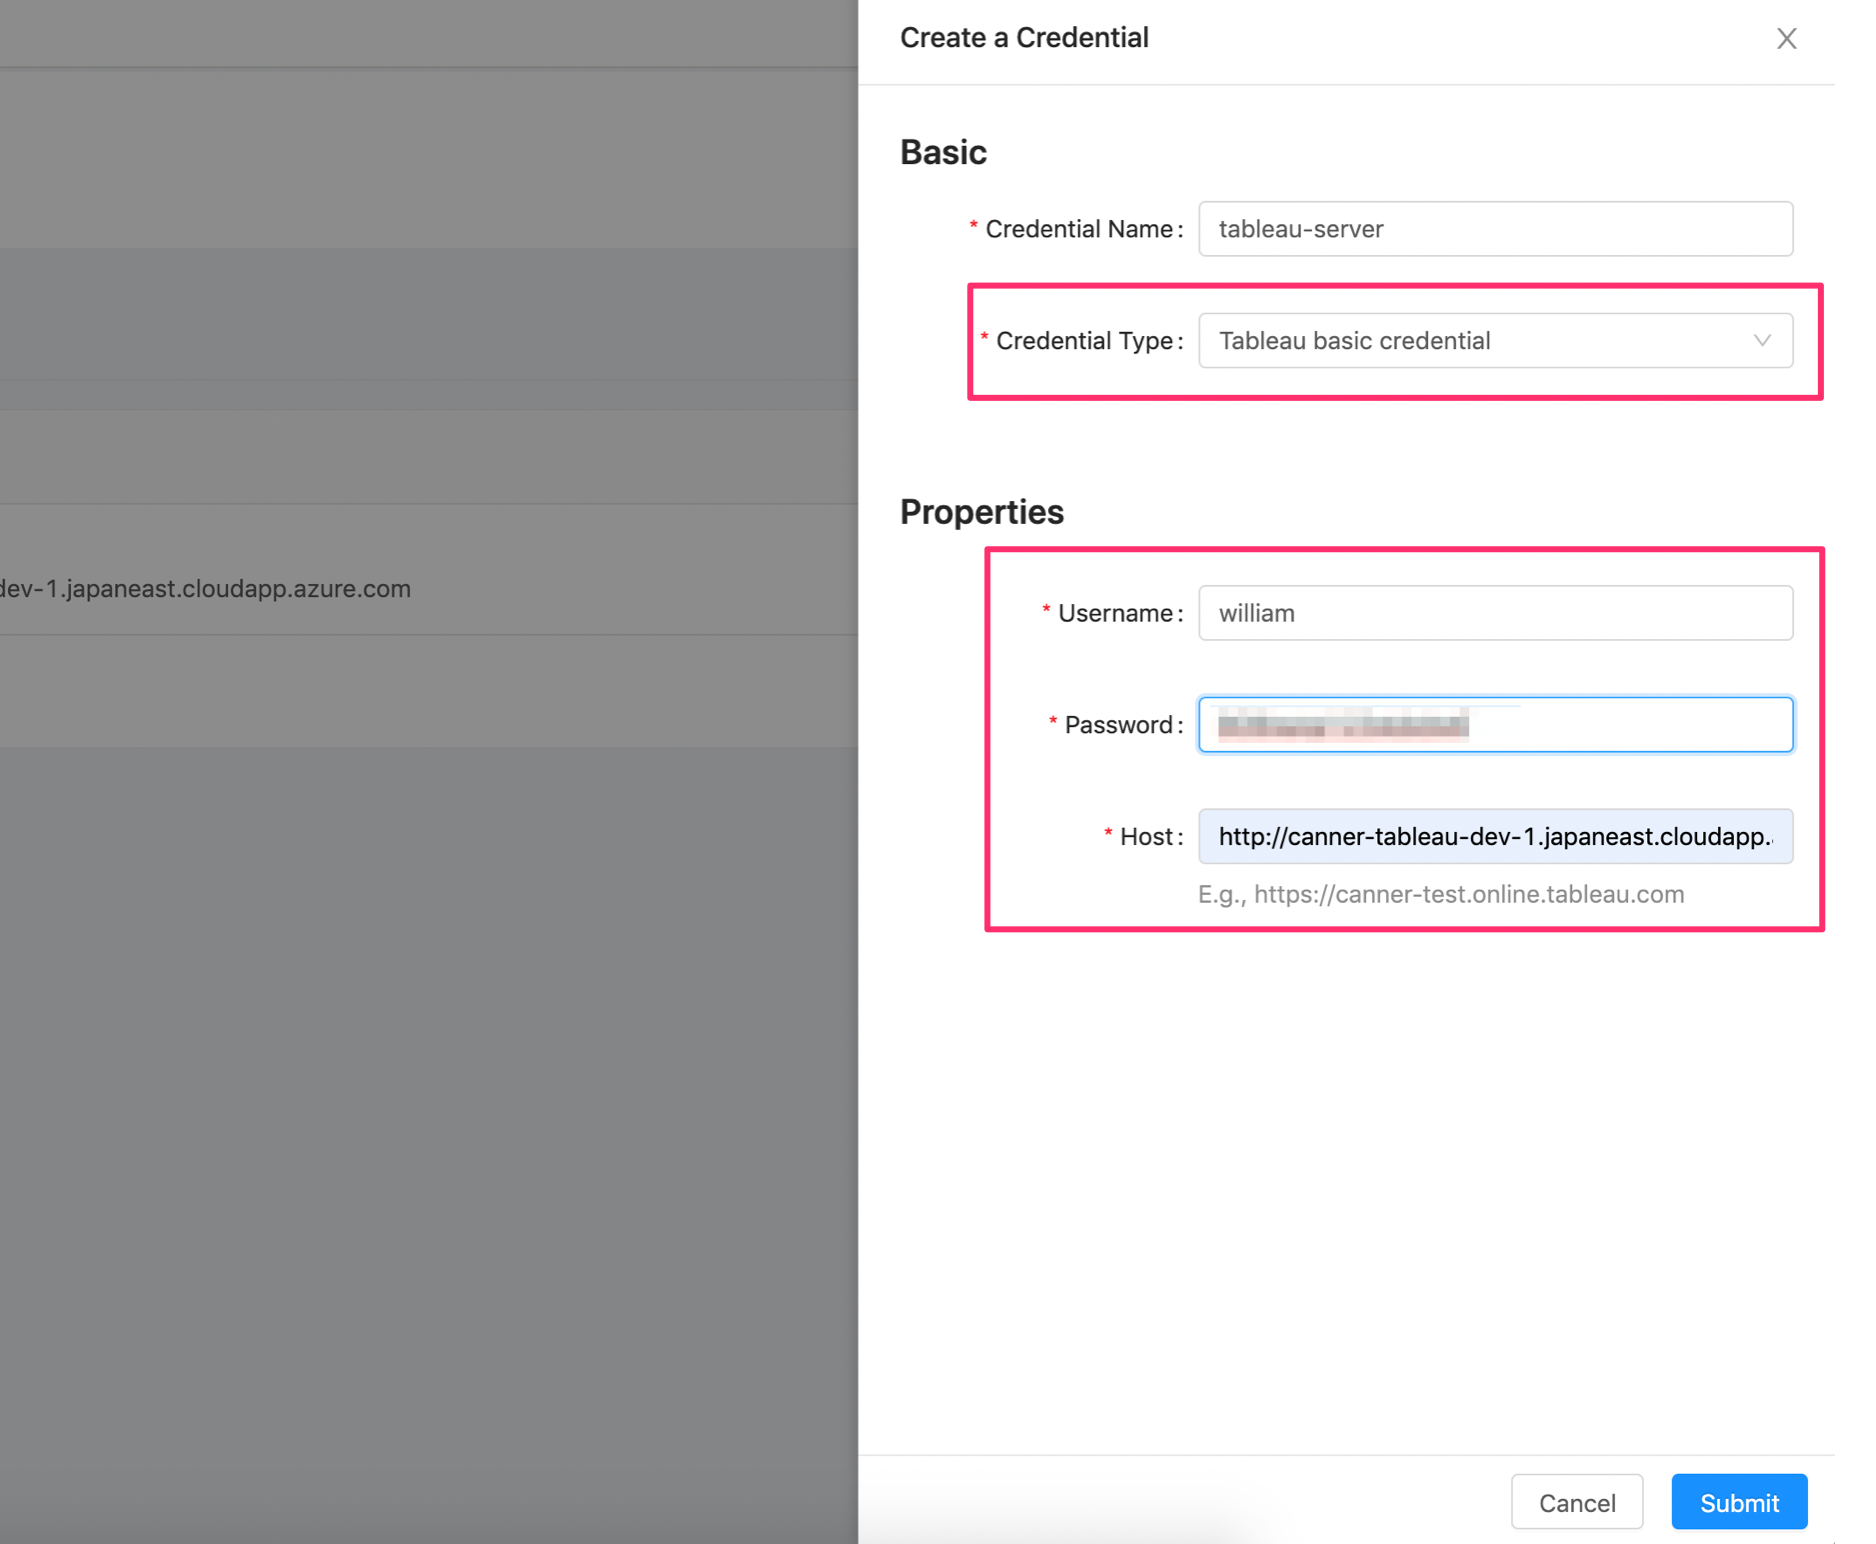 Go to the Canner Enterprise Settings page, click Create a credential in the Credentials section, select
 Tableau basic credential, and enter the following information.
1. Username: Tableau username
2. Password: Tableau user password
3. Host: Enter the URL of the tableau server, enter https://canner-test.online.tableau.com in a format similar to this
Step 2: Create the data you want to publish to Tableau Server as a Materialized View.
Refer to How to Create Materialized View.
Step 3: Set up Tableau Publish
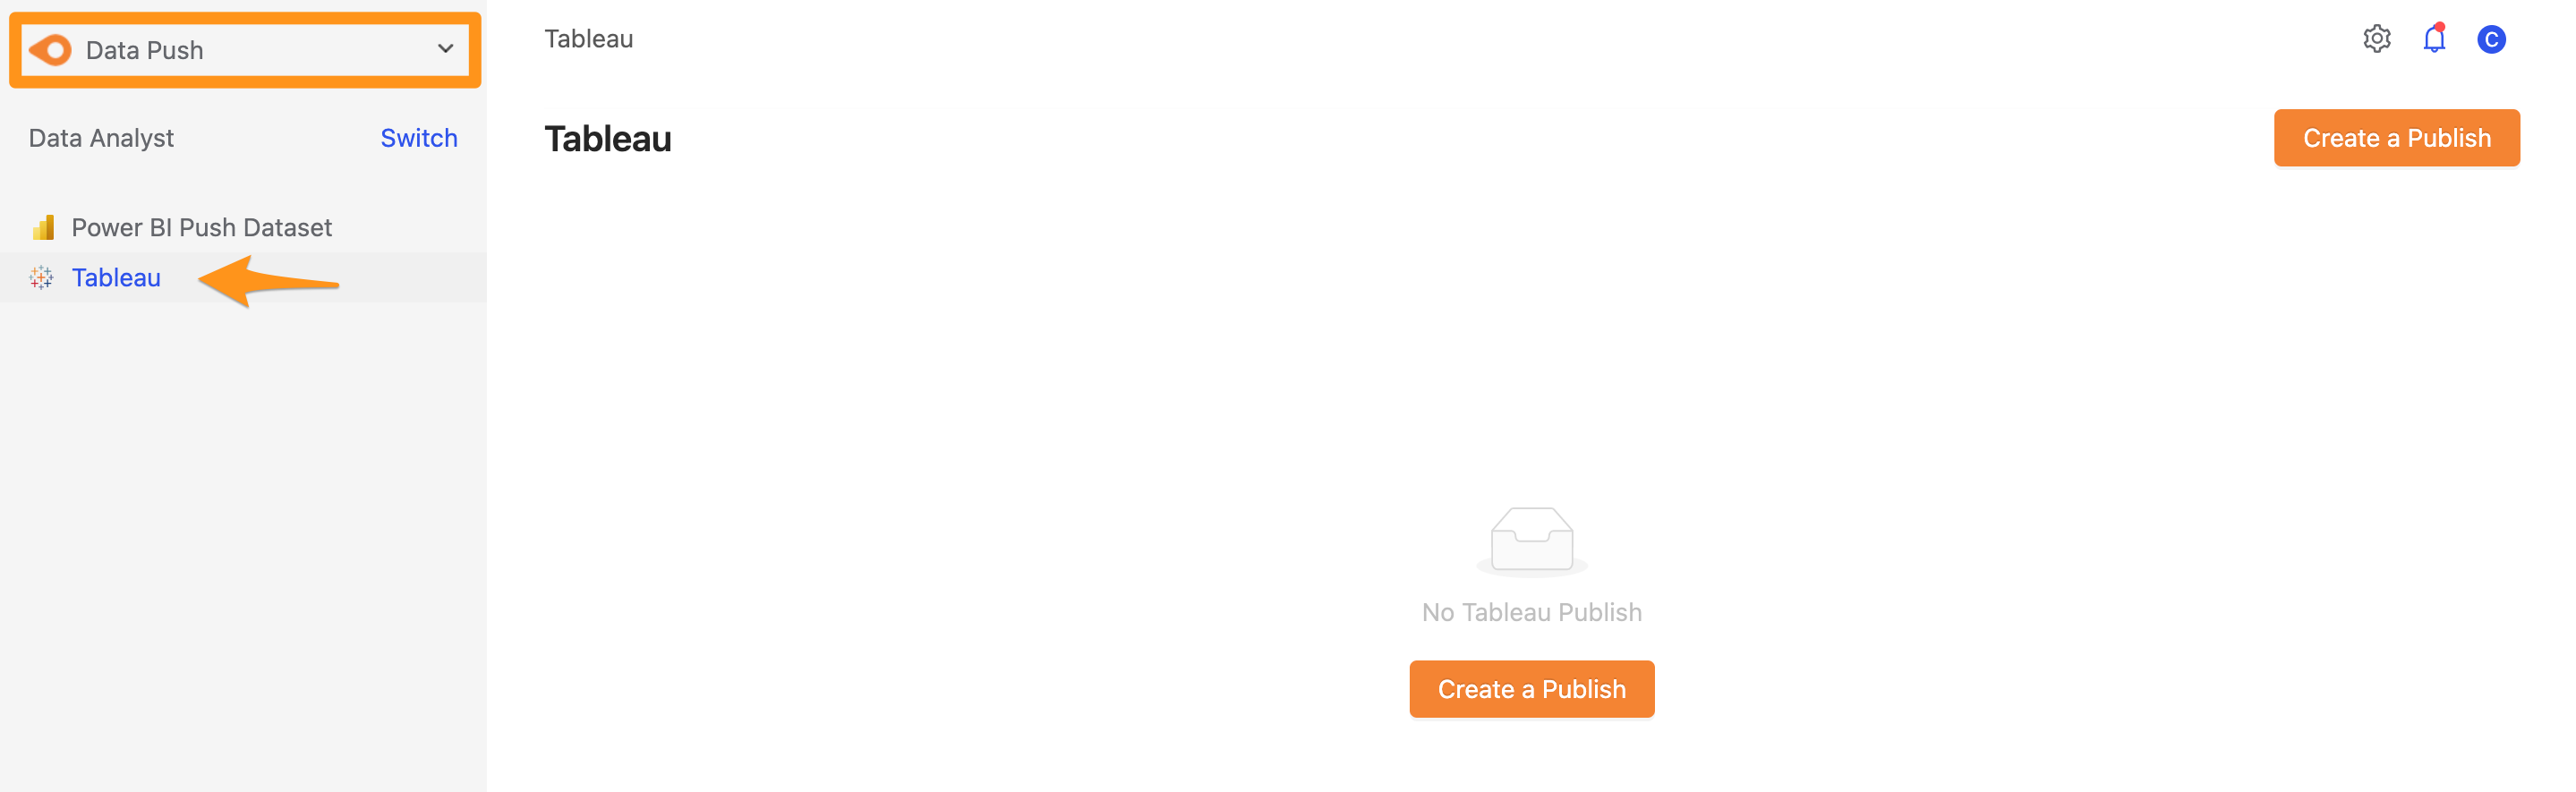
Click the switching menu in the upper left corner to enter the Tableau page.
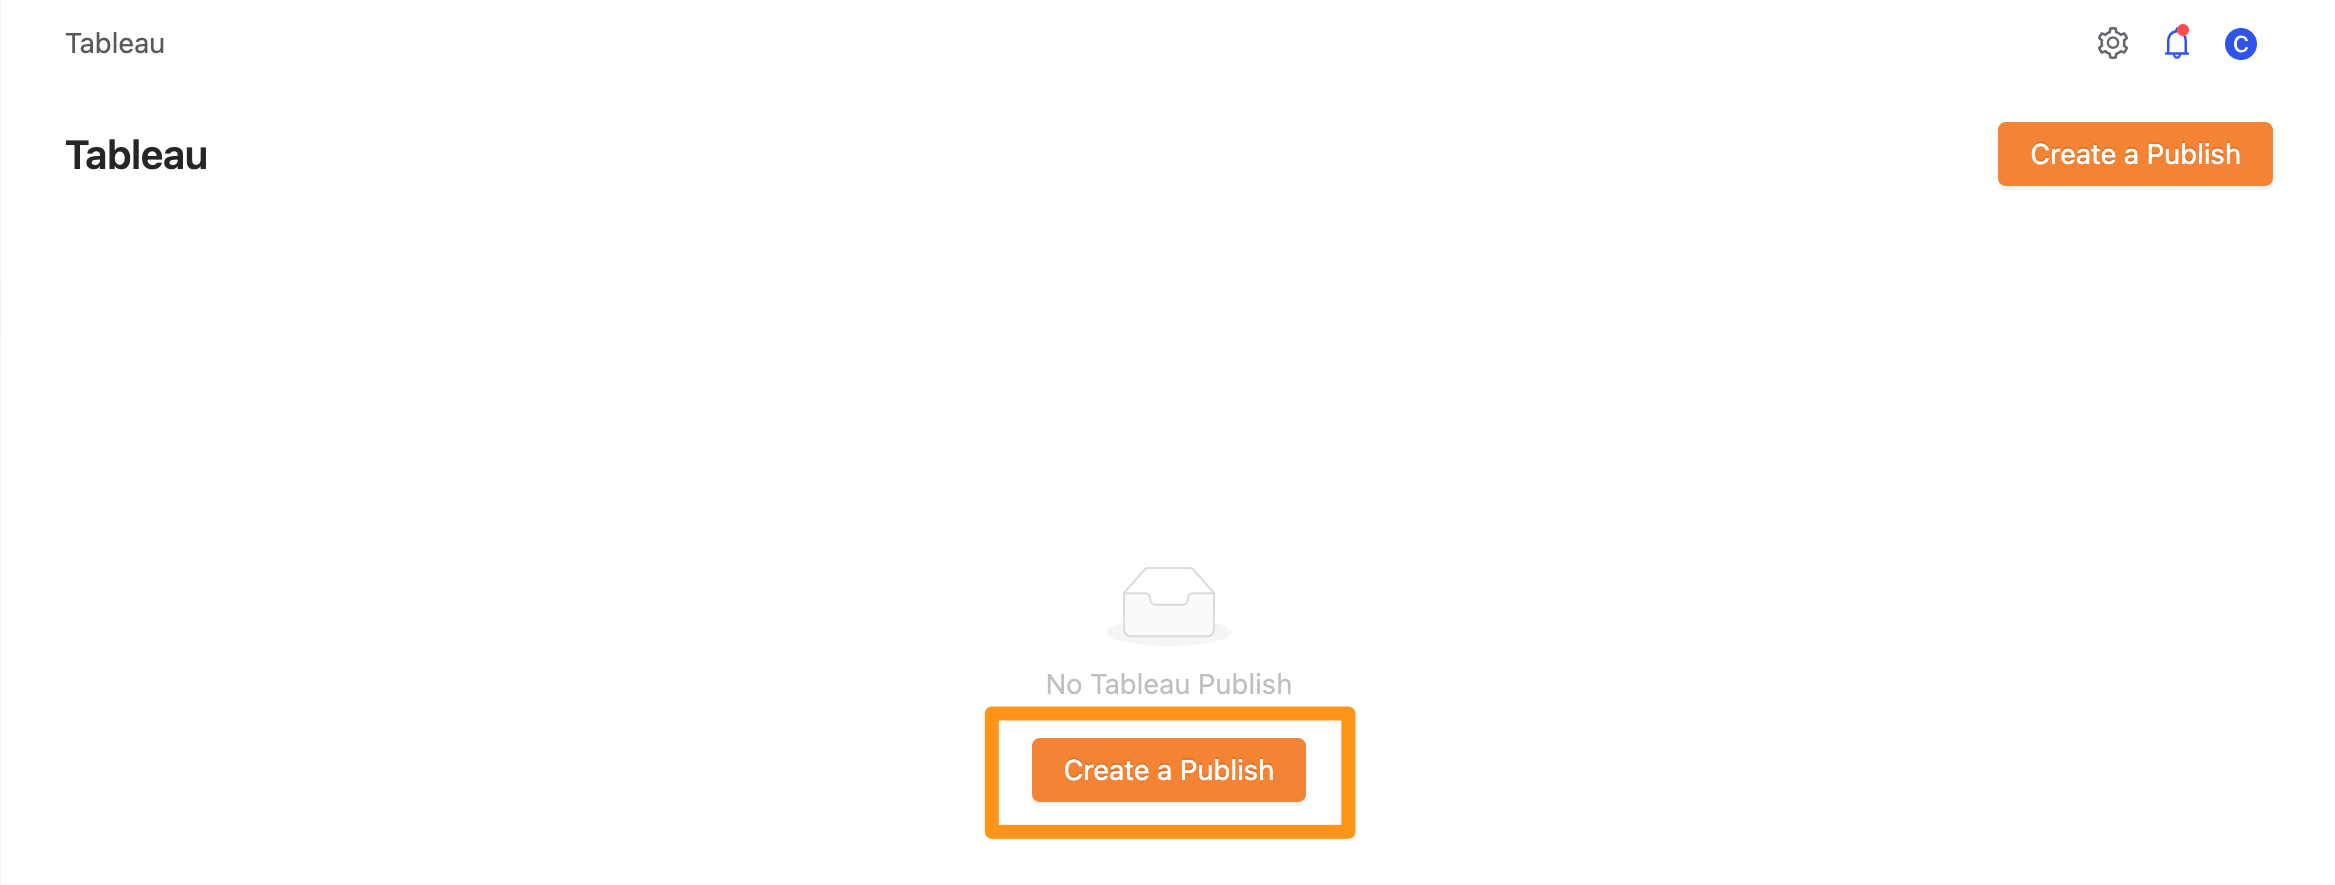
Click the Create a Publish button.
Fill in Tableau Server related information.
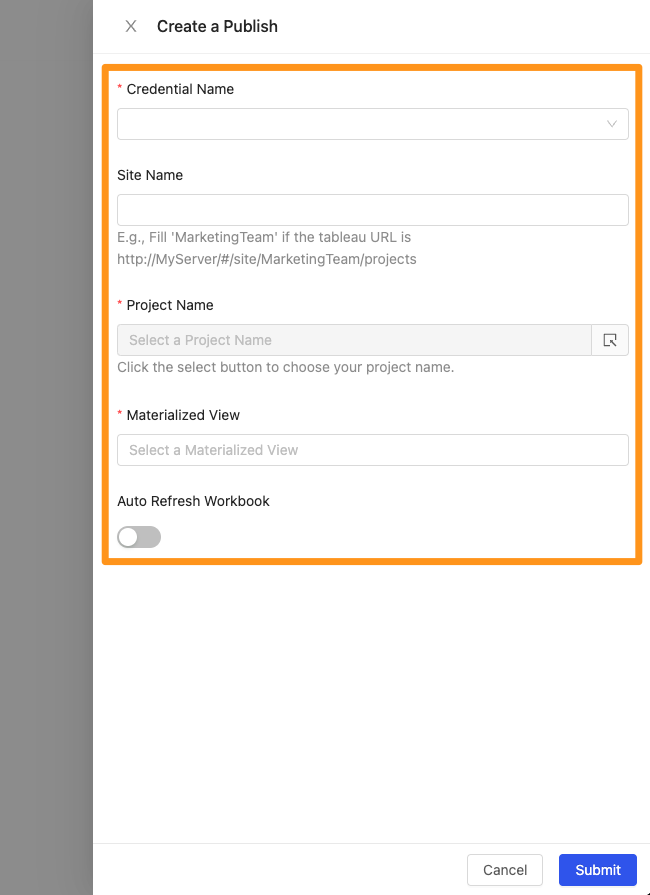
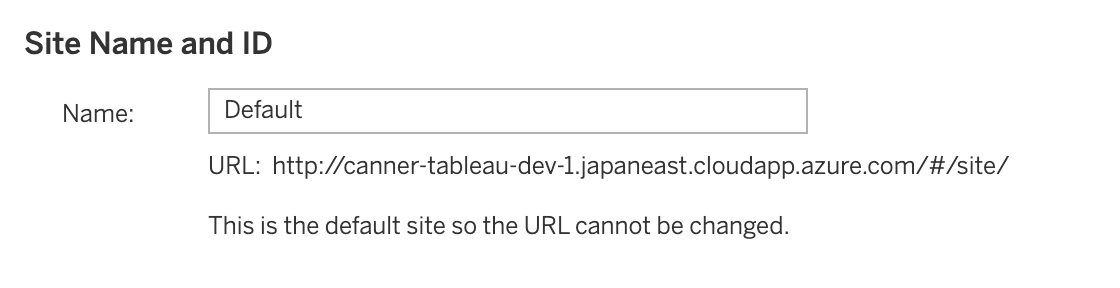
1. Site Name
Deploy to the Default Site; please leave this field blank (if there is no new site or only one Site, please leave this field blank); if there are multiple Sites, please go to the Settings page to copy the site id and paste it to this field.
Settings > Site Name and ID of Default Site will be shown below on Tableau; please leave this field blank
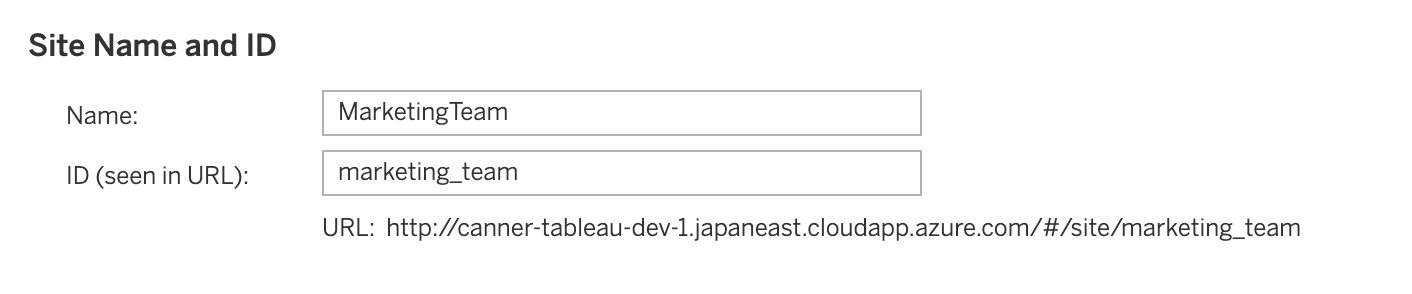
Settings > Site Name and ID of non-Default Site will be as shown in Tableau; please copy the value of ID (Seen in URL)
2. Select the Credential created in the previous step
Please select Credential at this step before selecting Project in the next step.
3. Select a Project
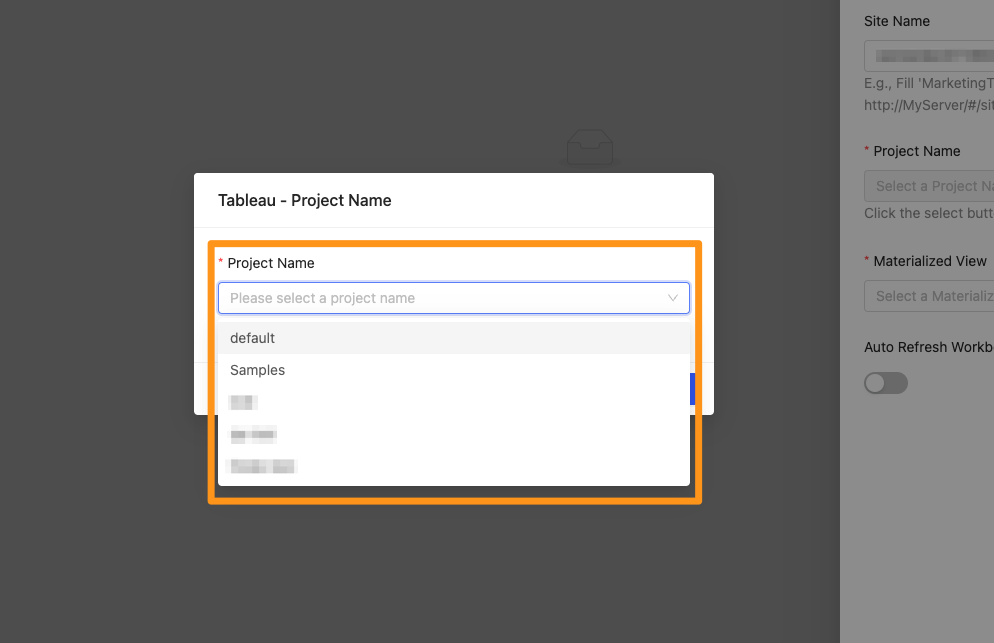
In this step, you can select the Project where the data is stored.
4. Select multiple Materialized Views
In this step, you can choose which Materialized View to publish data to Tableau.
Step 4: Wait for publish
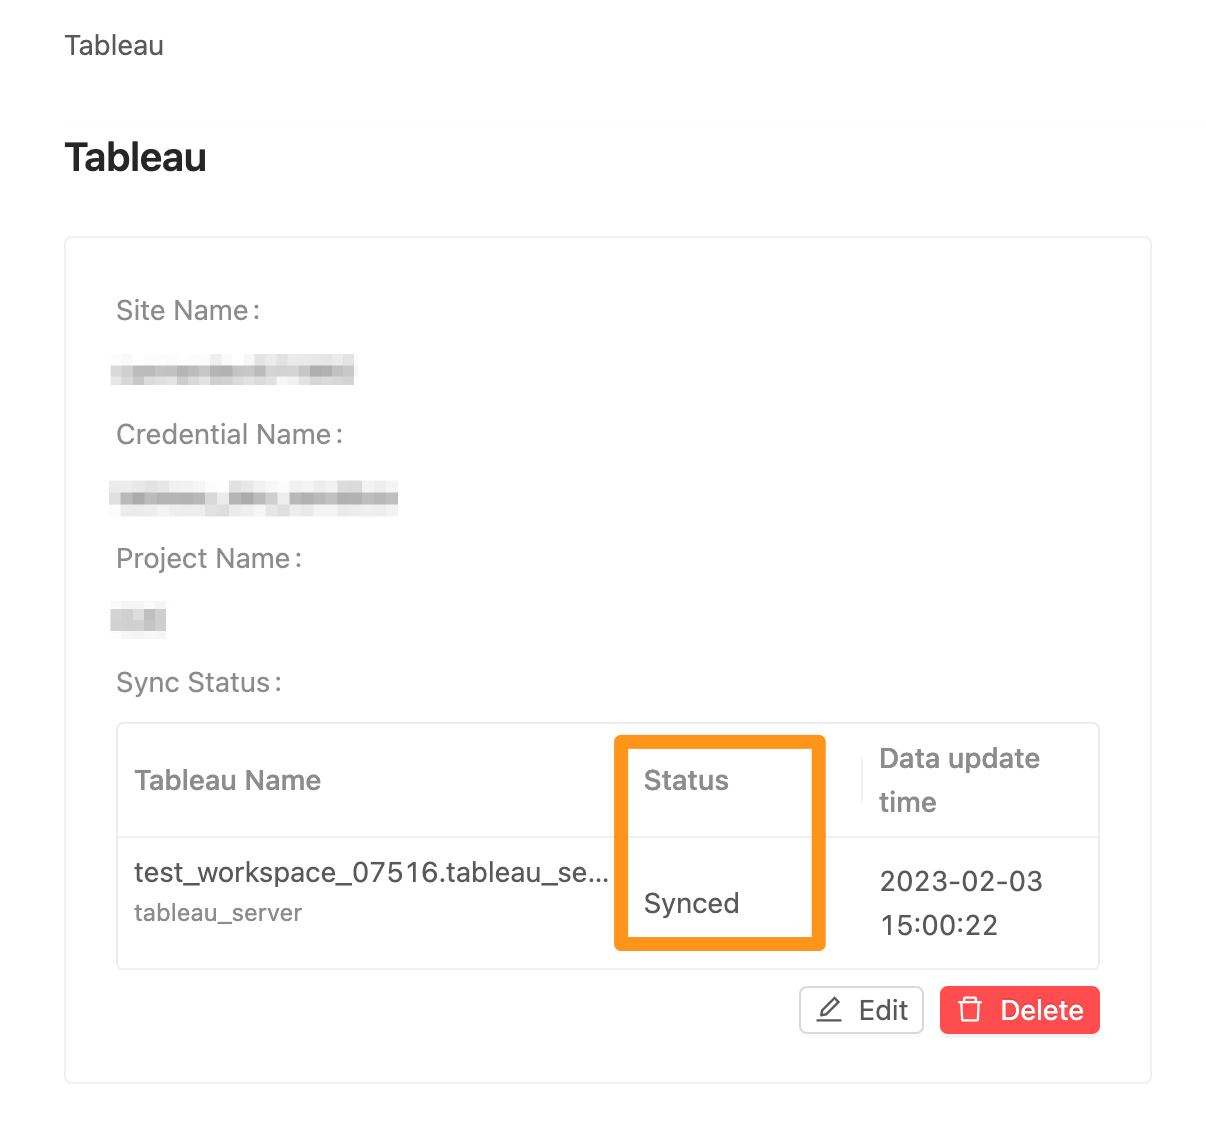 Each Tableau Publish will render in the Tableau section; please click the
 Refresh button to refresh the latest status. If the status changes to Synced, the data is published to Tableau Server.
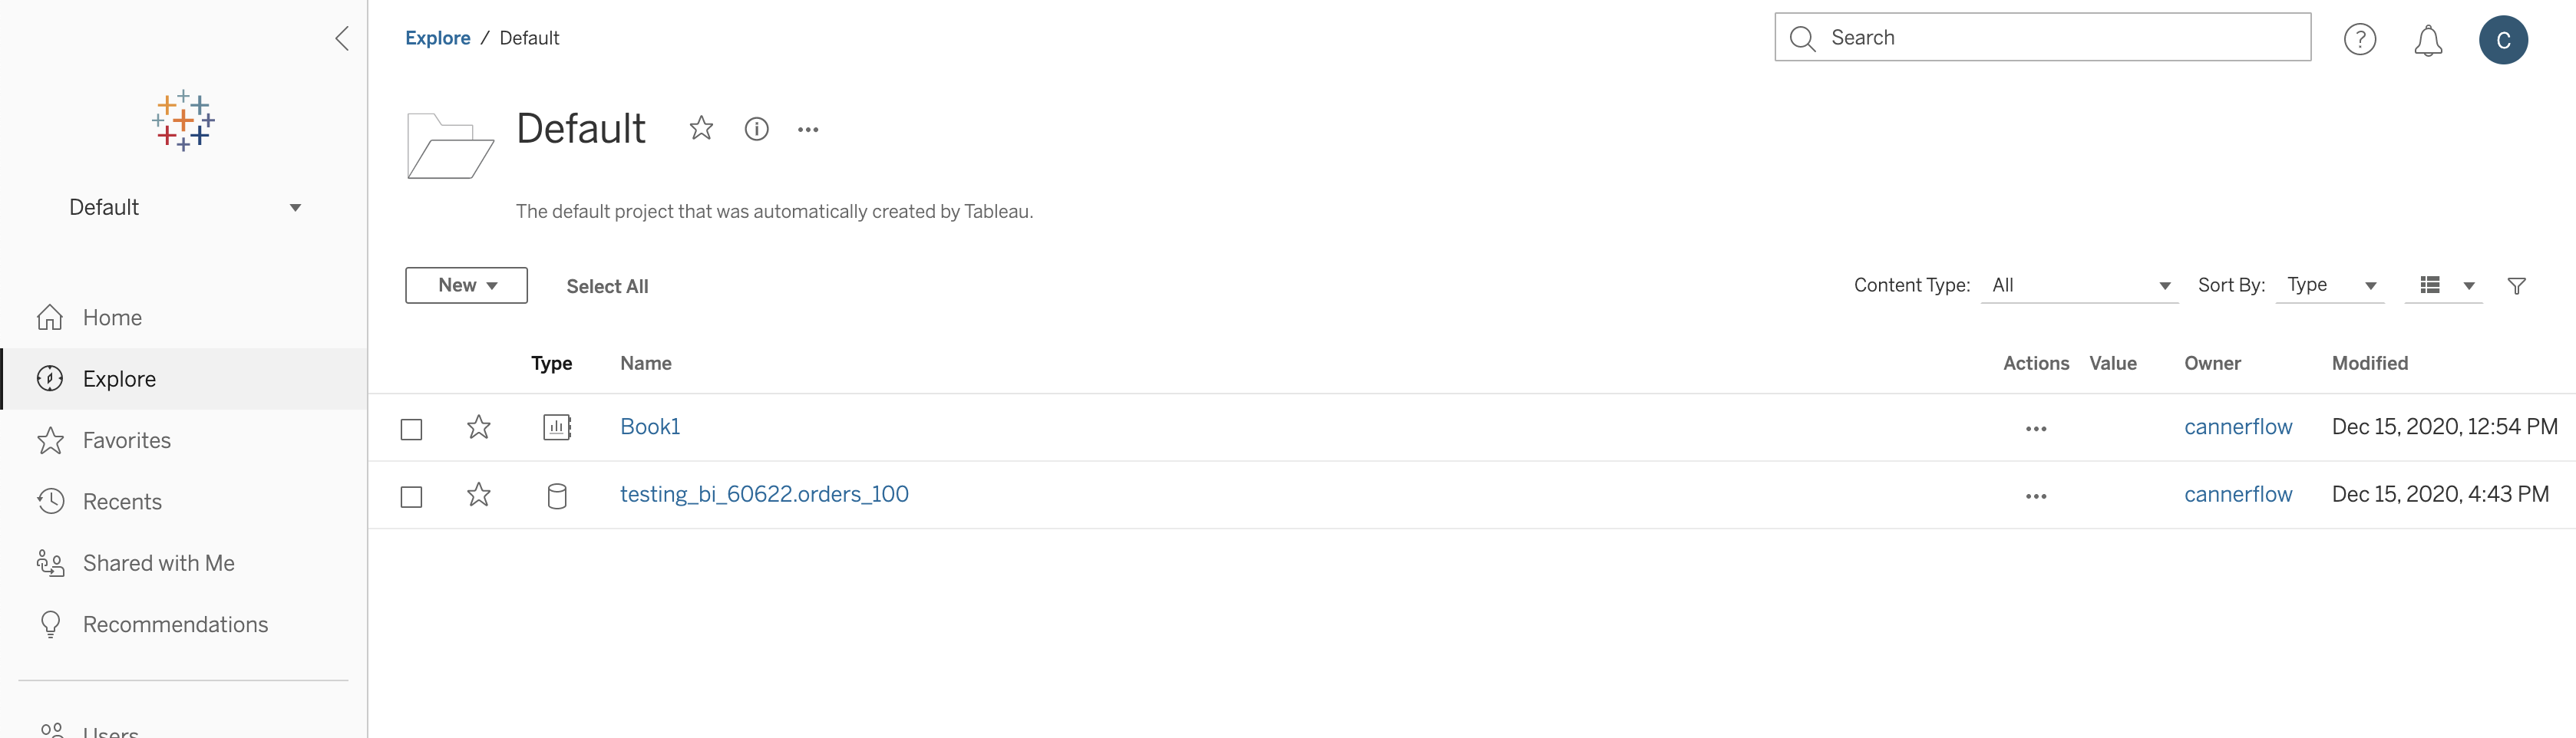 In Tableau Server, you can see the published dataset in the corresponding Site > Project and use them in Tableau Desktop.
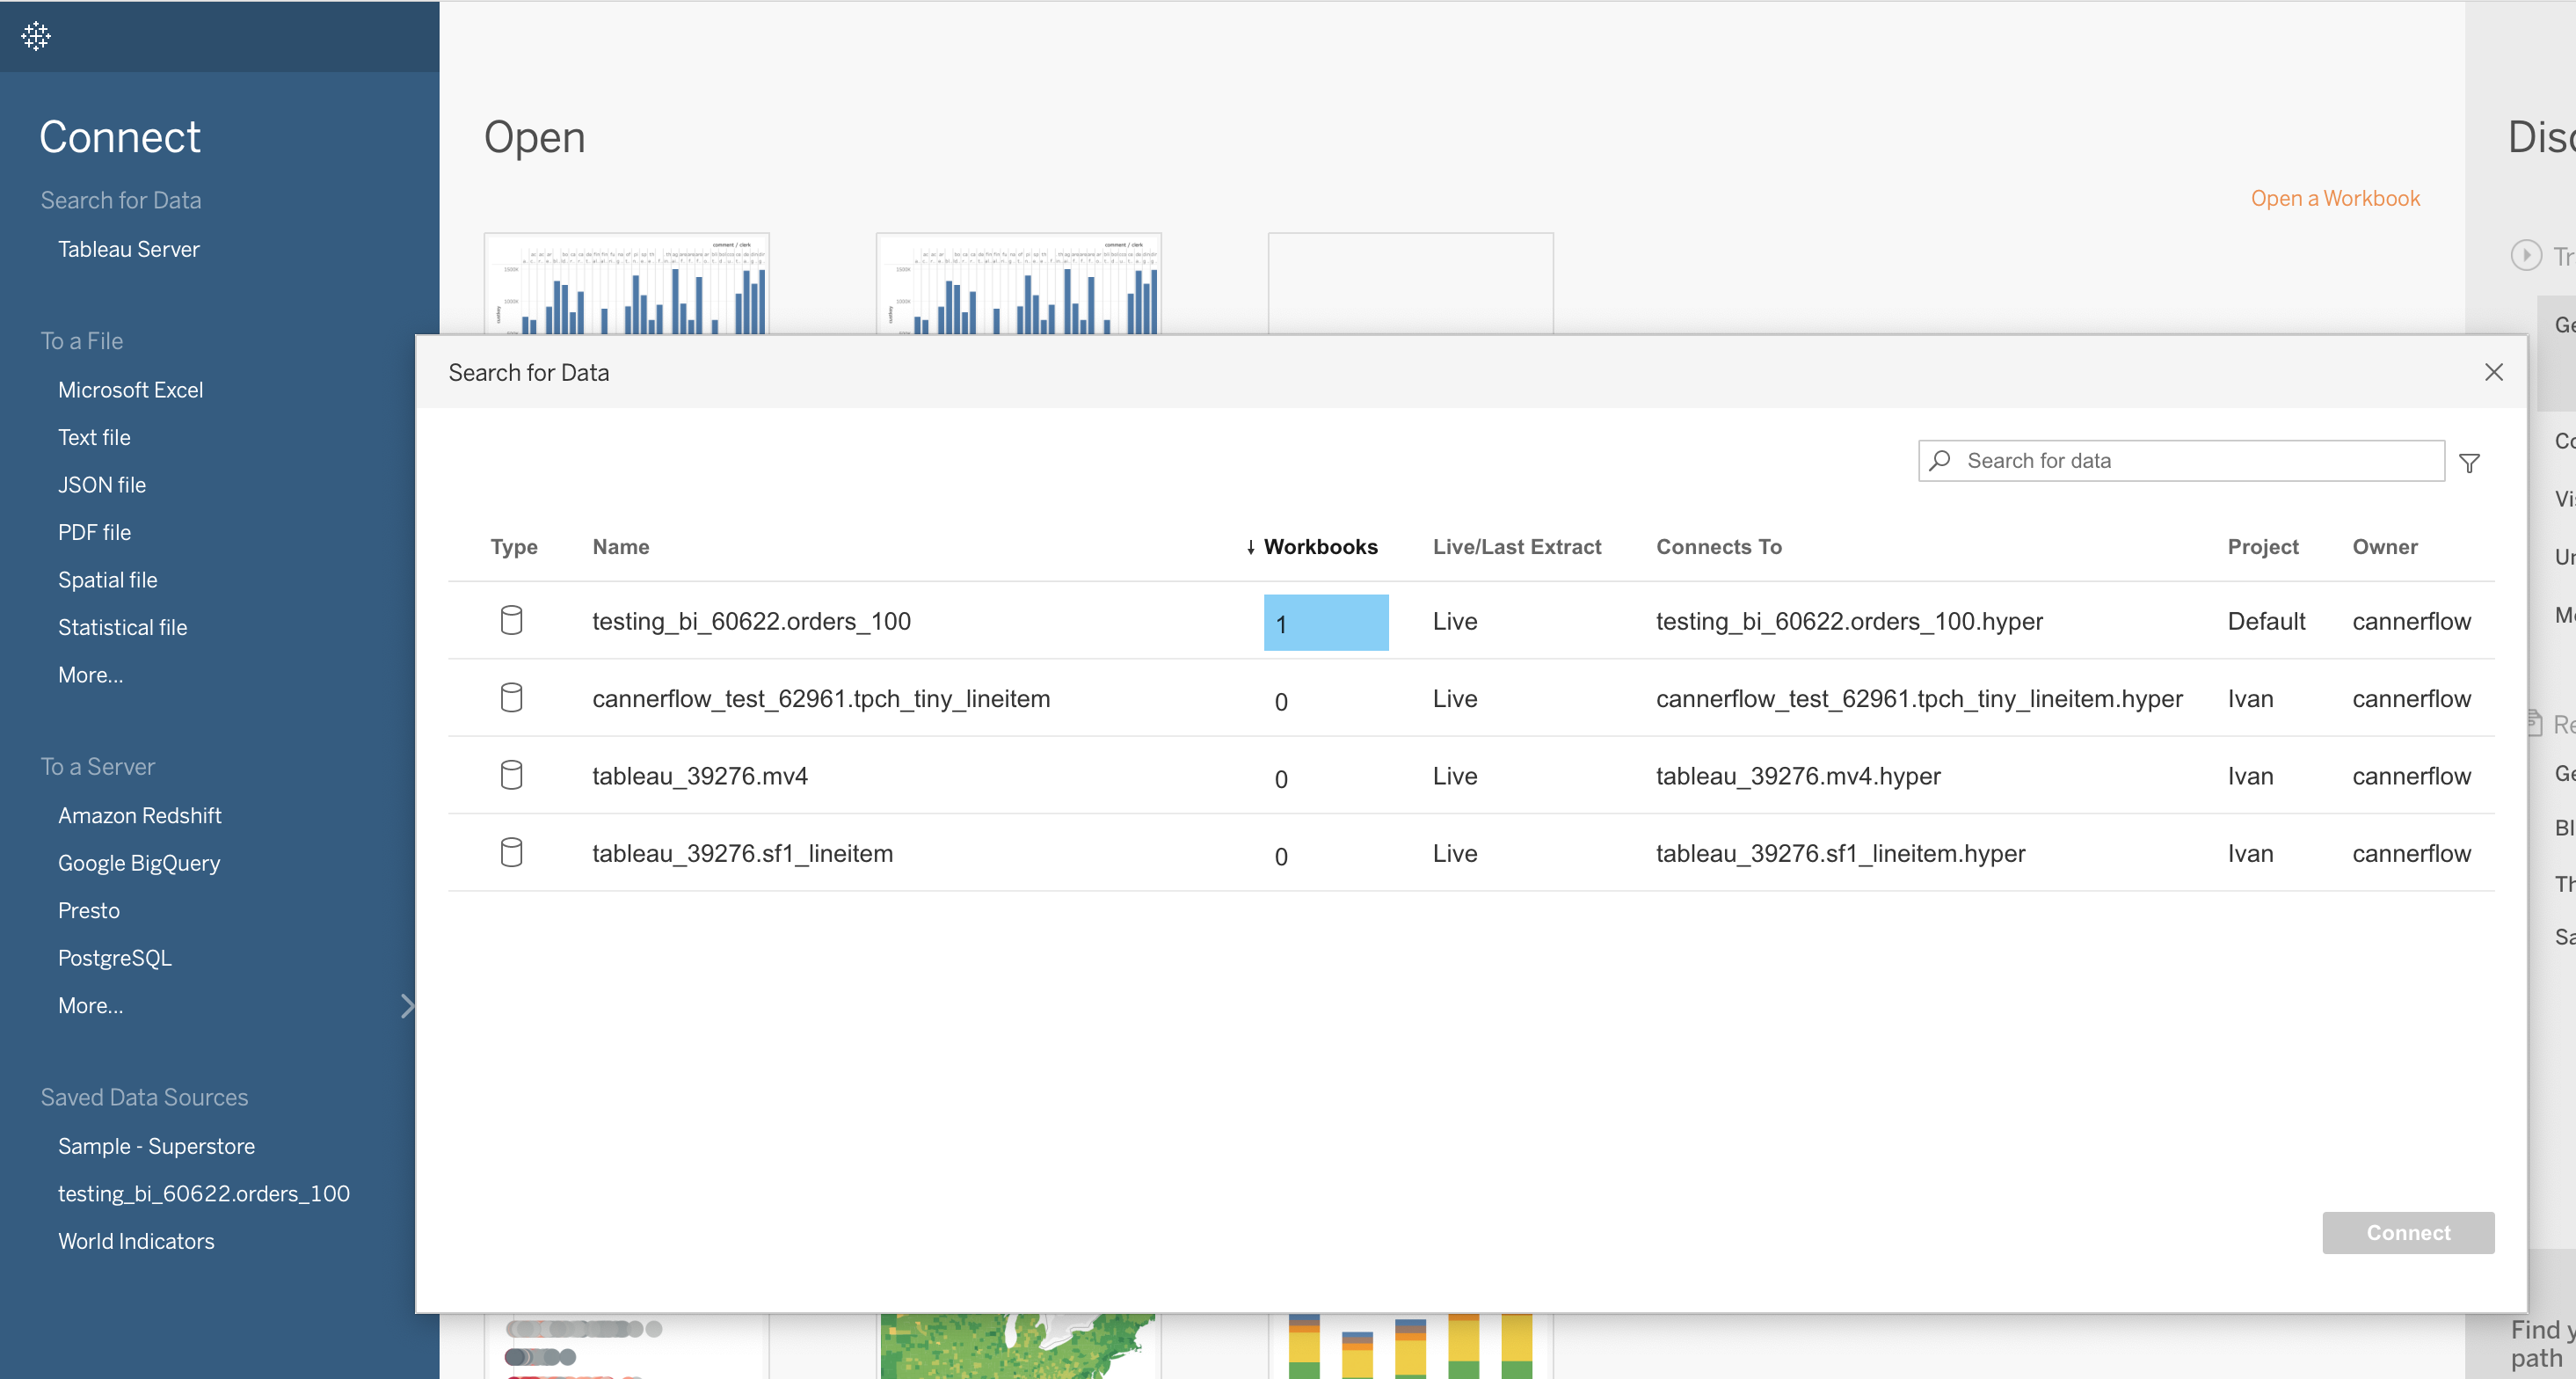 Click Search for Data > Tableau Server in Tableau Desktop, you can see the data published from Canner Enterprise, and you can connect to the workbook for use.
How to set schedule update
When you successfully schedule Materialized View, each update will be republished to Tableau Server. When Materialized View is re-crawling data, the status in Tableau Publish will change to Preparing, it will become Synced when successful.
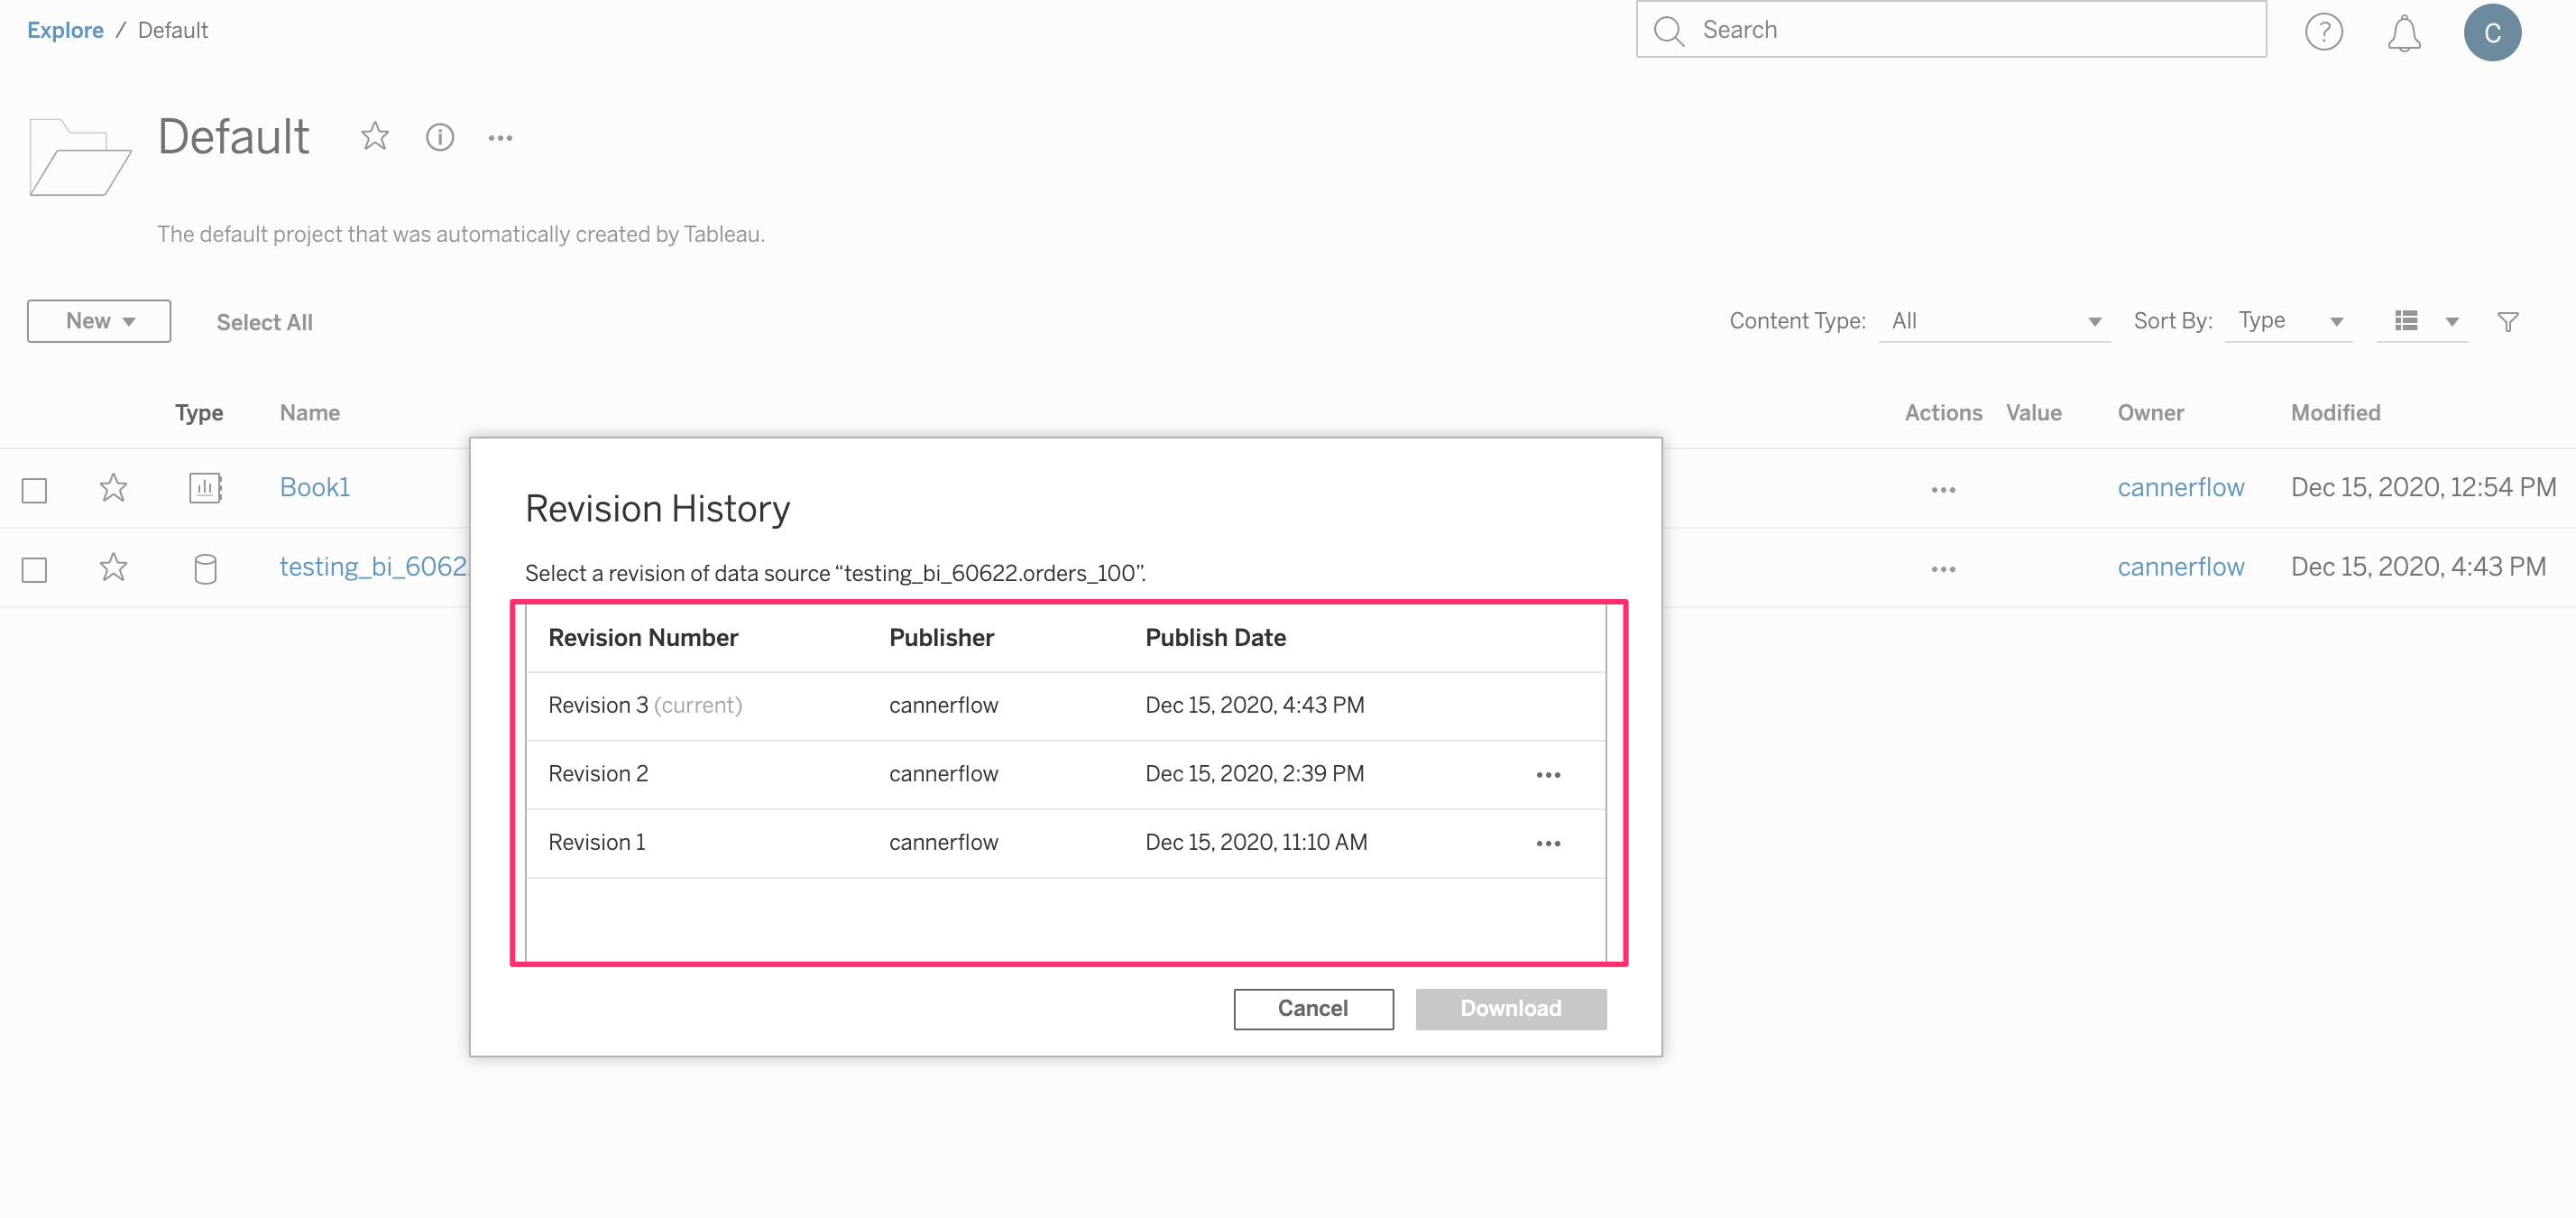
On Tableau Server, you can click Revision History to view the revision history of this data source.
How to do access control
Canner Enterprise will be responsible for publishing the data to the corresponding Project. Therefore, in terms of access control, the Tableau administrator needs to use the Project to distinguish which users or groups can see which data. Admins can set access control in the Data Source section of Project access control.
Please refer to Tableau's official documentation https://help.tableau.com/current/server/en-us/permissions.htm
Set up Tableau Canner Connector
Only versions above 2020.2 (inclusive) are currently supported.
Download Canner Enterprise Connector & Driver upload
- Canner Connector (.taco)
- [Canner Enterprise JDBC Driver](https://s3.ap-northeast-1.amazonaws.com/maven-repo.cannerdata.com/release/com/canner/canner-jdbc/0.3.5/canner-jdbc- 0.3.5-jar-with-dependencies.jar)
Setup Tableau Desktop
Step 1: Install Canner Enterprise JDBC Driver
After downloading the Canner Enterprise JDBC Driver, follow the [official website instructions](https://help.tableau.com/current/pro/desktop/zh-tw/examples_otherdatabases_jdbc.htm#%E6%8C%87%E5%AE%9A% E6%AD%A3%E7%A2%BA%E7%9A%84-jdbc-%E9%A9%85%E5%8B%95%E7%A8%8B%E5%BC%8F) Canner, JDBC Driver placed under the specific path
The JDBC driver is a separate jar file. Place the .jar file in a folder for your operating system. (If the folder does not exist, you need to create a folder).
- Windows:
C:\Program Files\Tableau\Drivers - Mac:
~/Library/Tableau/Drivers - Linux:
/opt/tableau/tableau_driver/jdbc
Step 2: Install Canner Connector (.taco)
After downloading Canner Connector (.taco), follow the [official website instructions](https://help.tableau.com/current/pro/desktop/zh-tw/examples_connector_sdk.htm#%E4%BD%BF%E7% 94%A8%E4%BB%A5-tableau-connector-sdk-%E7%B5%84%E4%BB%B6%E7%9A%84%E9%80%A3%E7%B7%9A%E5%99 %A8) placed under the indicated path
Place the .taco file in the following directory (default location):
for Tableau Desktop
- Windows -
C:\Users\[Windows users]\Documents\My Tableau Repository\Connectors - macOS -
/Users/[user]/Documents/My Tableau Repository/Connectors
For Tableau Prep
- Windows:
C:\Users\[Windows Users]\Documents\My Tableau Prep Repository\Connectors - MacOS:
/Users//Documents/My Tableau Prep Repository/Connectors
For Web workflow, on Tableau Server:
/data/tabsvc/flowqueryservice/Connectors
For Tableau Prep Conductor, on Tableau Server:
/data/tabsvc/flowprocessor/Connectors
For Tableau Server
C:\ProgramData\Tableau\Tableau Server\data\tabsvc\vizqlserver\Connectors
Step 3: Connect to Canner Enterprise
Prepare Personal Access Token before use
Canner Enterprise connector will show up in the list of sources
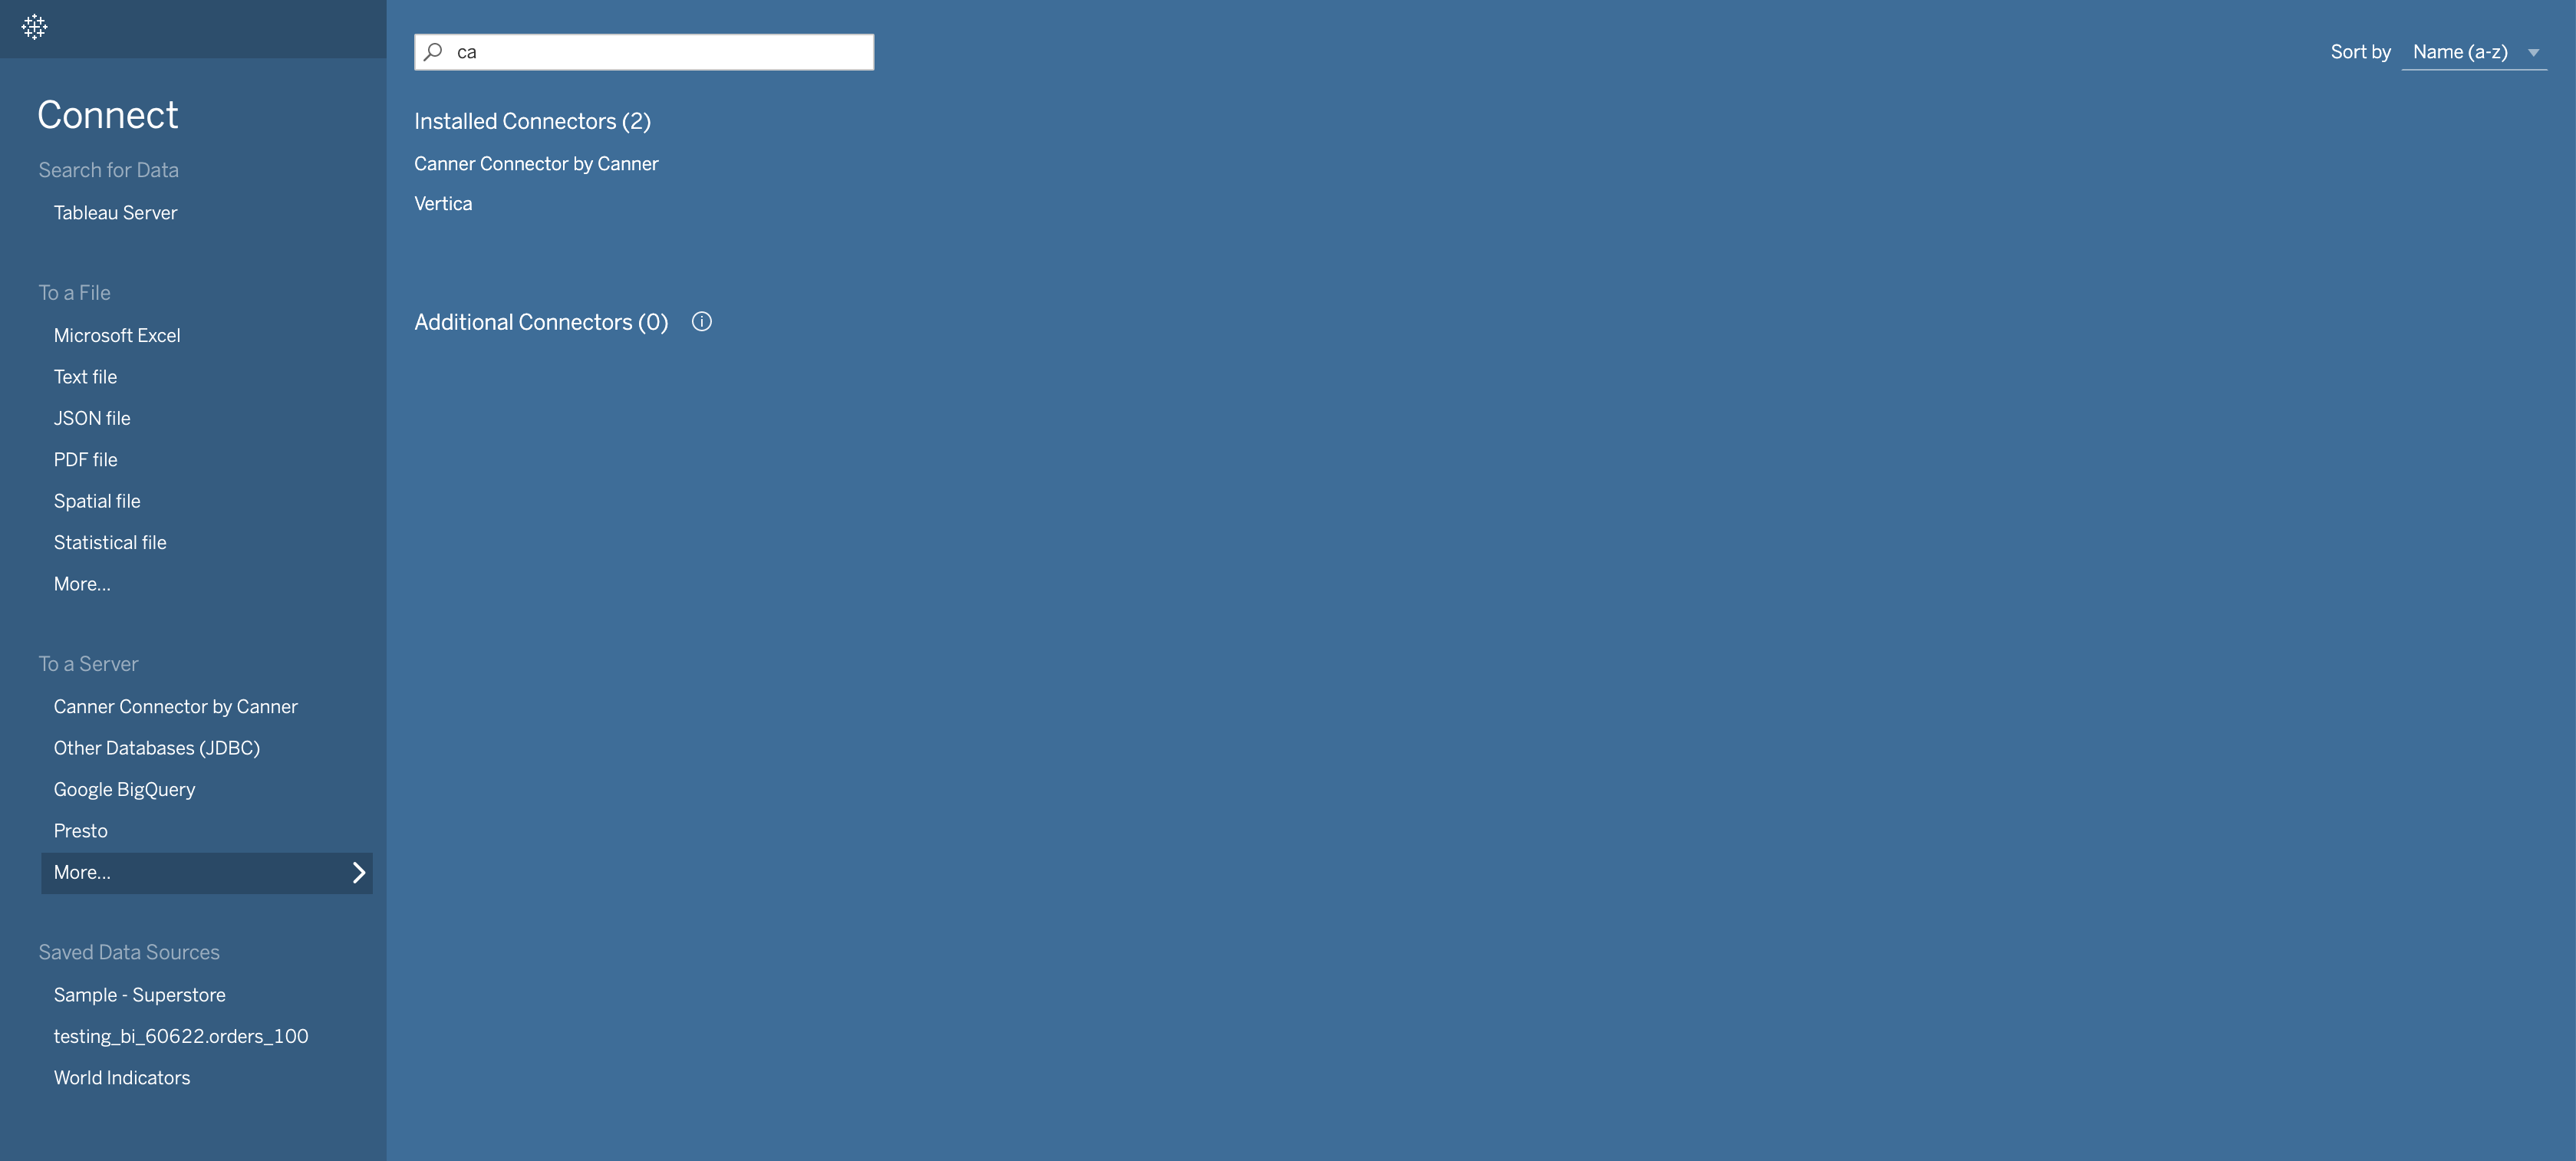
After selecting Canner Connector by Canner, fill in the login information and log in
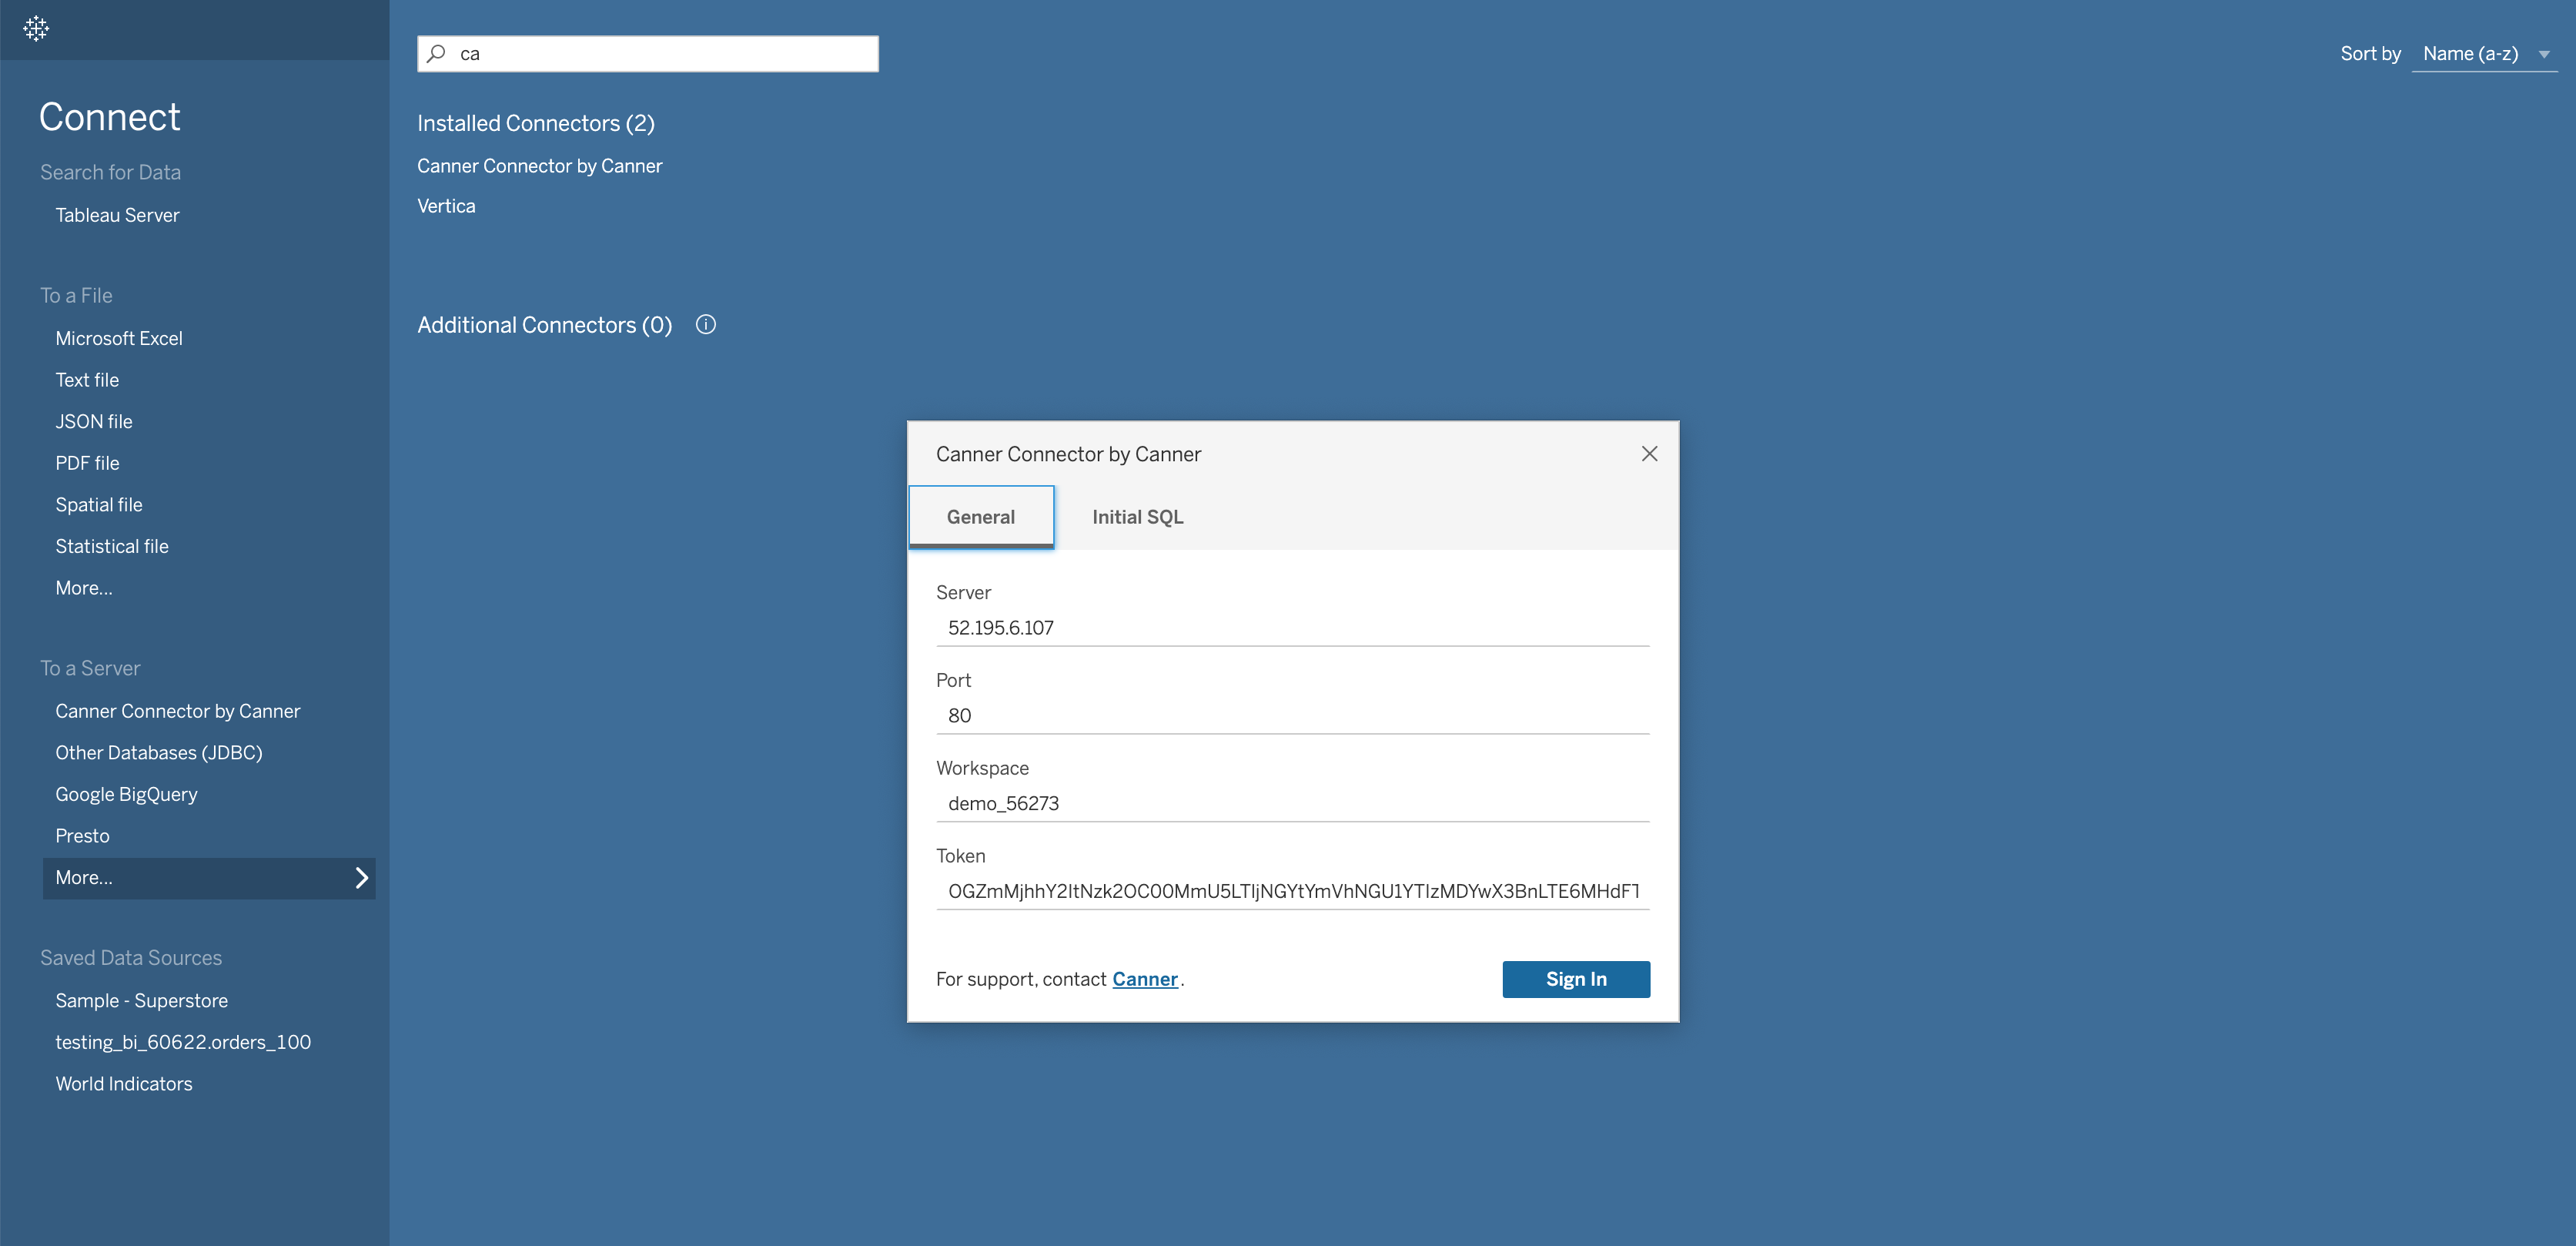
- Server: Canner Server URL, IP address or Host, excluding
http,https, Ex:my-canner.abc.com - Port: Support Https, use
443; if not, please use80 - Workspace: Please go to
Config>SQL Namein the Workspace you want to connect to, and copy the SQL Name of the Workspace - Token: Paste Personal Access Token
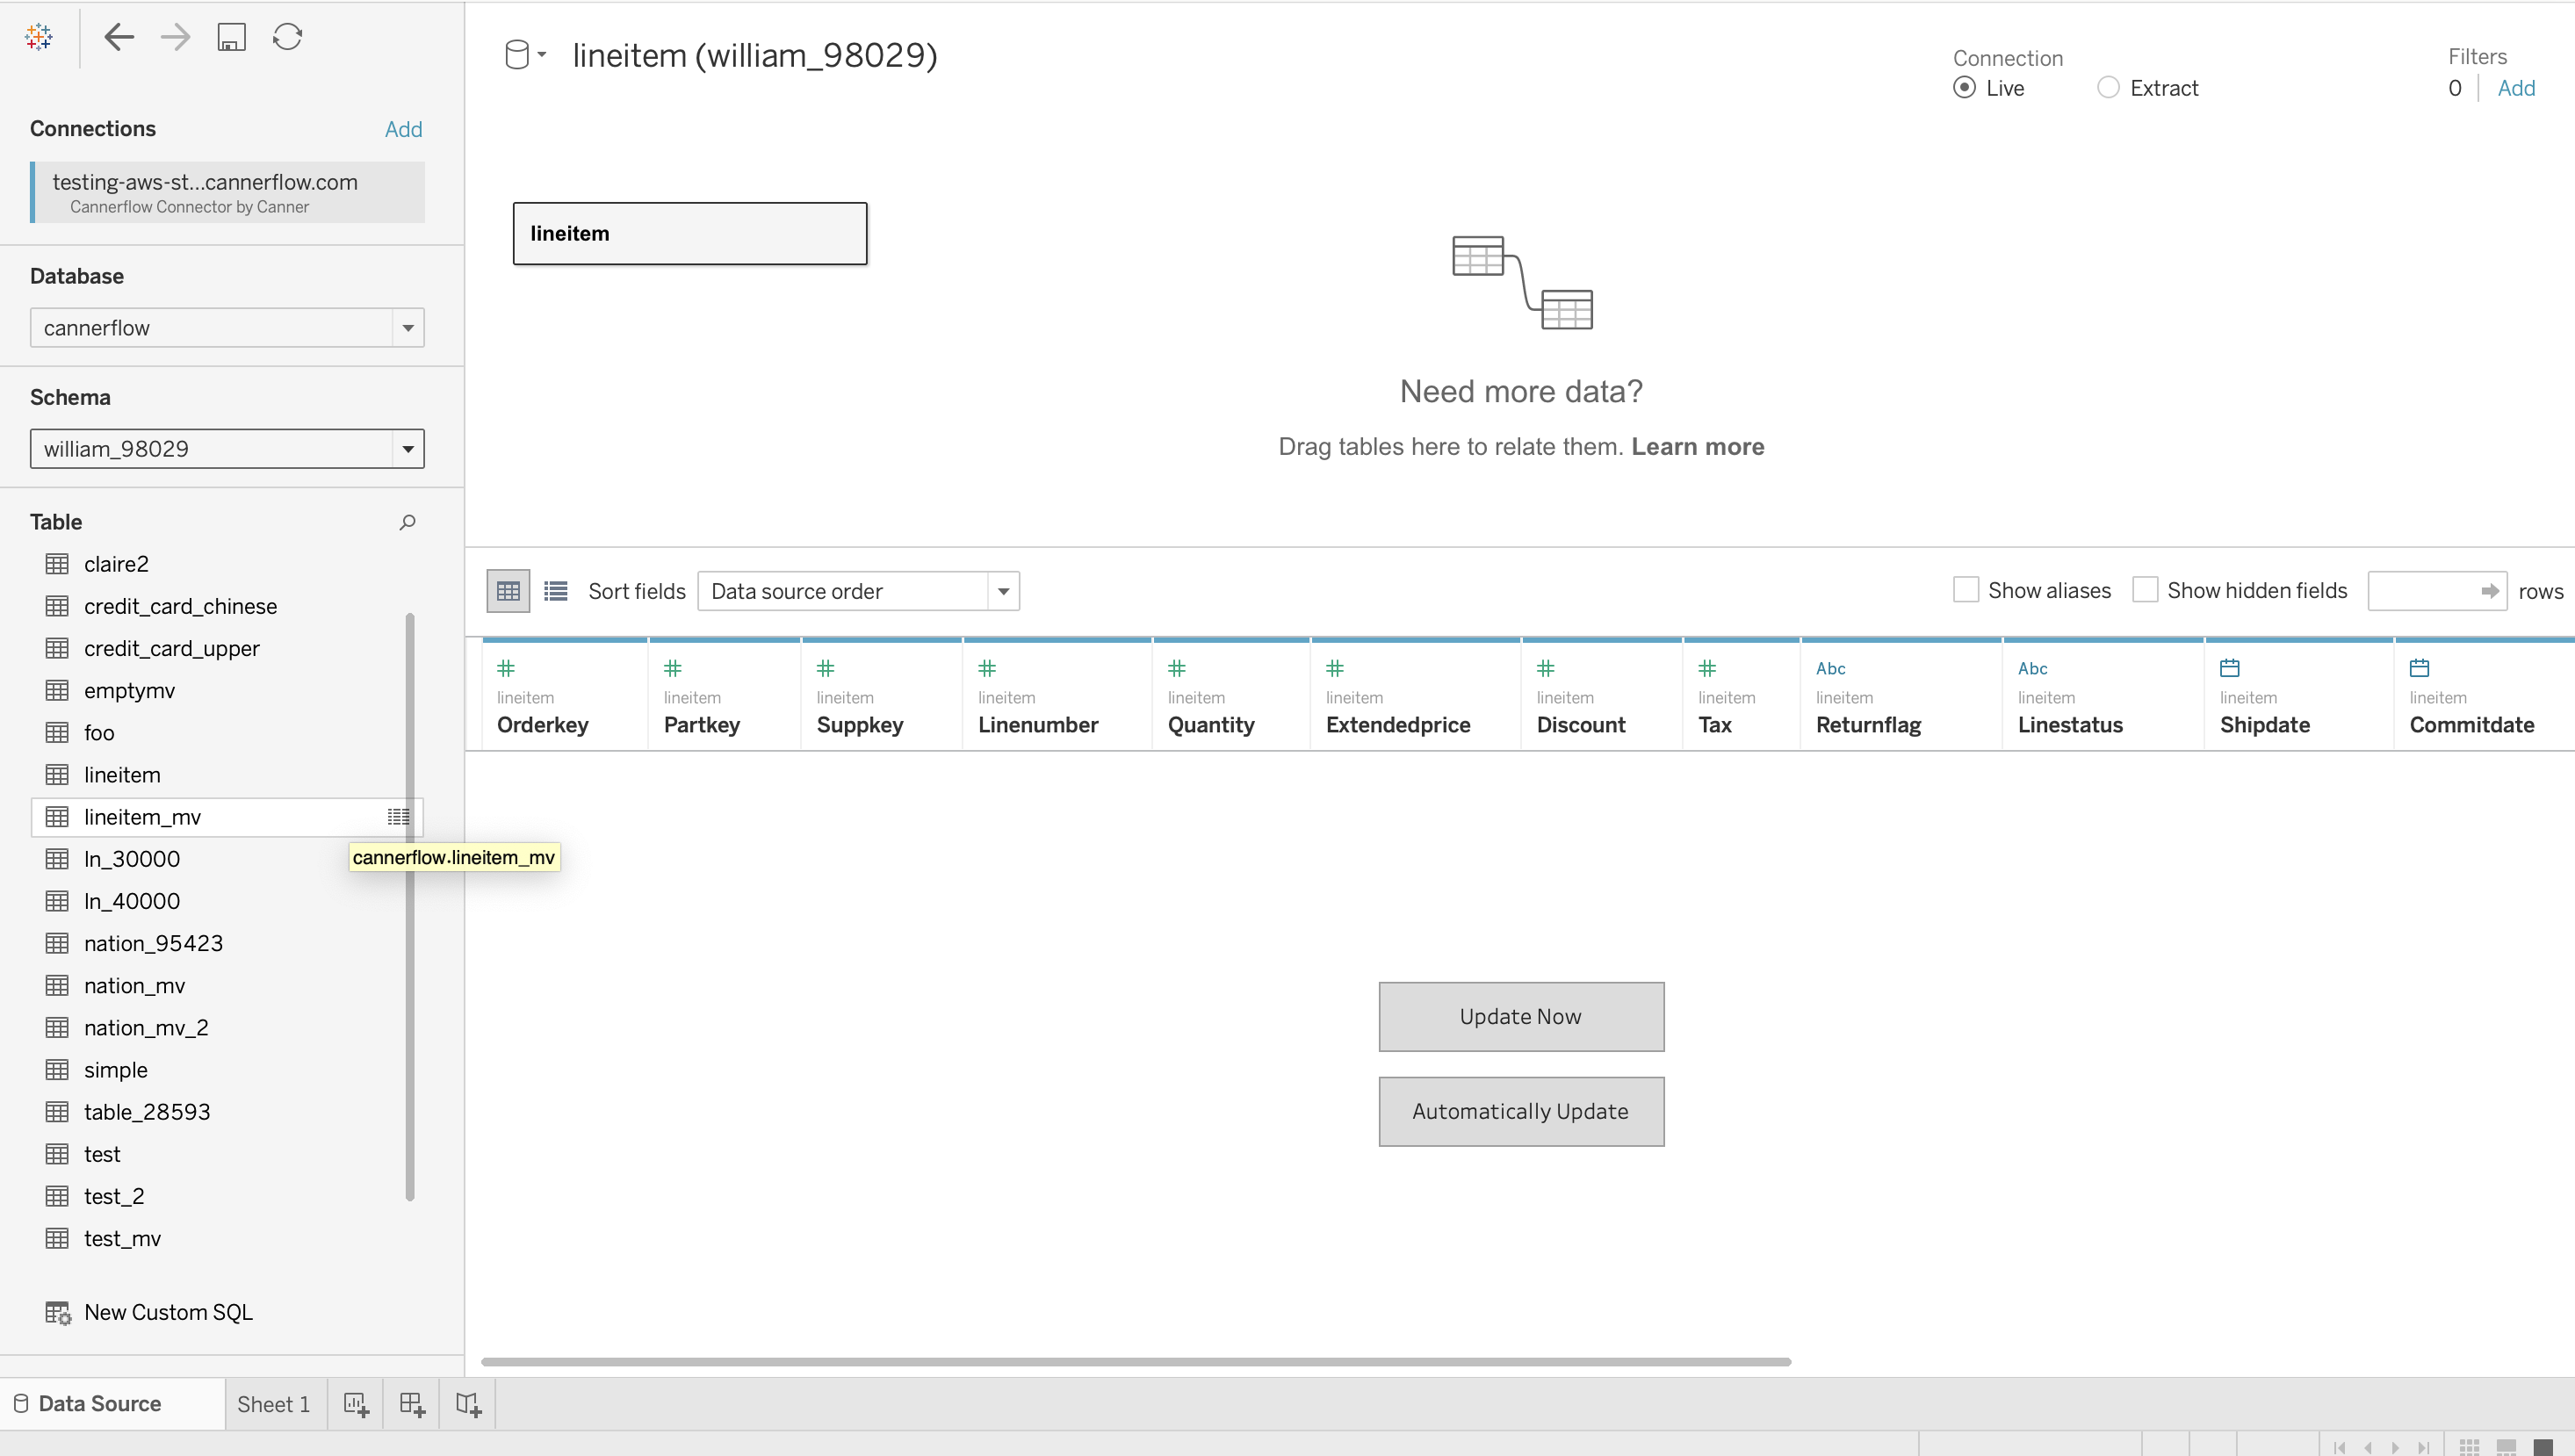
The Workspace profile on Canner Enterprise is then available in Tableau
How to configure Canner Connector in Tableau Server
- Linux
- Windows
1. Create a folder (ex: /home/<user>/tableau_connectors), and put Canner Connector (.taco) under it
2. Use the command to set the path of the connector
tsm configuration set -k native_api.connect_plugins_path -v <path to folder created in step 1>
For example, using /home/<user>/tableau_connectors as folder would be
tsm configuration set -k native_api.connect_plugins_path -v /home/<user>/tableau_connectors
3. Place the JDBC Driver
Place Canner Enterprise JDBC Driver under /opt/tableau/tableau_driver/jdbc
4. Apply changes
Apply changes to the Tableau server; this command will restart Tableau Server.
tsm pending-changes apply
1. Put Canner Connector (.taco) under C:\ProgramData\Tableau\Tableau Server\data\tabsvc\vizqlserver\Connectors
2. Place Canner Enterprise JDBC Driver under C:\Program Files\Tableau\Drivers
3. Restart Tableau Server
Next, you can publish the Tableau report connected to Canner Enterprise to Tableau Server.