Using Power BI Push Dataset
You will learn
- How to use Power BI Push Dataset
- How to set schedule update
- FAQ
Power BI Service Settings
In the next few steps, you need to set the relevant permissions on the Power BI Service and obtain the required information to fill in Canner Enterprise later.
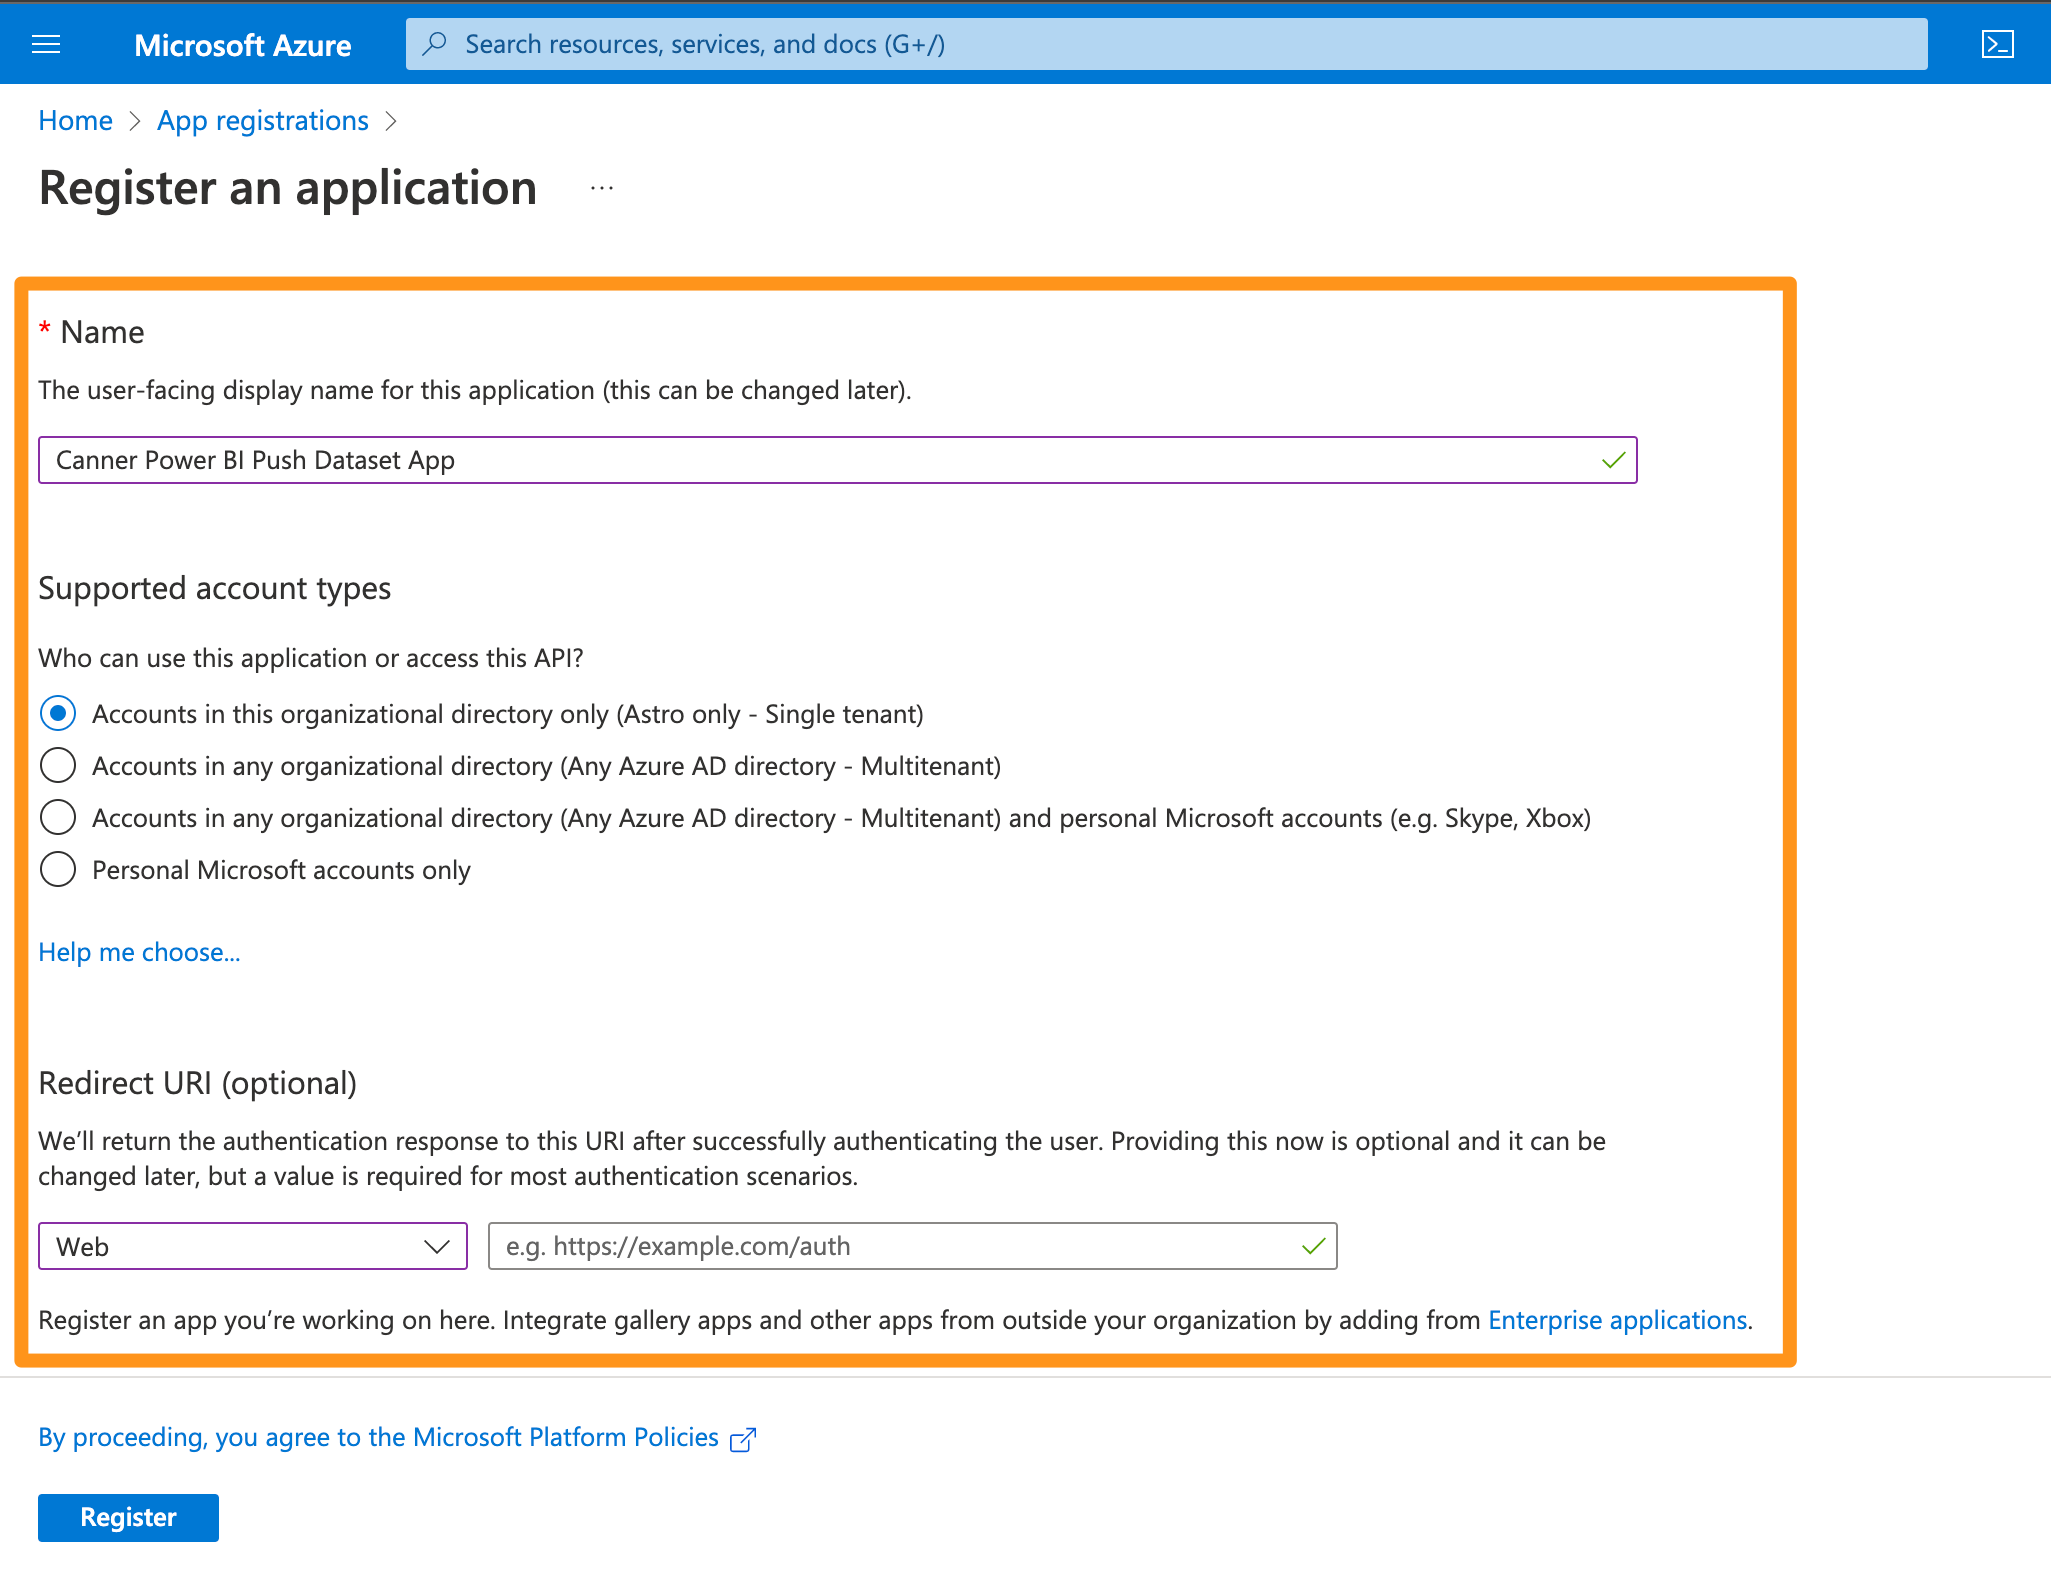
Step 1: Application Registration
- Application Registration > Create an application with the name
Canner Power BI Push Dataset App.
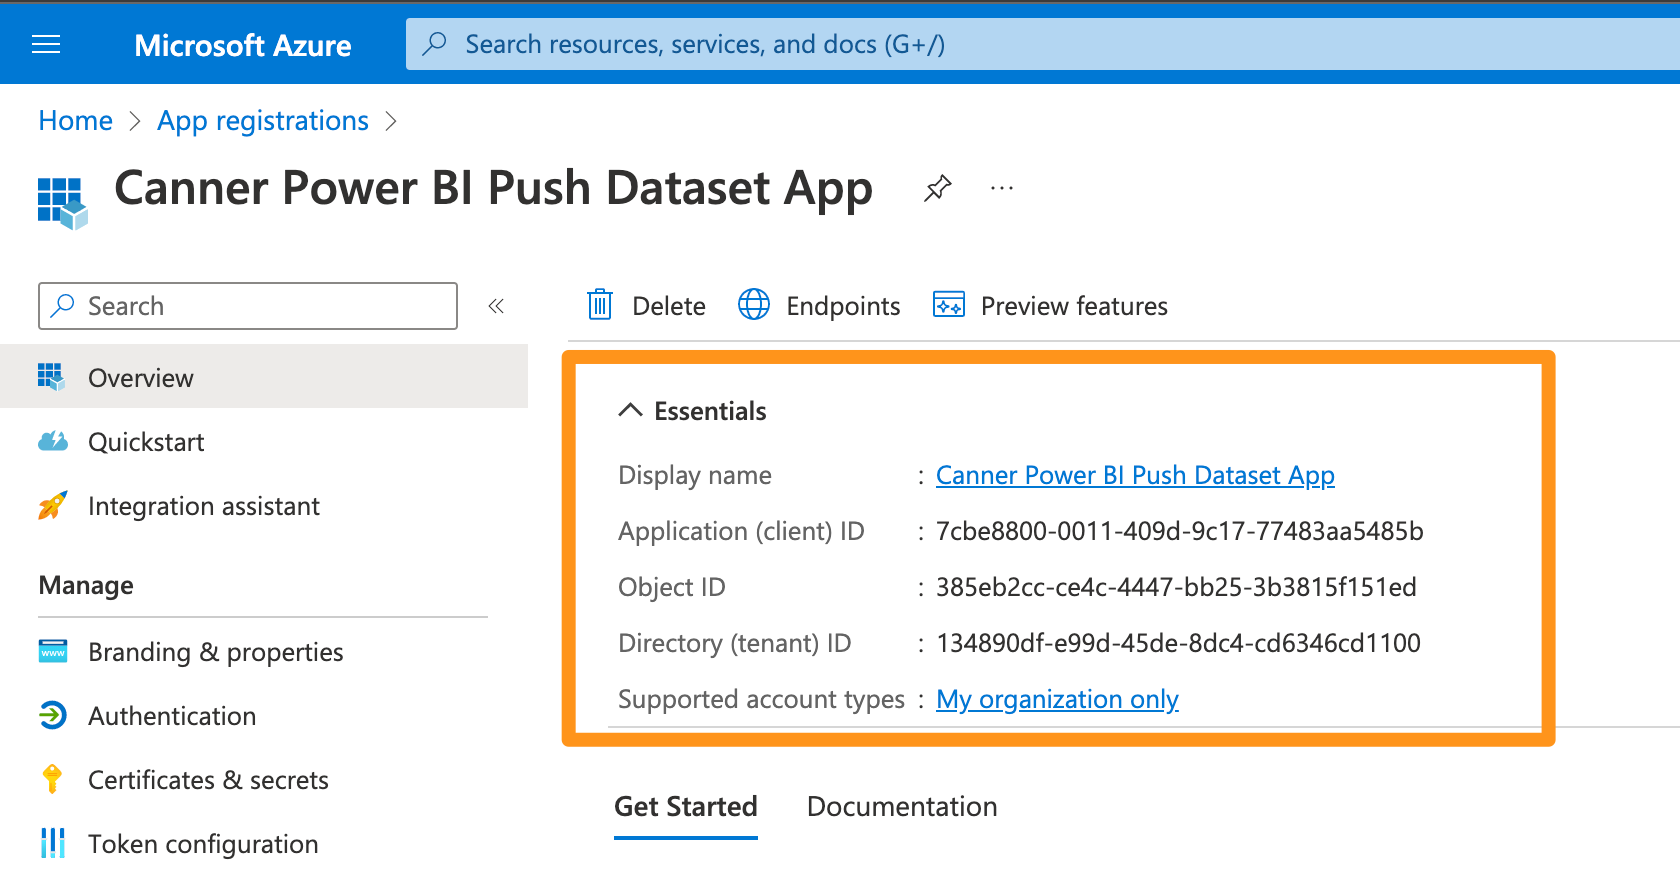
- Click the created Canner Enterprise Power BI Push Dataset App > copy the "Application (Client) Identification Code (Application ID)" and "Directory (Tenant User) Identification Code (Tenant ID)"; you will use them in the following steps.
 ·
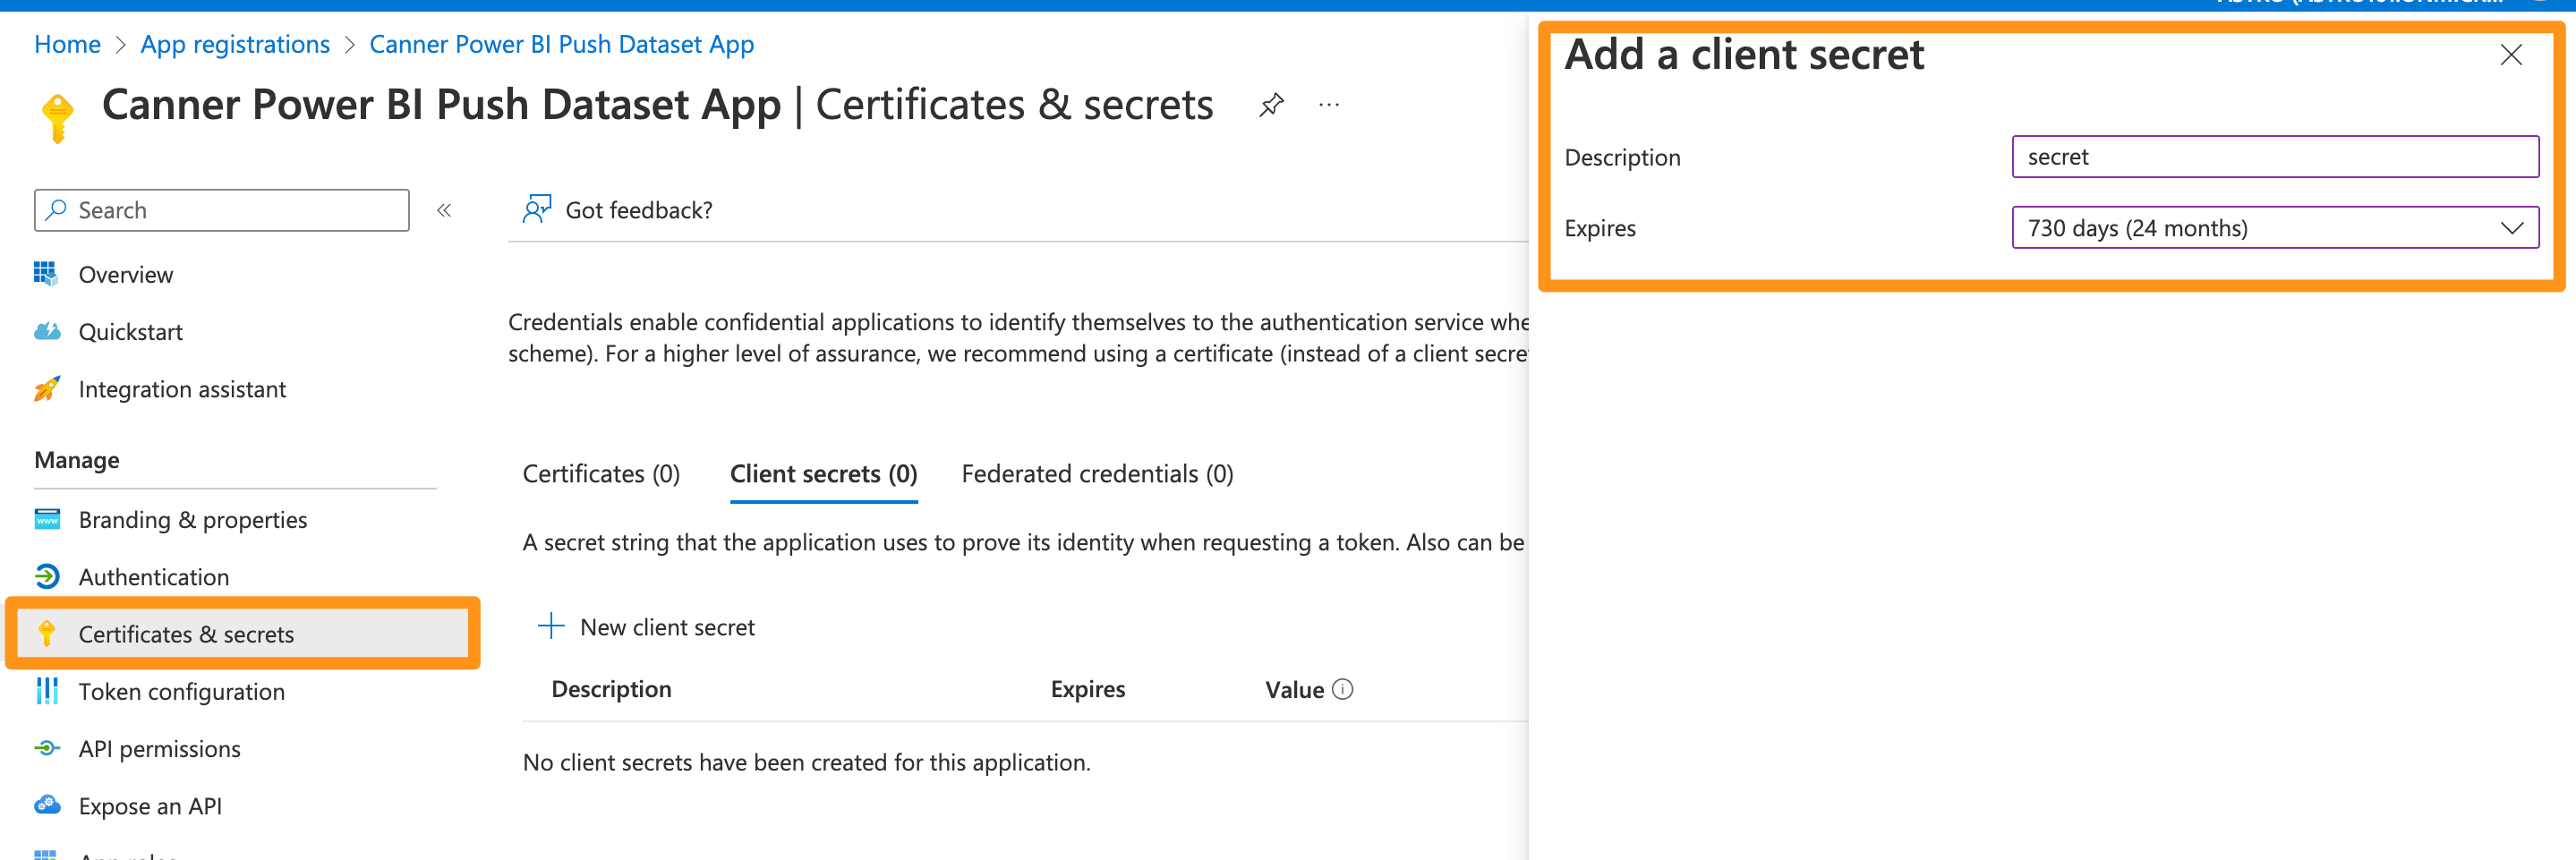
3. Click Credentials and Secrets > In the
·
3. Click Credentials and Secrets > In the Client Password section, add a new client password, which can be set for longer (24 months is better) when creating it to avoid expiration problems.
- Copy the value of
Canner Power BI Push Datasetsecret (Application secret).
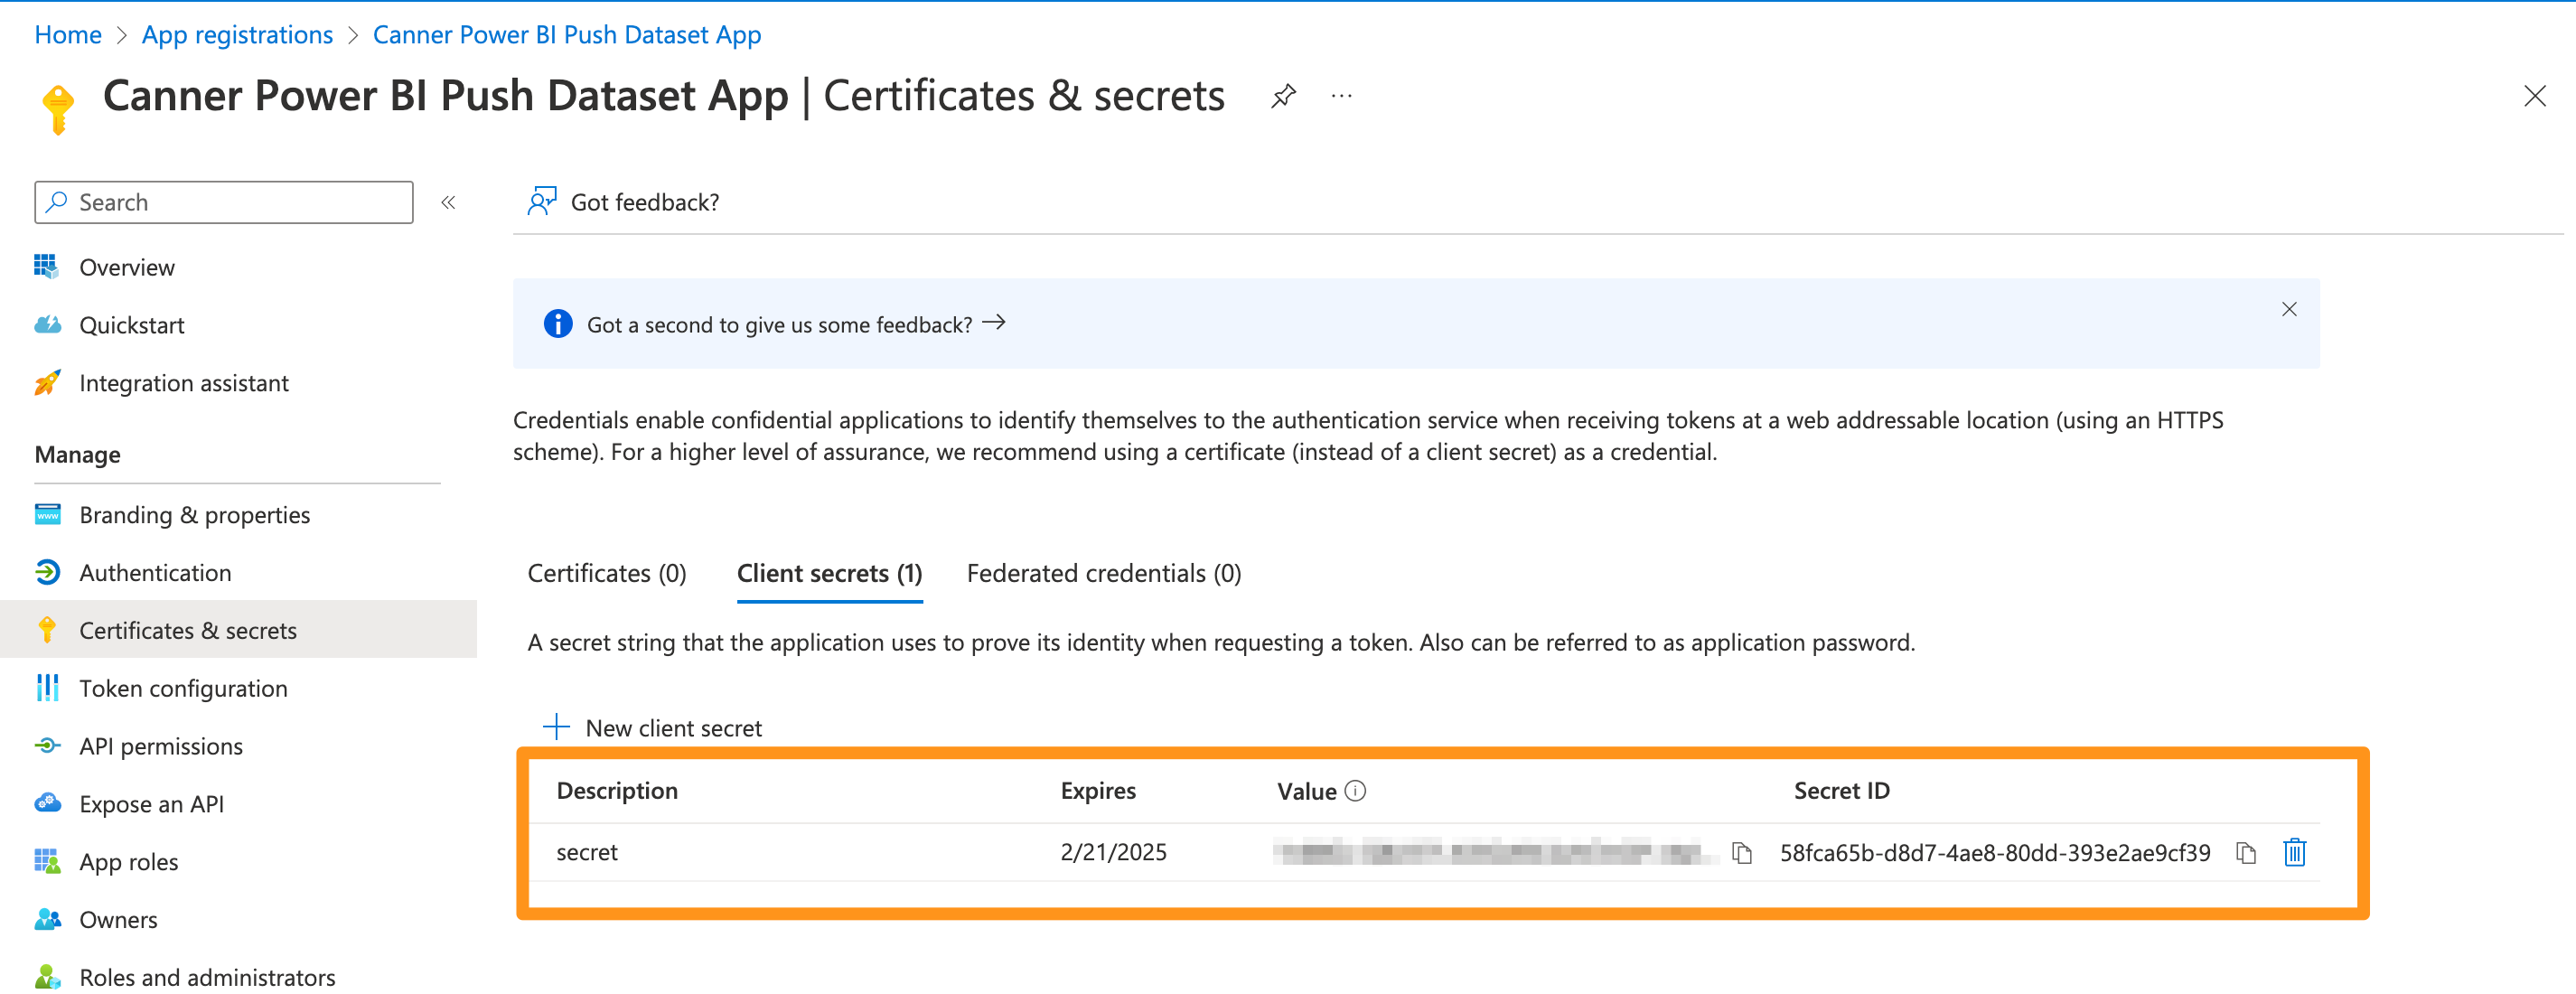
In this step, please copy the value of the secret key, and you will not be able to copy the token if you look back later.
Step 2: Create Security Groups
- Go to Azure Active Directory > Groups, and click "Add Group"
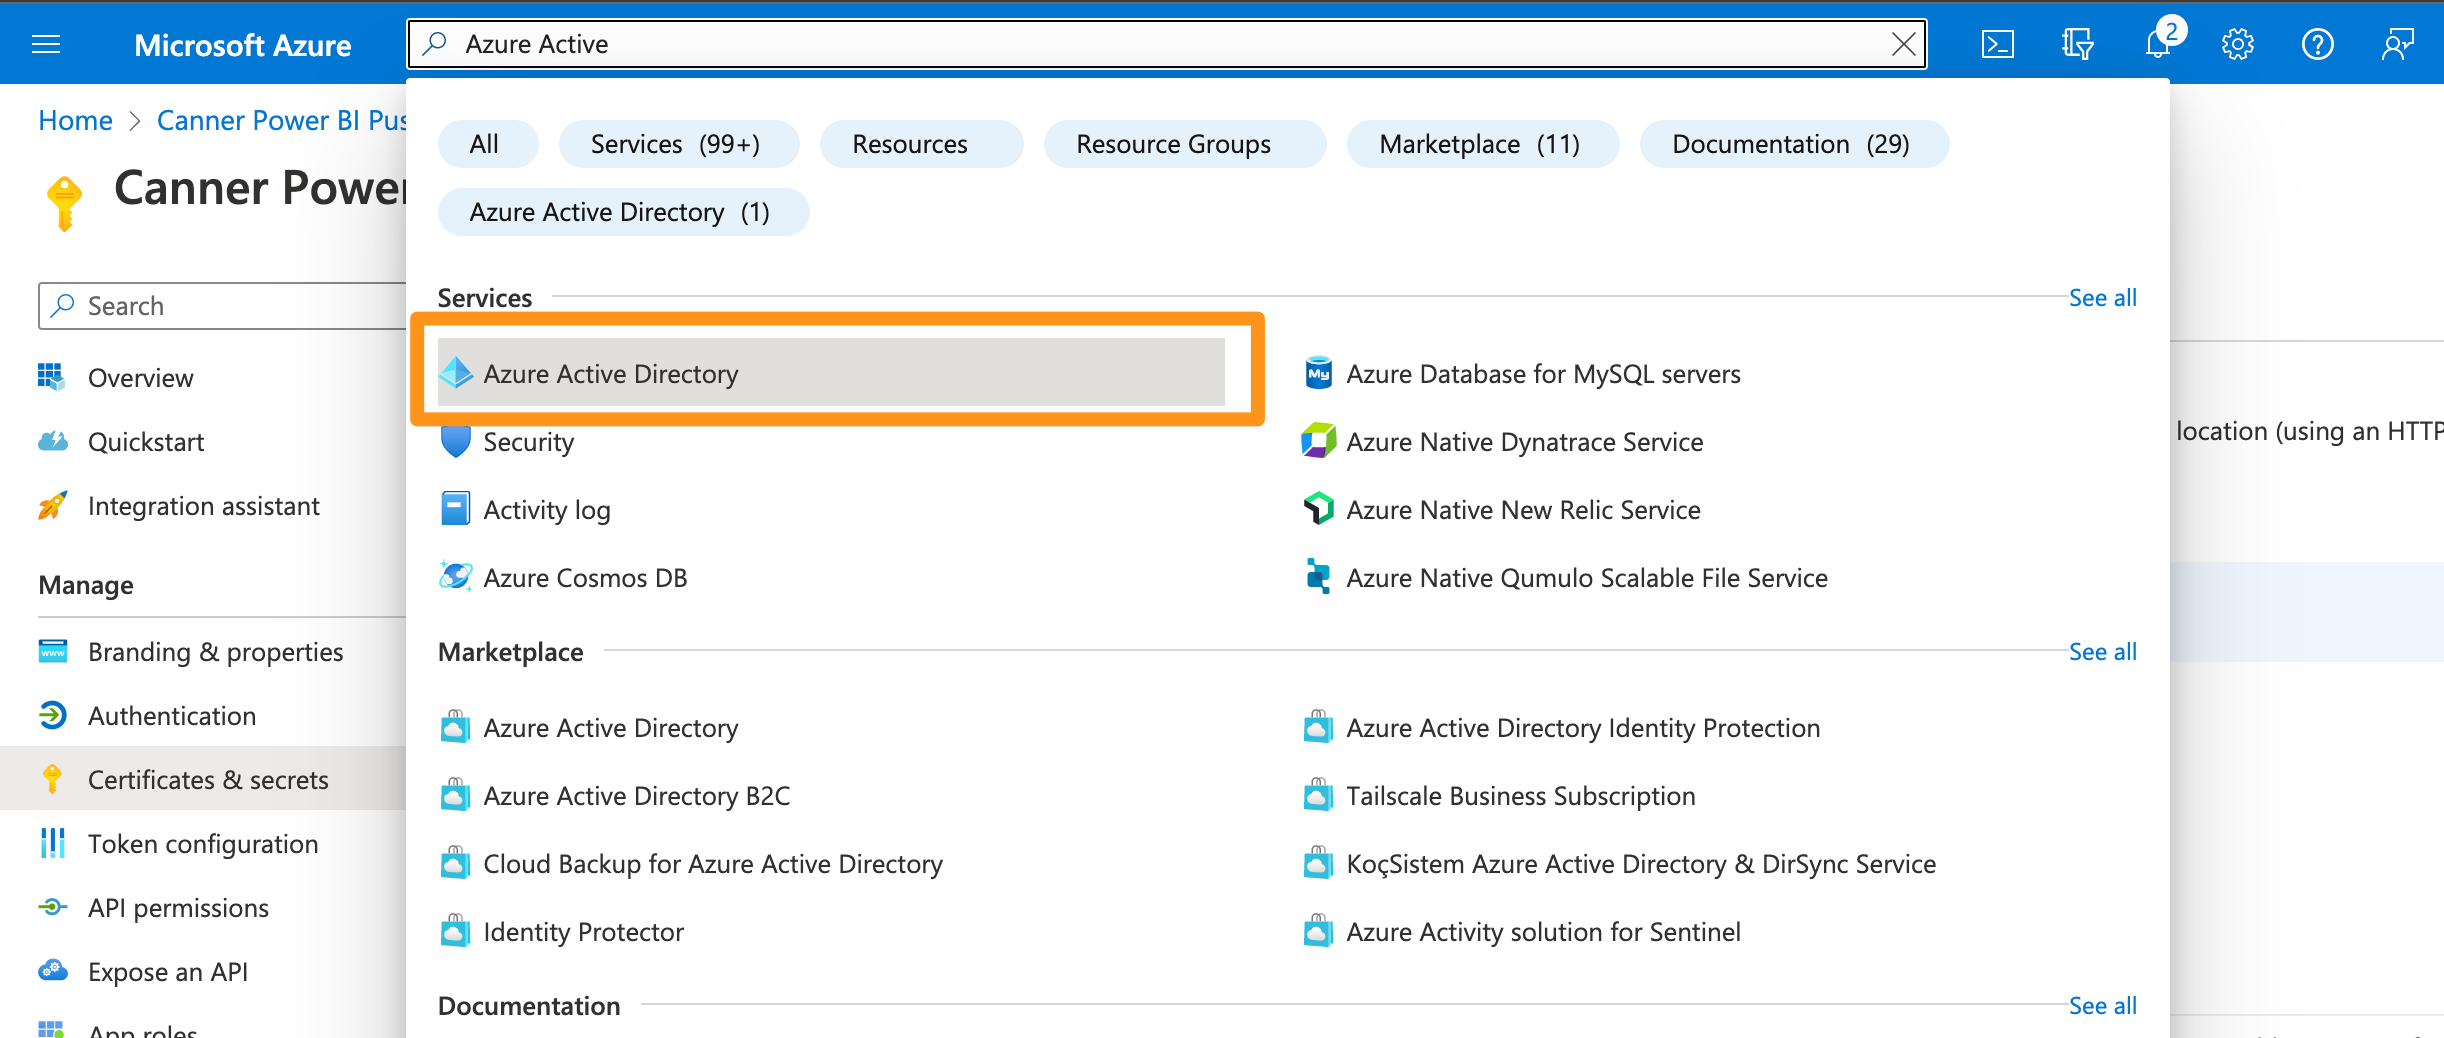
Search for
Azure Active Directory
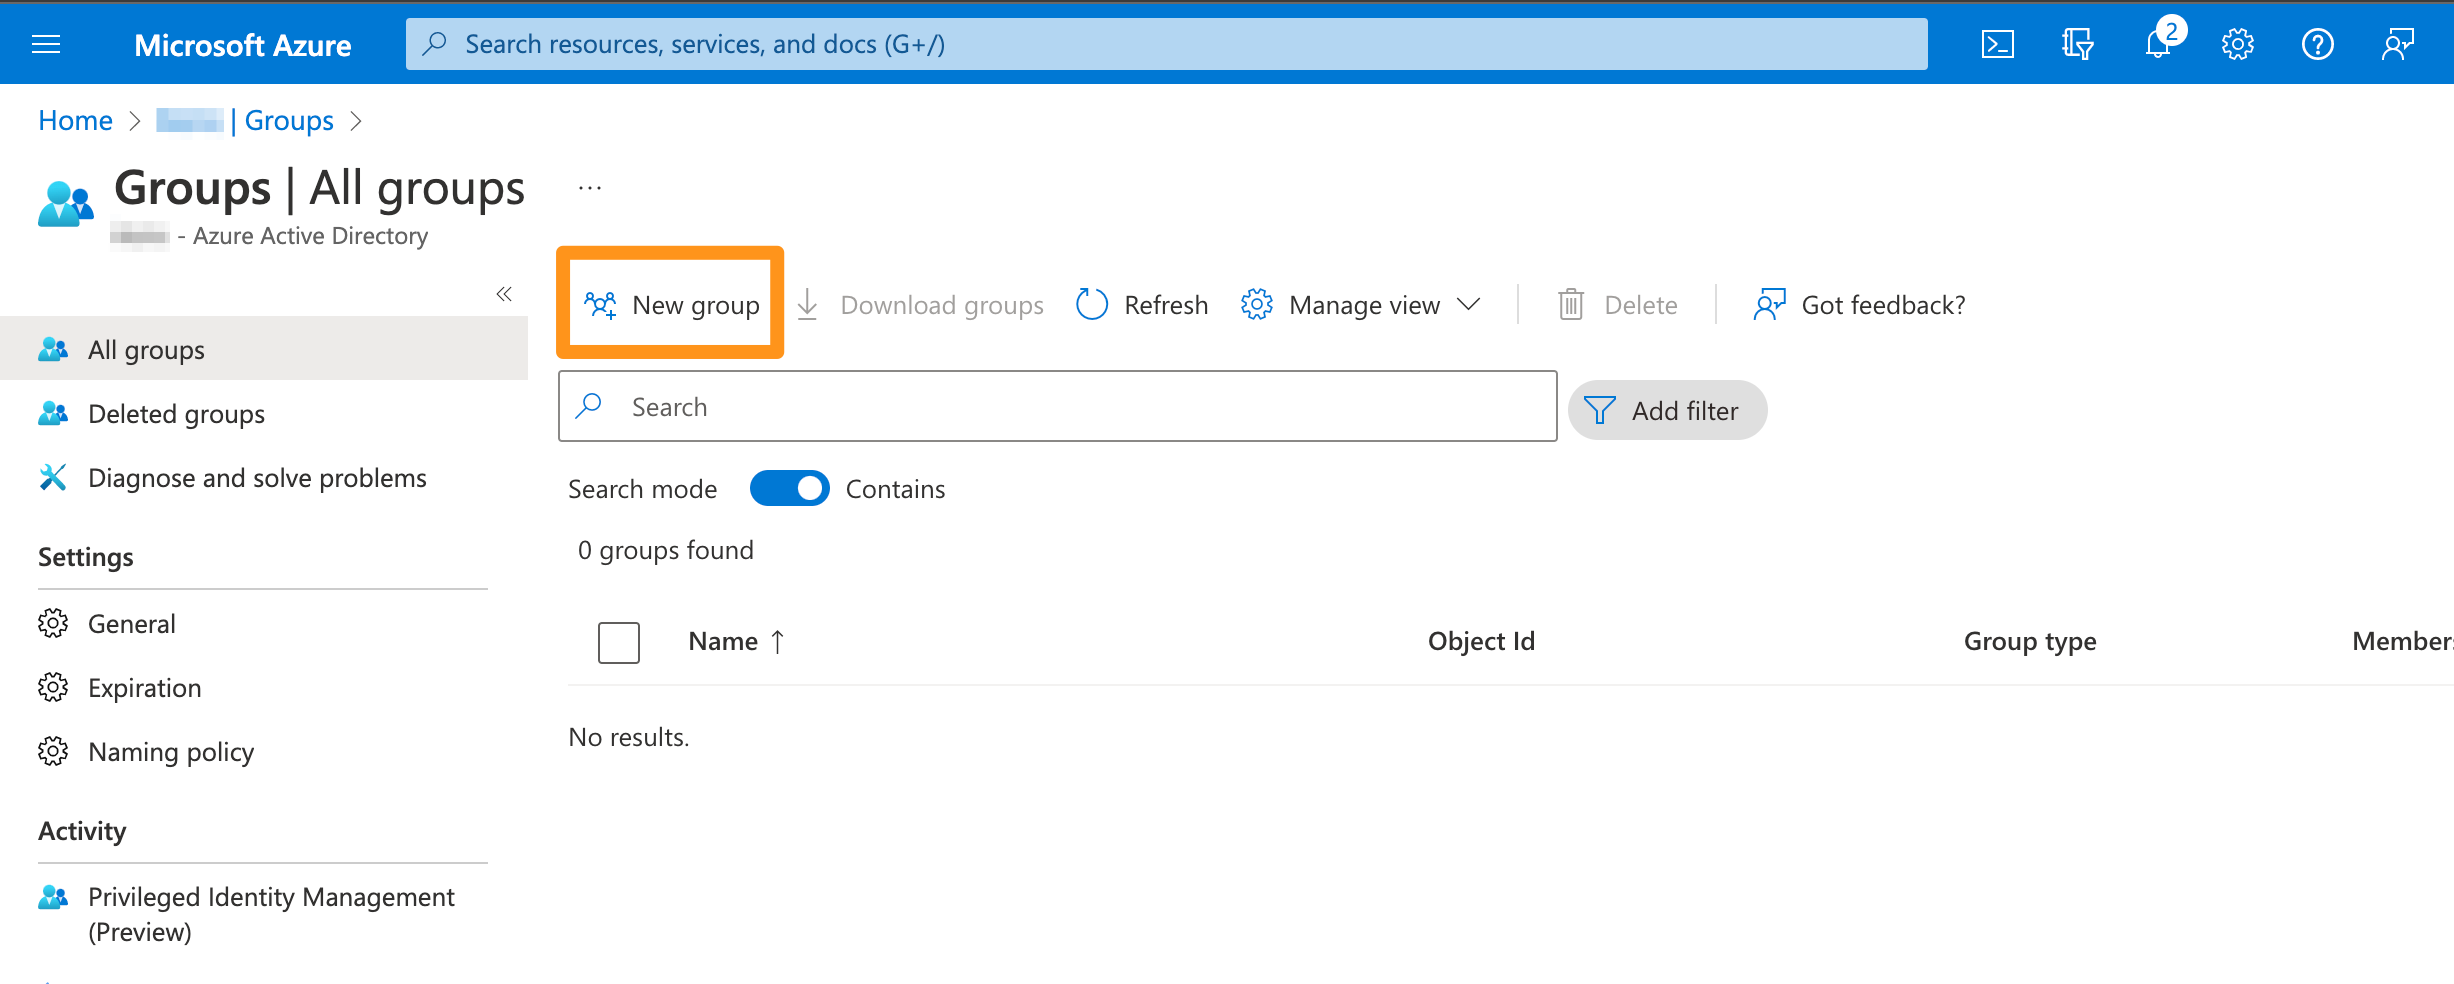
Click "Add Group" on this page
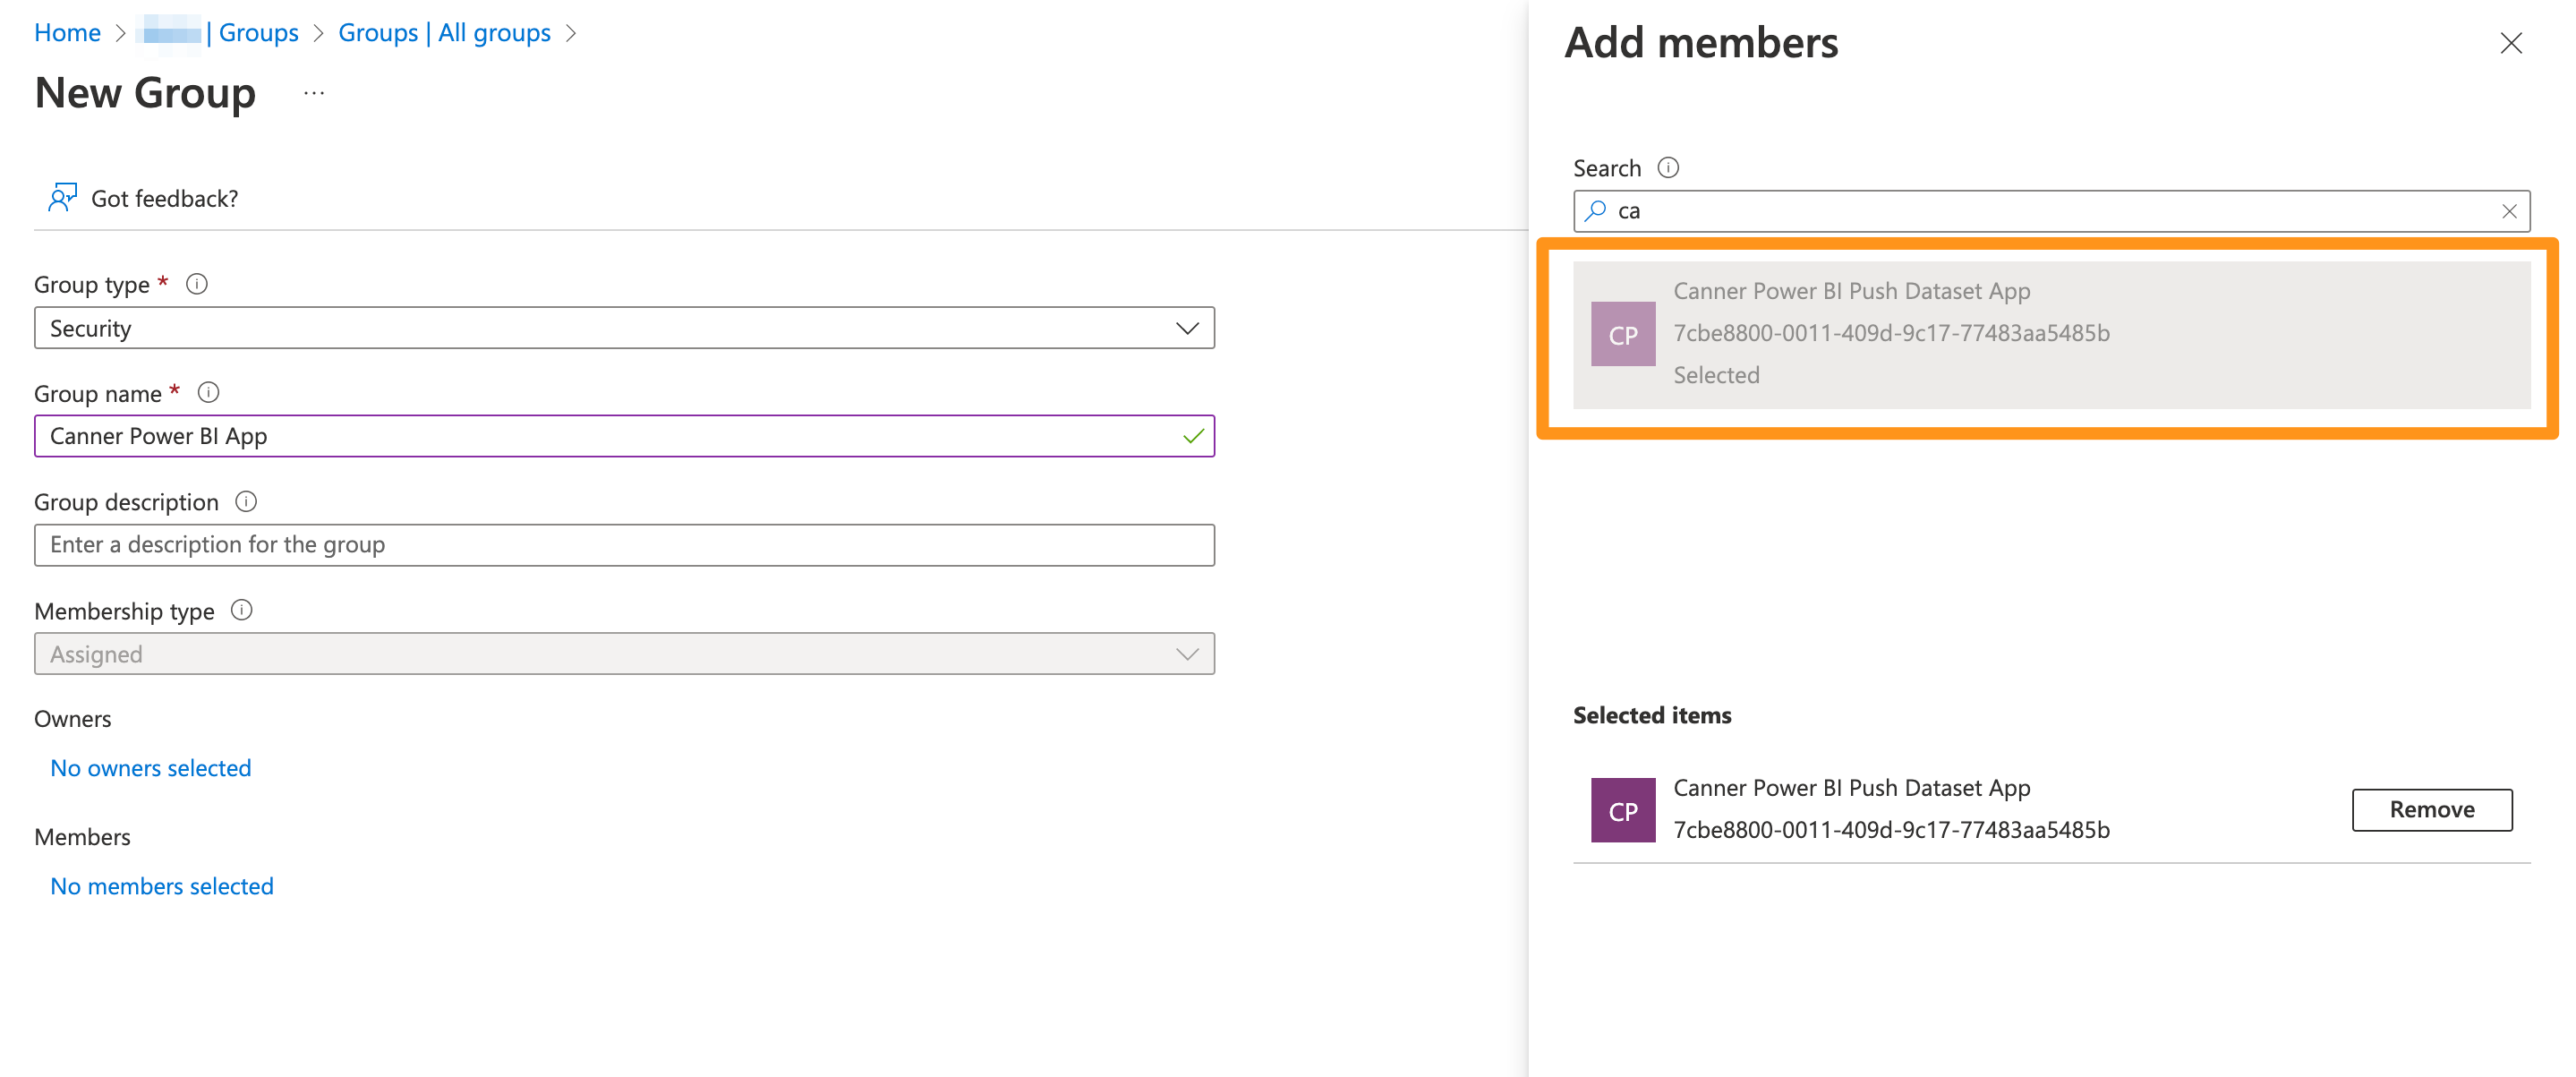
- When creating, enter the newly created application
Canner Power BI Push Dataset Appin "Members" and select "Security" for the group type
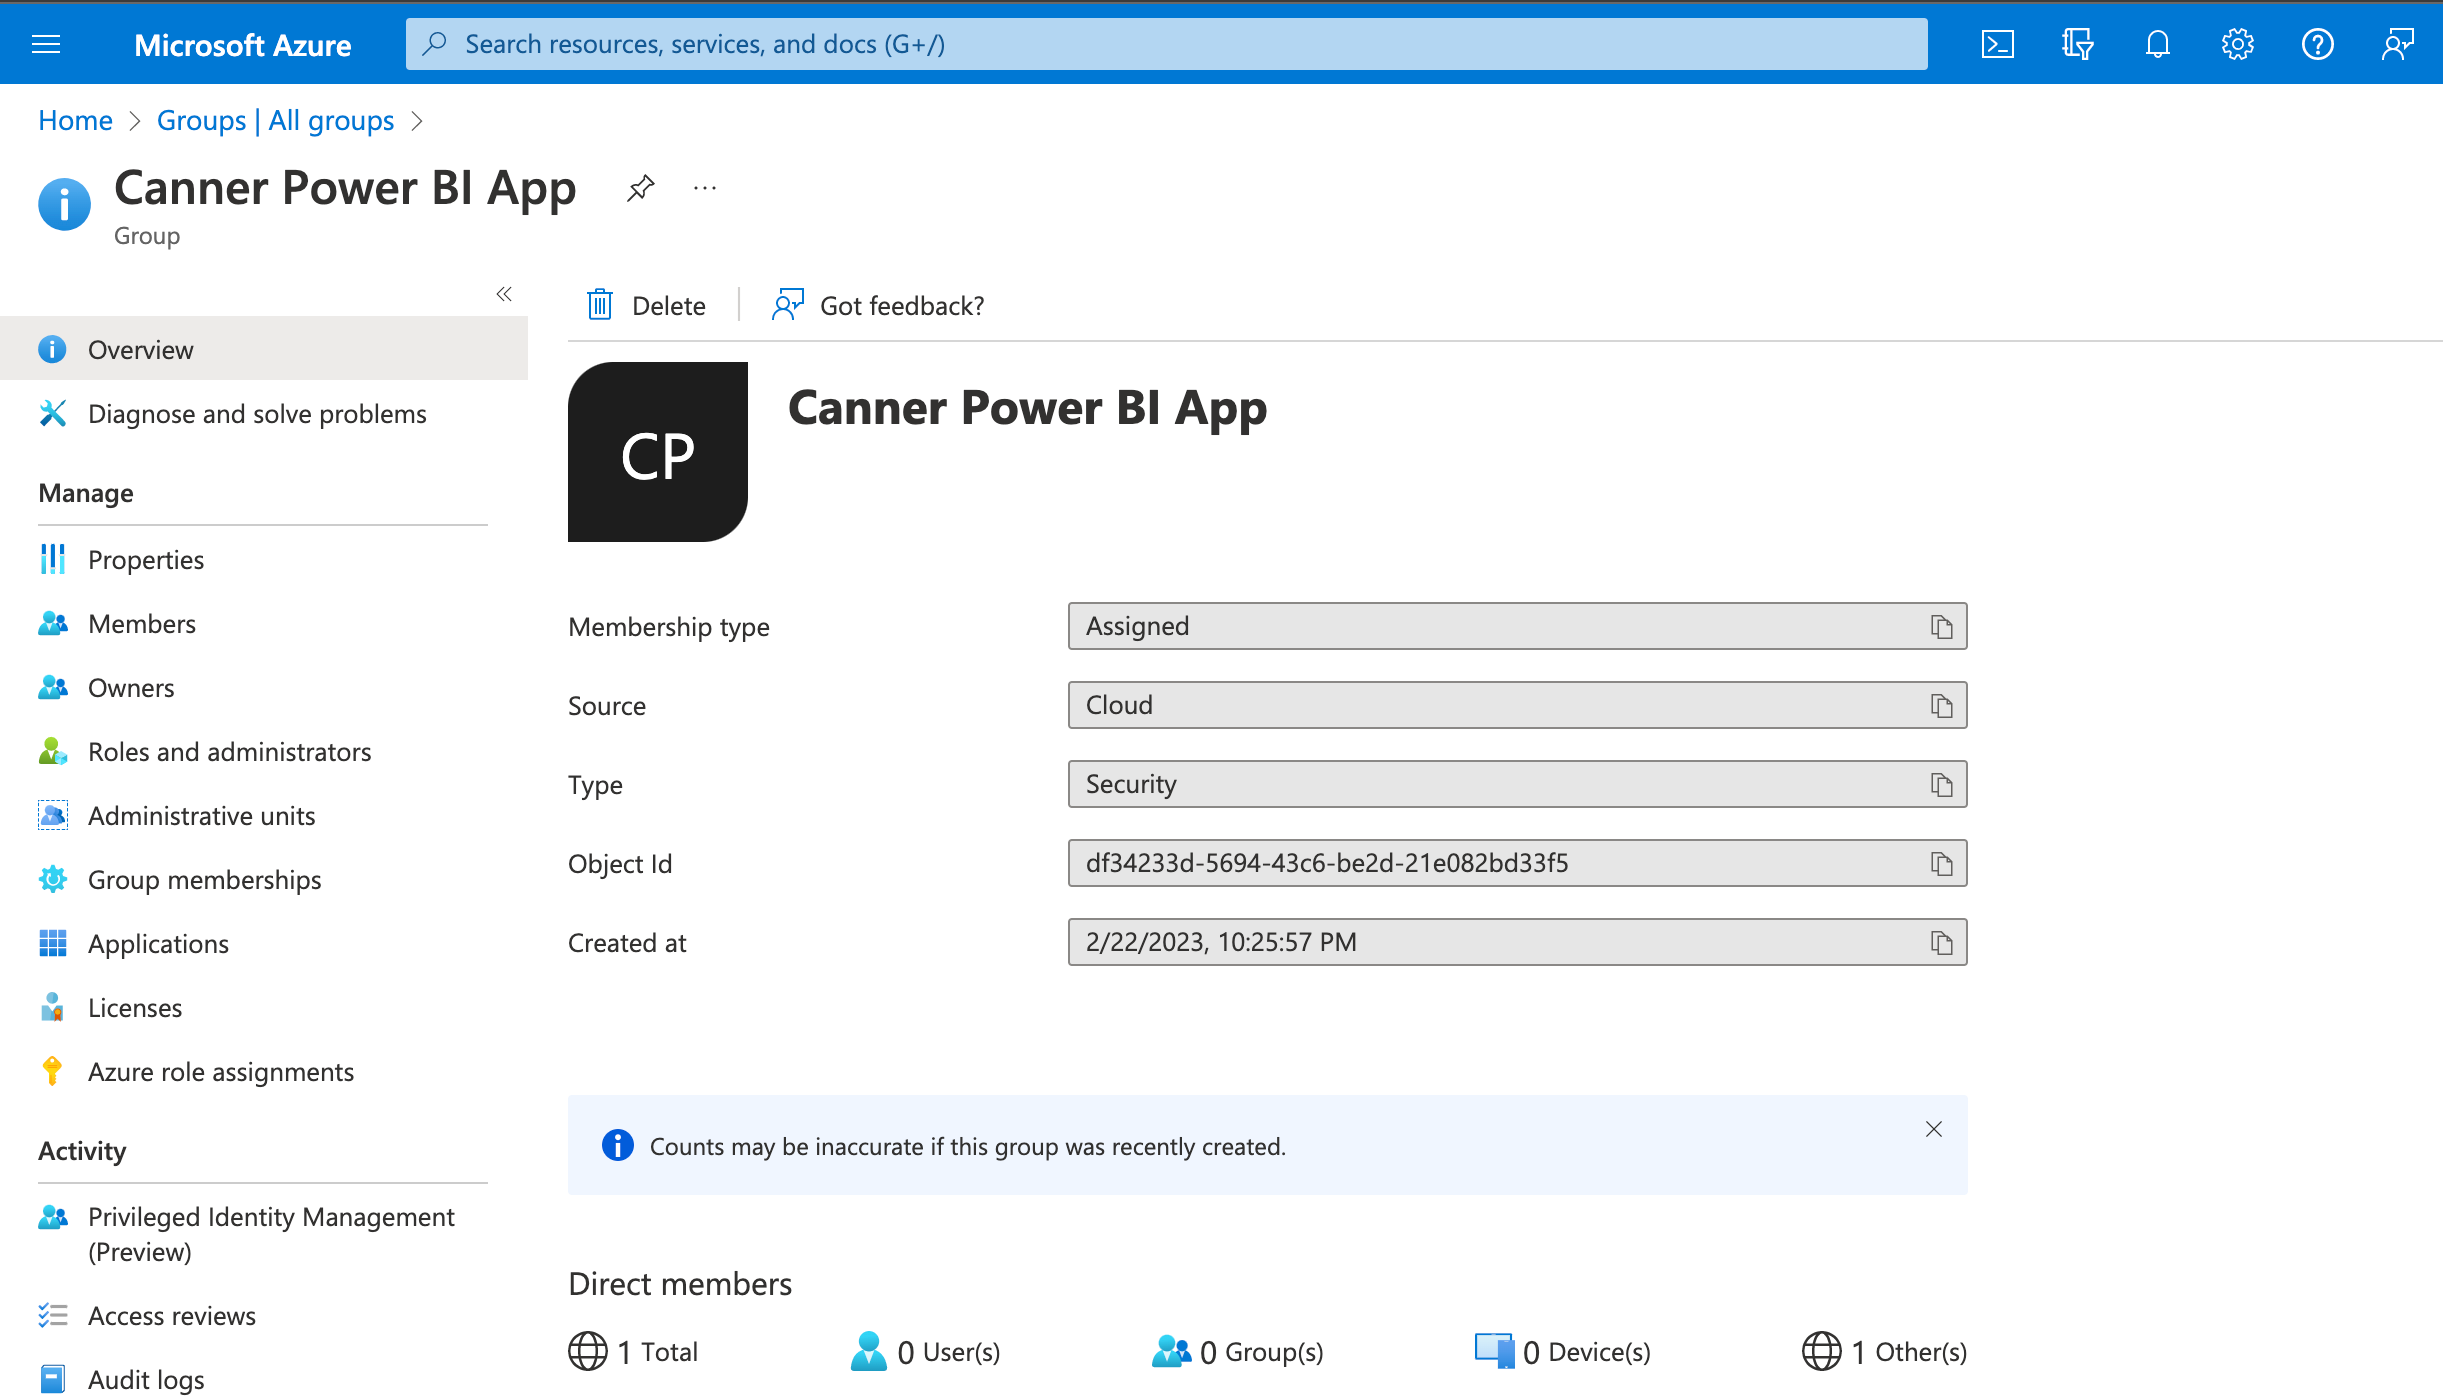
- After complete the establishment, the following picture is shown:
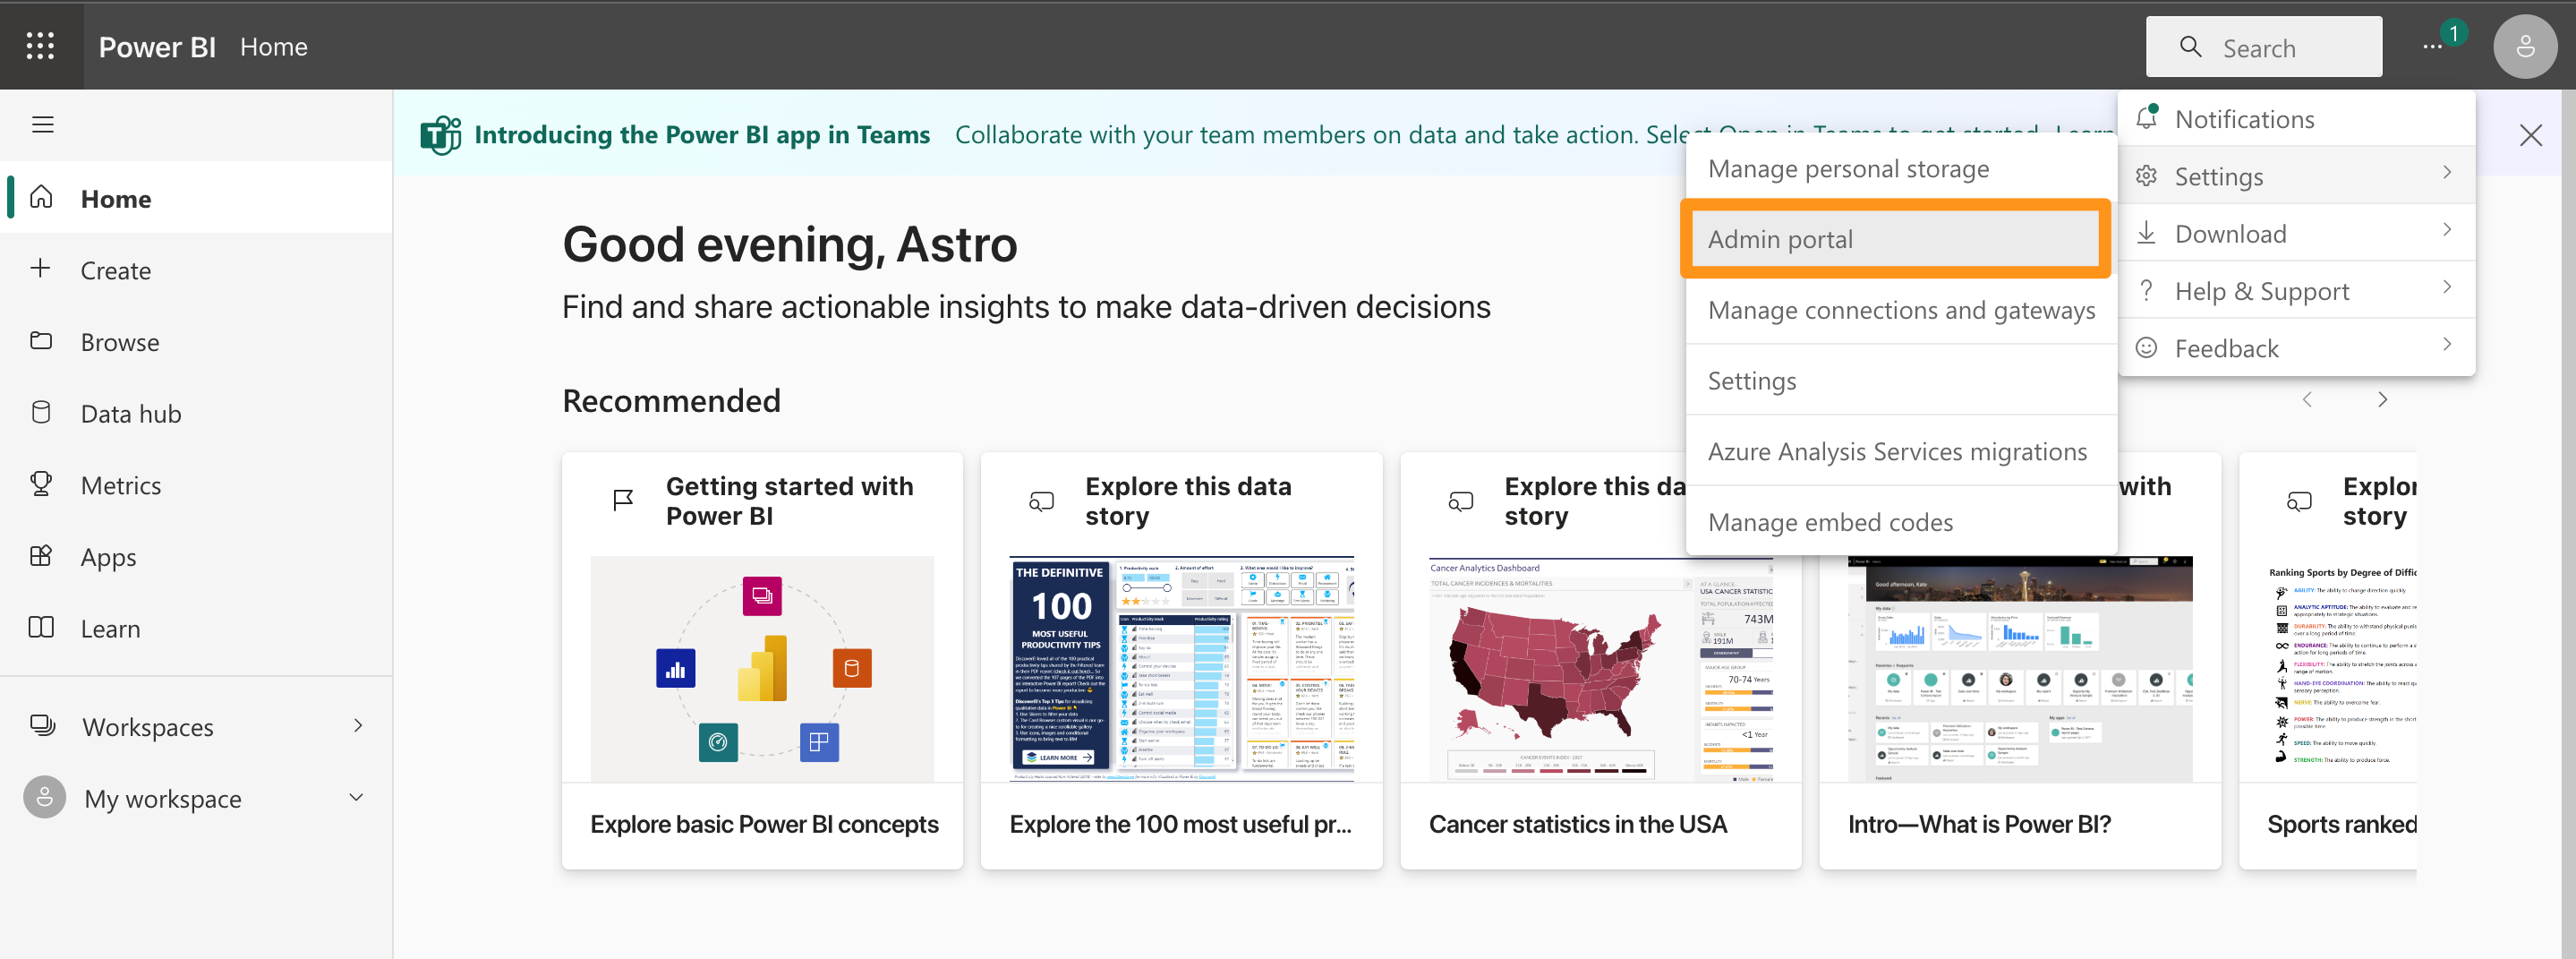
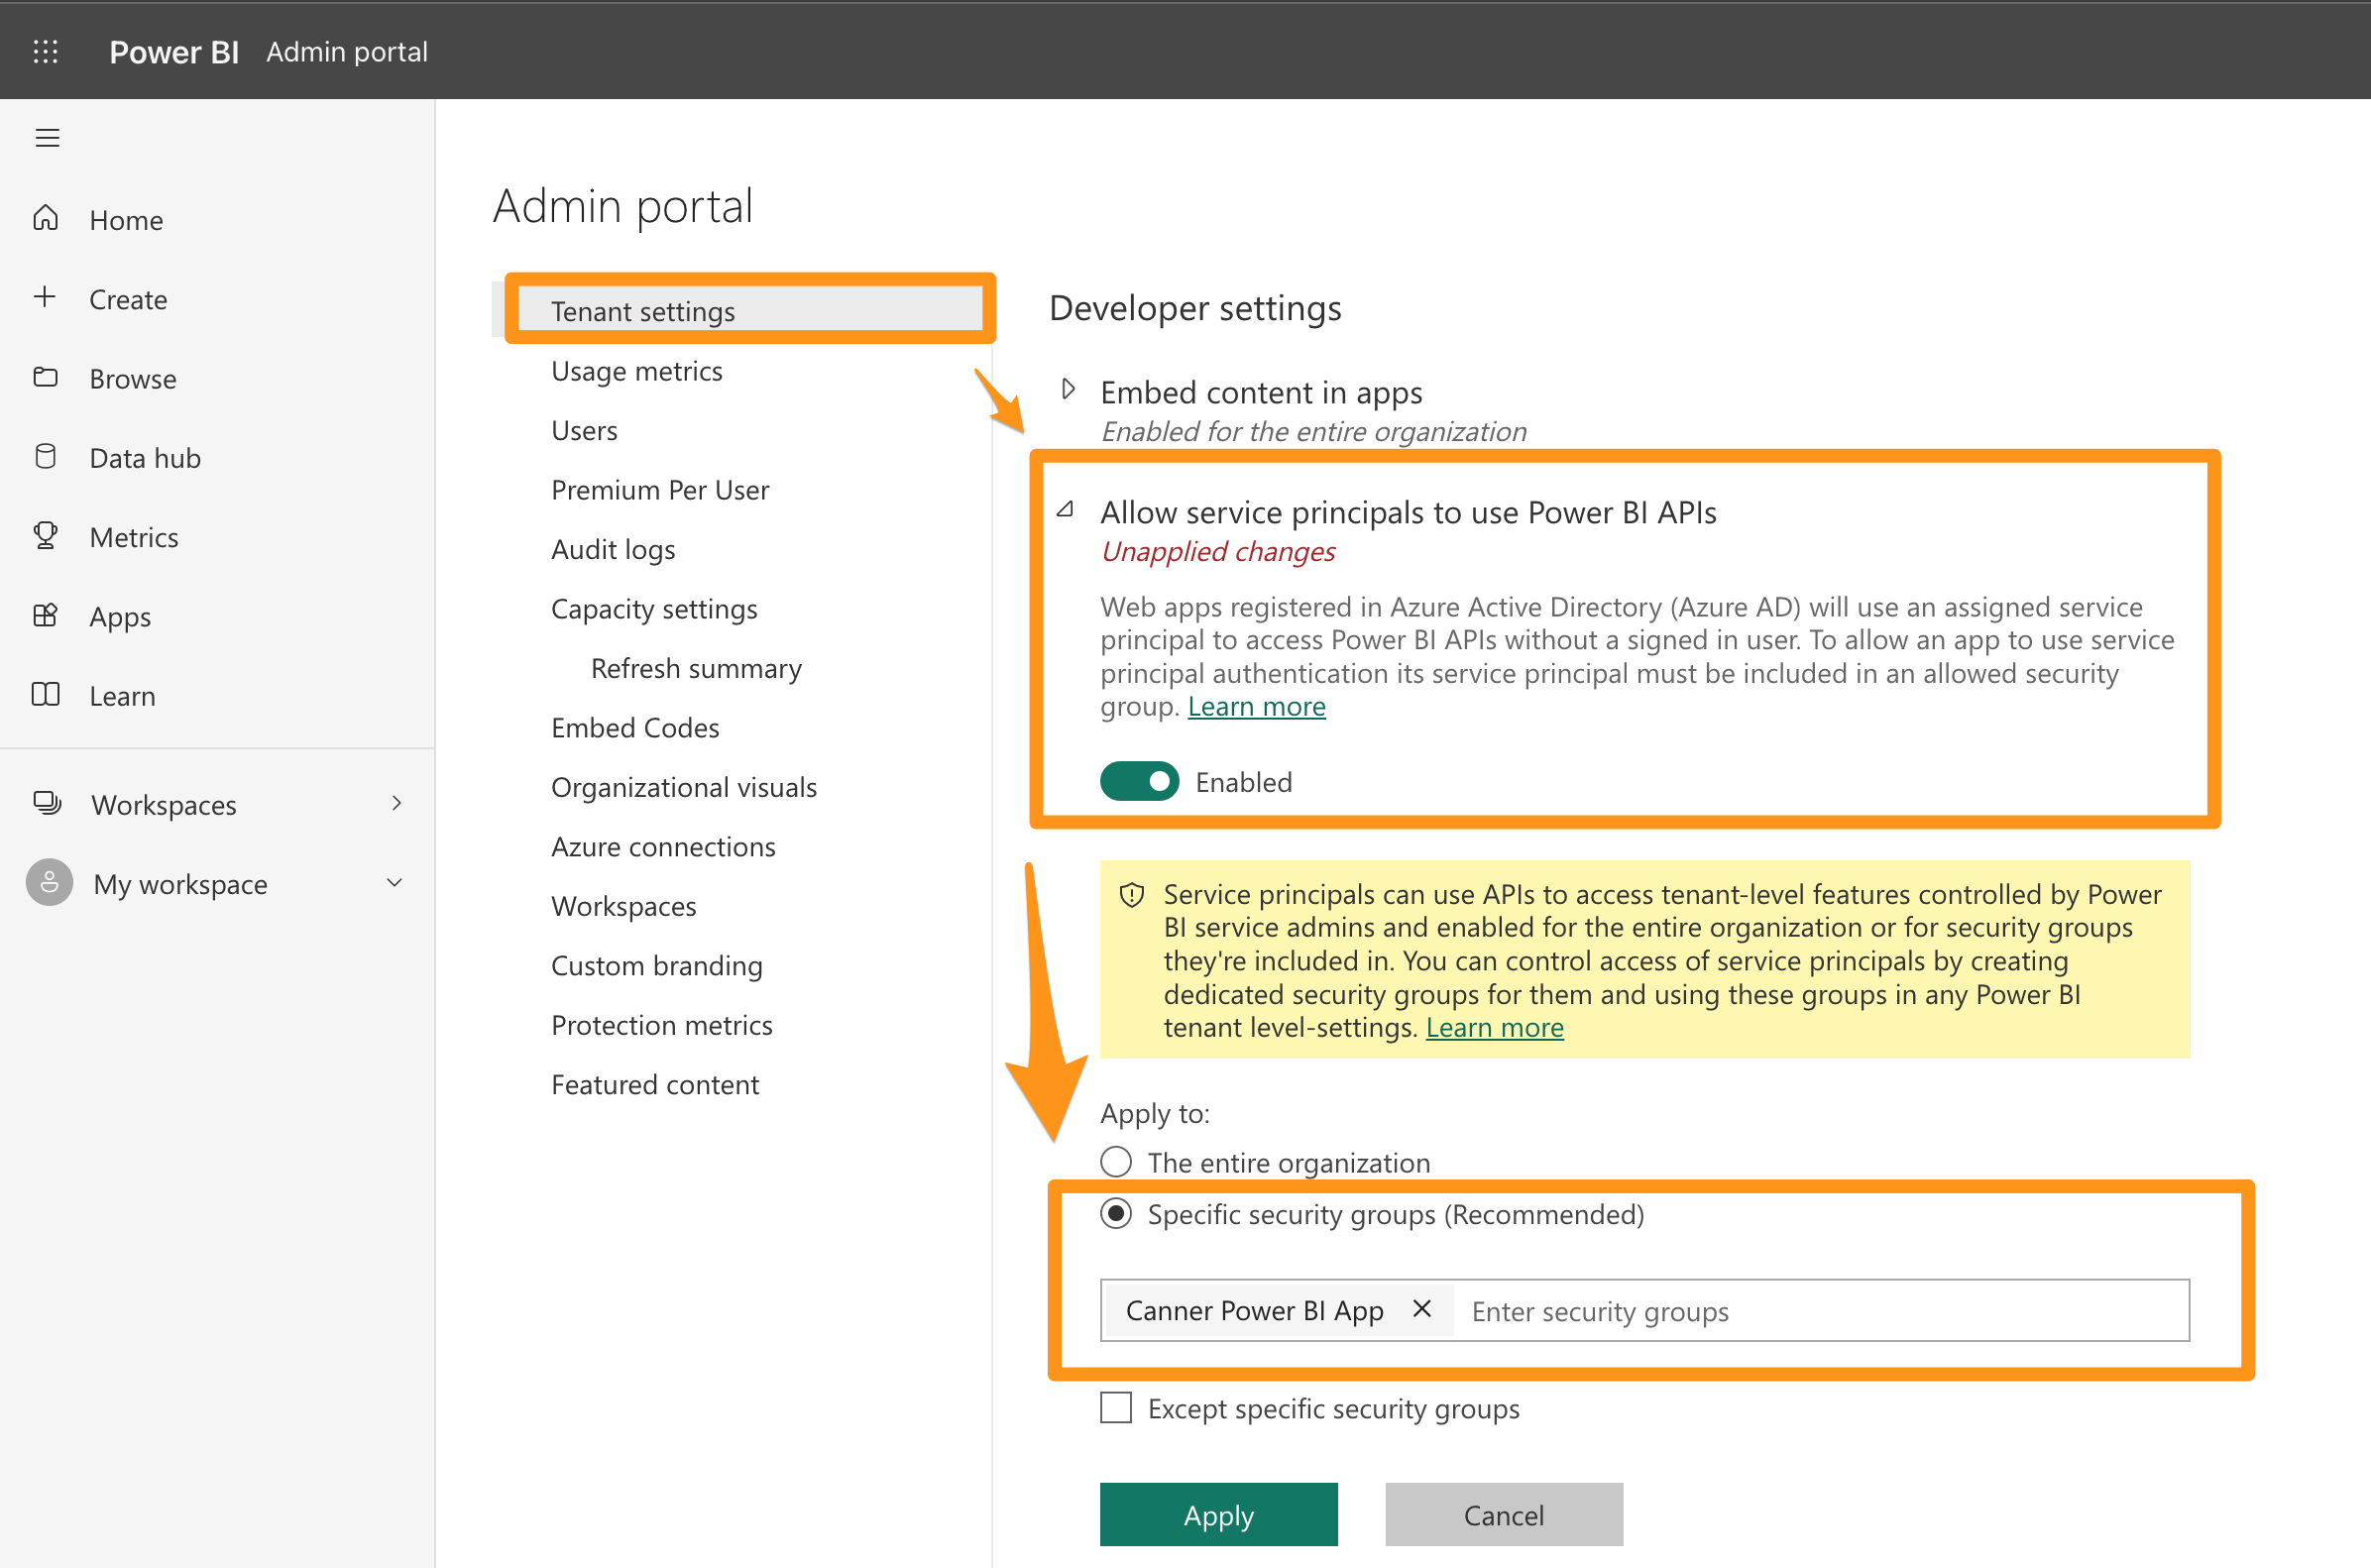
Step 3: Enable Power BI Service Admin Settings
- Next, to allow the service subject Canner Enterprise Power BI Push Dataset App to access the API of Power BI, we need to open the permission of the service subject to access the API in the Service of Power BI. The settings in this part can only be set by Power BI The administrator permission of Azure (different from the administrator permission of Azure), if you want to open the administrator permission of Power BI, please refer to this document: https://docs.microsoft.com/zh-tw/power-bi/admin/service- admin-role
- By specifying a "specific security group", the access rights to the API can be limited to this security group. Then we can allow specific workspaces to be protected by adding this security group Power BI API access operations.
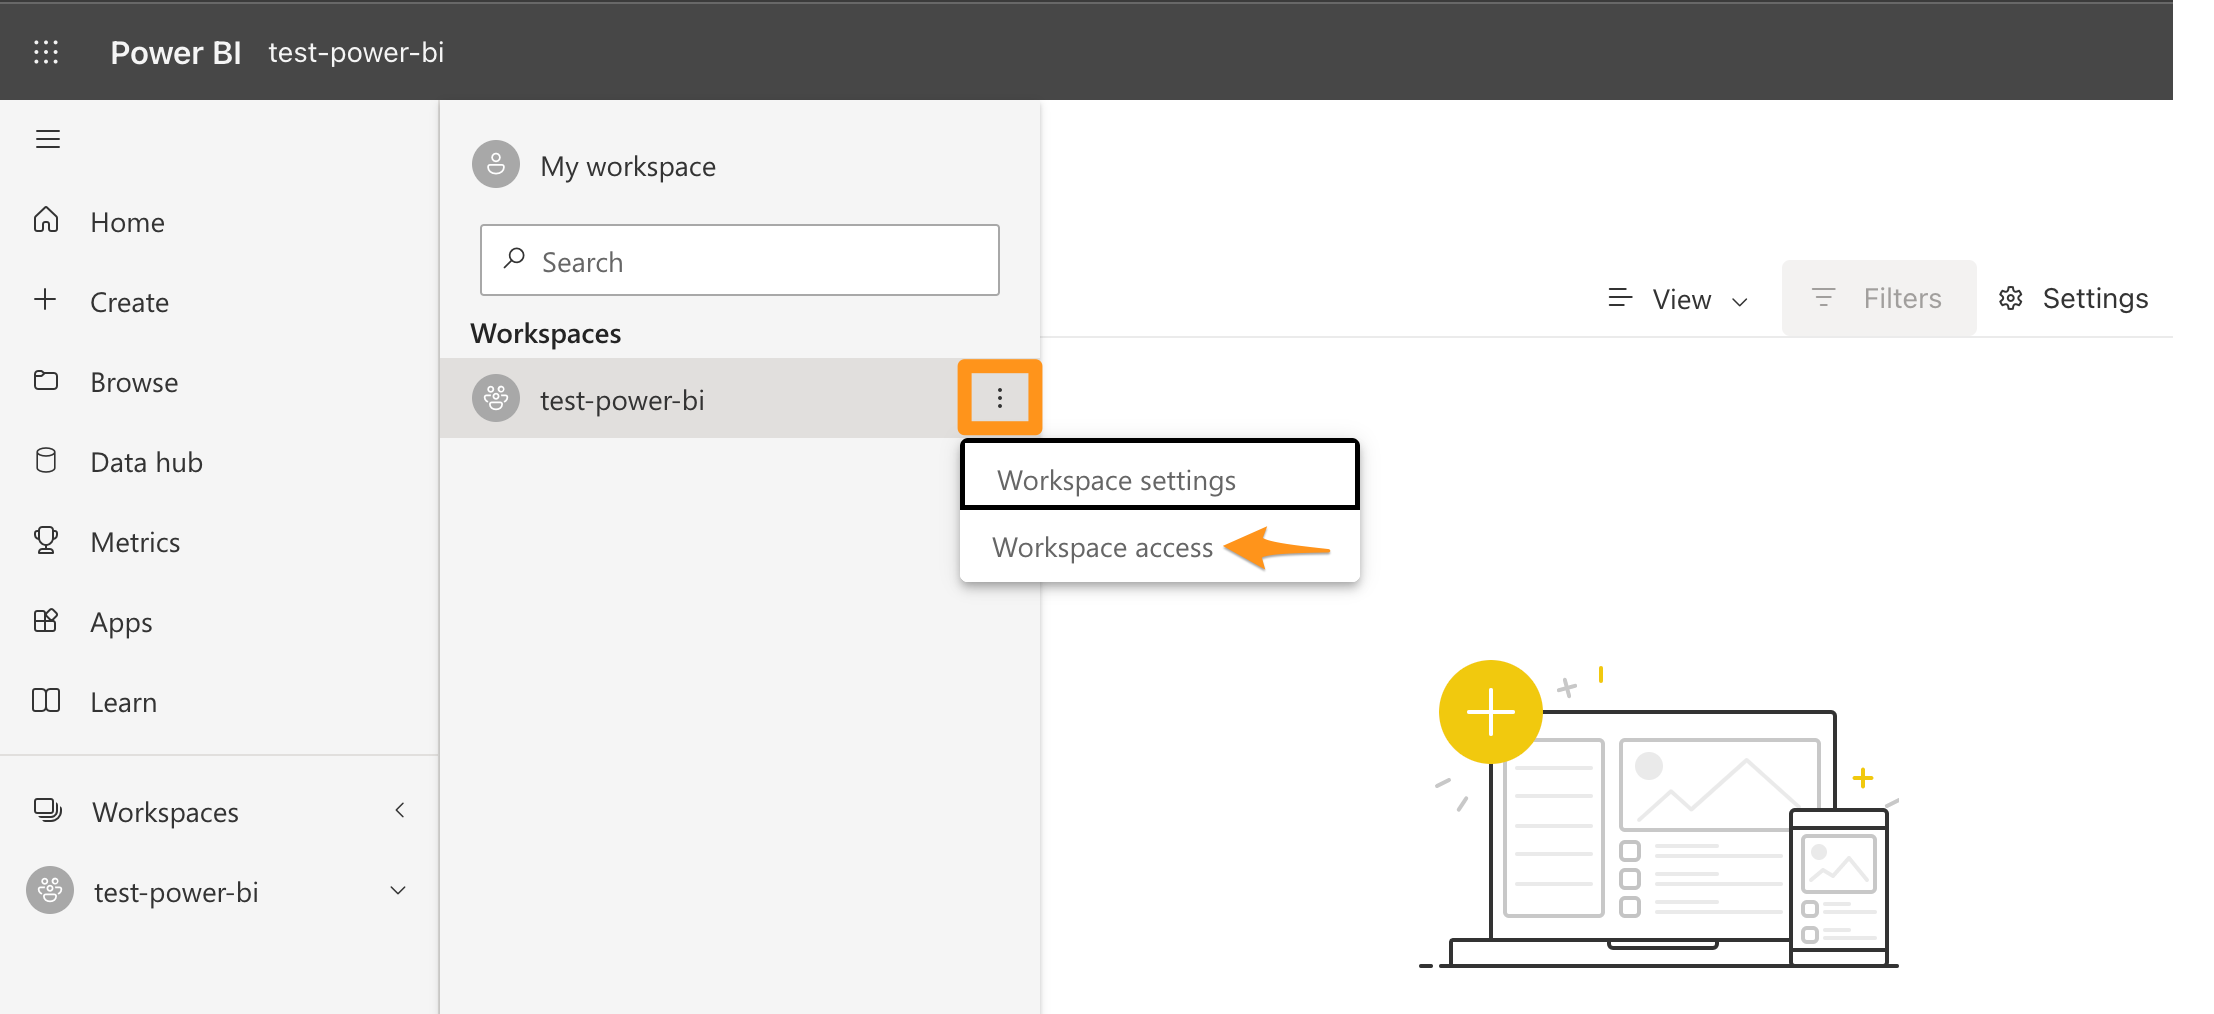
Step 4: Add the service principal to your Workspace
- Create a workspace that needs to be accessed through the Power BI API through "Create Workspace"> then click on the newly created Workspace and open the workspace access, as follows for test-power-bi:
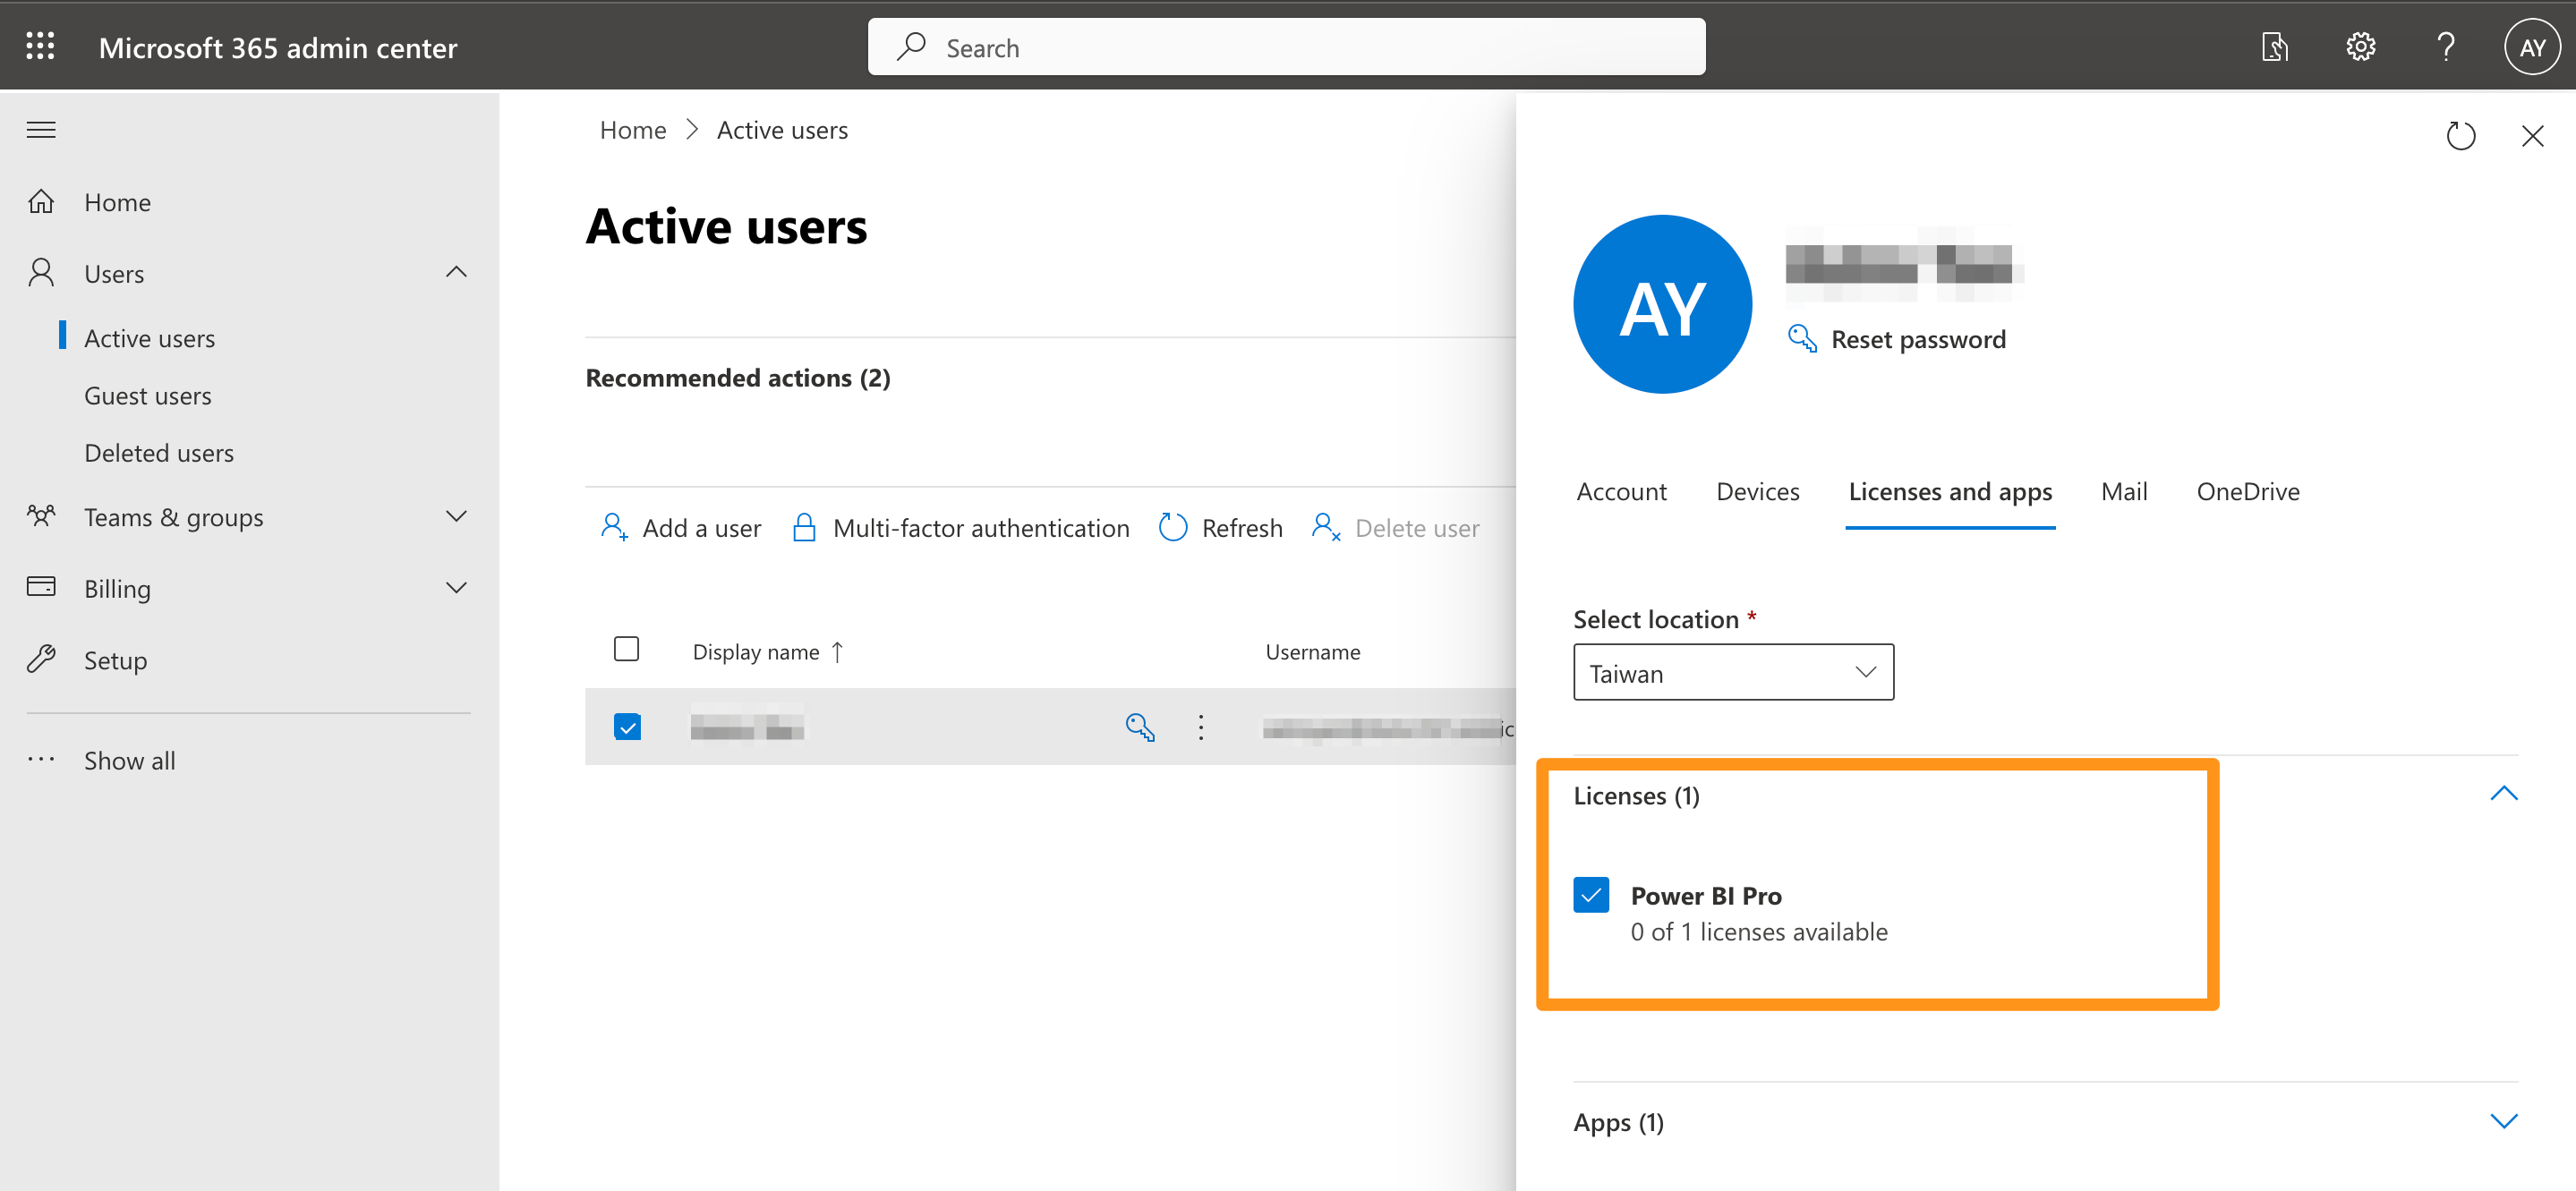
Workspace access and creation of Workspace requires Power BI Pro product permissions, which are different from Power BI administrator role permissions, as shown in the following figure from the confirmation of User > Authorization (License) in Azure AD:
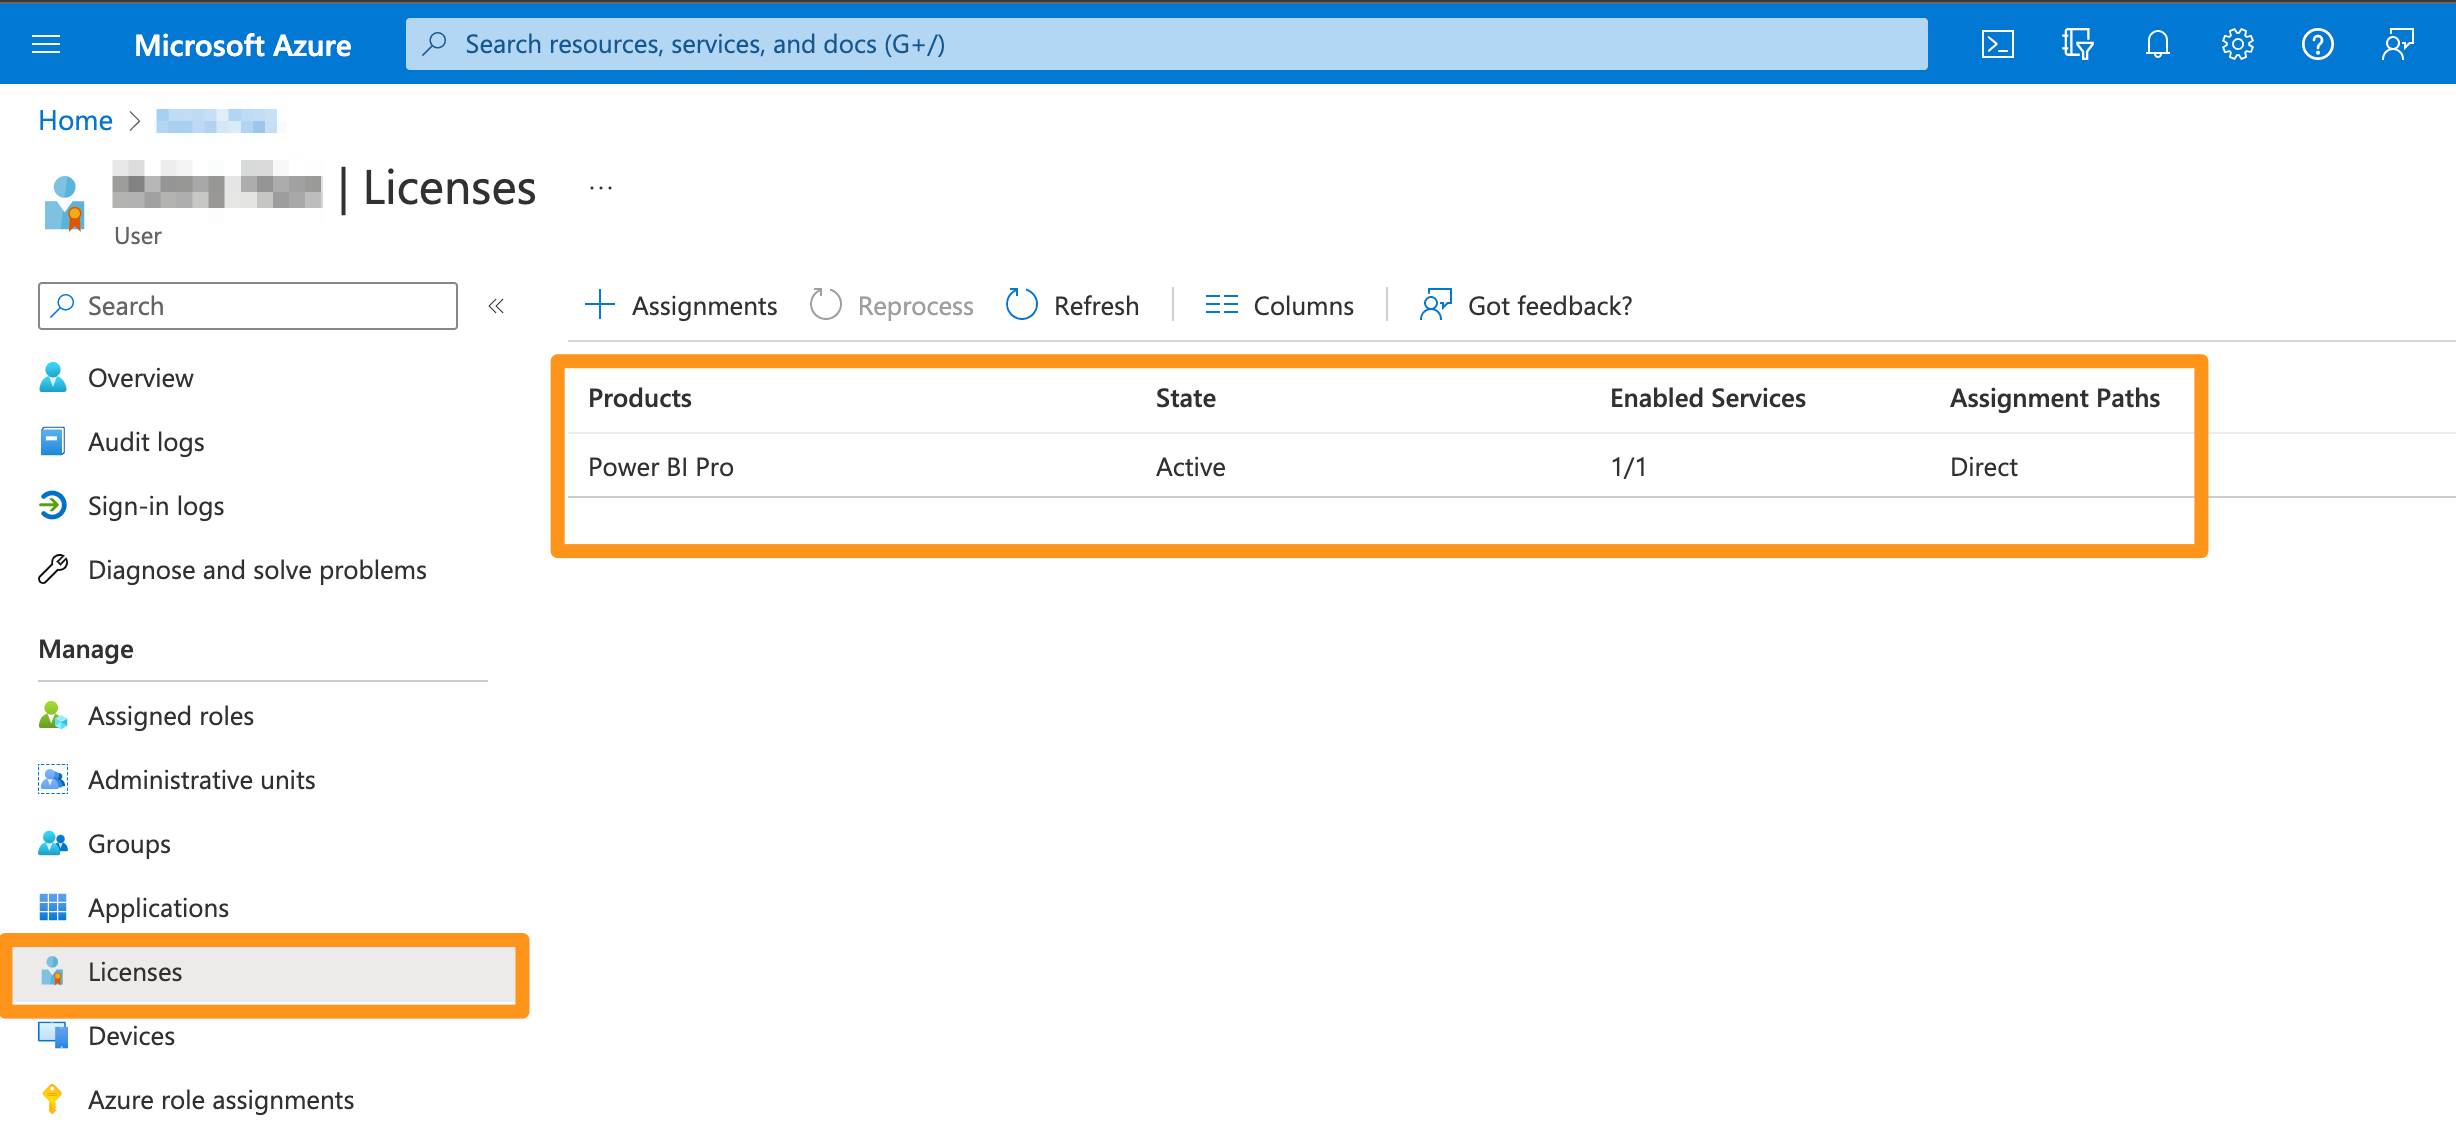
You can set it here if you do not have Power BI Pro product permissions. In the Power BI service, go to the "Admin Portal" in the upper right corner > User > Go to [Microsoft 365 Admin Center](https://portal .office.com/AdminPortal/Home#/homepage)
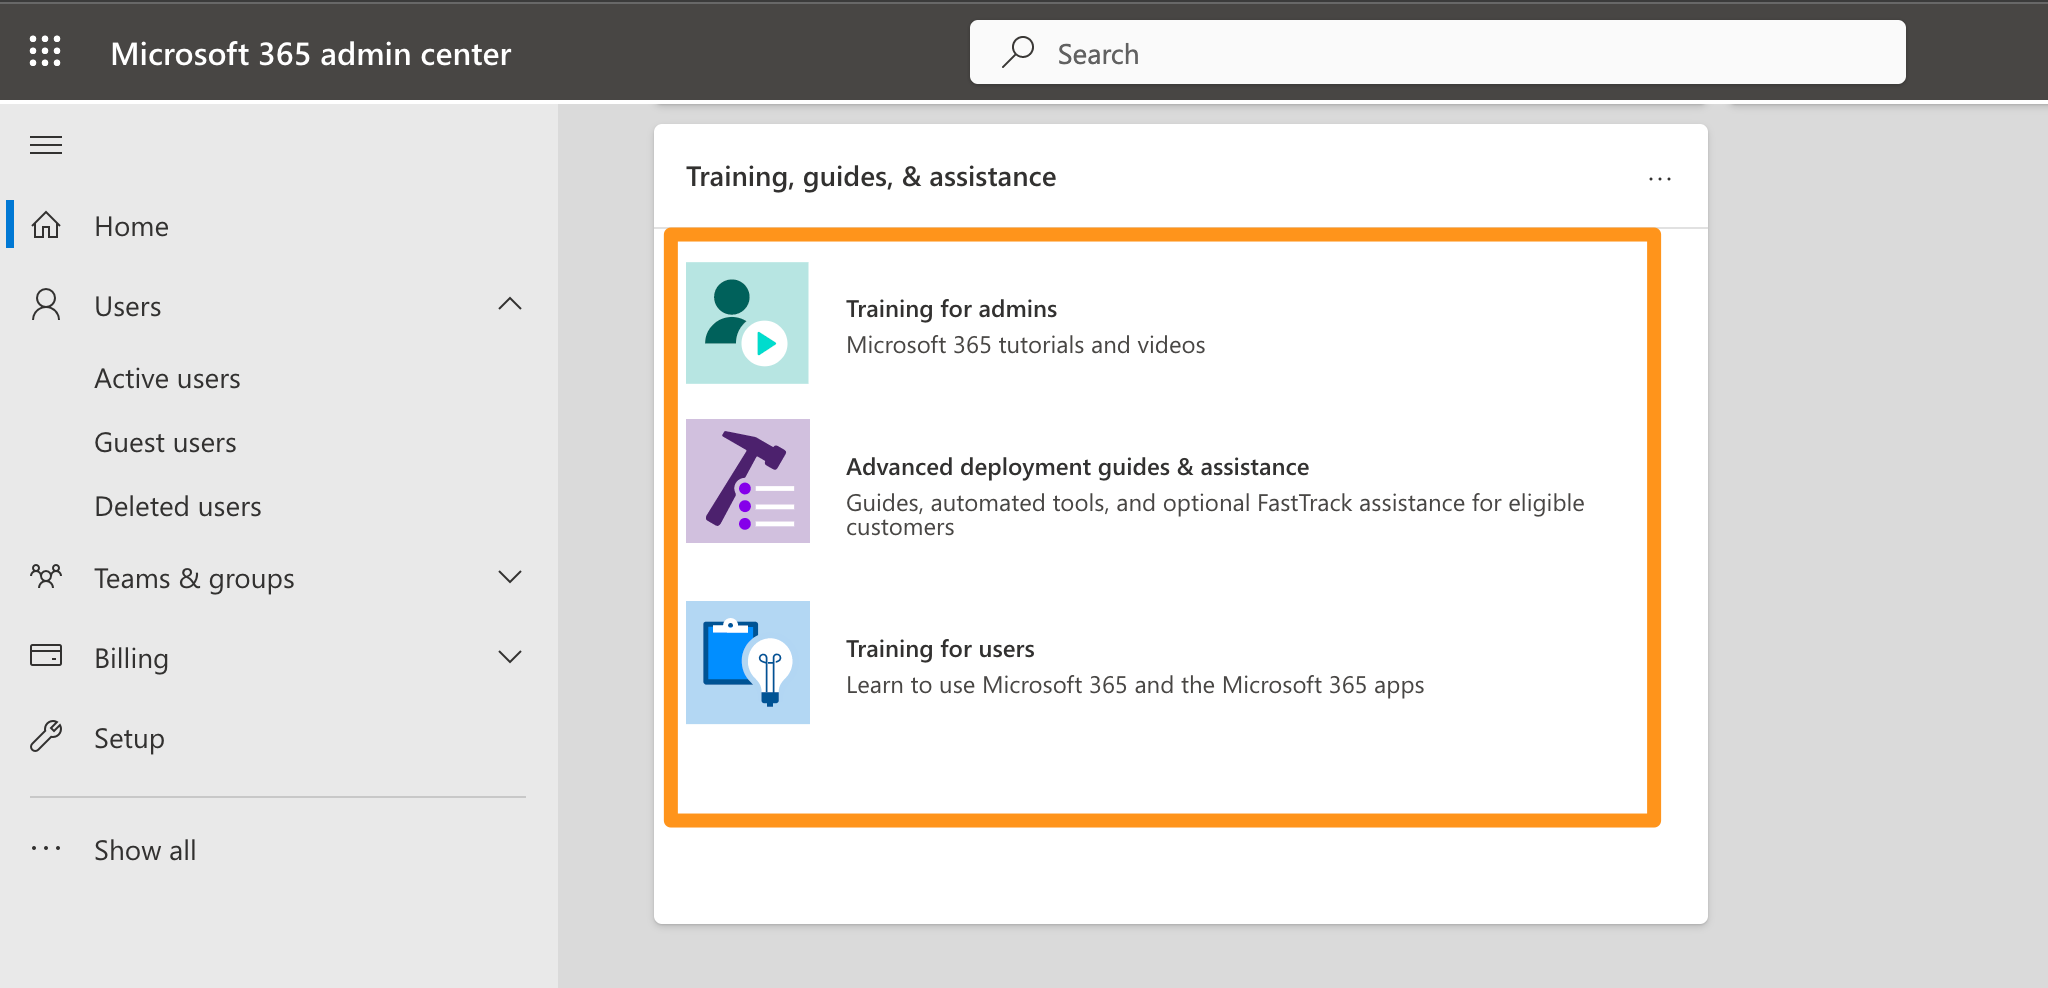
And open Microsoft, click the active user, edit the user's authorization and App authorization, and open Power BI Pro.
- Enter the security group created in Azure AD:
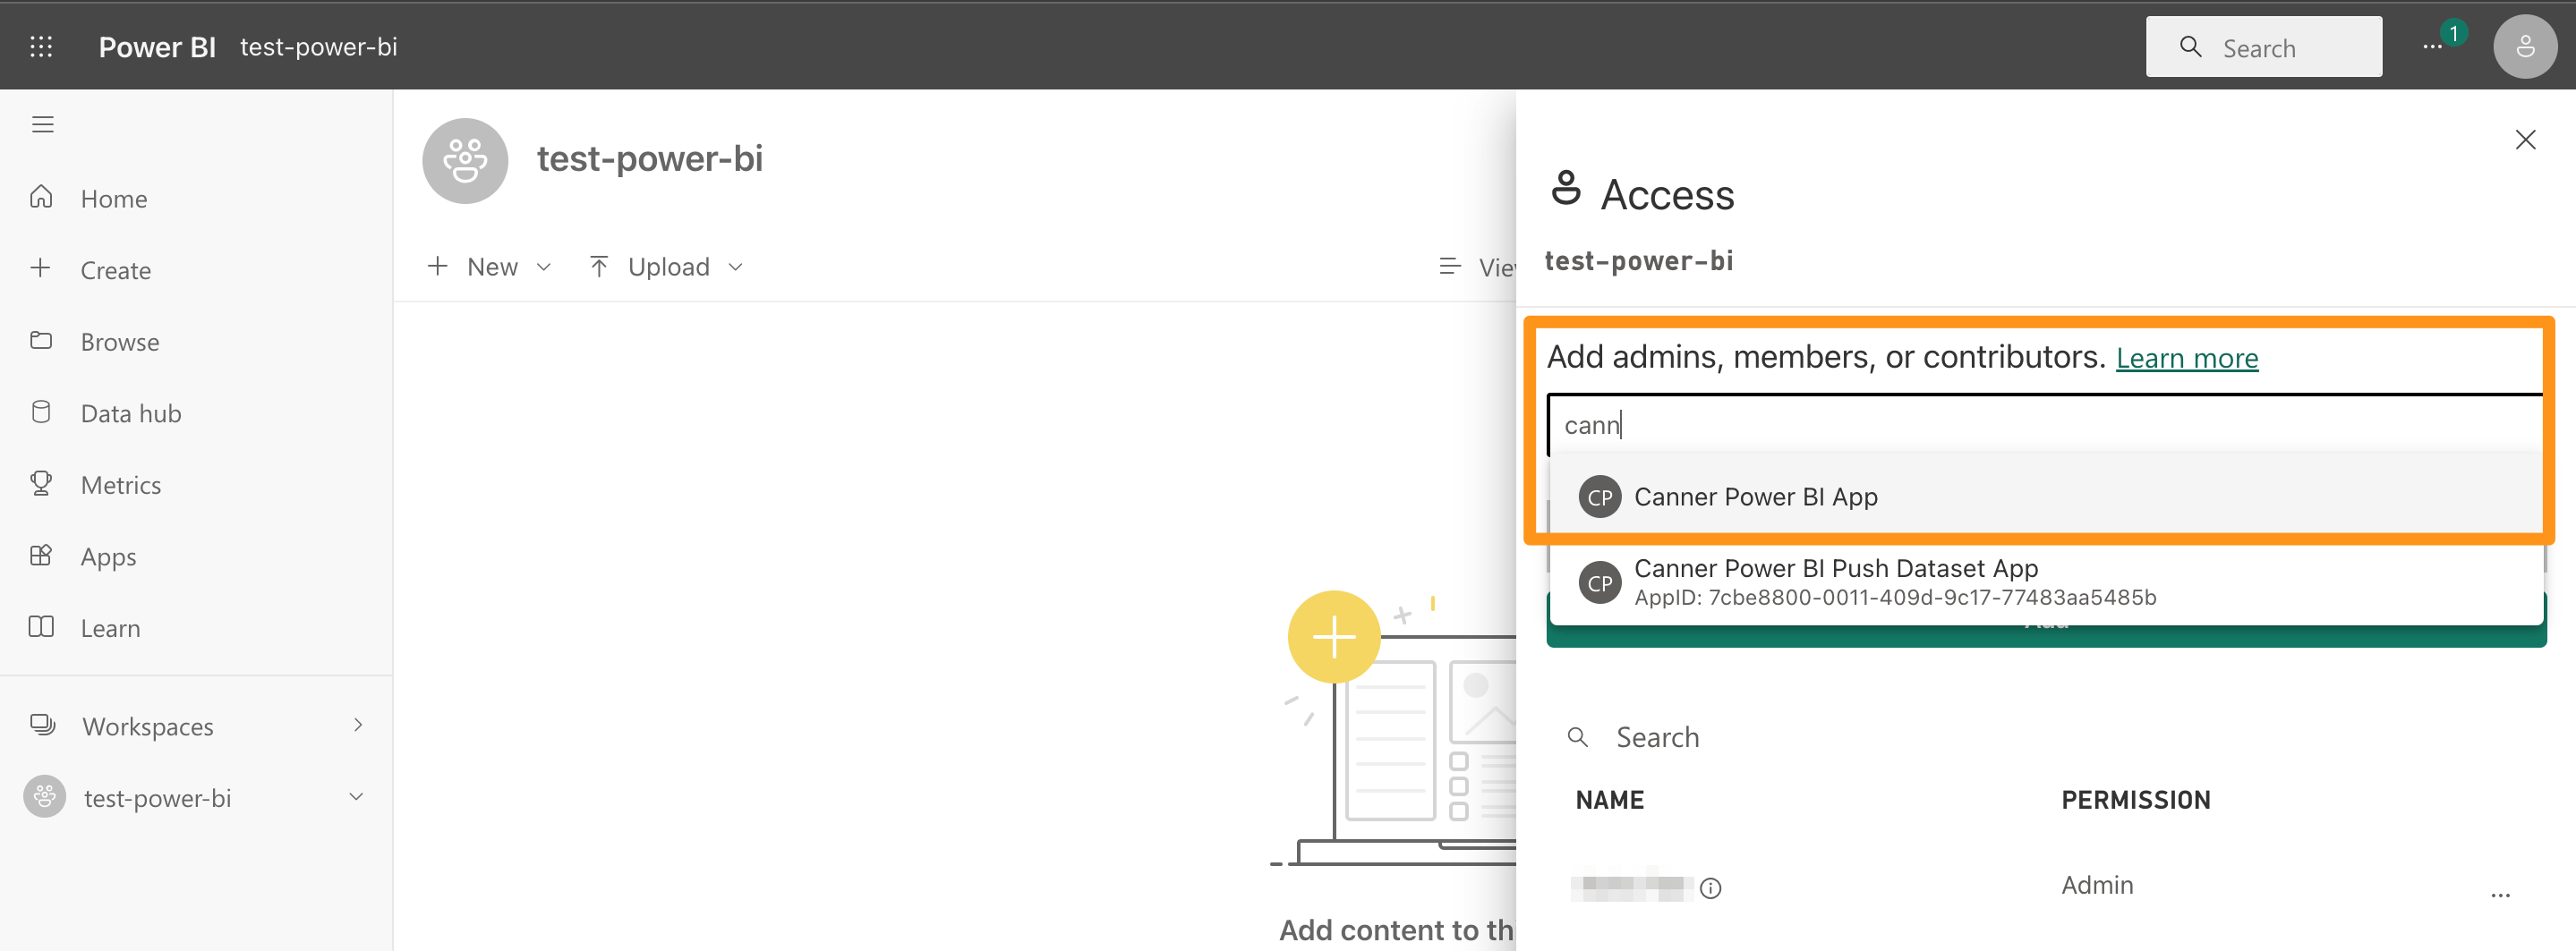
This belongs to the Workspace because, with this security group Canner Enterprise Power BI App, the Canner Enterprise Power BI Push Dataset App service principal (Service Principal) belonging to the security group can obtain the Power BI API Access permissions and can only use the Workspace where the group is added.
Canner Enterprise set Push Dataset
Step 1: Create Power BI Service Principal Credential
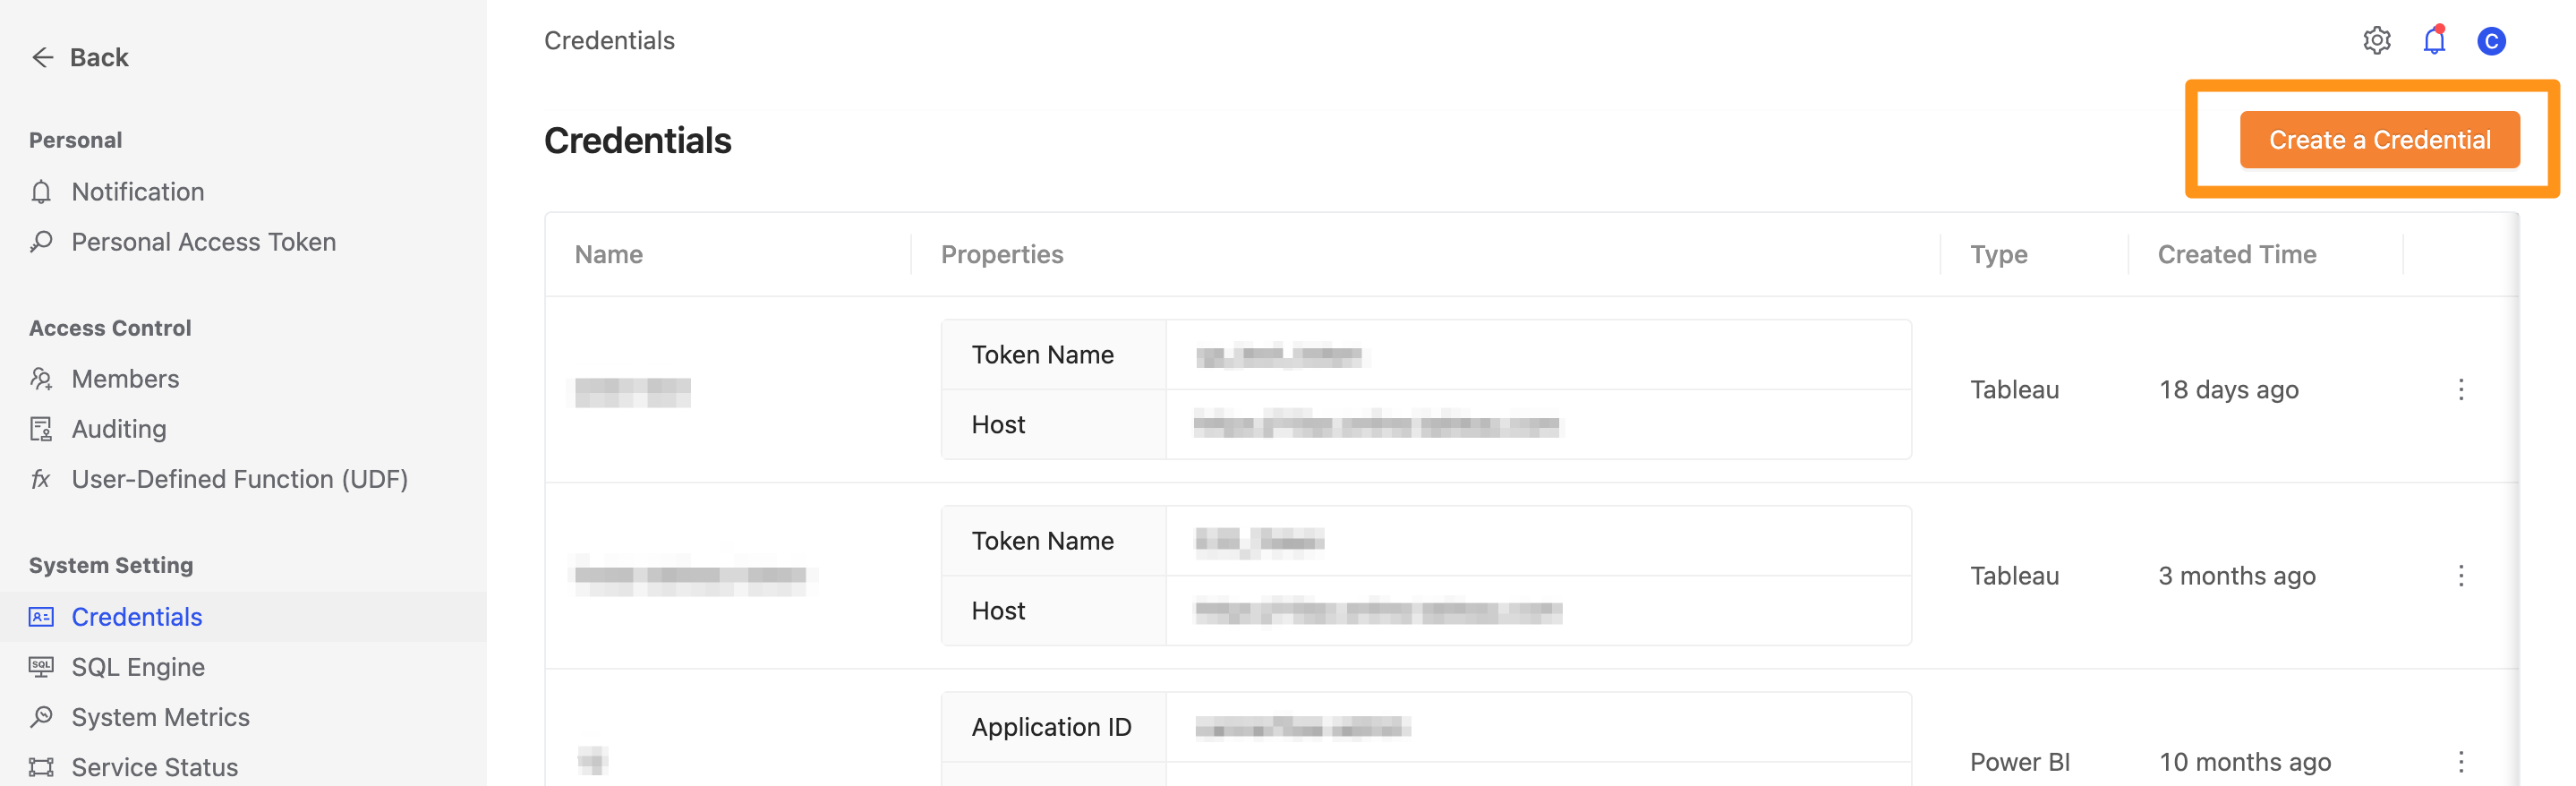
Click the gear icon in the upper right corner, expand the menu, and select Credentials.
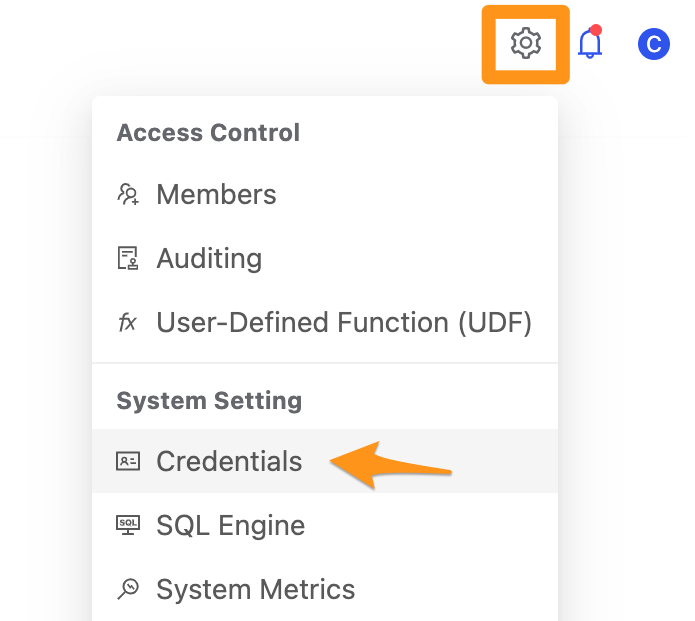
Once entered, click the Create a Credential button.
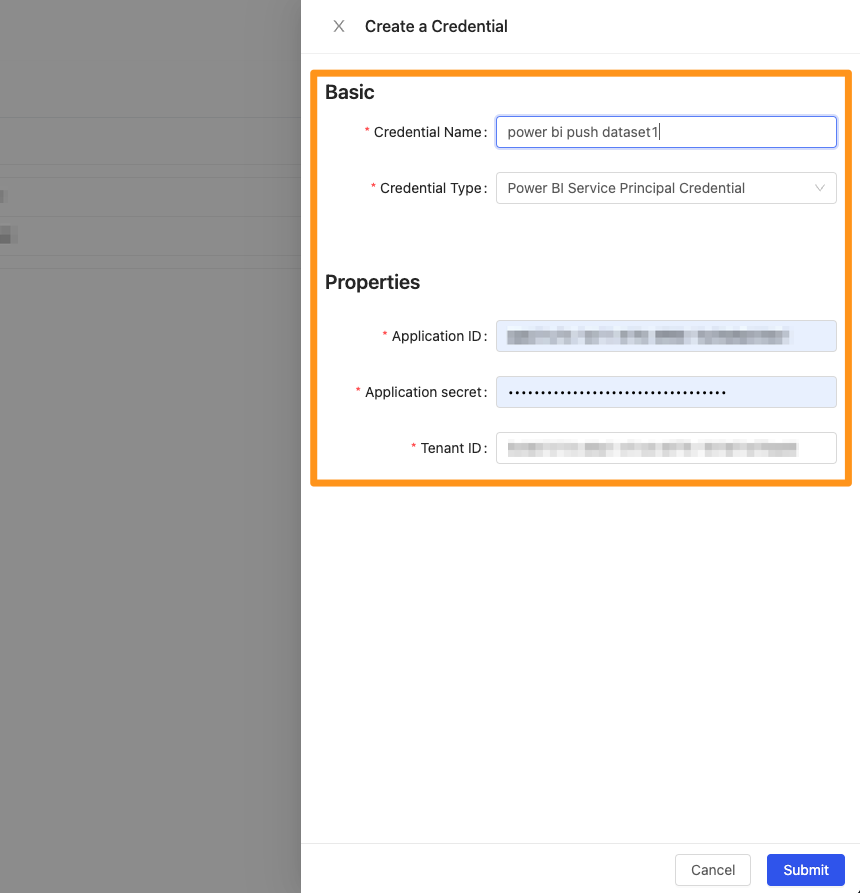
Enter the obtained
- Application ID (application (client) identification code obtained in the information after the application is successfully registered)
- Application Secret (obtained in the certificate and secret after the application is successfully registered)
- Tenant ID (directory (rental user) identification code (Tenant ID), obtained in the information after the application is successfully registered)
Step 2: Create Push Dataset
Click the function module in the upper left corner to switch to Data Push and enter the Power BI Push Dataset page.
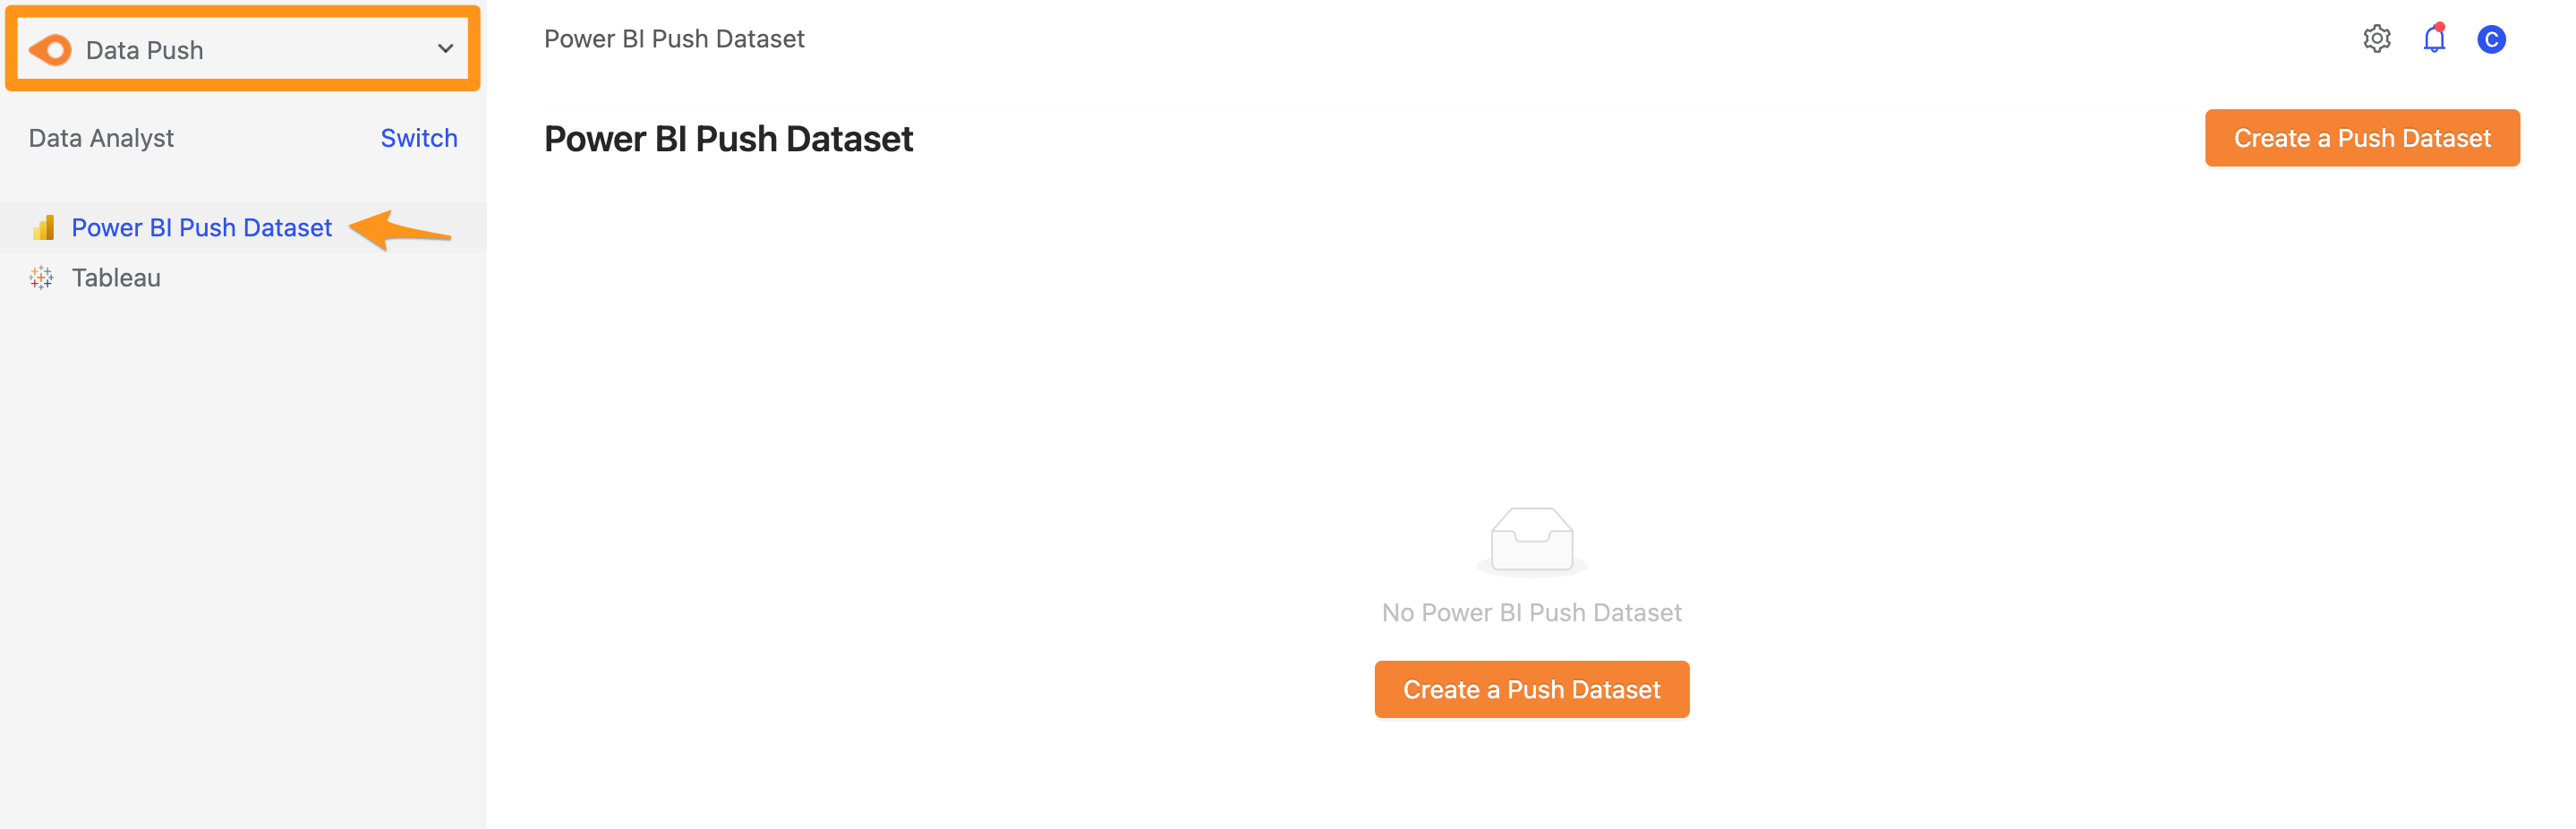
Click Create
Create a Push Dataset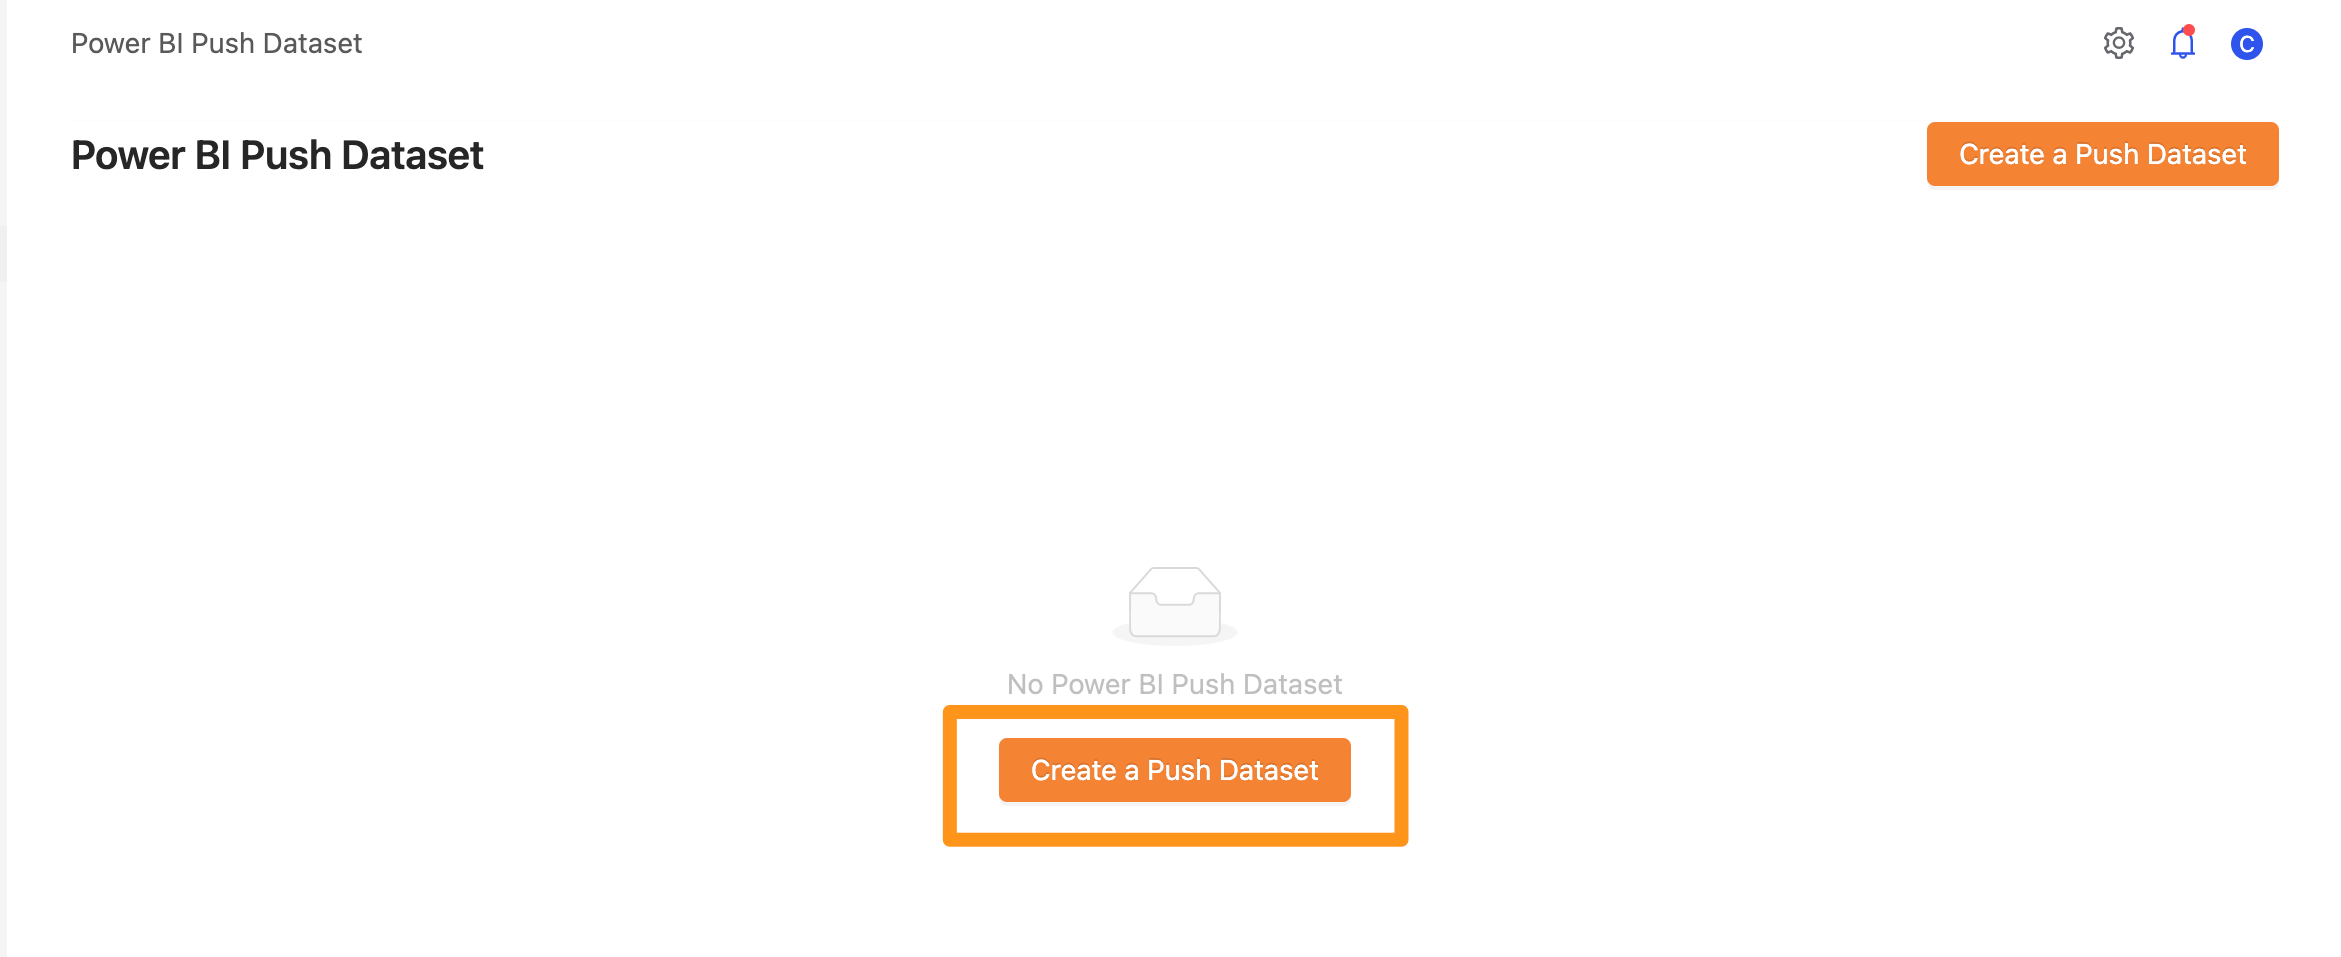
Fill in the following information
Credential Name: SelectPower BI Service Principal Credentialcreated in the previous stepPower BI Workspace Name: Select which Power BI workspace to push toMaterialized View: Select the Materialized View to be pushedRebind Report: Under normal circumstances, Please check this field; we will update the data set bound to the report simultaneously.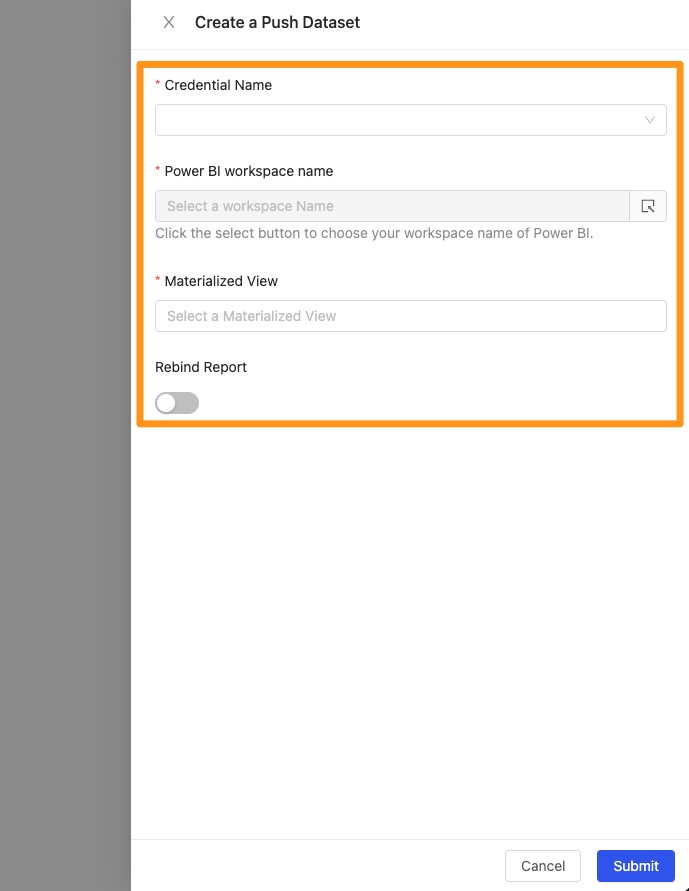
When selecting
Power BI Workspace Name, a window will pop up for the user to choose a workspace.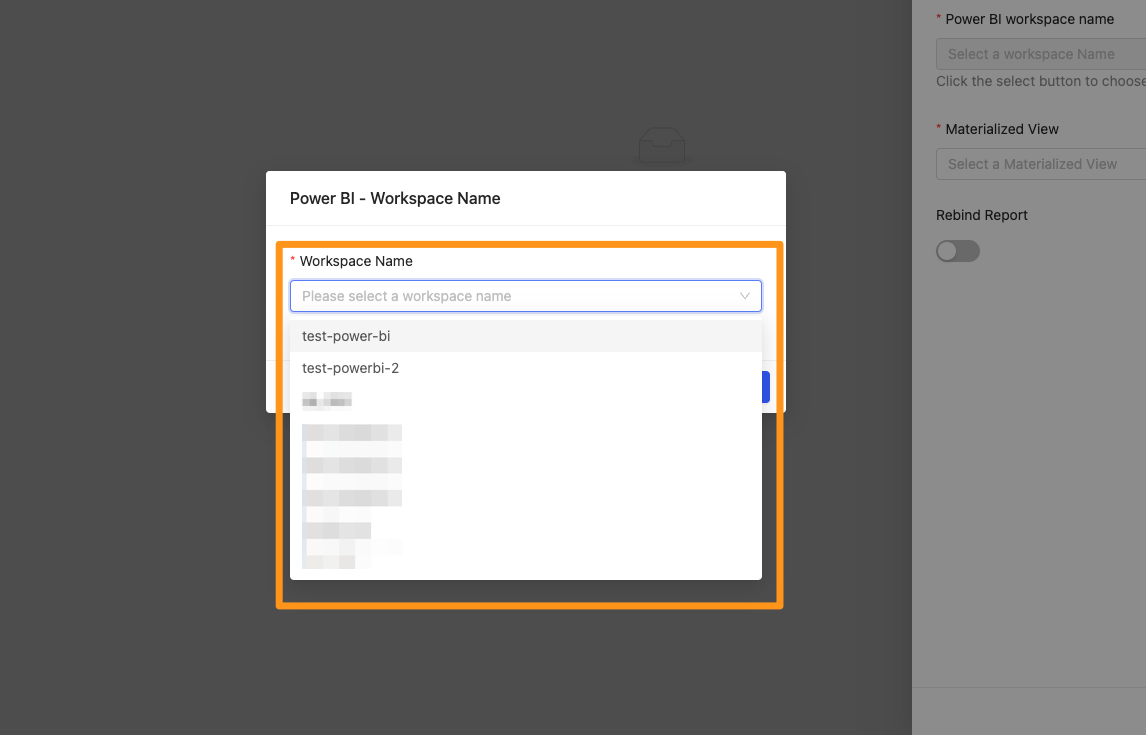
You may notice that when you add a group workspace (Group Workspace) in Power BI, it will not be visible on Canner Enterprise immediately because the Power BI Rest API will not get the latest data, as shown in the figure below when You created a workspace and authorized it to Canner Power BI App according to the previous steps.
The list currently seen may be empty

It takes a while to take effect, and the waiting time may be around 20 - 40 minutes.
Step 3: Observe the status of the Power BI Push Dataset
When the status changes to Synced, it means that the data push is successful
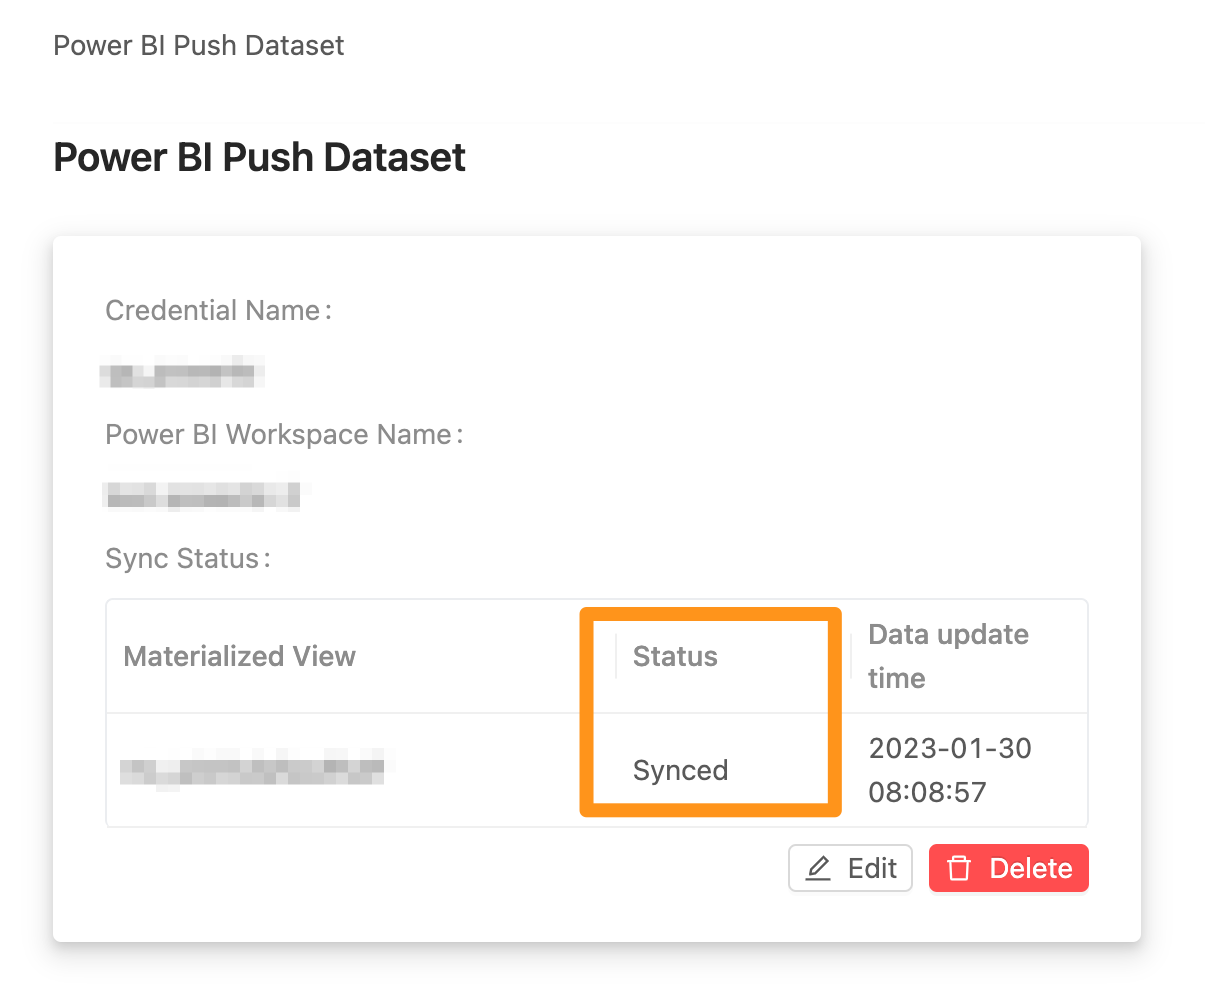
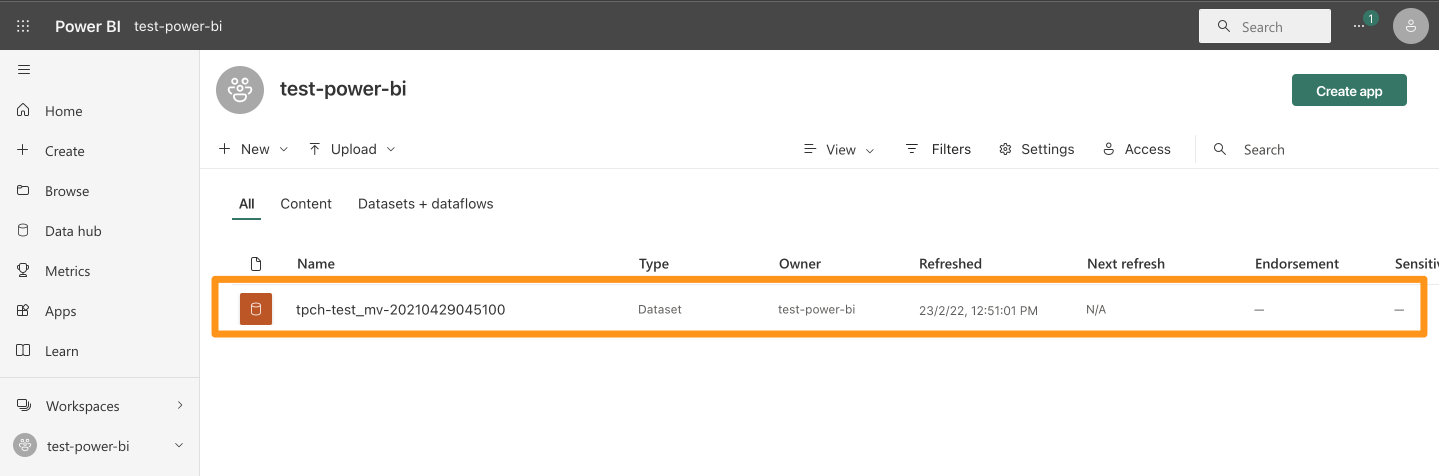
Materials are also available on the Power BI Service
How to set schedule update
When generating Materialized View, if you have selected [Schedule update](/v2/product/workspaces/sql/materialized_view# 1. Schedule management:), each time it is automatically updated, or you are on the Materialized View page, click When Refresh is manually updated, the Power BI Push Dataset will enter the Preparing state, which means that the Materialized View is being updated and the data is being pushed to the Power BI Service.
The meaning of
Power BI Push Dataset has three states
- Preparing: Represents that the Materialized View is being updated
- Syncing: Indicates that data is being sent to Power BI Service
- Synced: Indicates that the data transmission has been completed
FAQ
1. What are the relevant restrictions?
- A data set can have up to 75 fields
- A data set can hold a maximum of 1,000,000 data
2. Sometimes I see that the Power BI Push Dataset fails, and a Failed message appears; what should I do?
Please check the following points:
- On the Power BI Service, whether the Credential has been deleted or whether the permission settings have been changed
- On the Power BI Service, has the Storage reached the limit of [Workspace](https://docs.microsoft.com/zh-tw/power-bi/admin/service-admin-manage-your-data-storage-in- power-bi)
If the above points are all right, and the previous scheduling is also successful, the Power BI Service API is unstable and throws an error back. The Power BI Service API service is not 100% stable and sometimes fails. But please don't worry, Canner Enterprise will automatically reschedule and push the data again.
3. When creating a Power BI Push Dataset -> select Workspace, my Workspace does not appear in the selection list. / My Workspace list is empty?
You may notice that when you add a group workspace (Group Workspace) in Power BI, it will not be visible on Canner Enterprise immediately because the Power BI Rest API will not get the latest data, as shown in the figure below when You created a workspace and authorized it to Canner Power BI App according to the previous steps.
The list currently seen may be empty
It takes a while to take effect, and the waiting time may be around 20 - 40 minutes.