Masking Data
In this tutorial, you will learn how to use Canner Enterprise's SQL Explorer and UDF functions to mask your data and work with the workspace authorization mechanism to ensure compliance with sensitive data usage regulations.
Before starting this tutorial, you will need to have completed Connecting Data Sources in Canner Enterprise and learned about Import Data to your Workspace.
Data masking is a processing method of masking or replacing data to protect specific sensitive or private information, reducing the risk of data leakage while maintaining usability.
Basics: Data Masking in SQL Explorer
Enter the workspace, and add the data you want to mask in 【Tables】 >【Create a Table】.
Go to 【SQL Explorer】, enter ANSI SQL Query in the editor to mask: For example, you have a raw Table
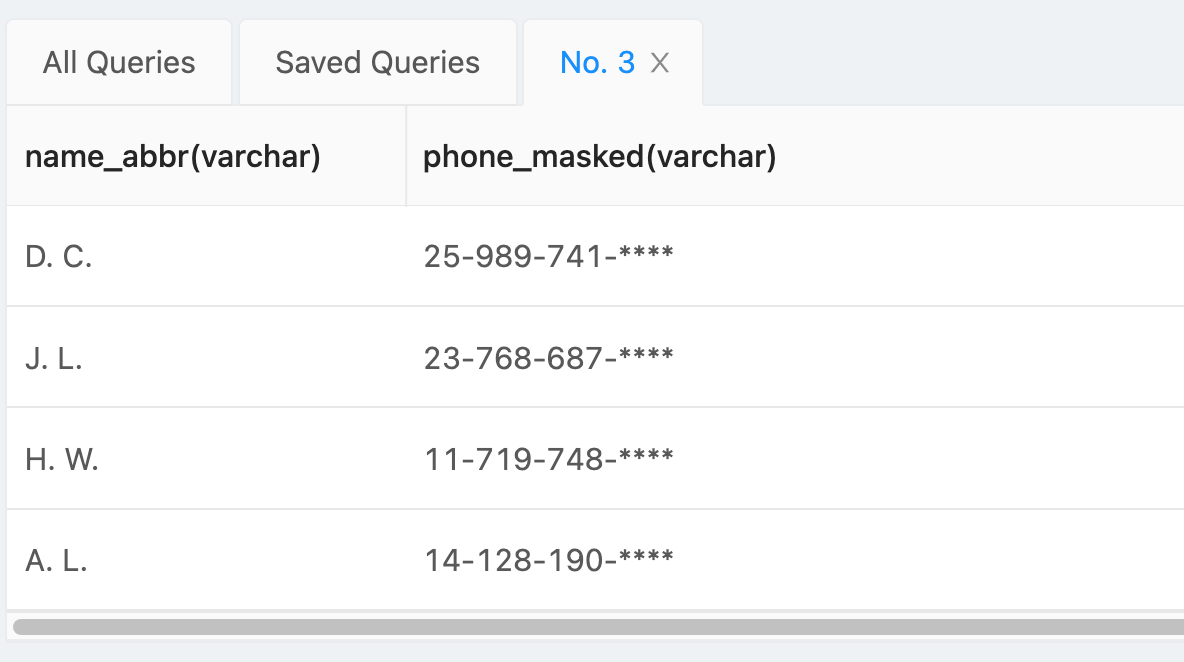
customer_tableName Phone David Chen 25-989-741-2988 Jennifer Lin 23-768-687-3665 Henry Wu 11-719-748-3364 Amber Lee 14-128-190-5944 The following query replaces the customer's name with an abbreviation and hides the last four digits of the phone number as "****"
SELECT
substr(split_part(Name,' ',1),1,1)||'. '||substr(split_part(Name,' ',2),1,1)||'.' AS Name_abbr,
substr(Phone,1,11)||'****'AS Phone_masked
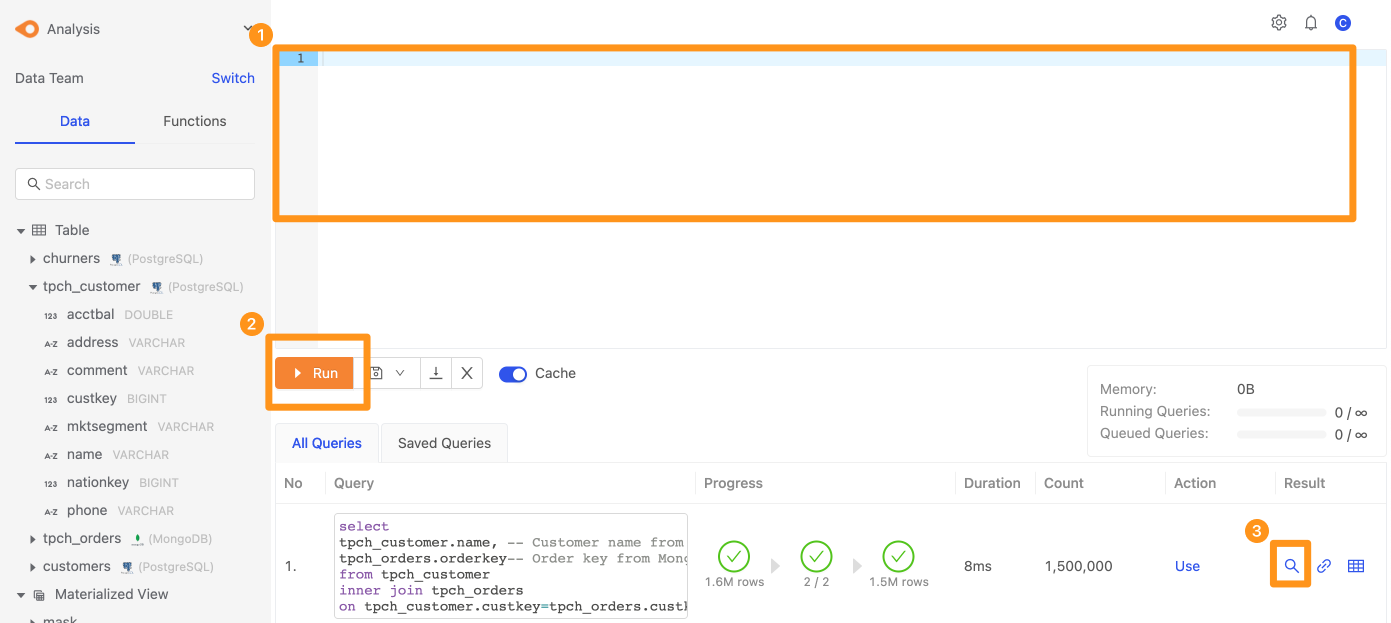
FROM customer_tableWrite and mask 【SQL】 > Click 【Run】, and the result after masking will be displayed in 【Result】 >【View(magnifying glass)】.
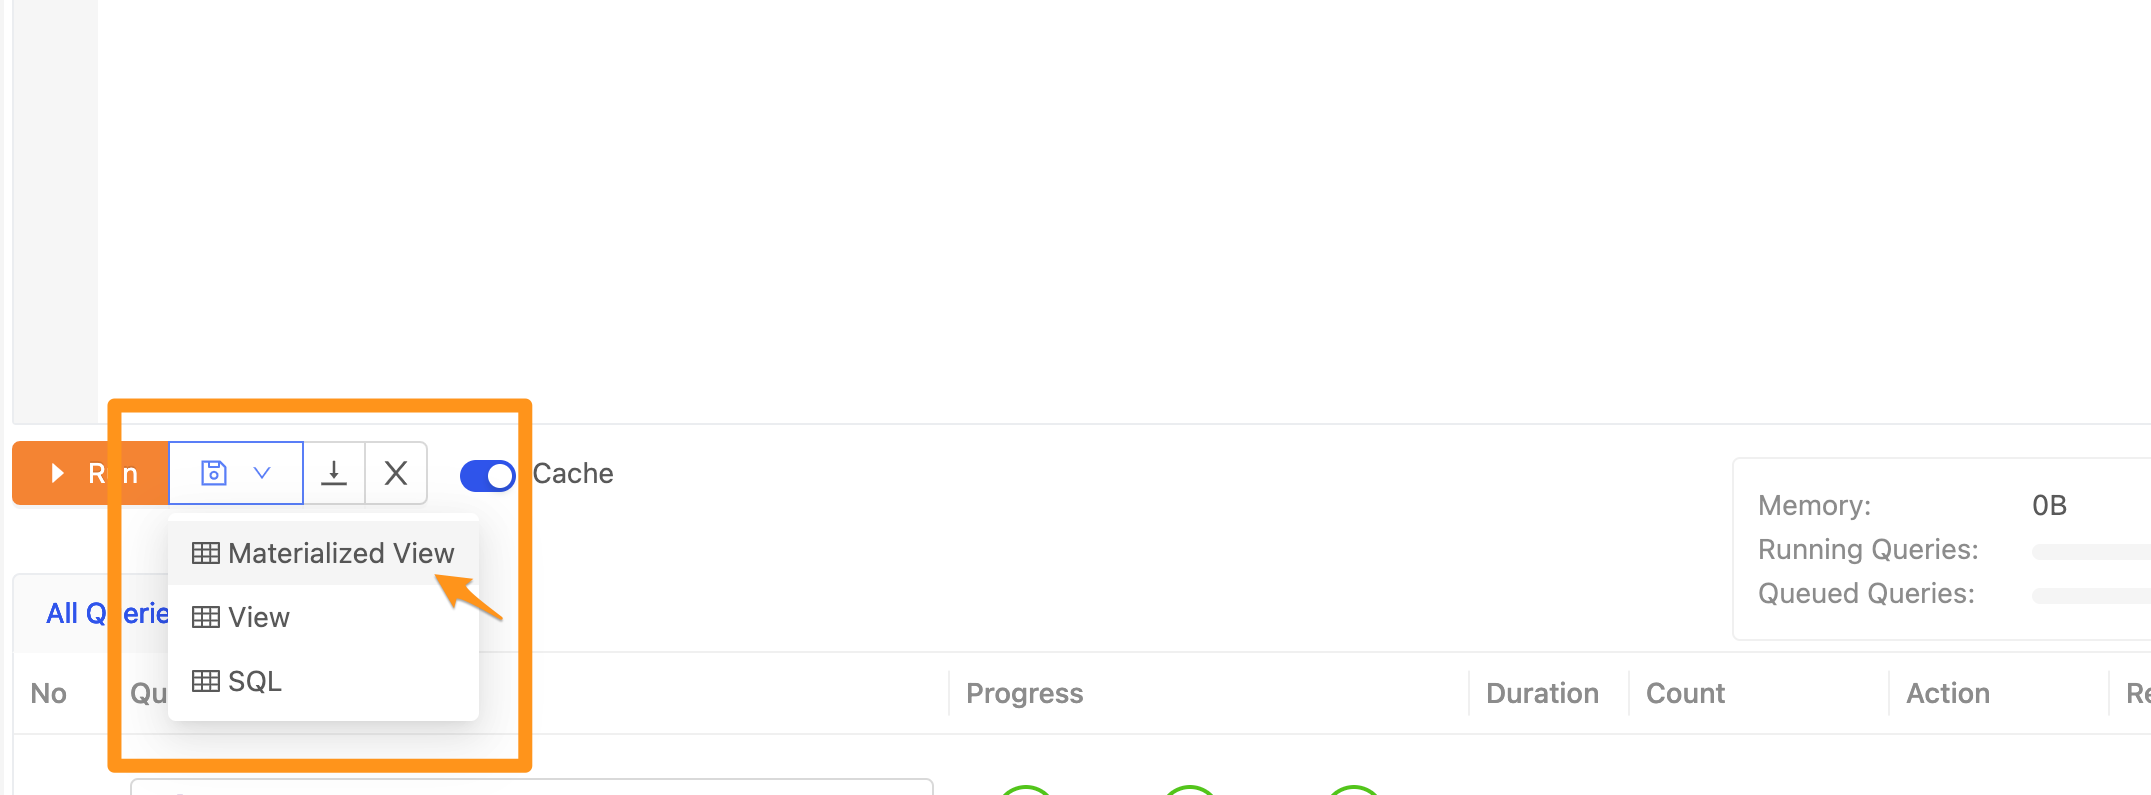
Click 【Save as (save mark)】, and you can save the masked data as View or Materialized View for subsequent output and application.
Advanced: with UDF function
If your masking logic is complex, or you want all users to use the same business logic to process data, you can use the UDF function of Canner Enterprise to help.
First, upload your custom mask function on the 【UDF】 page: The function you upload needs to be written in Java; the following example
MaskFunctionfunction will replace the entire specified string field with *package com.brandboat.udfs.scalar;
import io.airlift.slice.Slice;
import io.trino.spi.function.Description;
import io.trino.spi.function.ScalarFunction;
import io.trino.spi.function.SqlType;
import io.trino.spi.type.StandardTypes;
import static io.airlift.slice.Slices.utf8Slice;
public class MaskFunction
{
private MaskFunction() {}
@Description("mask value in column")
@ScalarFunction("mask_column")
@SqlType(StandardTypes. VARCHAR)
public static Slice maskColumnSlice(@SqlType(StandardTypes.VARCHAR) Slice value)
{
return utf8Slice("*****");
}
}After writing the function, you must save the java file in .jar format and upload it.
After the upload is complete, click to enter the function file you want to use in 【Action】 >【Edit Access Control】 enable Enable and set 【Privilege Type】 to Public, All workspaces can use this function. If you only want to allow specific workspaces to be used, please set 【Privilege Type】 to Private, and select which workspaces you want to share the specified function to in 【Share to workspace】.
Enter the workspace, and add the data you want to mask in 【Tables】 >【Create a Table】.
Go to 【SQL Explorer】, enter ANSI SQL Query in the editor, and use the uploaded UDF function to mask: For example, you have a raw Table
customer_tableName Phone David Chen 25-989-741-2988 Jennifer Lin 23-768-687-3665 Henry Wu 11-719-748-3364 Amber Lee 14-128-190-5944 The following query uses the
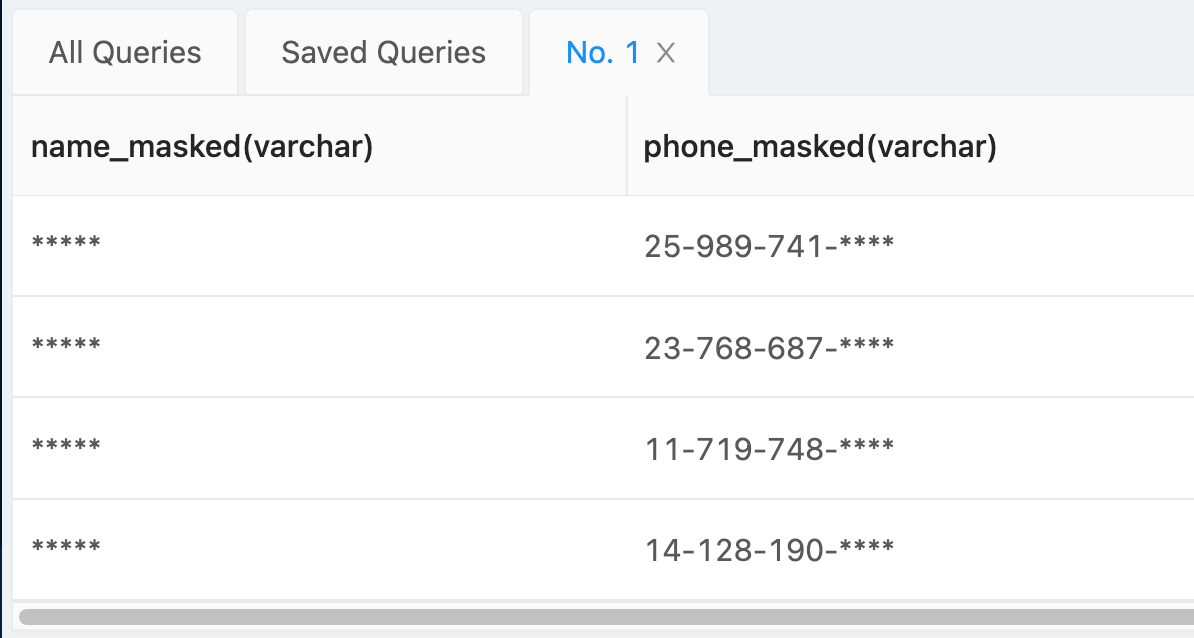
MaskFunctionfunction to replace the customer's name with an "*" number and mask the last four digits of the phoneSELECT
mask_column(Name) AS Name_masked,
substr(Phone,1,11)||'****' AS Phone_masked
FROM customer_tableWrite and mask 【SQL】 > Click 【Run】, and the result after masking will be displayed in 【Result】 >【View(magnifying glass)】.
Click 【Save as (save mark)】, and you can save the masked data as View or Materialized View for subsequent output and application.
Next step
You can use How Access Control works in Canner Enterprise and use the Using Semantic Layers to Manage Data Semantics in the workspace to specify that other users can only use your The masked data achieves data security requirements.