Connecting to Microsoft SQL Server
Before starting
Before you begin, learn how to create a data source
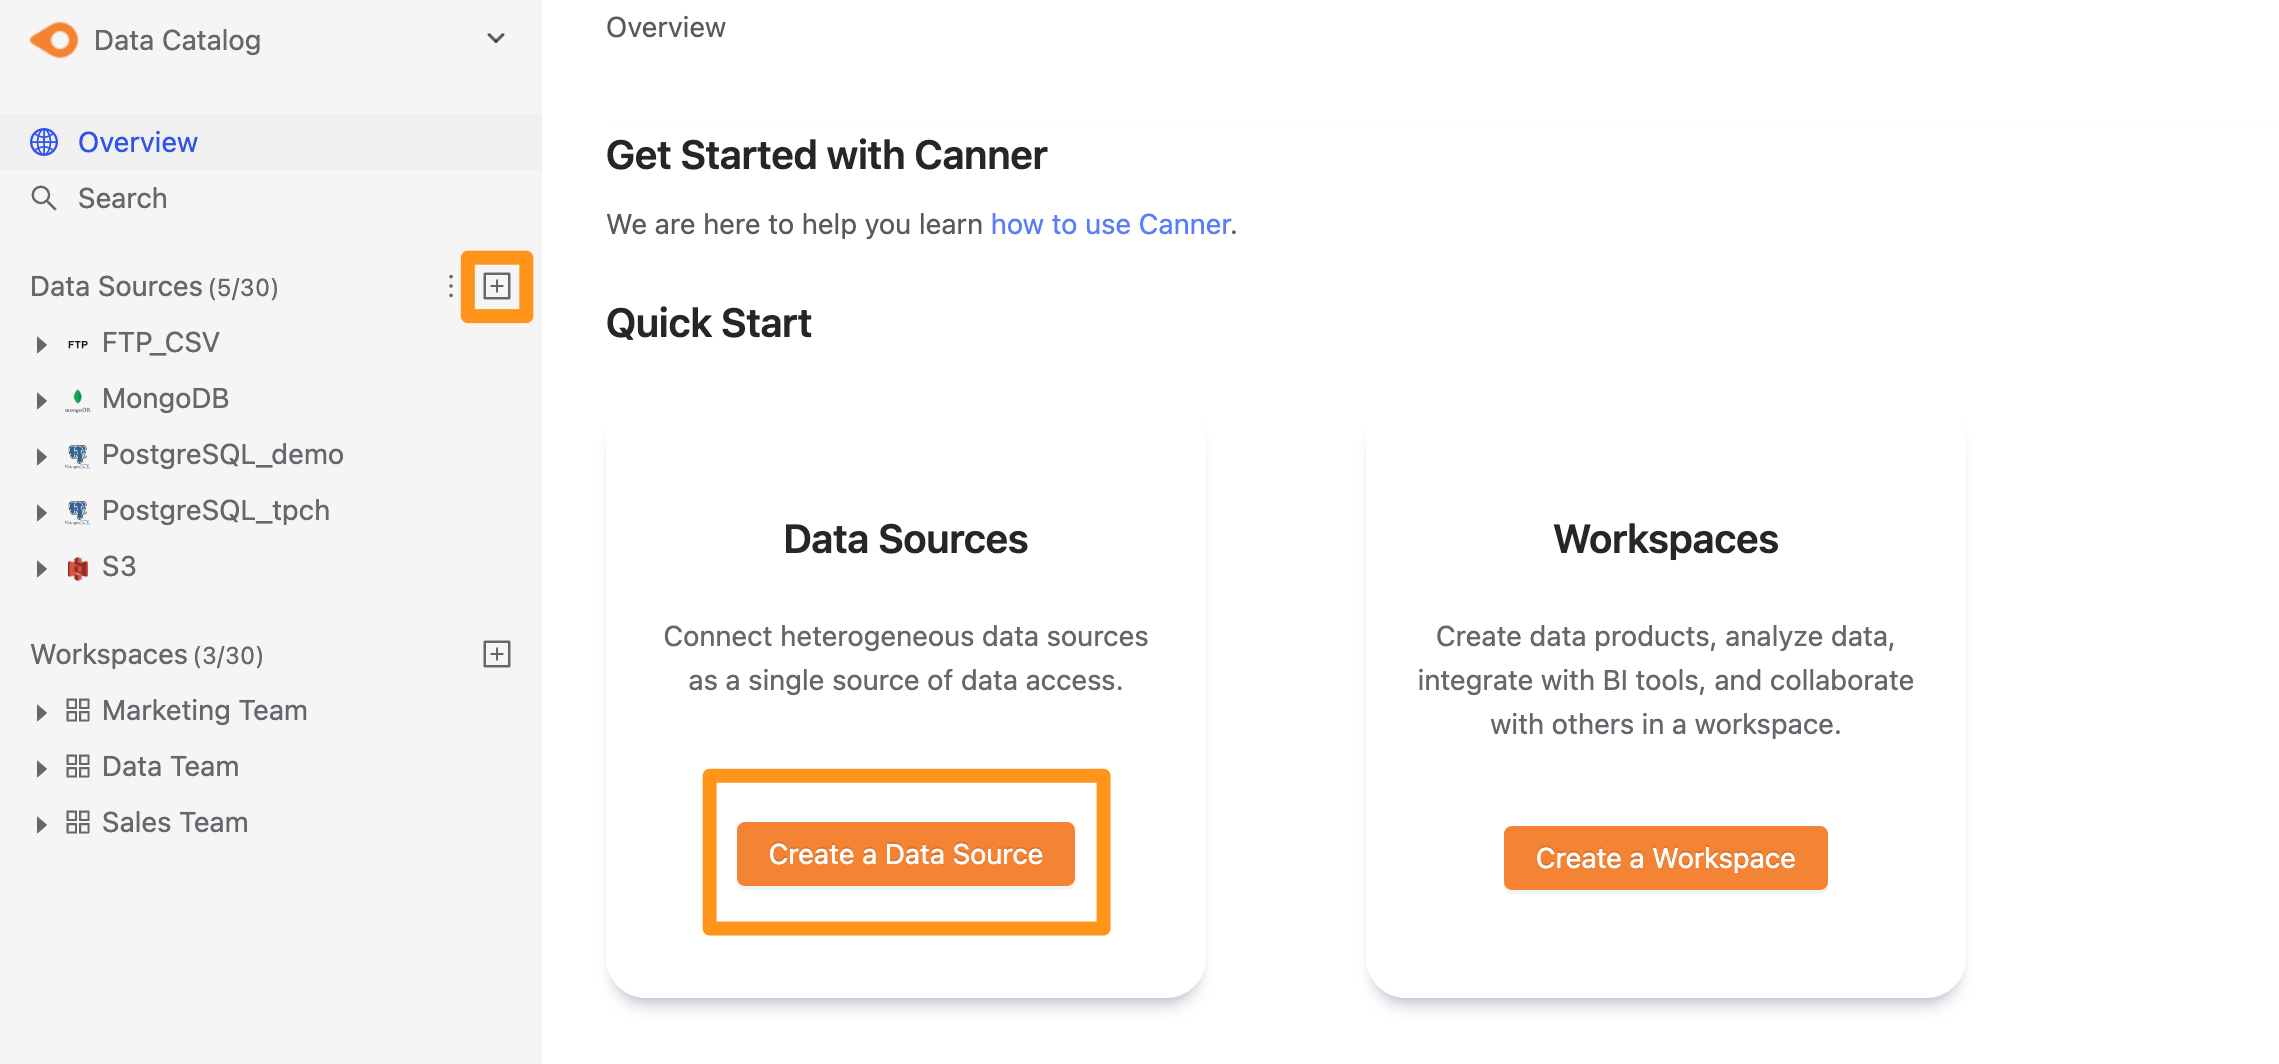
Step 1: Create data sources
You can create a data source through the following two operations. The first is to click the "+" button on the sidebar Data Source or click the Create a Data Source button on the Overview page to create.
Step 2: Set connection information
In the pop-up window form, fill in and set the connection information, and click Submit to send.
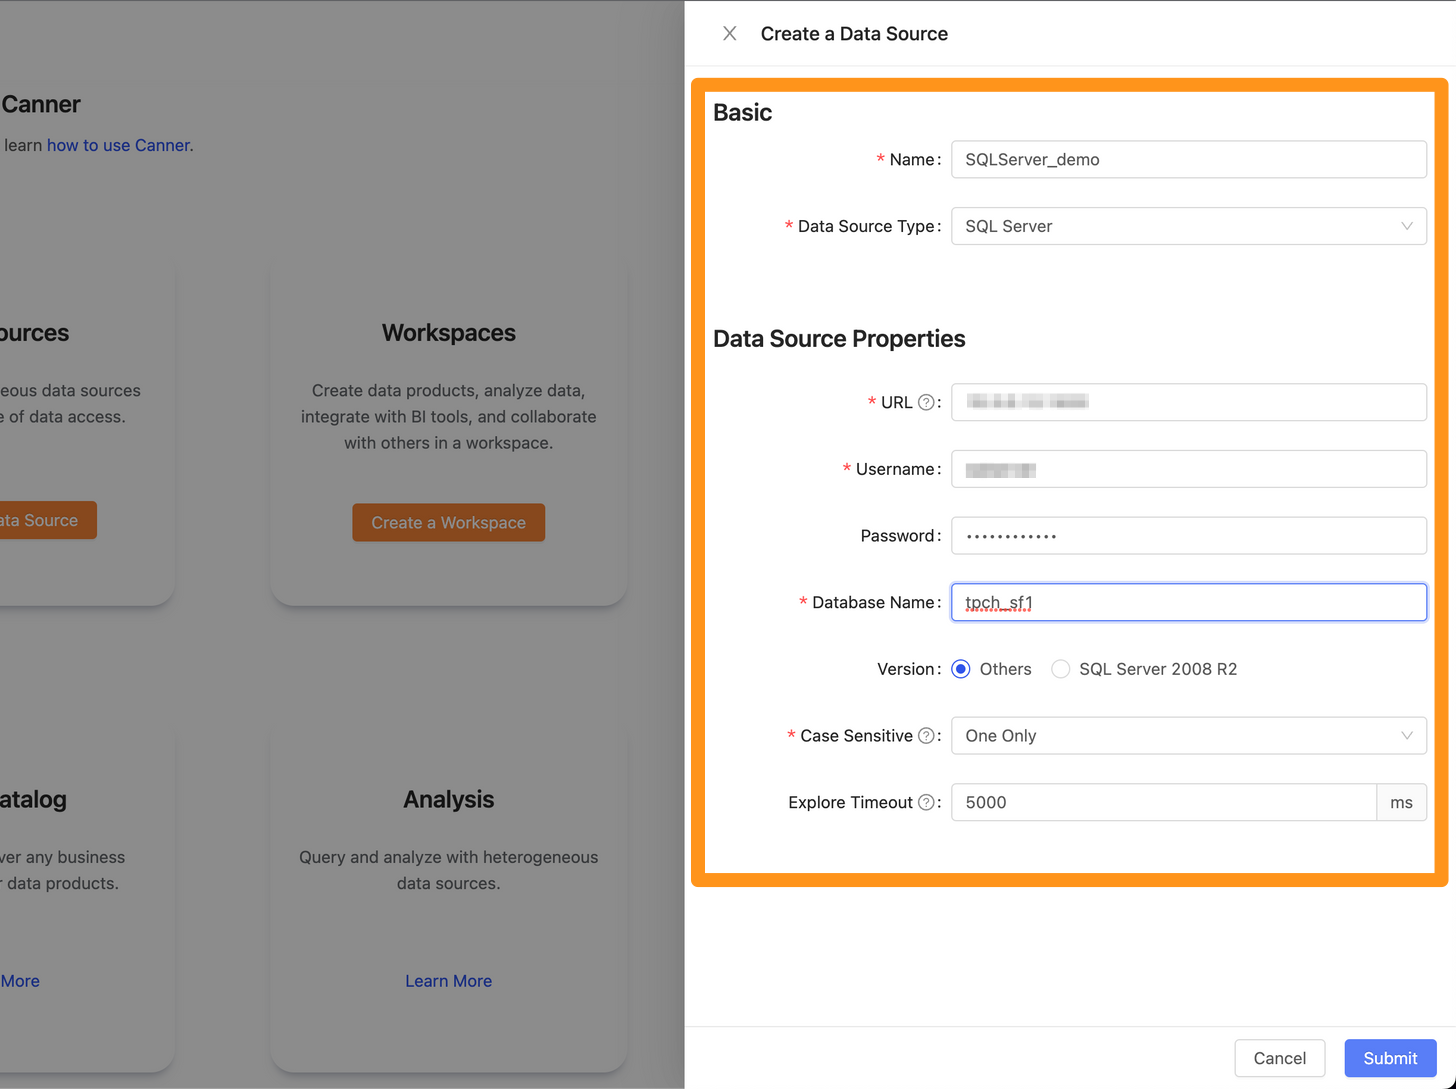
Name: database name, for display, can be modified laterData Source Type: database type, please selectSQL ServerURL: Please fill in<hostname>:<port>format, for exampledatabase-1.cboscstksckj.ap-northeast-1.rds.amazonaws.com:1433,10.207.64.3:1433Username: Username used for connectionPassword: Password used for connectionDatabase Name: The database name of the connection
Info
Table Pattern feature is only available after version 2.4.3
Table Pattern: Can use Java regular expression to filter the tables you want to connect. E.g.public.r.*for selecting all tables under thepublicschema whose names start with the letterr.Explore Timeout: If the database contains a large number of Tables, it is recommended to increase this parameter so that Explorer can wait for a longer time
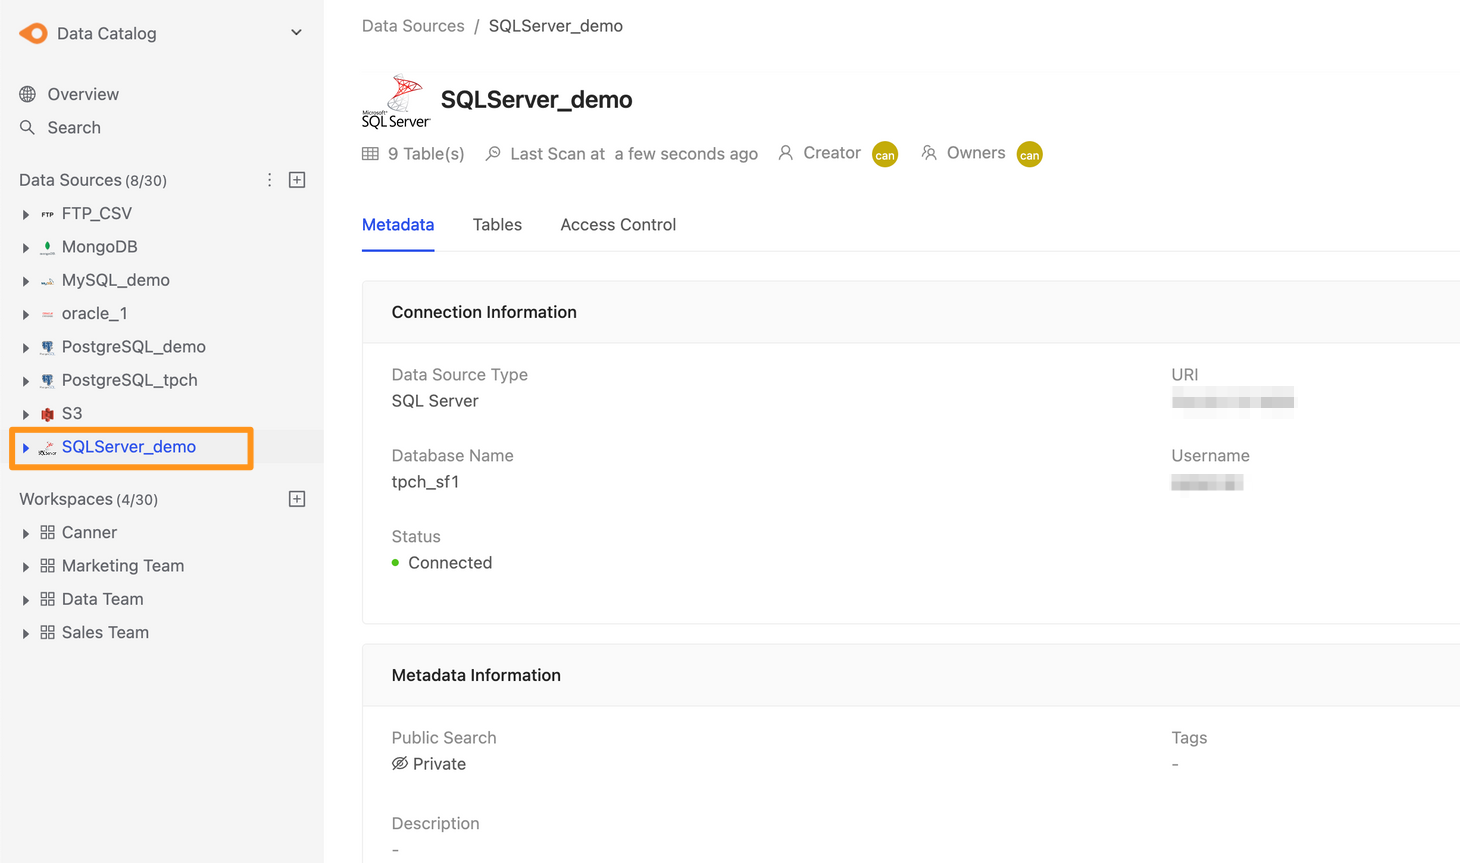
Step 3: Complete the build
After submitting, the Microsoft SQL Server data source will show up in the sidebar after a while, and you can click to enter the data source details page.