Create Workspace
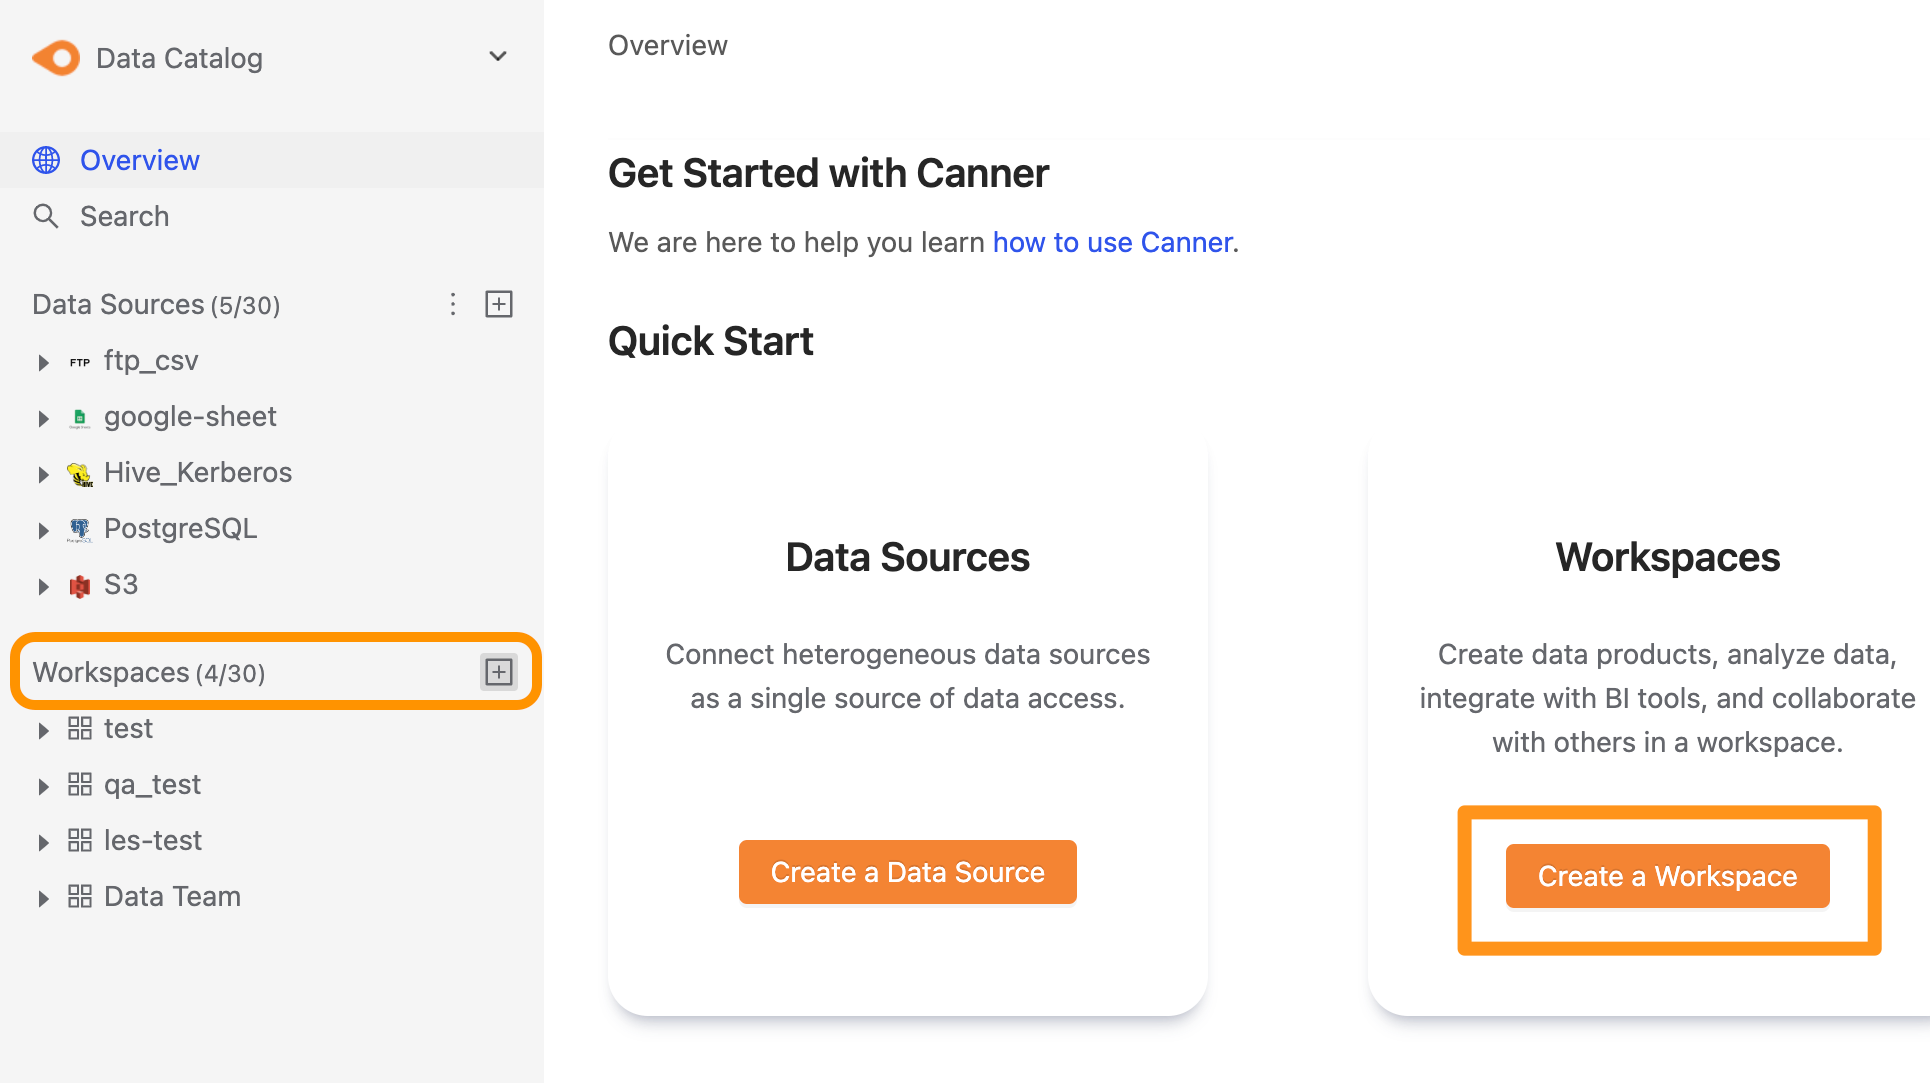
You can create a data source through the following two operations. The first is to click the "+" button on the sidebar Workspace or click the Create a Workspace button on the Overview page.
After clicking Create, a form pops up where you can set the workspace's name.
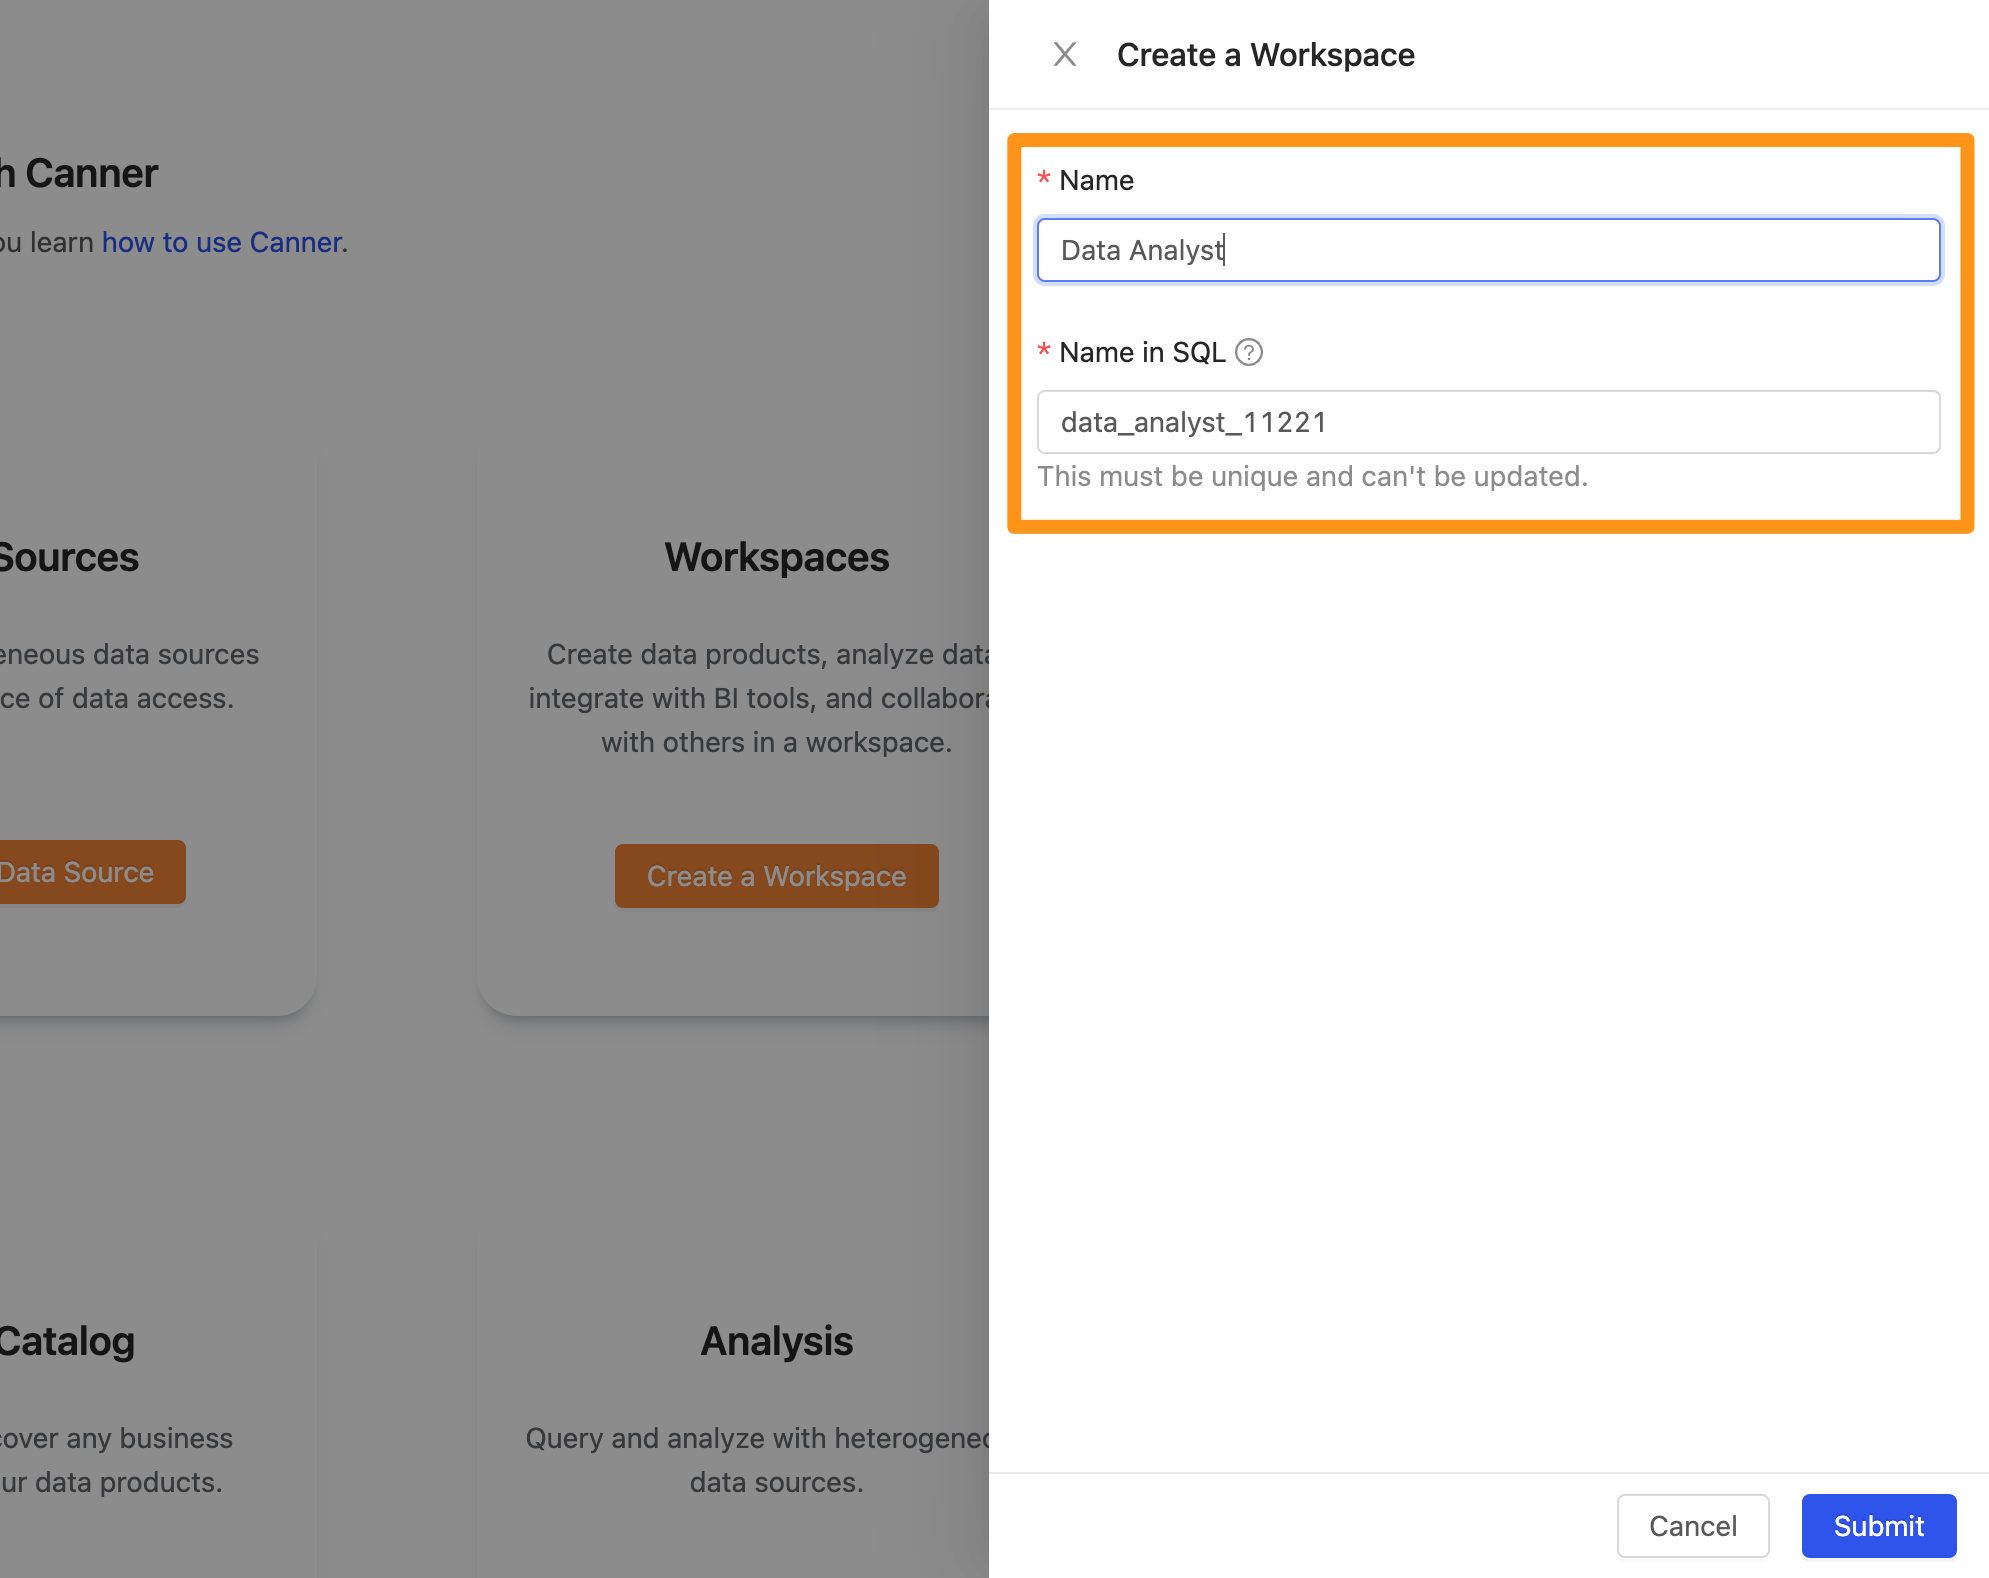
- Name: Enter the name of your workspace
- Name in SQL: Automatically generate an independent ID. The information required to connect to this workspace via API / Driver / Canner Protocol.
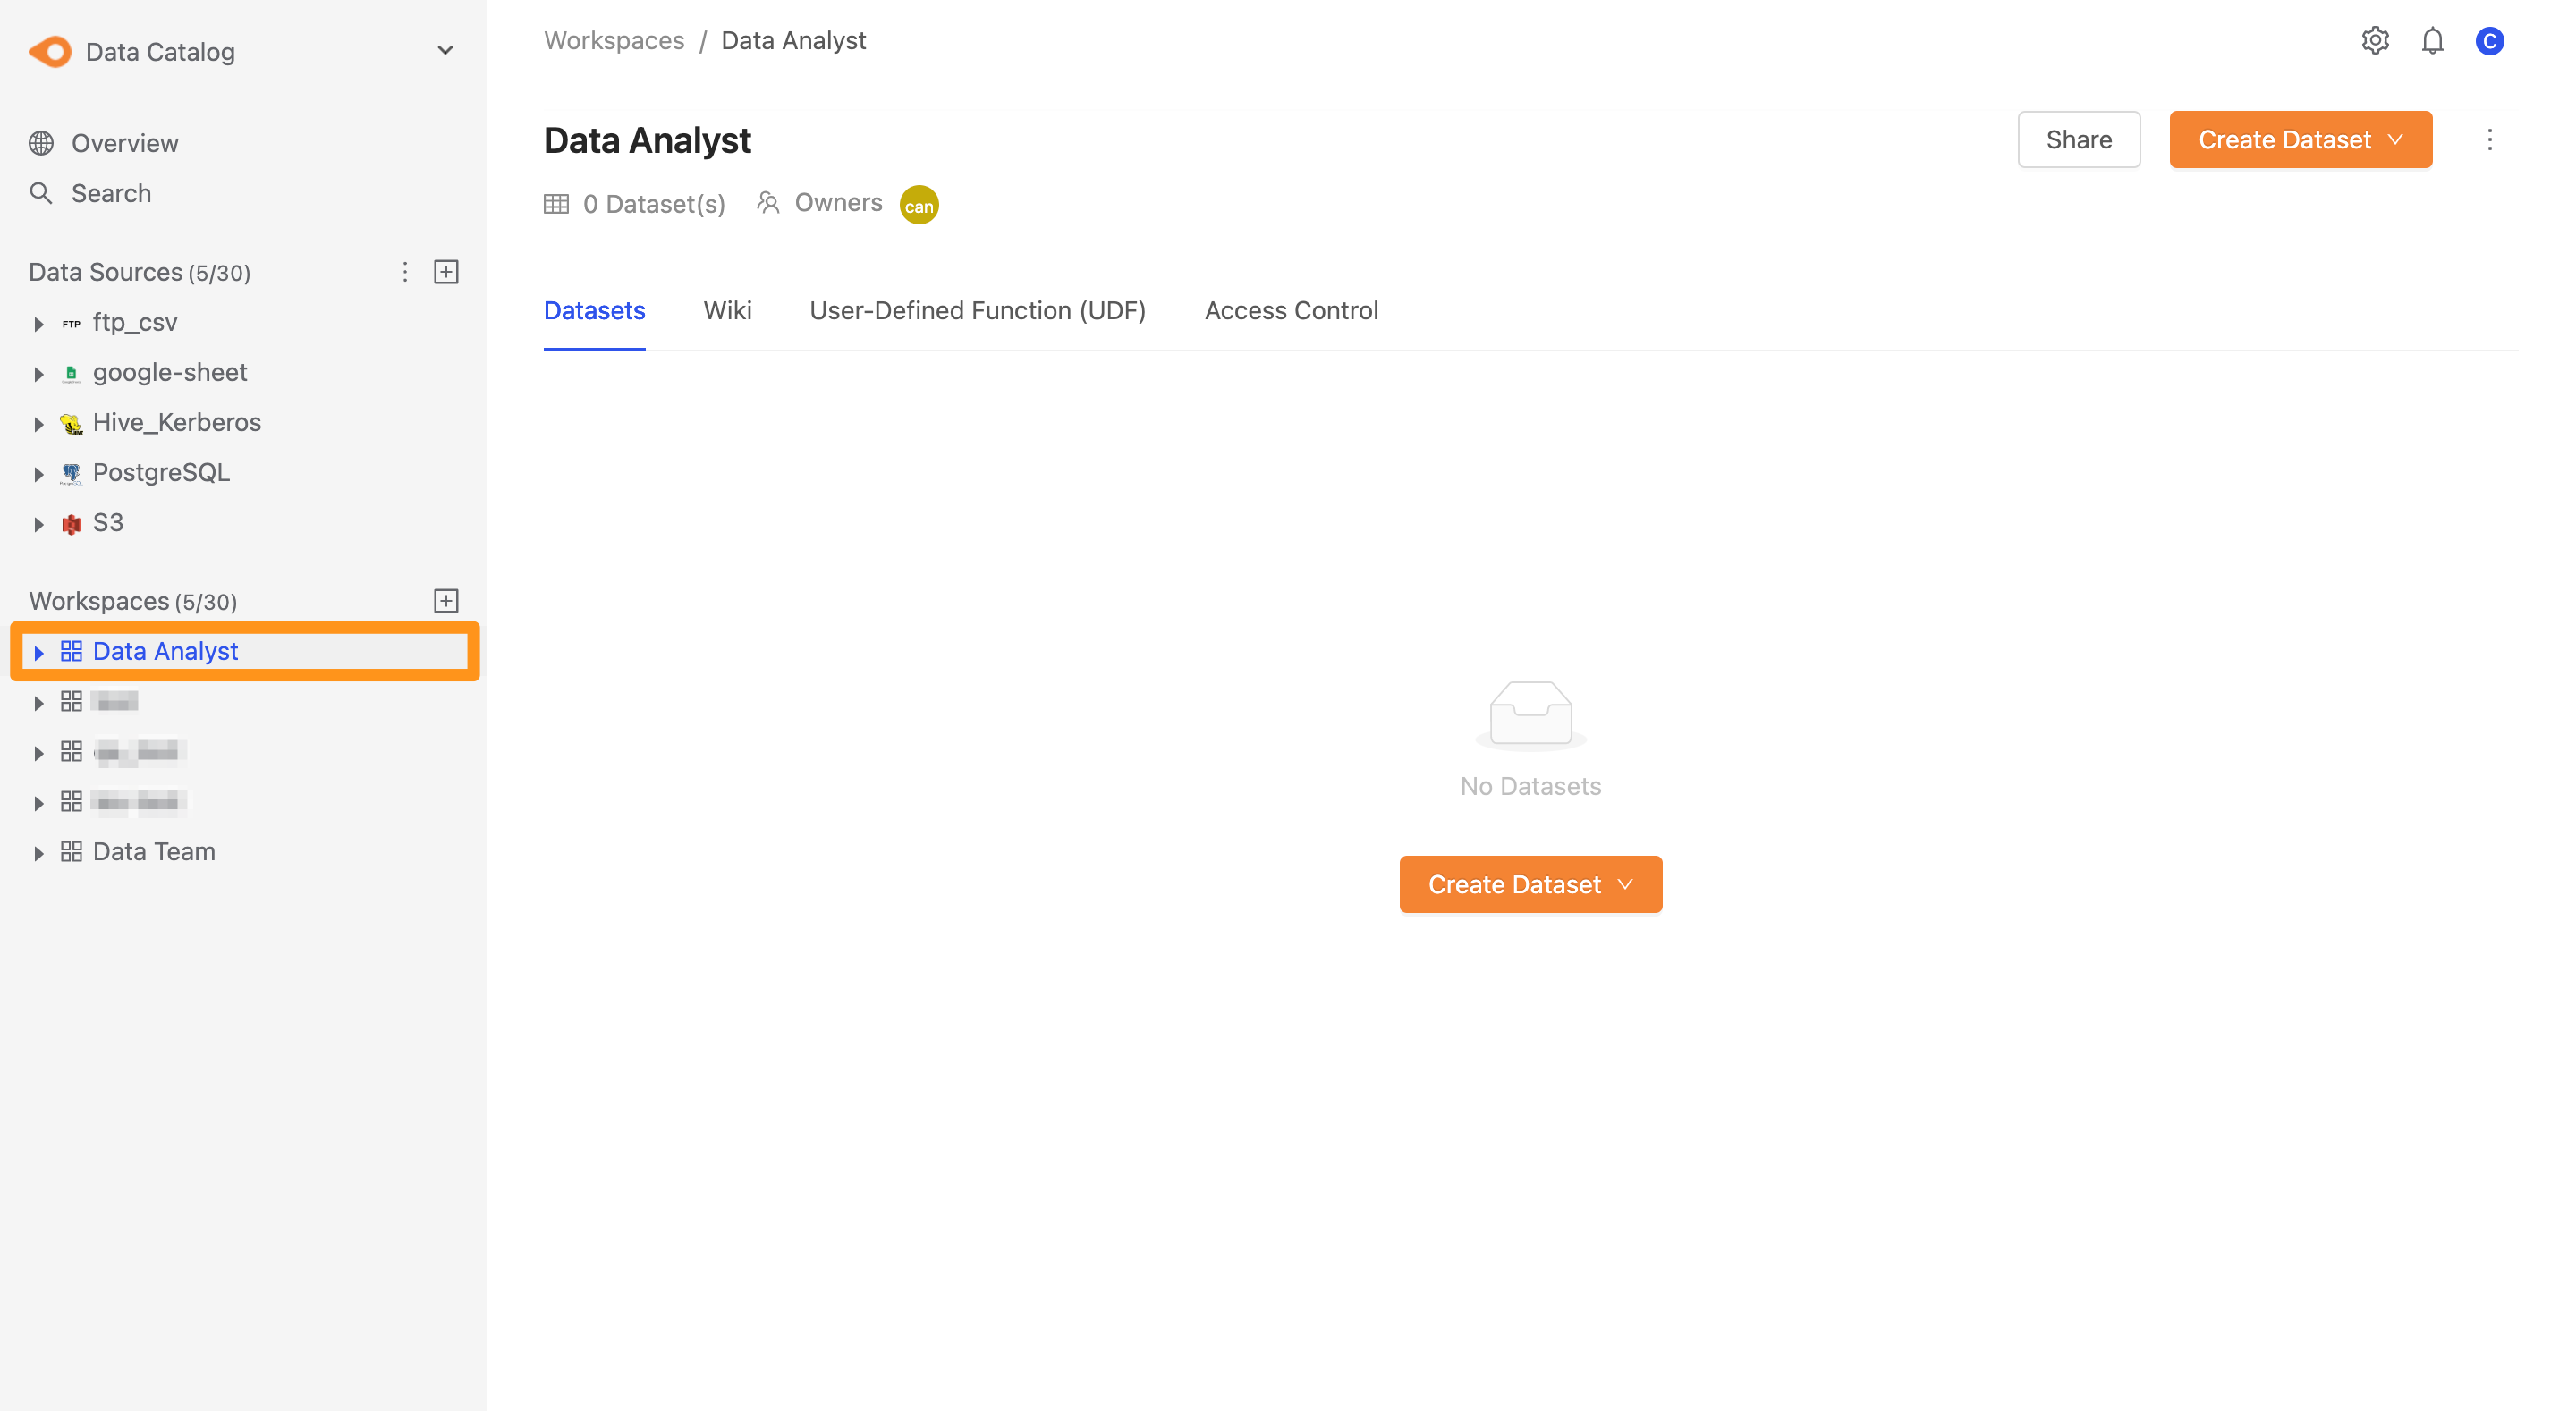
Click Submit. After completing the creation, you can see the workspace in the sidebar. After clicking, you can go to the workspace screen, as shown below.
Workspace introduction
Below the title in the workspace screen, you can see the following information.
- Datasets: represents the number of all datasets in the workspace. In Canner Enterprise, the workspace consists of Table / View / Materialized View / Shared Table, and the data in all workspaces are named after Datasets.
- Owners: represents the role of the owner who created the workspace. Please refer to Workspace Access Control for details.

In the upper right corner of the workspace screen, primary operations can perform on this workspace.
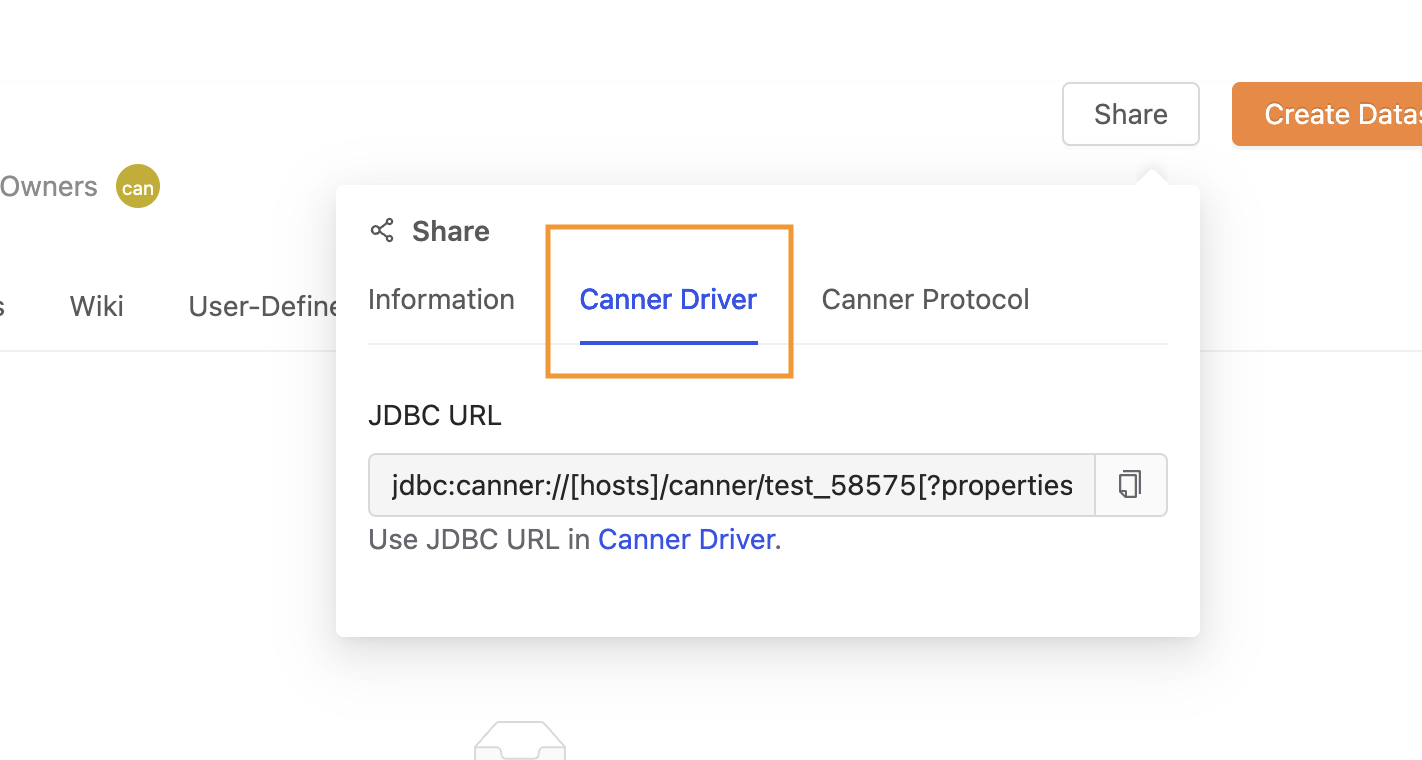
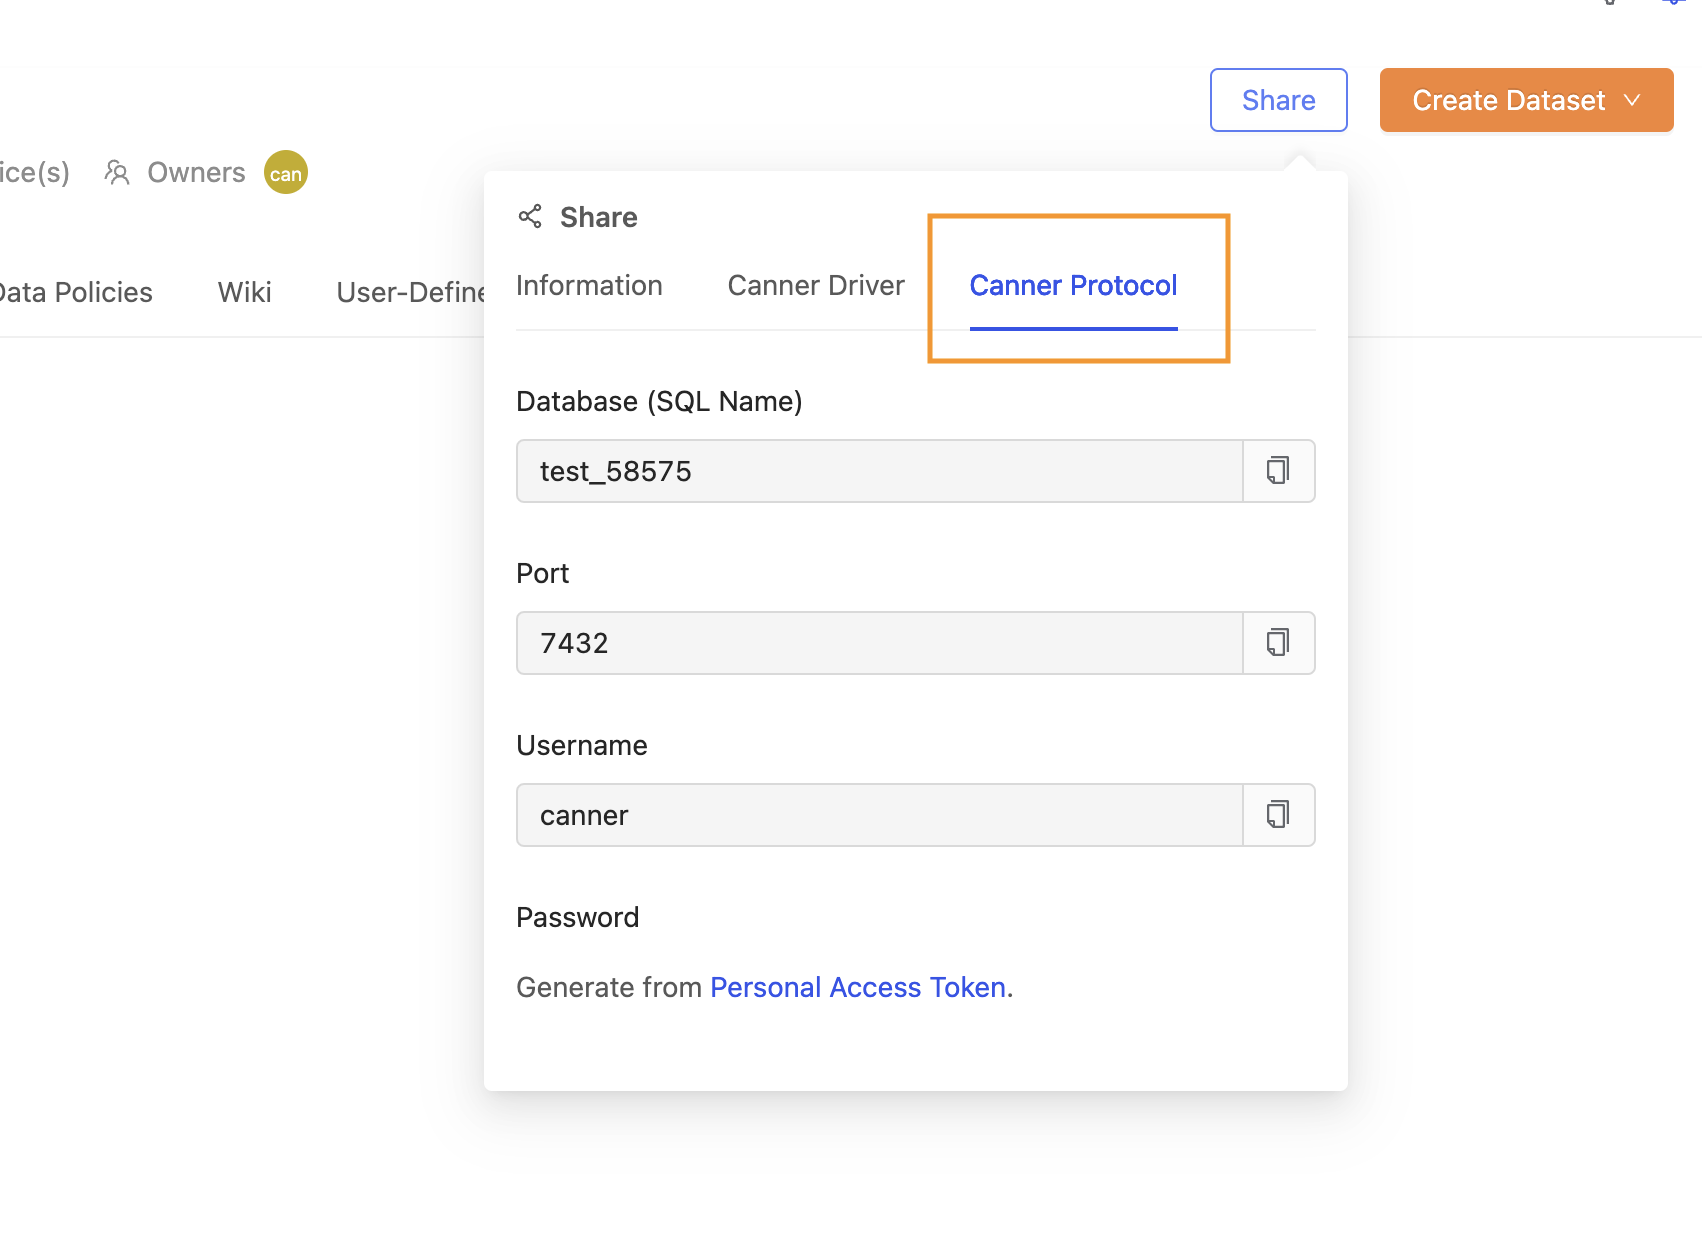
Sharebutton: After clicking it, you can mainly see how to use third-party applications to connect to Canner Enterprise and the required connection parameter information.
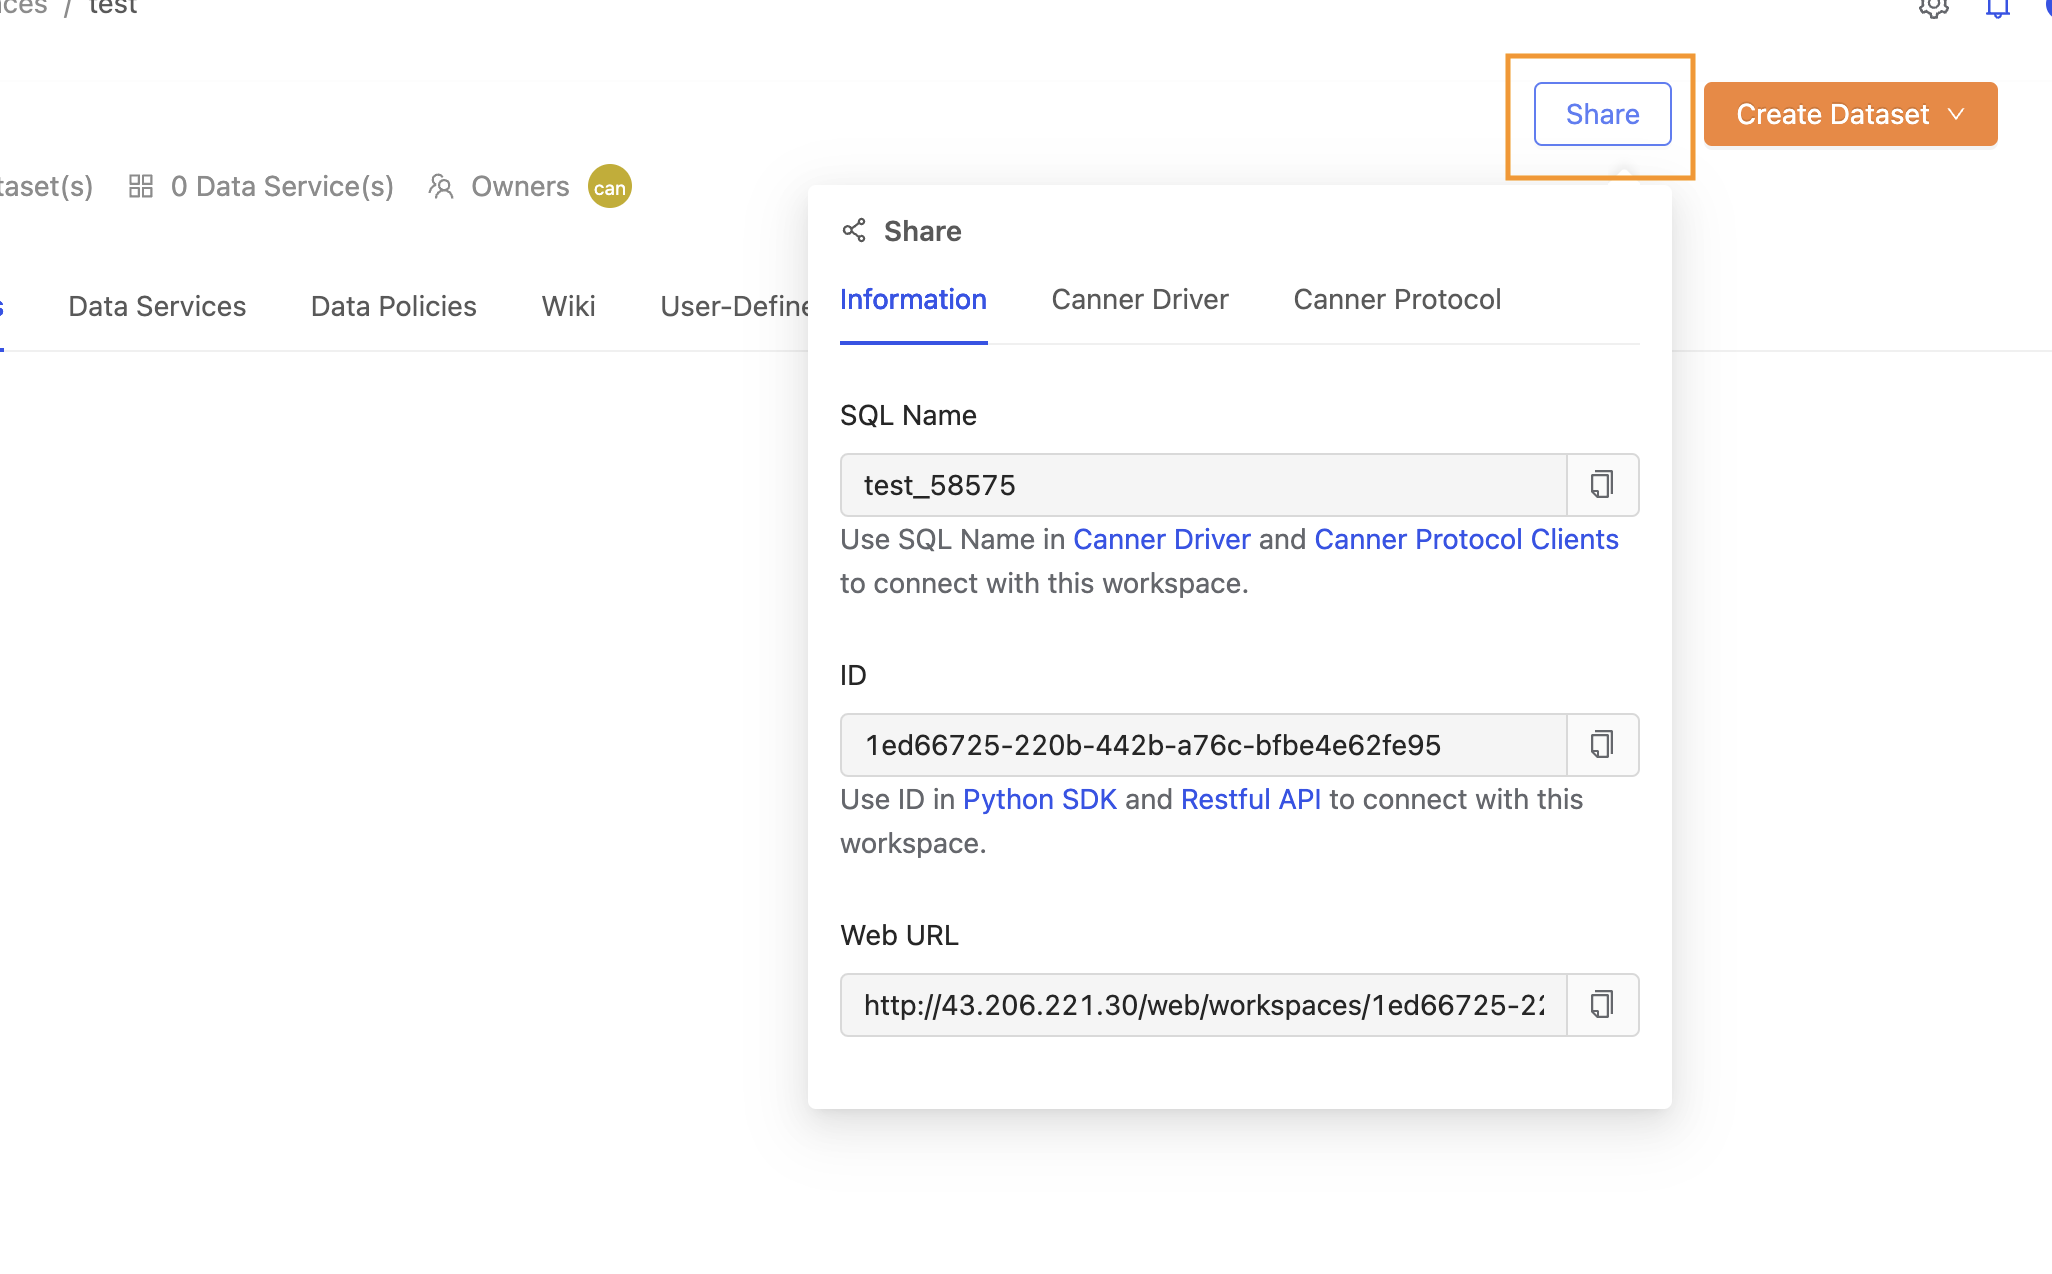
- Information about connecting to the workspace through the Canner Driver
- Information about connecting to the workspace via the Canner Protocol
Create Datasetbutton: After clicking, it mainly adds data from the data source to the workspace for the workspace.

...button: After clicking it, you can mainly see how to connect to Canner Enterprise and the required connection parameter information if you want to use a third-party application.

- Open in: Open the screen in other functional modules of this workspace
- View Schema History: View the Schema history of the workspace. For details, please refer to Workspace Schema Change Detection.
- Settings: Workspace management content. For details, please refer to Workspace Management
- Delete: Delete workspace