Tableau Data Push
Only versions above 2018.1 (inclusive) are currently supported.
You will learn
- How to operate Canner Enterprise to publish data to Tableau Server
- How to set schedule update
- How to do access control
Process Overview
The integration of Canner Enterprise and Tableau differs from the general Data Warehouse/Database connection through the connector.
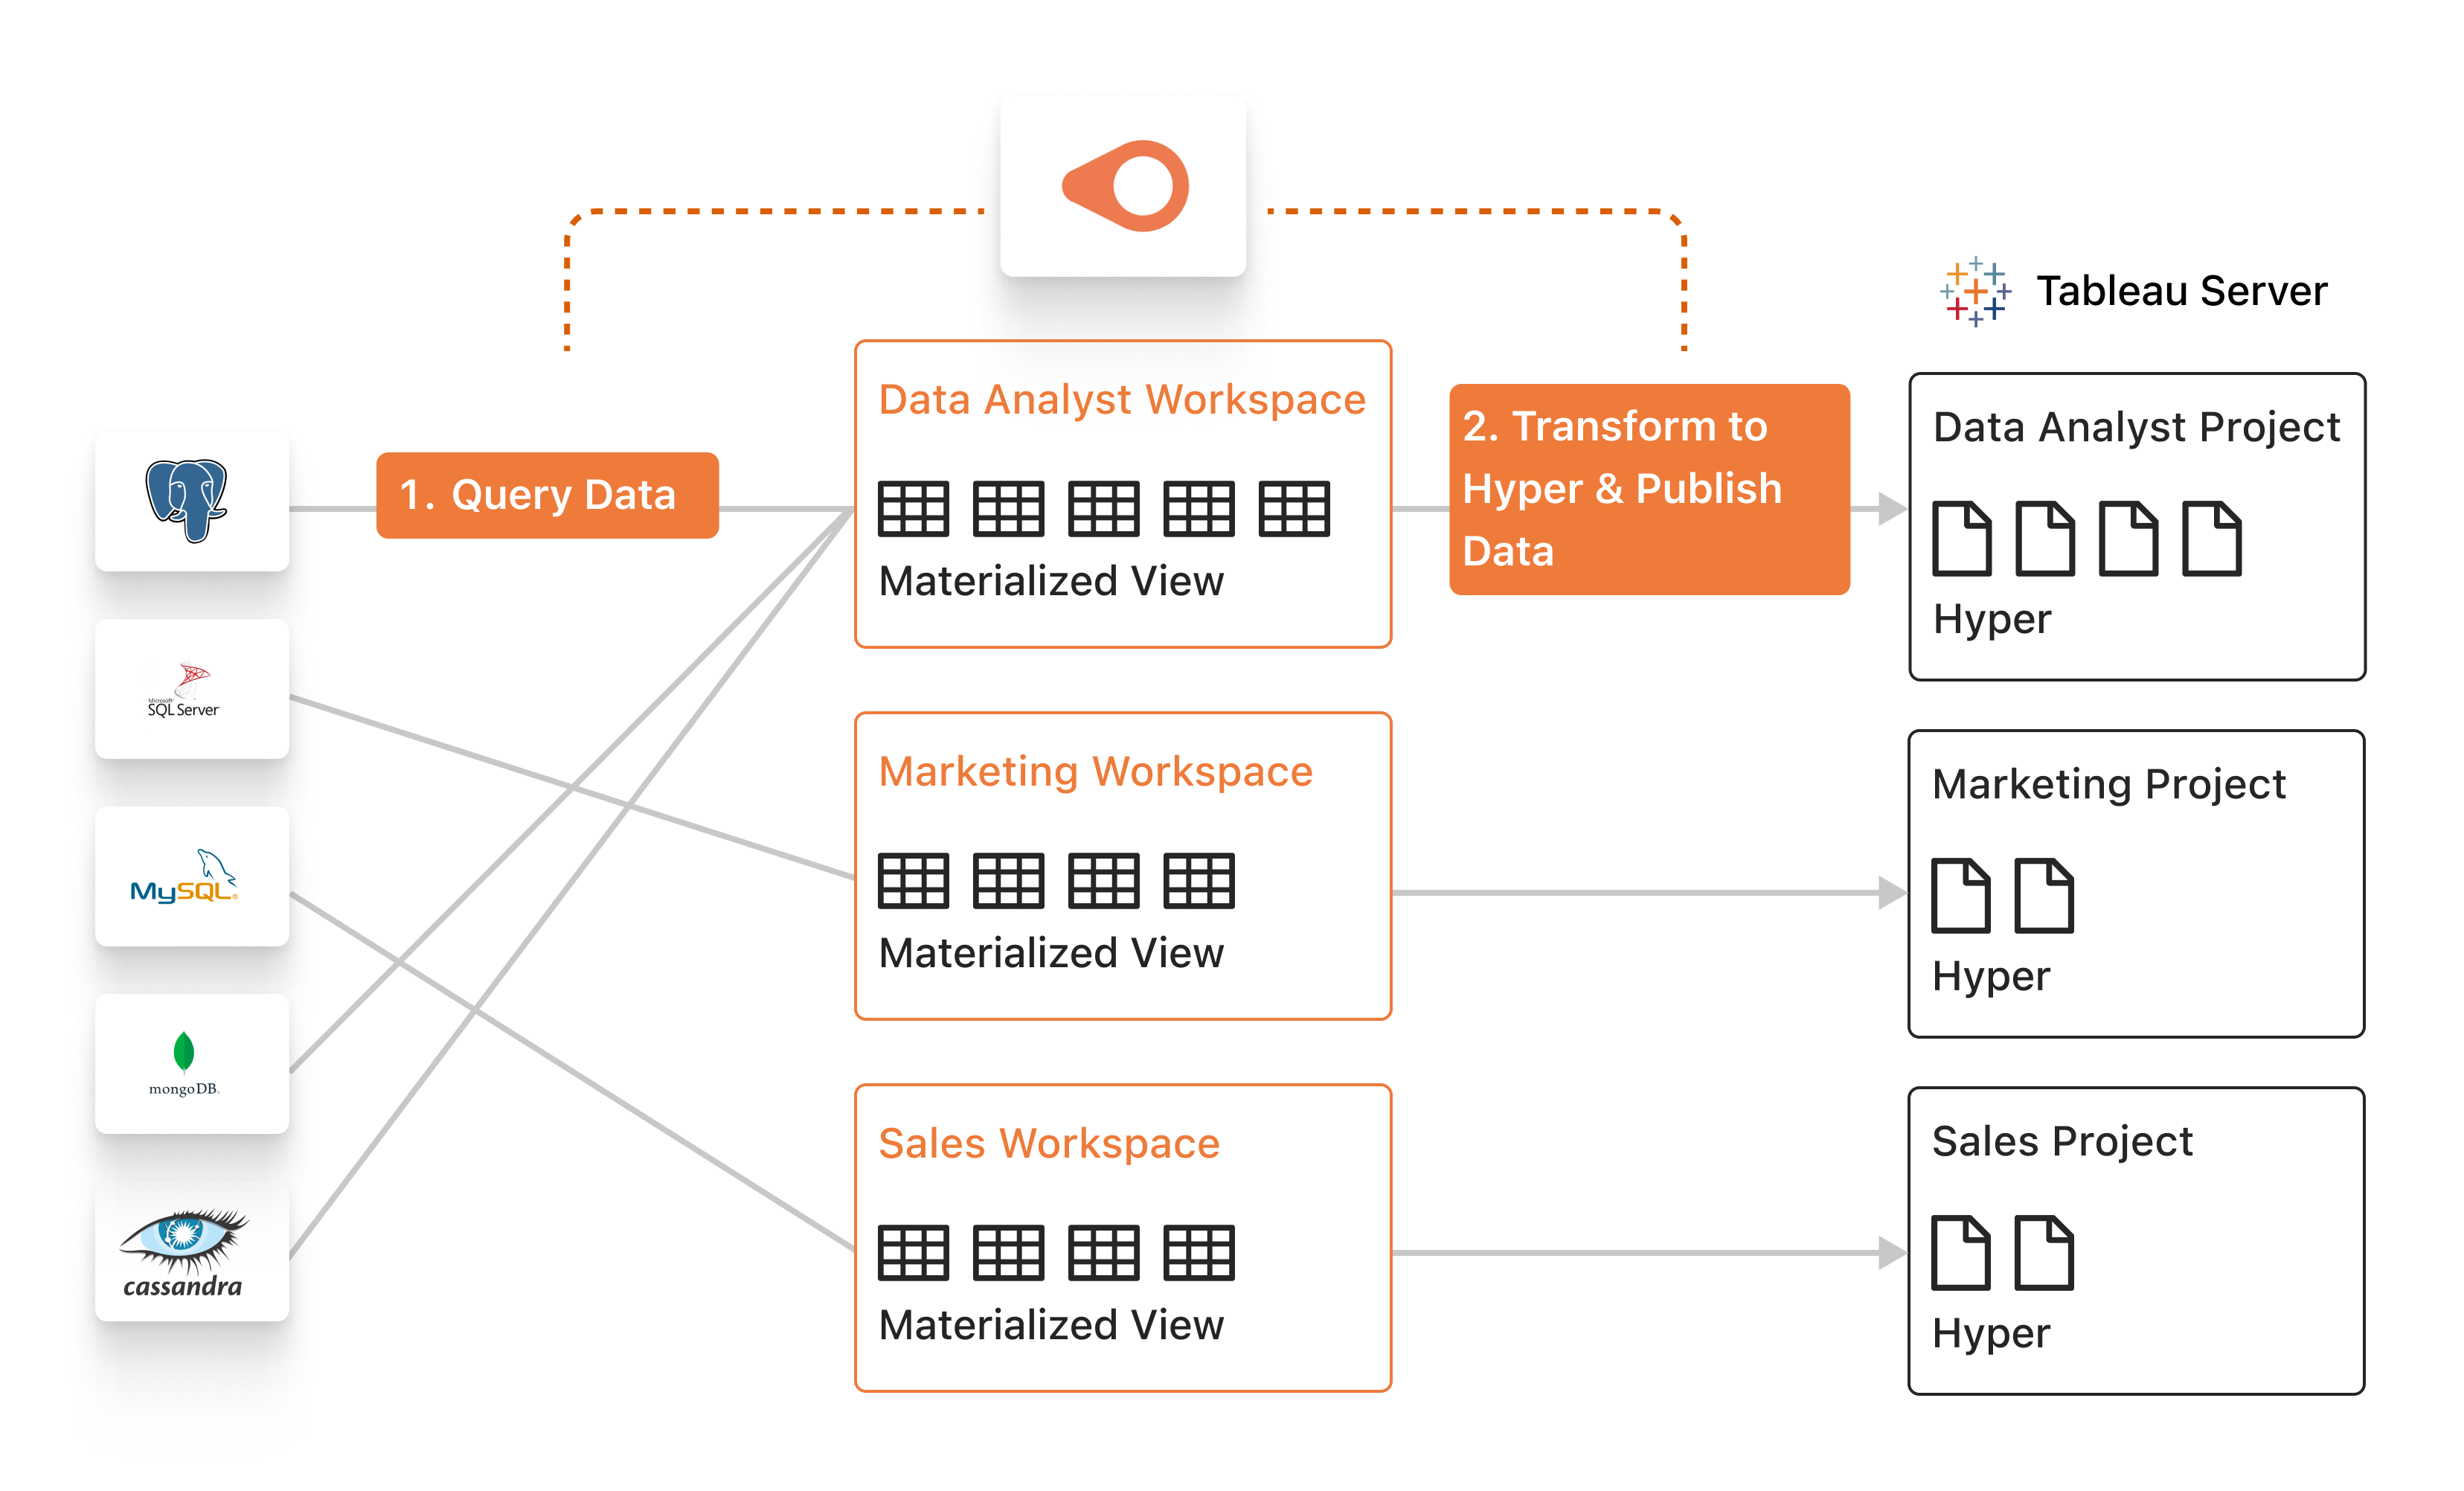
- Query Data: The user first configures Canner Enterprise to integrate data from different sources through Materialized View.
- Transform to Hyper & Publish Data: Canner Enterprise converts data into Hyper format and publishes it to Tableau Server.
- Result: After the Materialized View is created, Canner Enterprise will publish the Materialized View to the corresponding Site and Project on Tableau Server according to the established Tableau Publish information.
When Tableau Server successfully receives the published data, it will be visible in the corresponding Project.

testing_bi_60622.order100in the picture is the information released by Canner Enterprise
Publish data to Tableau Server
Step 1: Create Credential on Tableau Server
- Versions above
2019.4can usePersonal Access TokenorAccount Passwordfor authentication - Versions below
2019.4can only useaccount passwordfor authentication
- Use Personal Access Token (above 2019.4)
- Use account password (2018.1 and above)
 Please select My Account Settings from the drop-down menu in the upper right corner.
 And go to the Personal Access Tokens block, add a Personal Access Token, enter the Token Name, and click the create new token button
Please note that the token name does not contain illegal characters (characters such as !@#.&), and blank spaces.
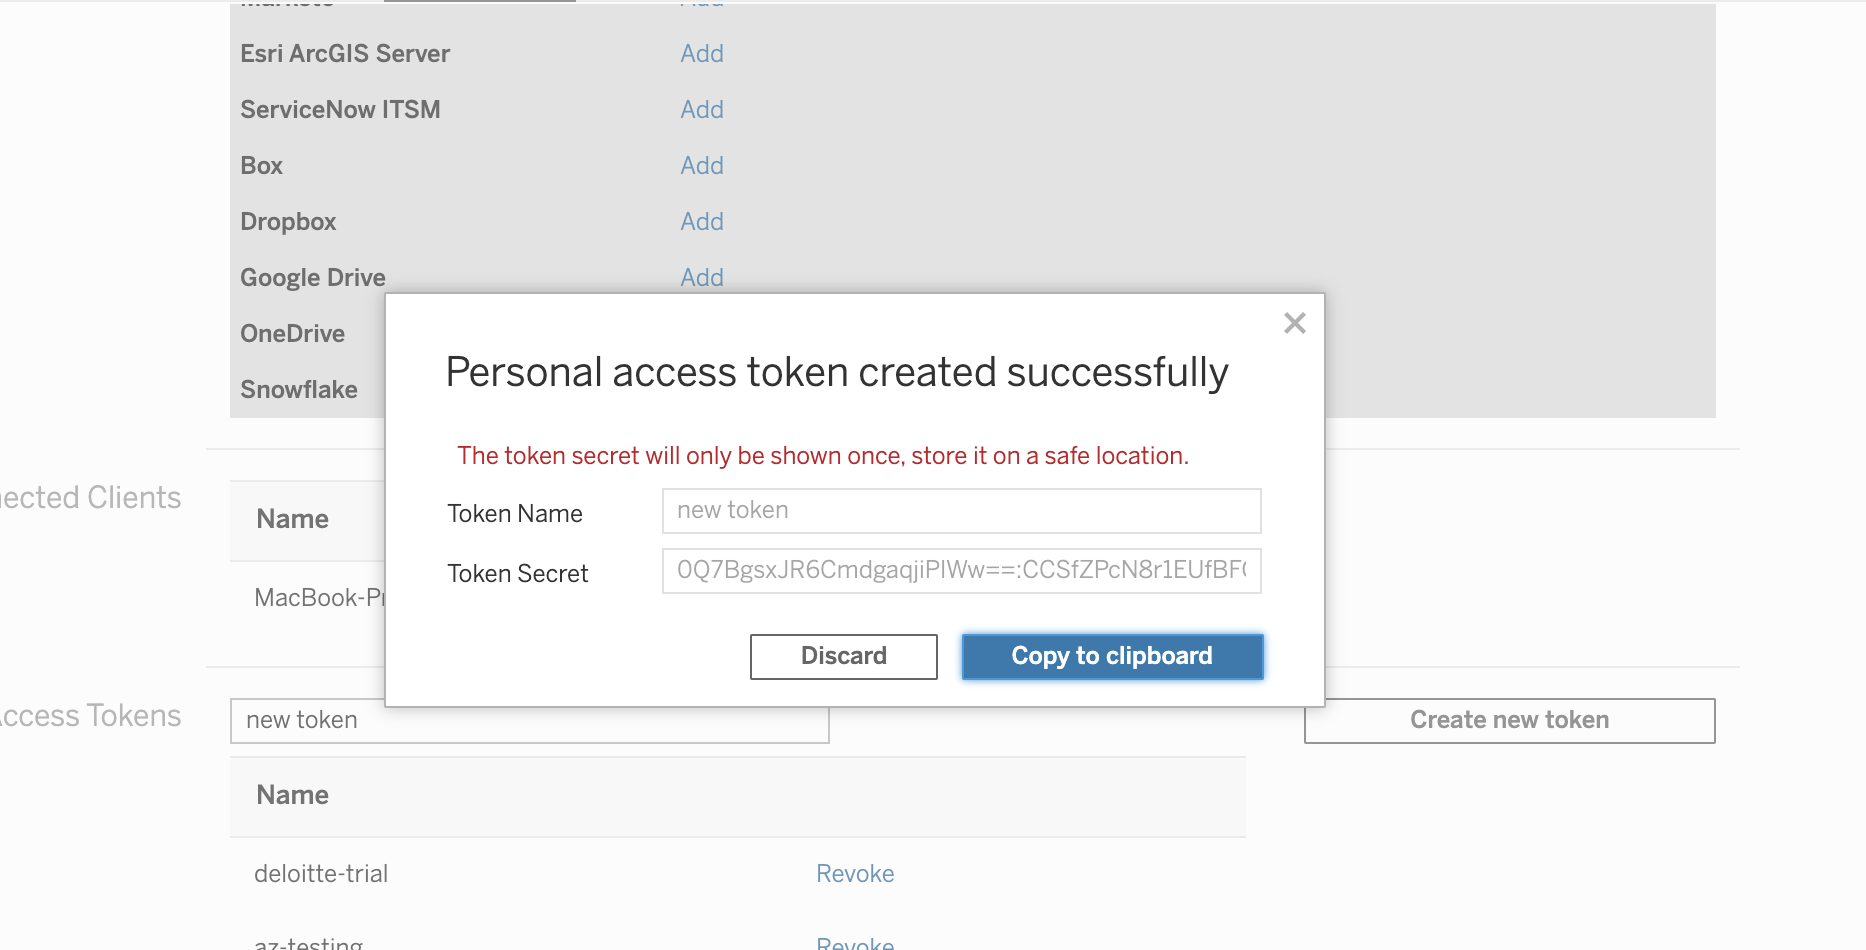 Then a window will pop up, and click Copy to clipboard to copy the secret token.
Go back to the Canner Enterprise page, click the gear icon in the upper right corner, expand the menu, and select Credentials.
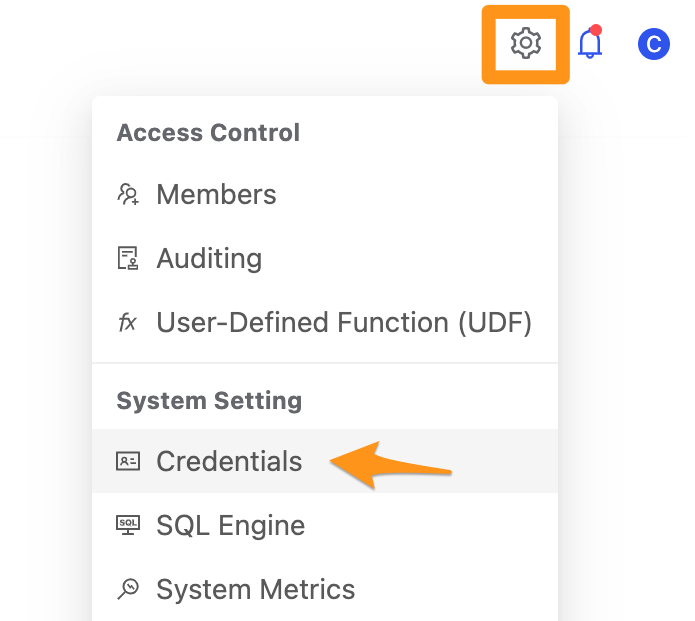
Once in, click Create a Credential.

Select Tableau Token, enter the following information.
1. Credential Name: This name is used for your convenience to identify the Credential and can select in subsequent steps
2. Token Name: Enter the Token Name of the Personal Access Token in the previous step
3. Token Secret: Enter the Token Secret copied from the Personal Access Token in the previous step
4. Host: Enter the URL of the tableau server, enter https://canner-test.online.tableau.com in a format similar to this

Here you will use your user account password on Tableau as authorization.
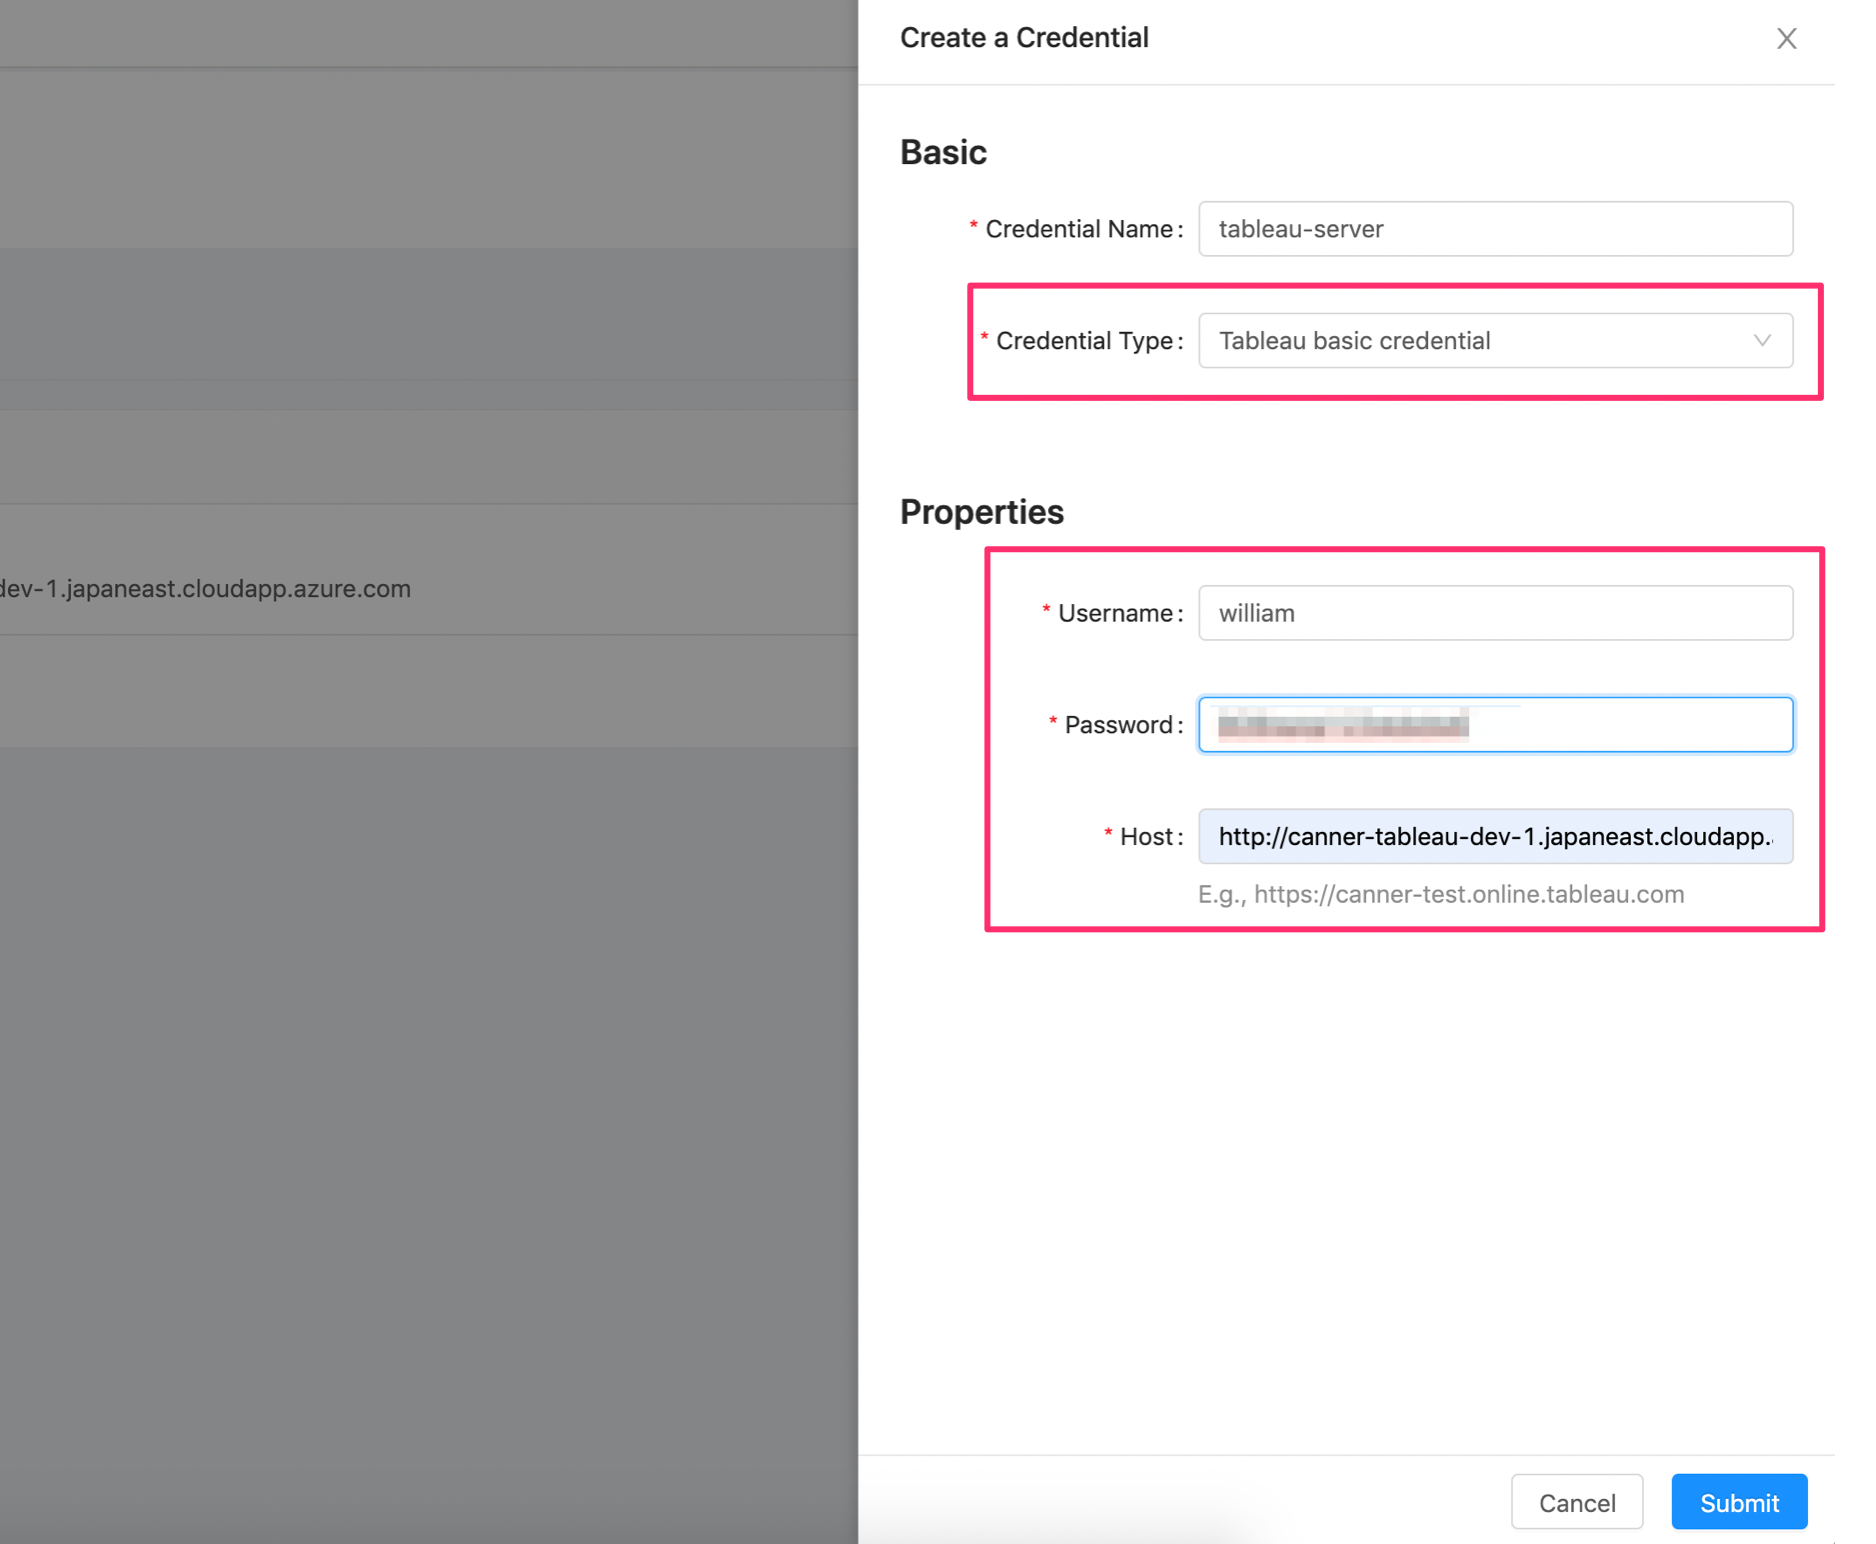 Go to the Canner Enterprise Settings page, click Create a credential in the Credentials section, select
 Tableau basic credential, and enter the following information.
1. Username: Tableau username
2. Password: Tableau user password
3. Host: Enter the URL of the tableau server, enter https://canner-test.online.tableau.com in a format similar to this
Step 2: Create the material you want to publish to Tableau Server as a Materialized View
Refer to How to Create Materialized View.
Step 3: Set up Tableau Publish
Click the function in the upper left corner to switch to Data Push and enter the Tableau page.

Click the Create a Publish button.
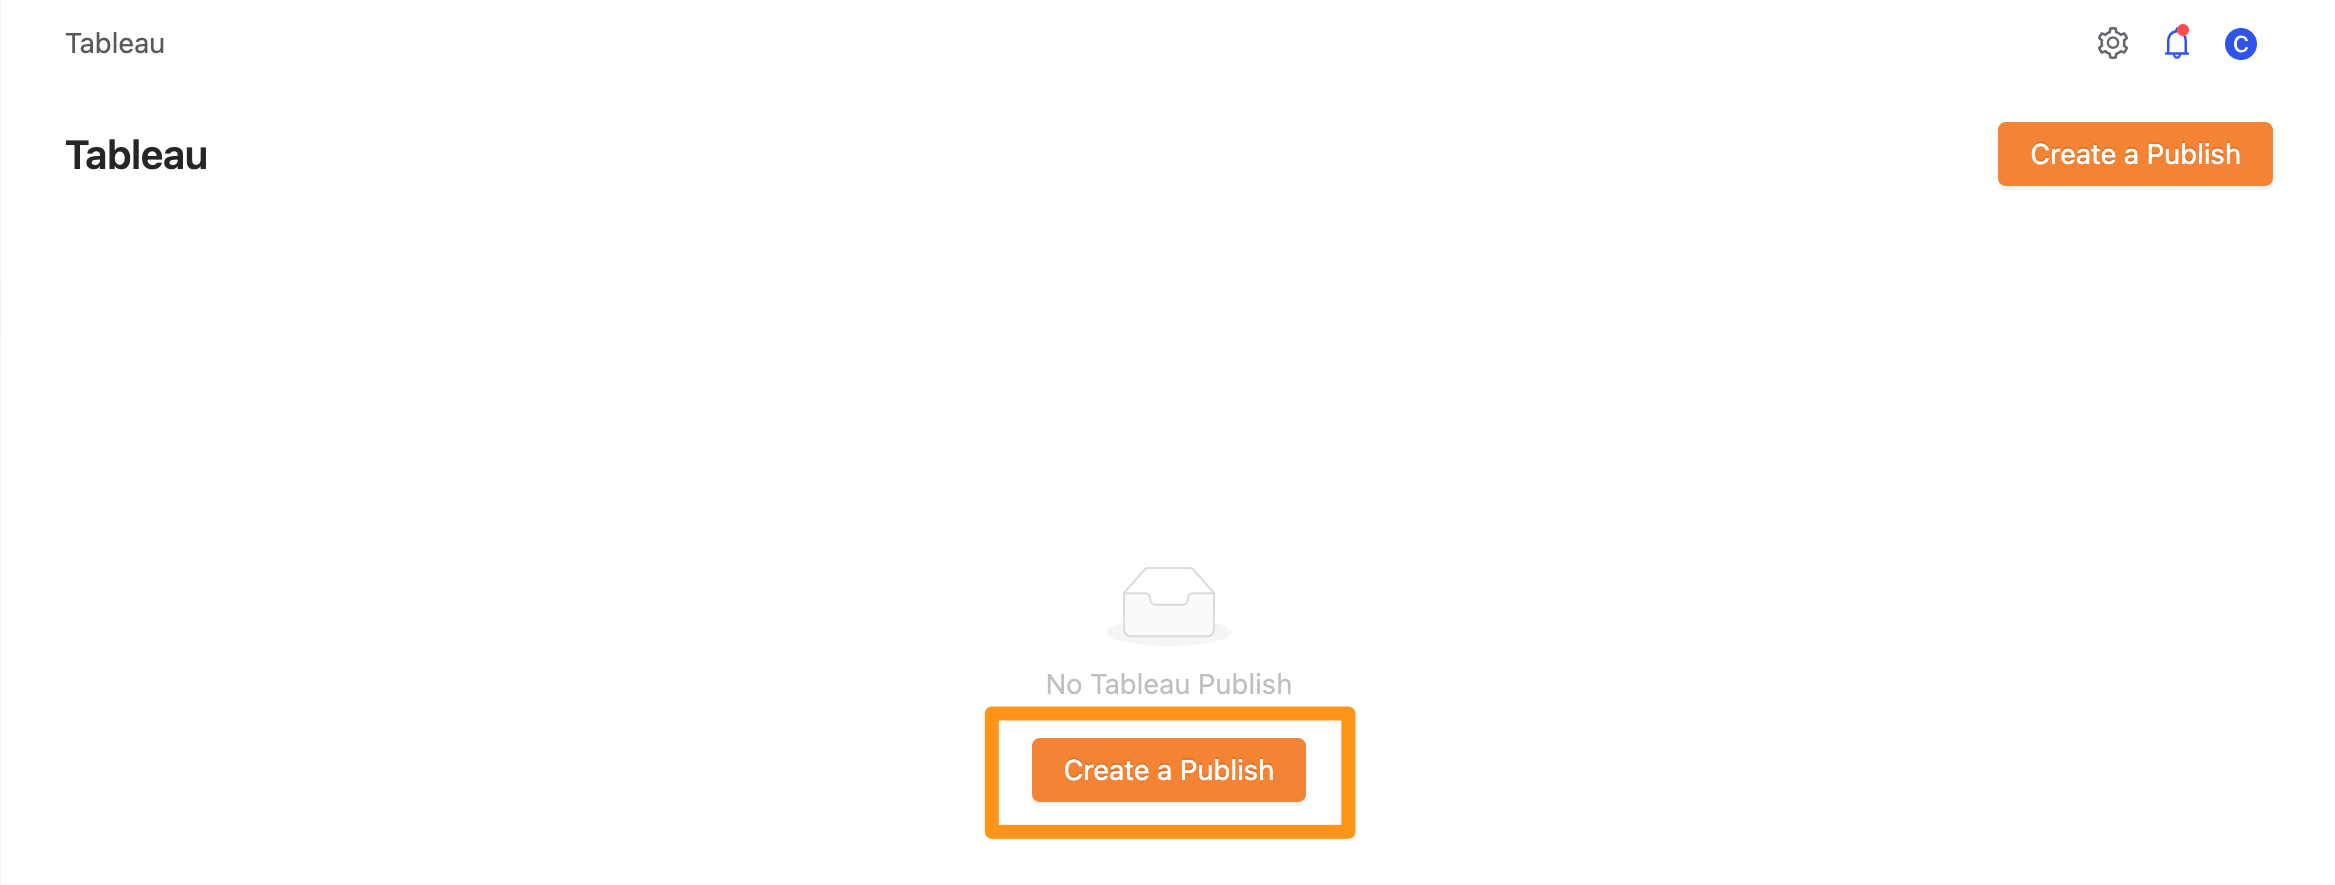
Fill in Tableau Server related information.
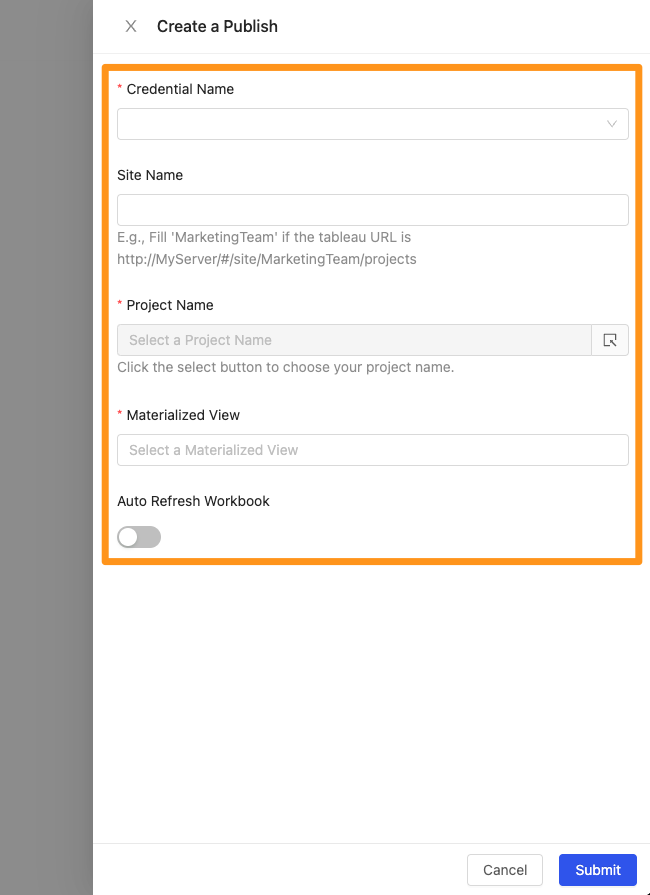
1. Site Name
Deploy to the Default Site; please leave this field blank (if there is no new site, if there is only one Site, please leave this field blank). If there are multiple Sites, please go to the Settings page to copy the site id and paste it into this column.
Settings > Site Name and ID of Default Site will be shown below on Tableau; please leave this field blank

Settings > Site Name and ID of non-Default Site will be as shown in Tableau; please copy the value of ID (Seen in URL)

2. Select the Credential created in the previous step
Please select Credential at this step before selecting Project in the next step.
3. Select a Project
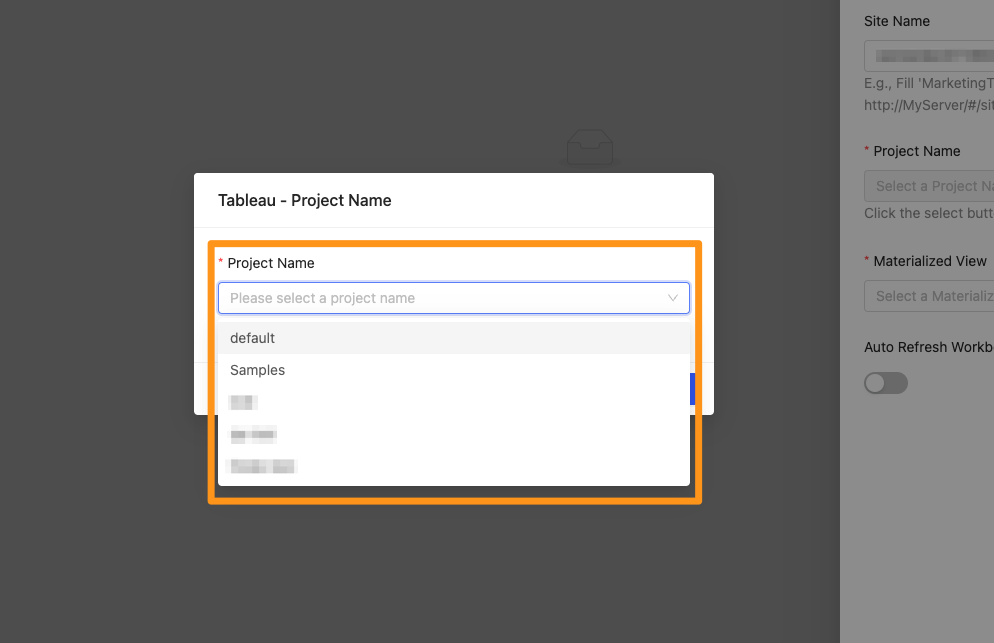
In this step, you need to select the Project where the data is stored.
4. Select multiple Materialized Views
In this step, you need to choose to publish data.
Step 4: Wait for the completion
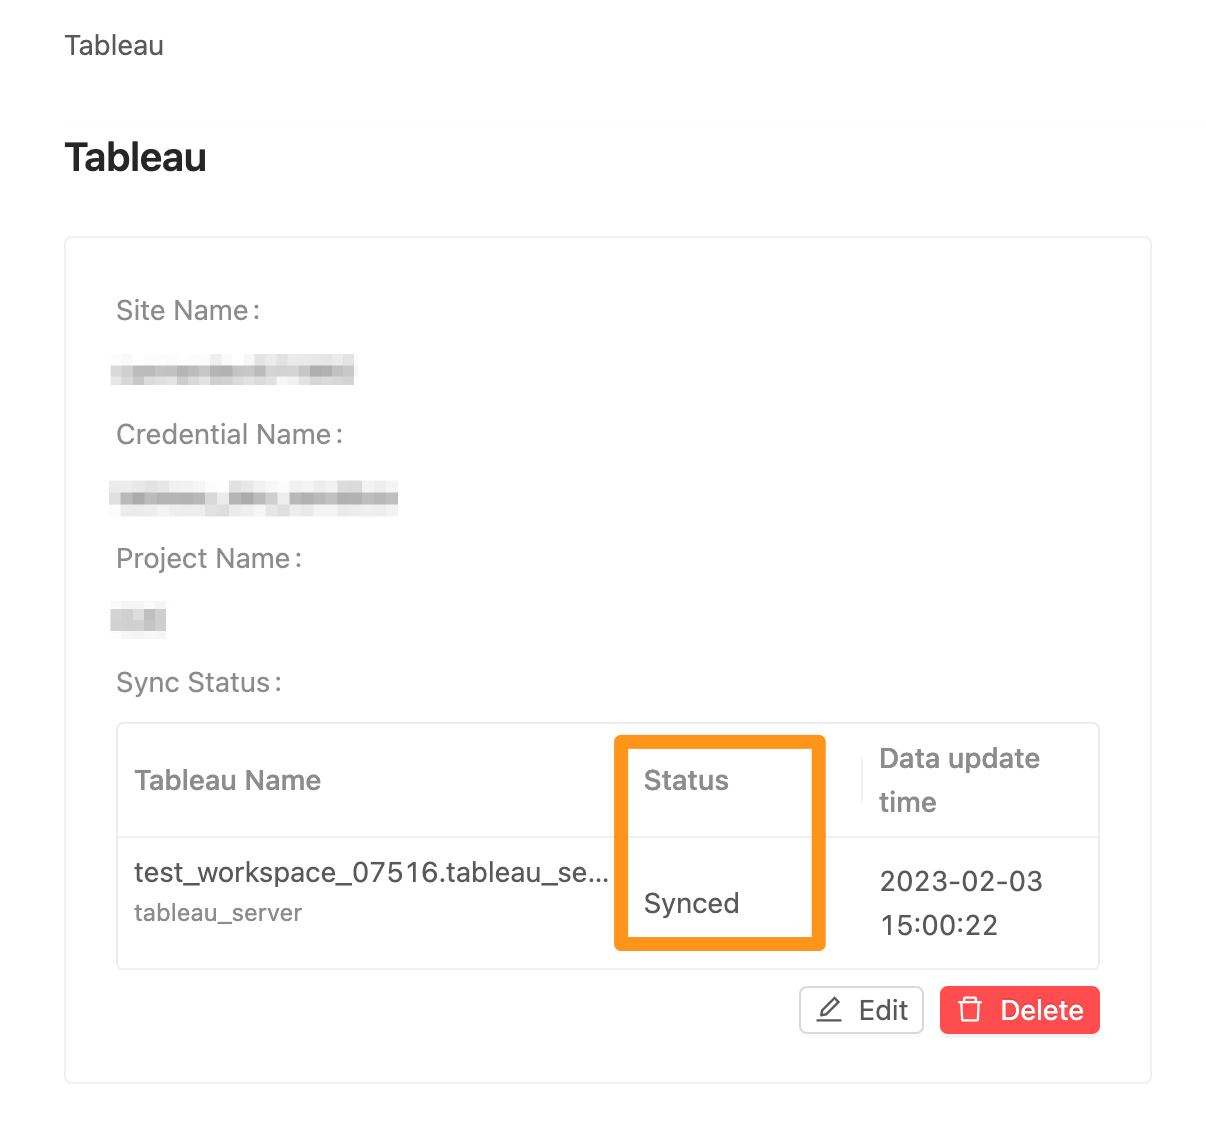 Each Tableau Publish will display in the Tableau area, and please click the
 Refresh button to refresh the latest status; if the status changes to Synced, it means that the data has been successfully published to Tableau Server.
 In Tableau Server, you can see the published data in the corresponding "Site > Project" and use them in Tableau Desktop.
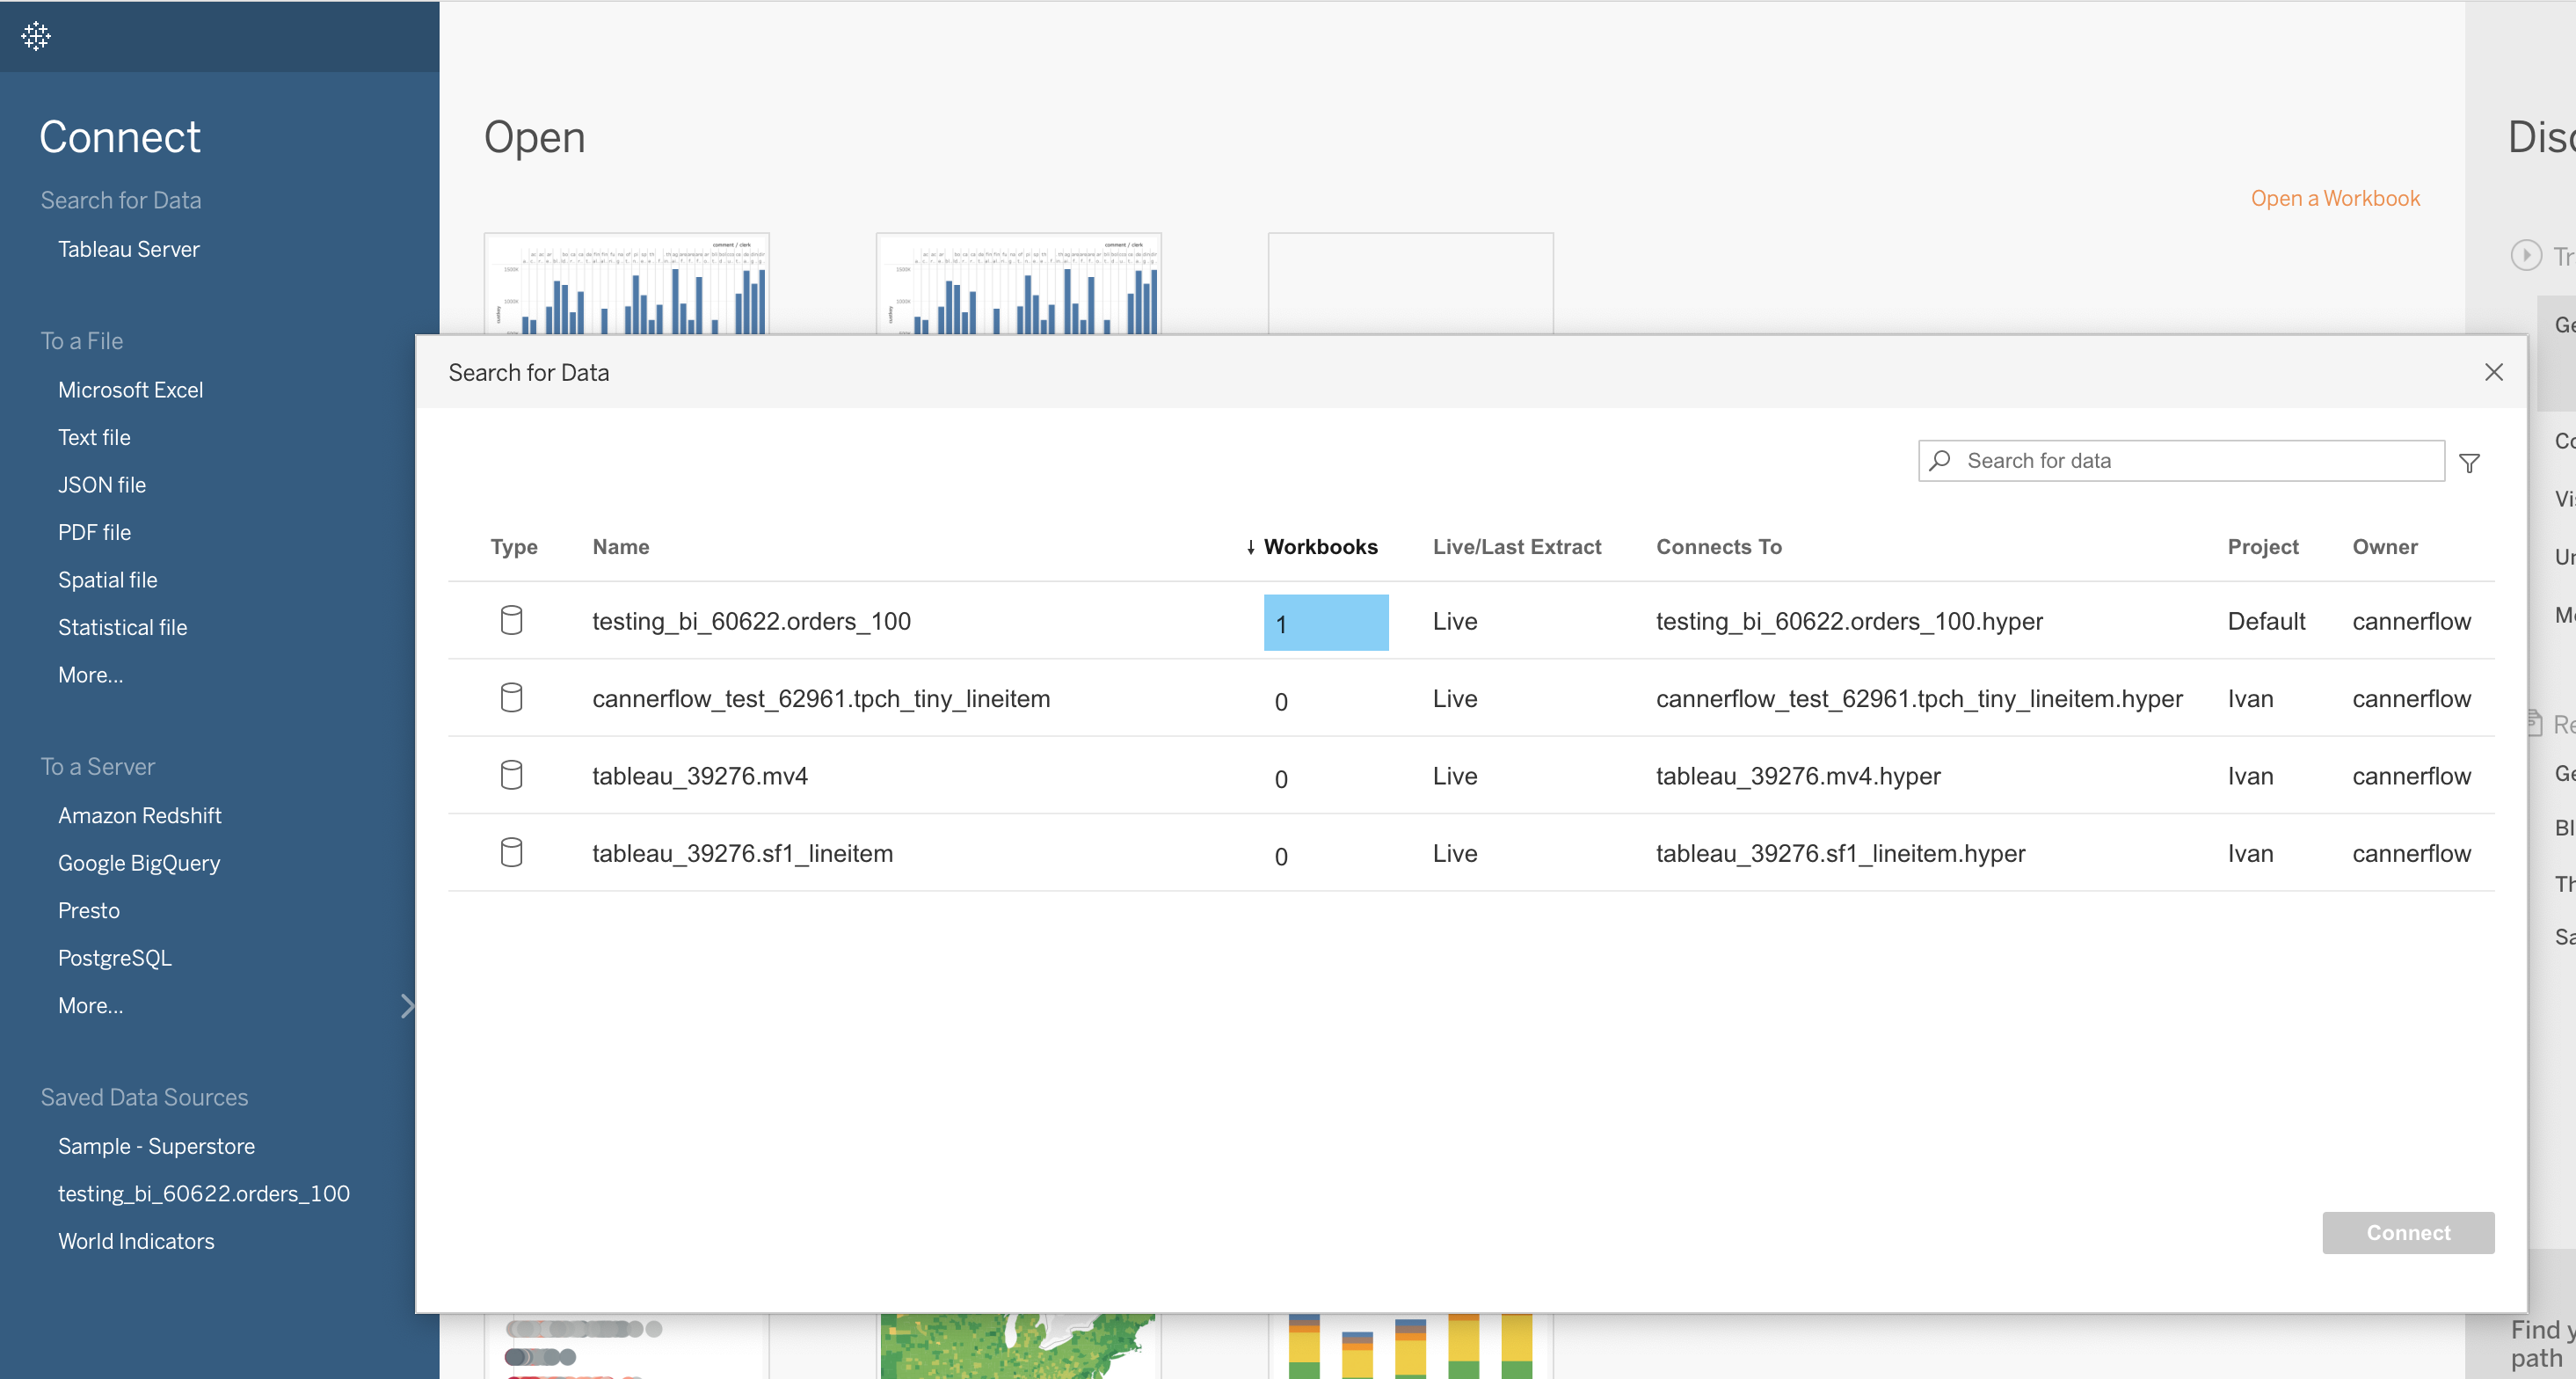 Click Search for "Data > Tableau Server" in Tableau Desktop, you can see the data published from Canner Enterprise, and you can connect to the workbook for use.
How to set schedule update
When you successfully schedule Materialized View, each update will be republished to Tableau Server. When Materialized View is re-crawling data, the status in Tableau Publish will change to Preparing. It will become Synced when successful.
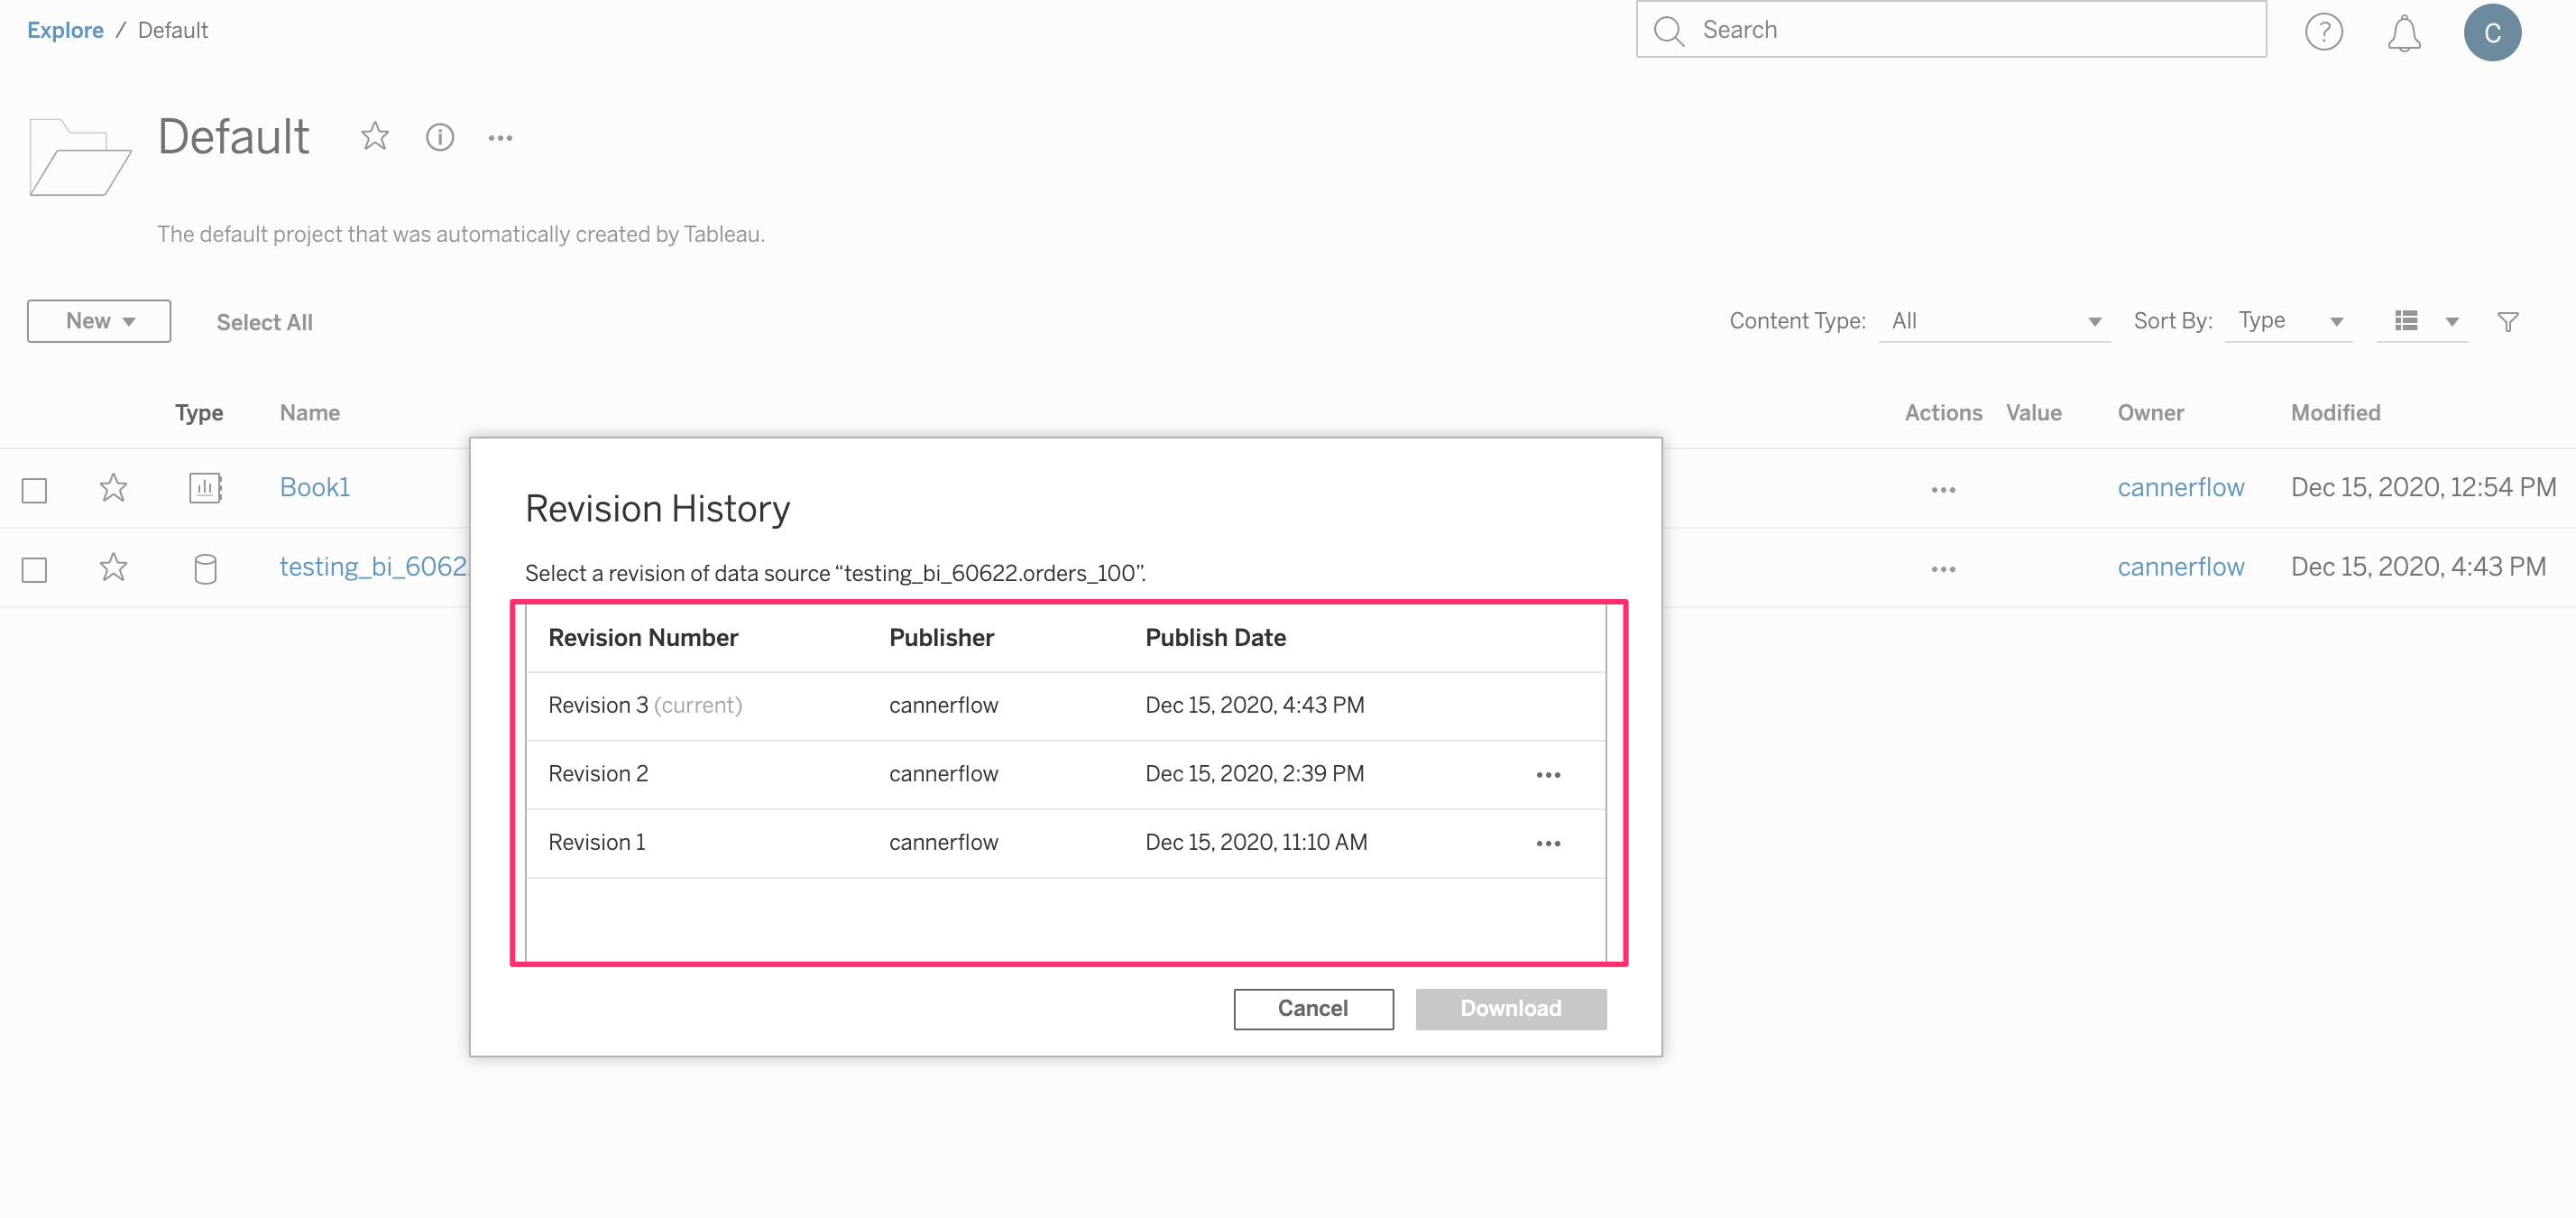
On Tableau Server, you can click Revision History to view the revision history of this data source.
How to access control
Canner Enterprise will be responsible for publishing the data to the corresponding Project. Therefore, in terms of permission management, the Tableau administrator needs to use the Project to distinguish which users or groups can see which data. This permission can be set in the Data Source section of Project Permission.
Please refer to Tableau official documentation https://help.tableau.com/current/server/en-us/permissions.htm