Import workspace data
Method 1: Import from the data source
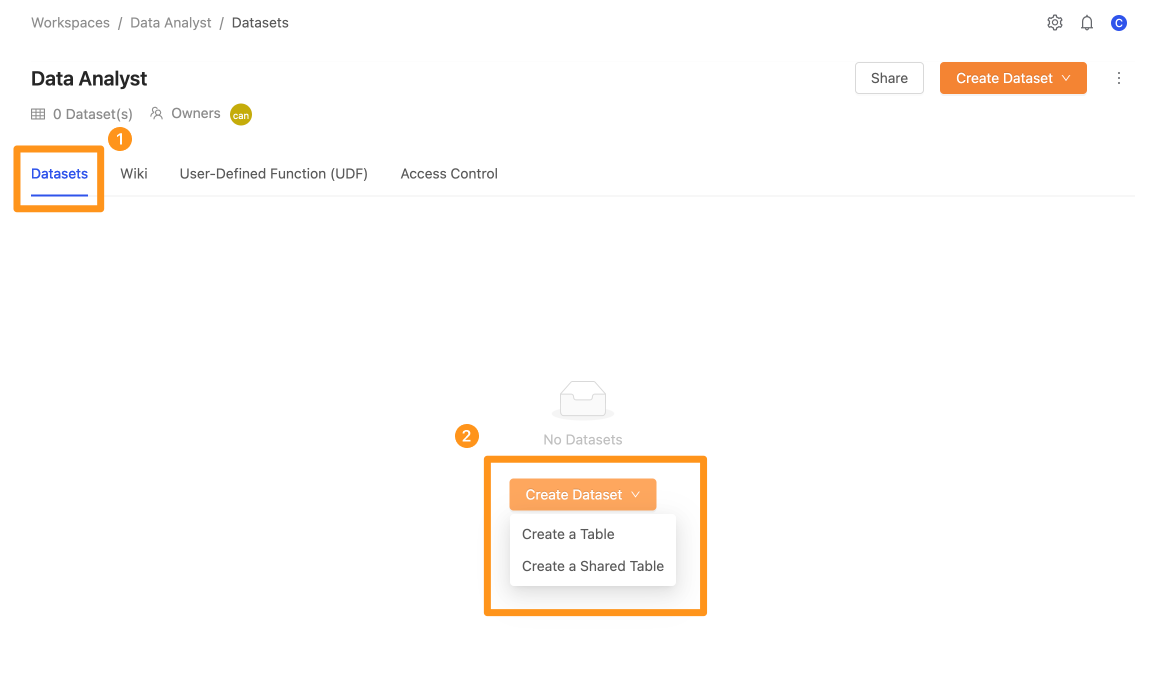
Step 1: Enter the workspace page
In the Datasets tab, click the Create Dataset button. After clicking, a drop-down menu will appear; select the Create a Table button.
Step 2: Set import data from data sources
Select the Create a Table button, and this form will appear where you can choose which data source to import, its tables, and columns.
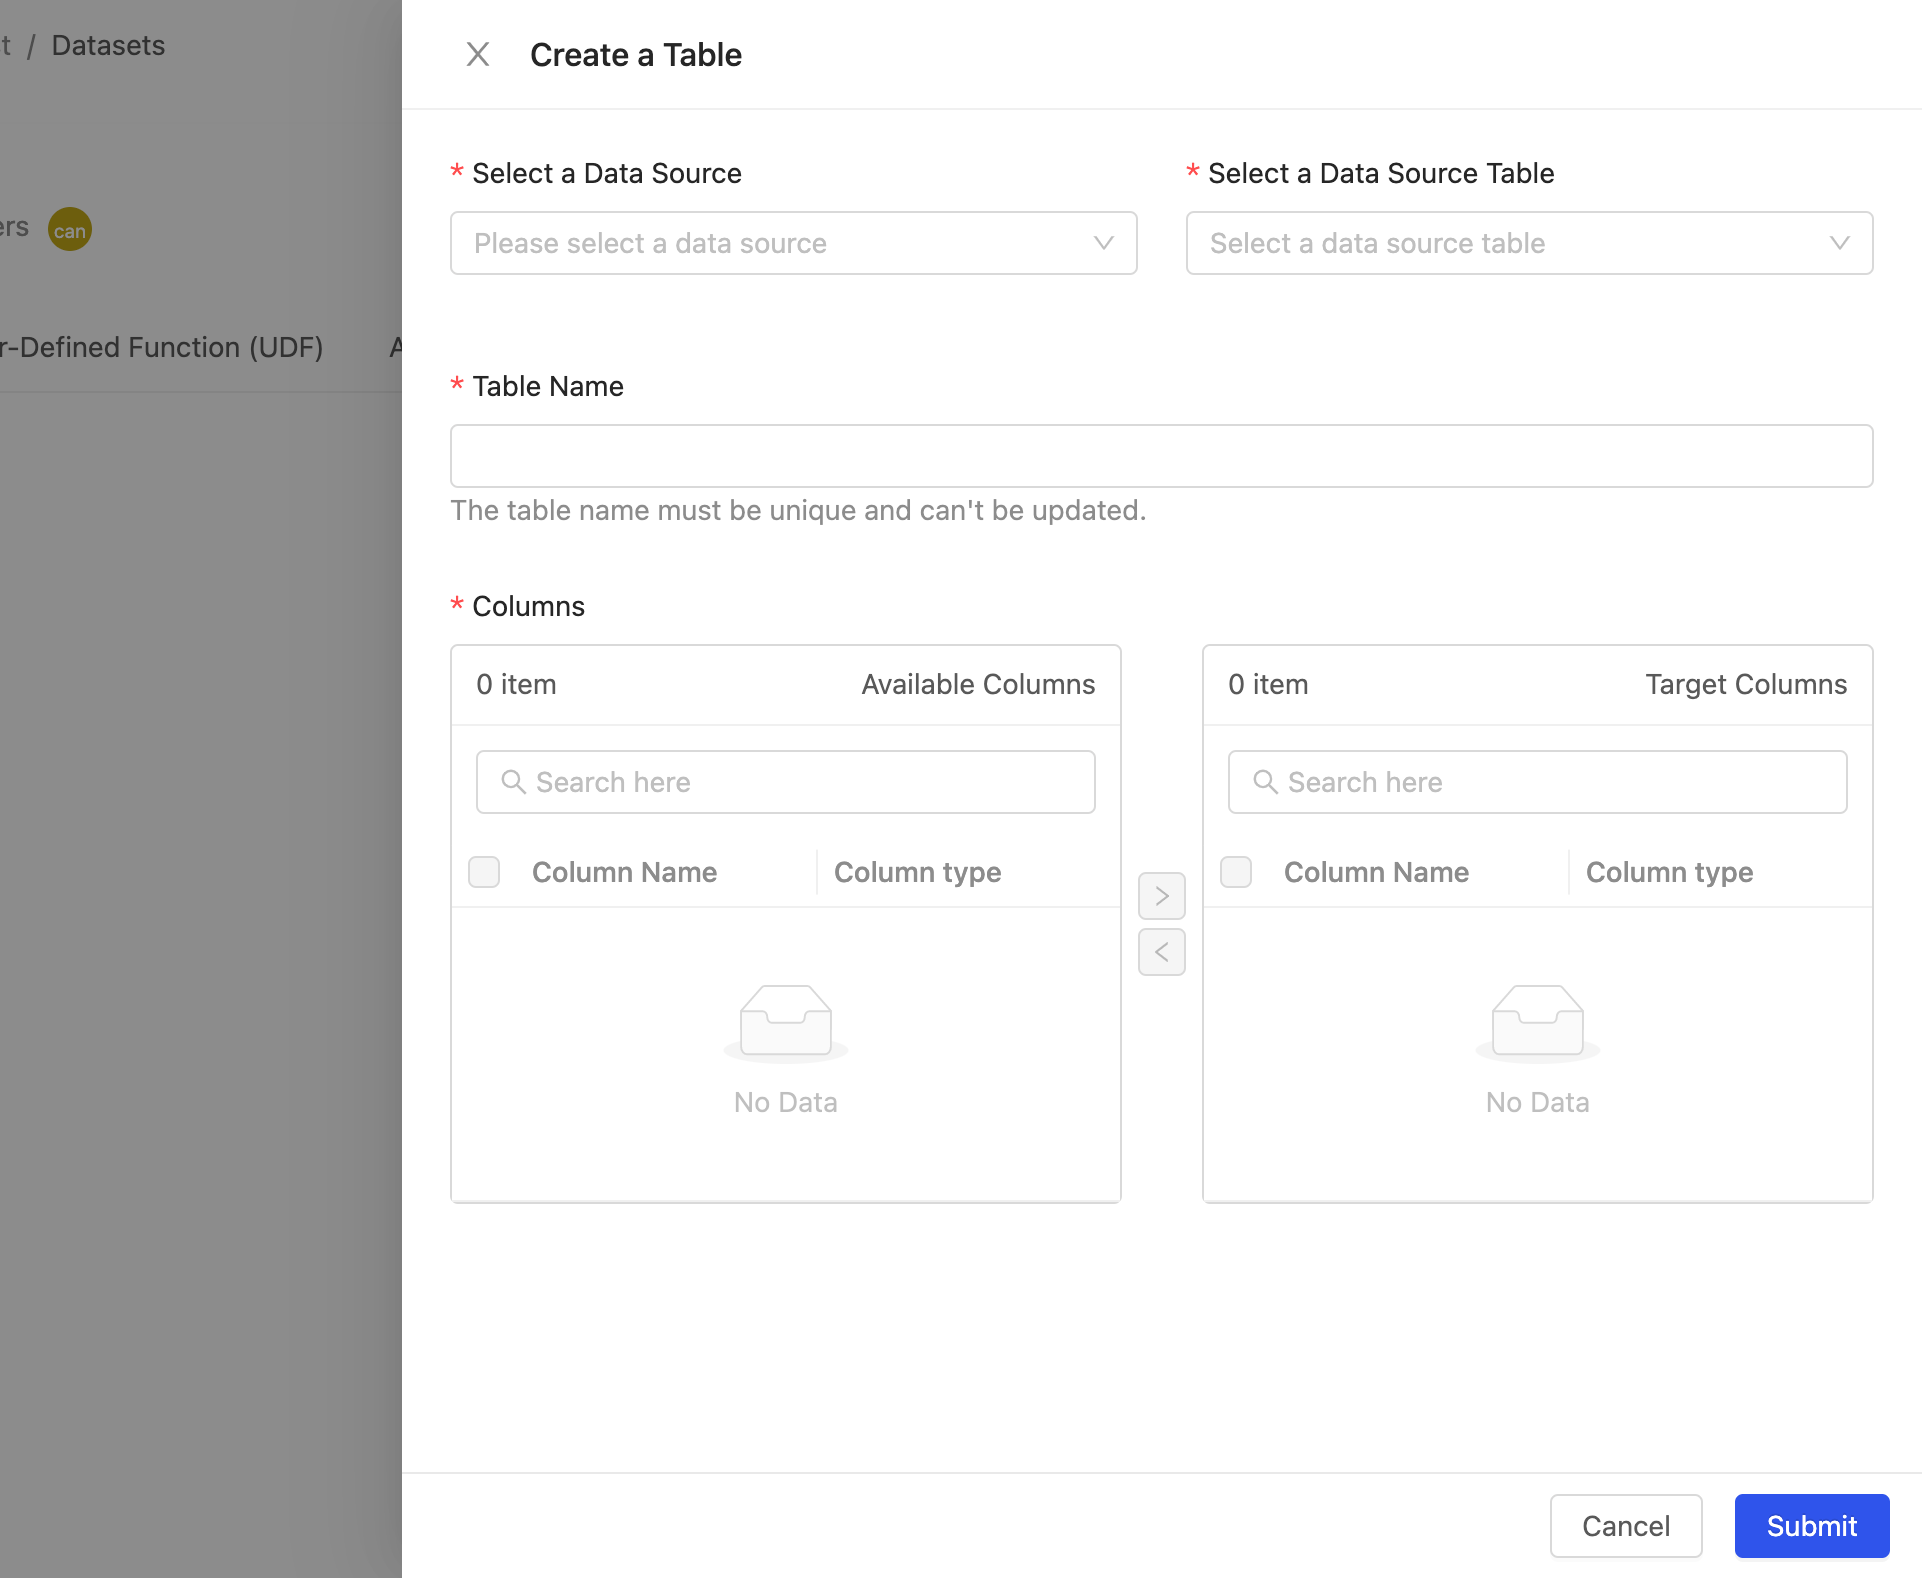
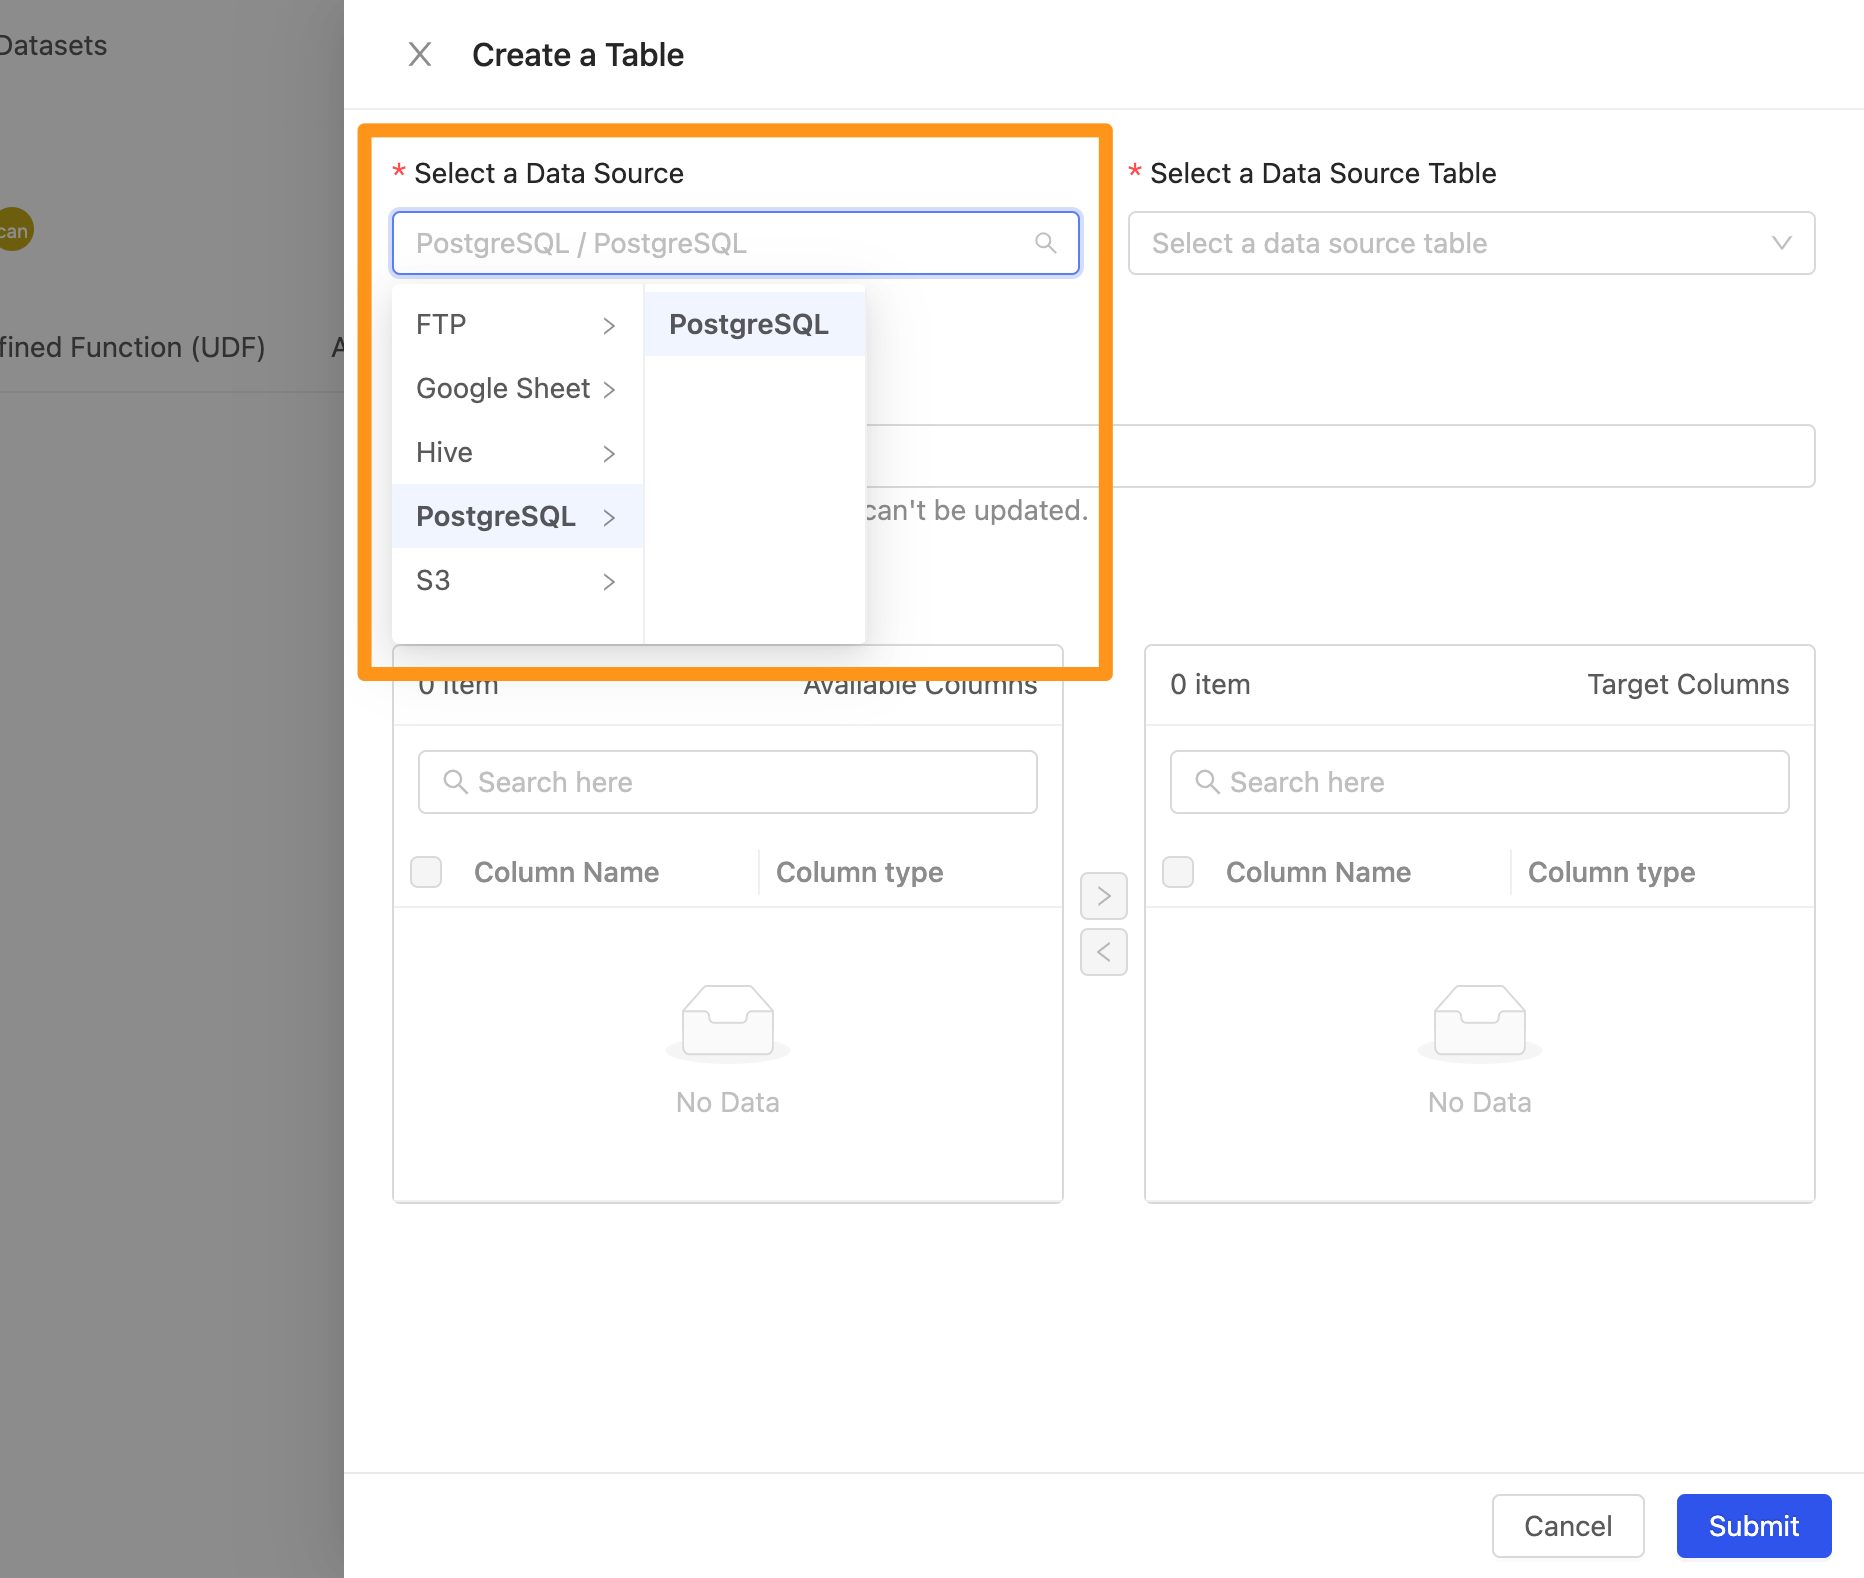
- Select a Data Source: Select a data source
- Select a Data Source Table: Select the Table in this data source; here, you can browse through the menu or enter keywords to query the name of the Table to import

- Table Name: When adding a Table, the system will automatically generate a unique value name based on the name of the data table to avoid duplication of table names with other table names.
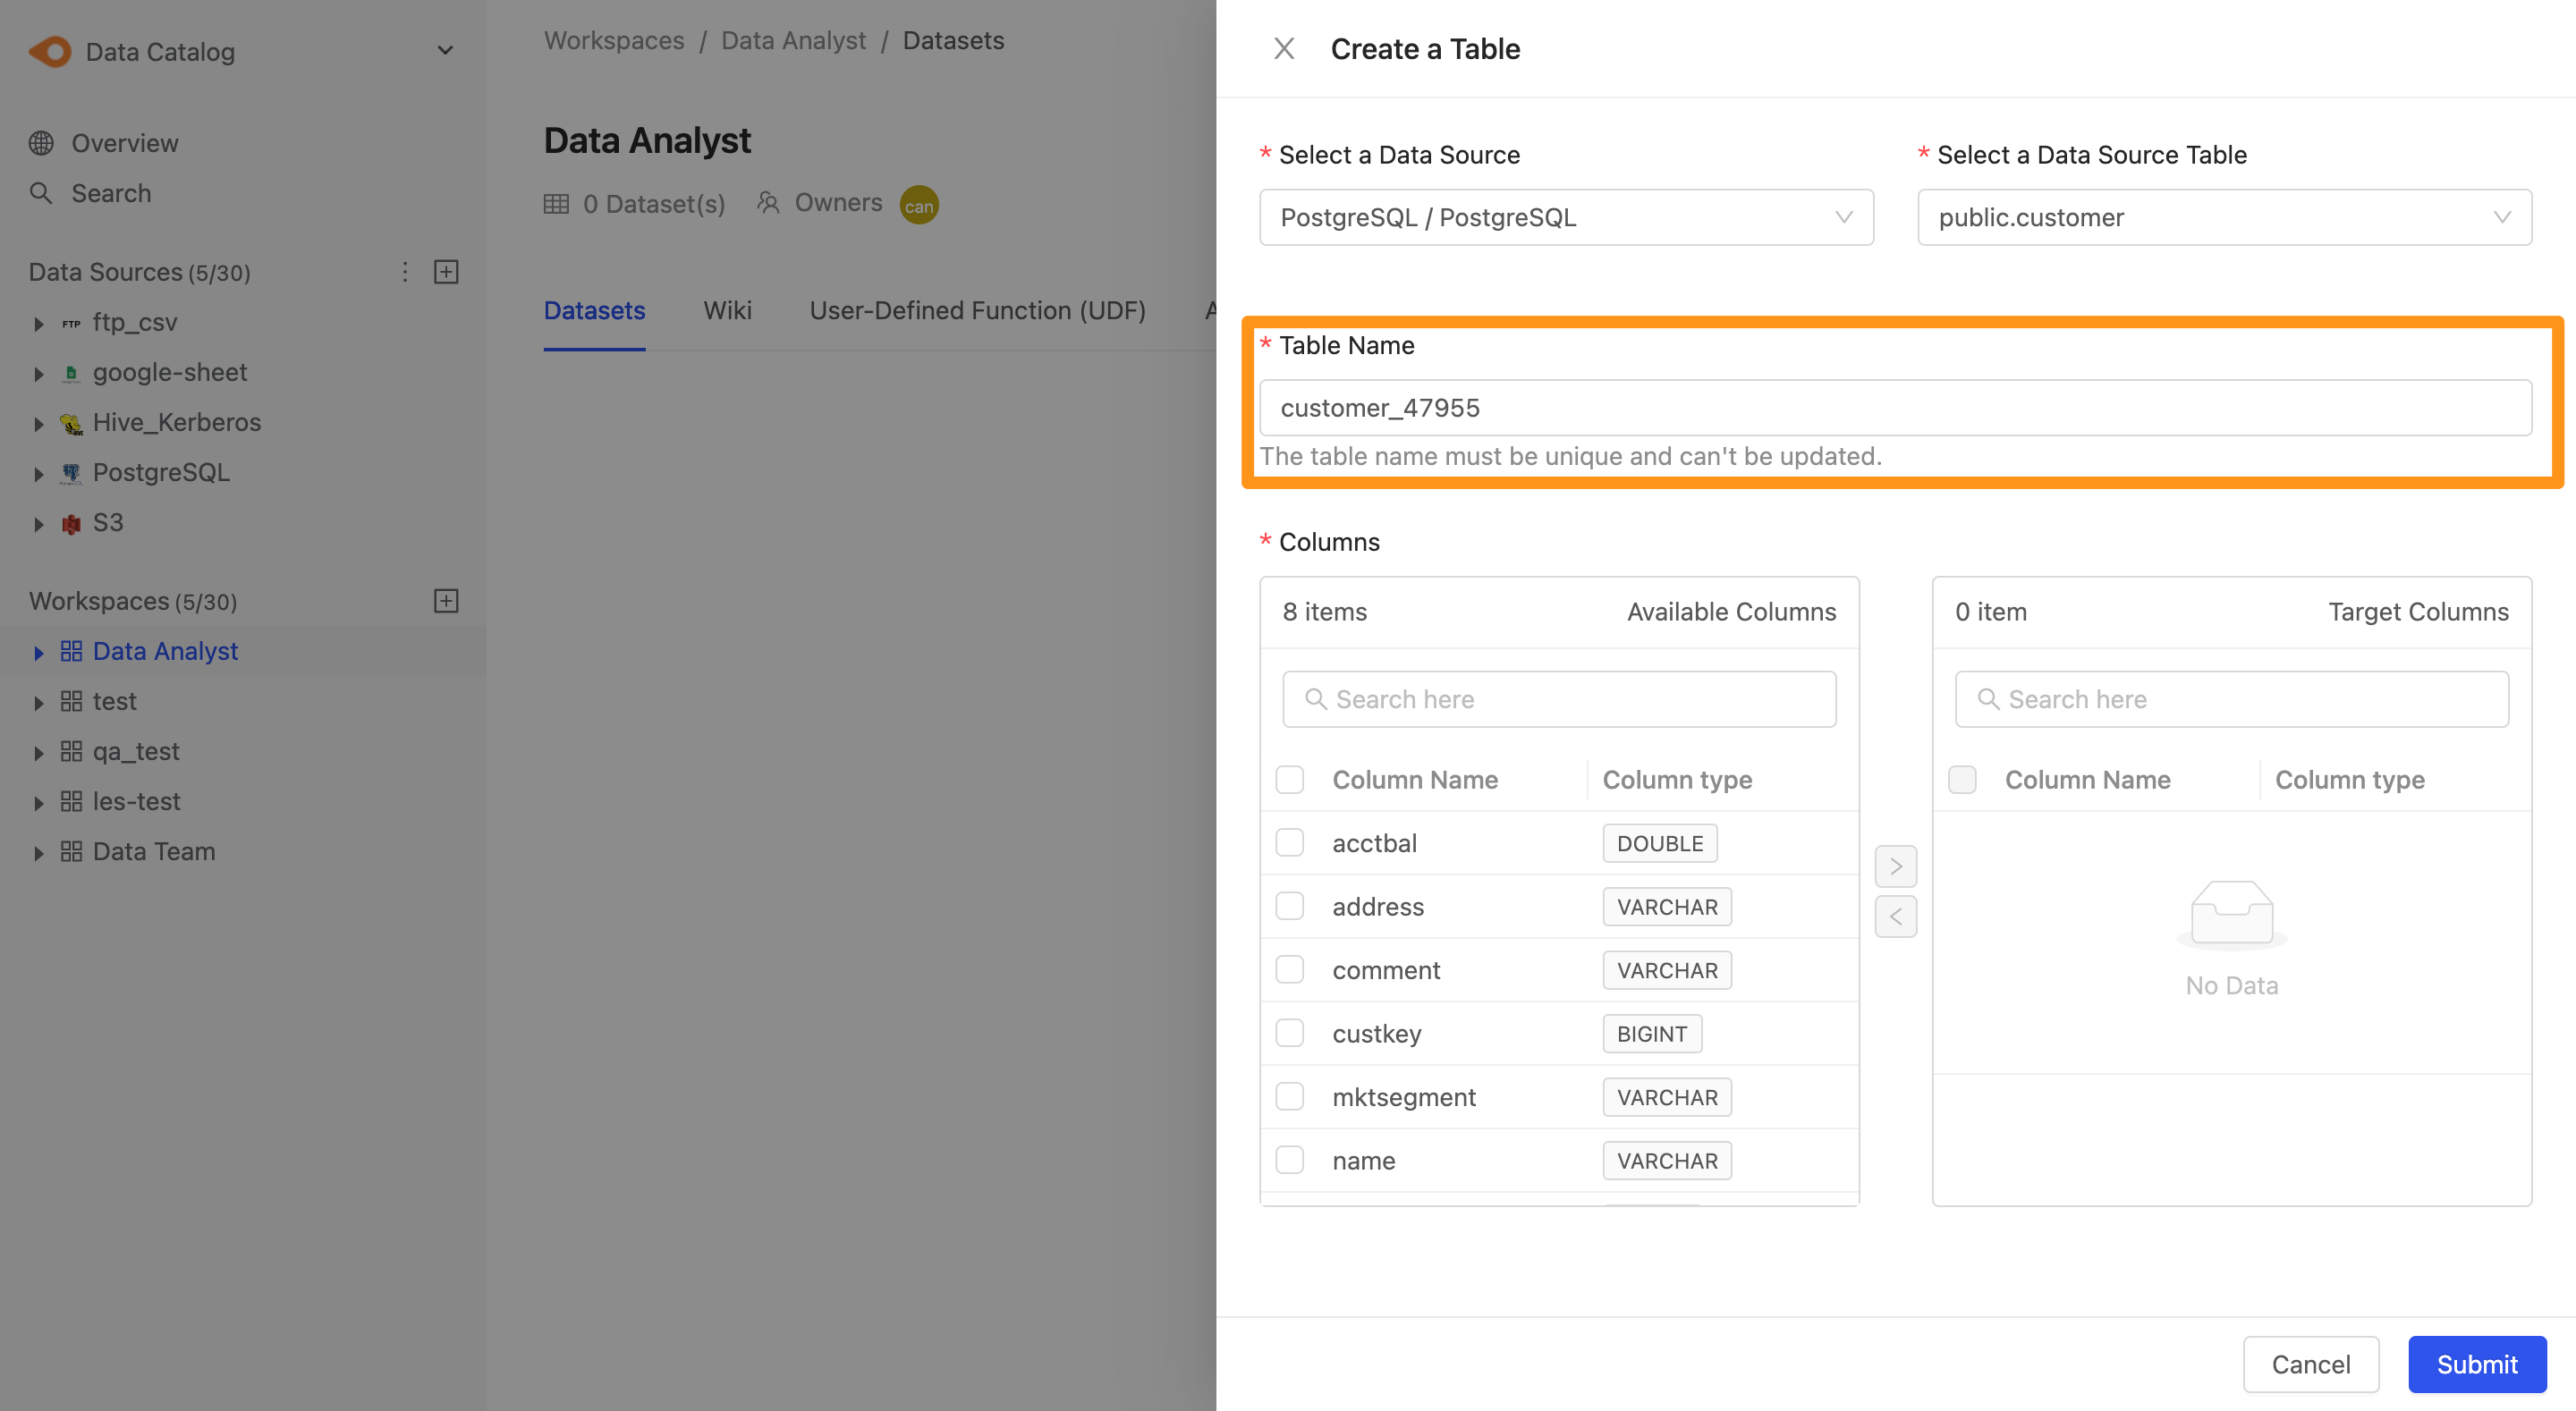
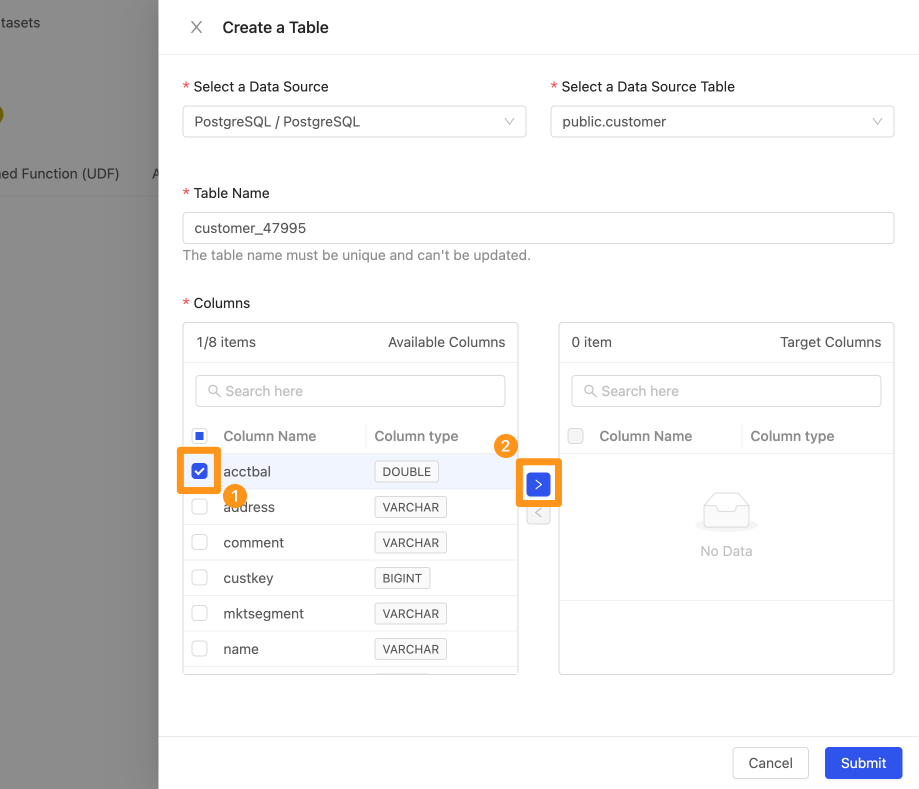
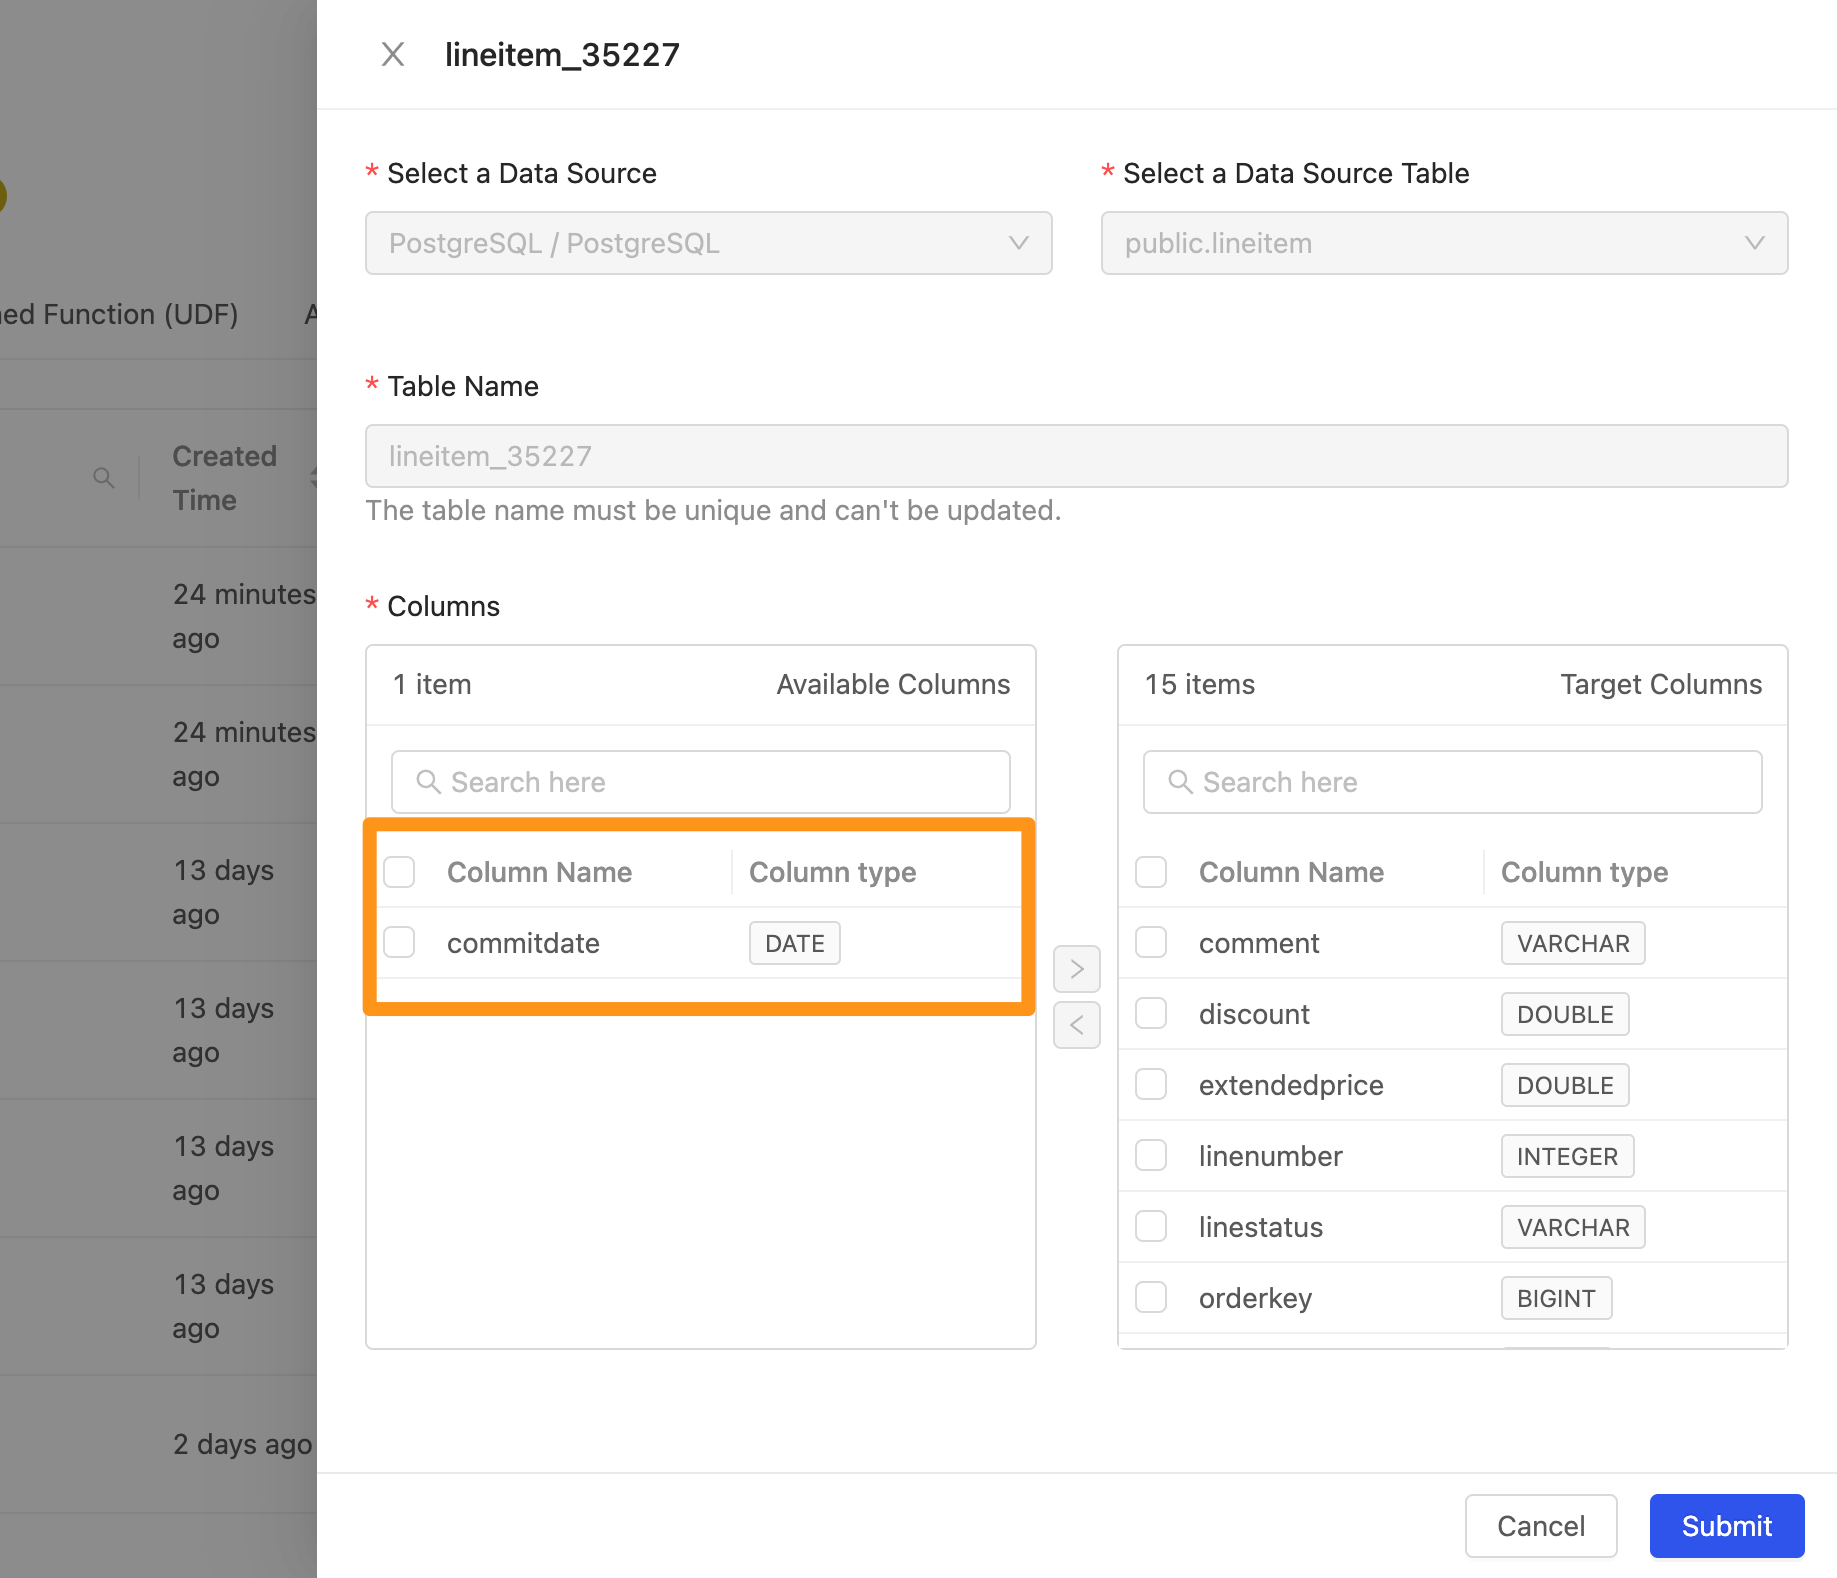
- Columns: Select the column; the Available Columns on the left represent the columns currently available in this Table, and the Target Column on the right represents the columns you can import into the workspace; you can use
>and<to select the desired column Which fields to add and remove.
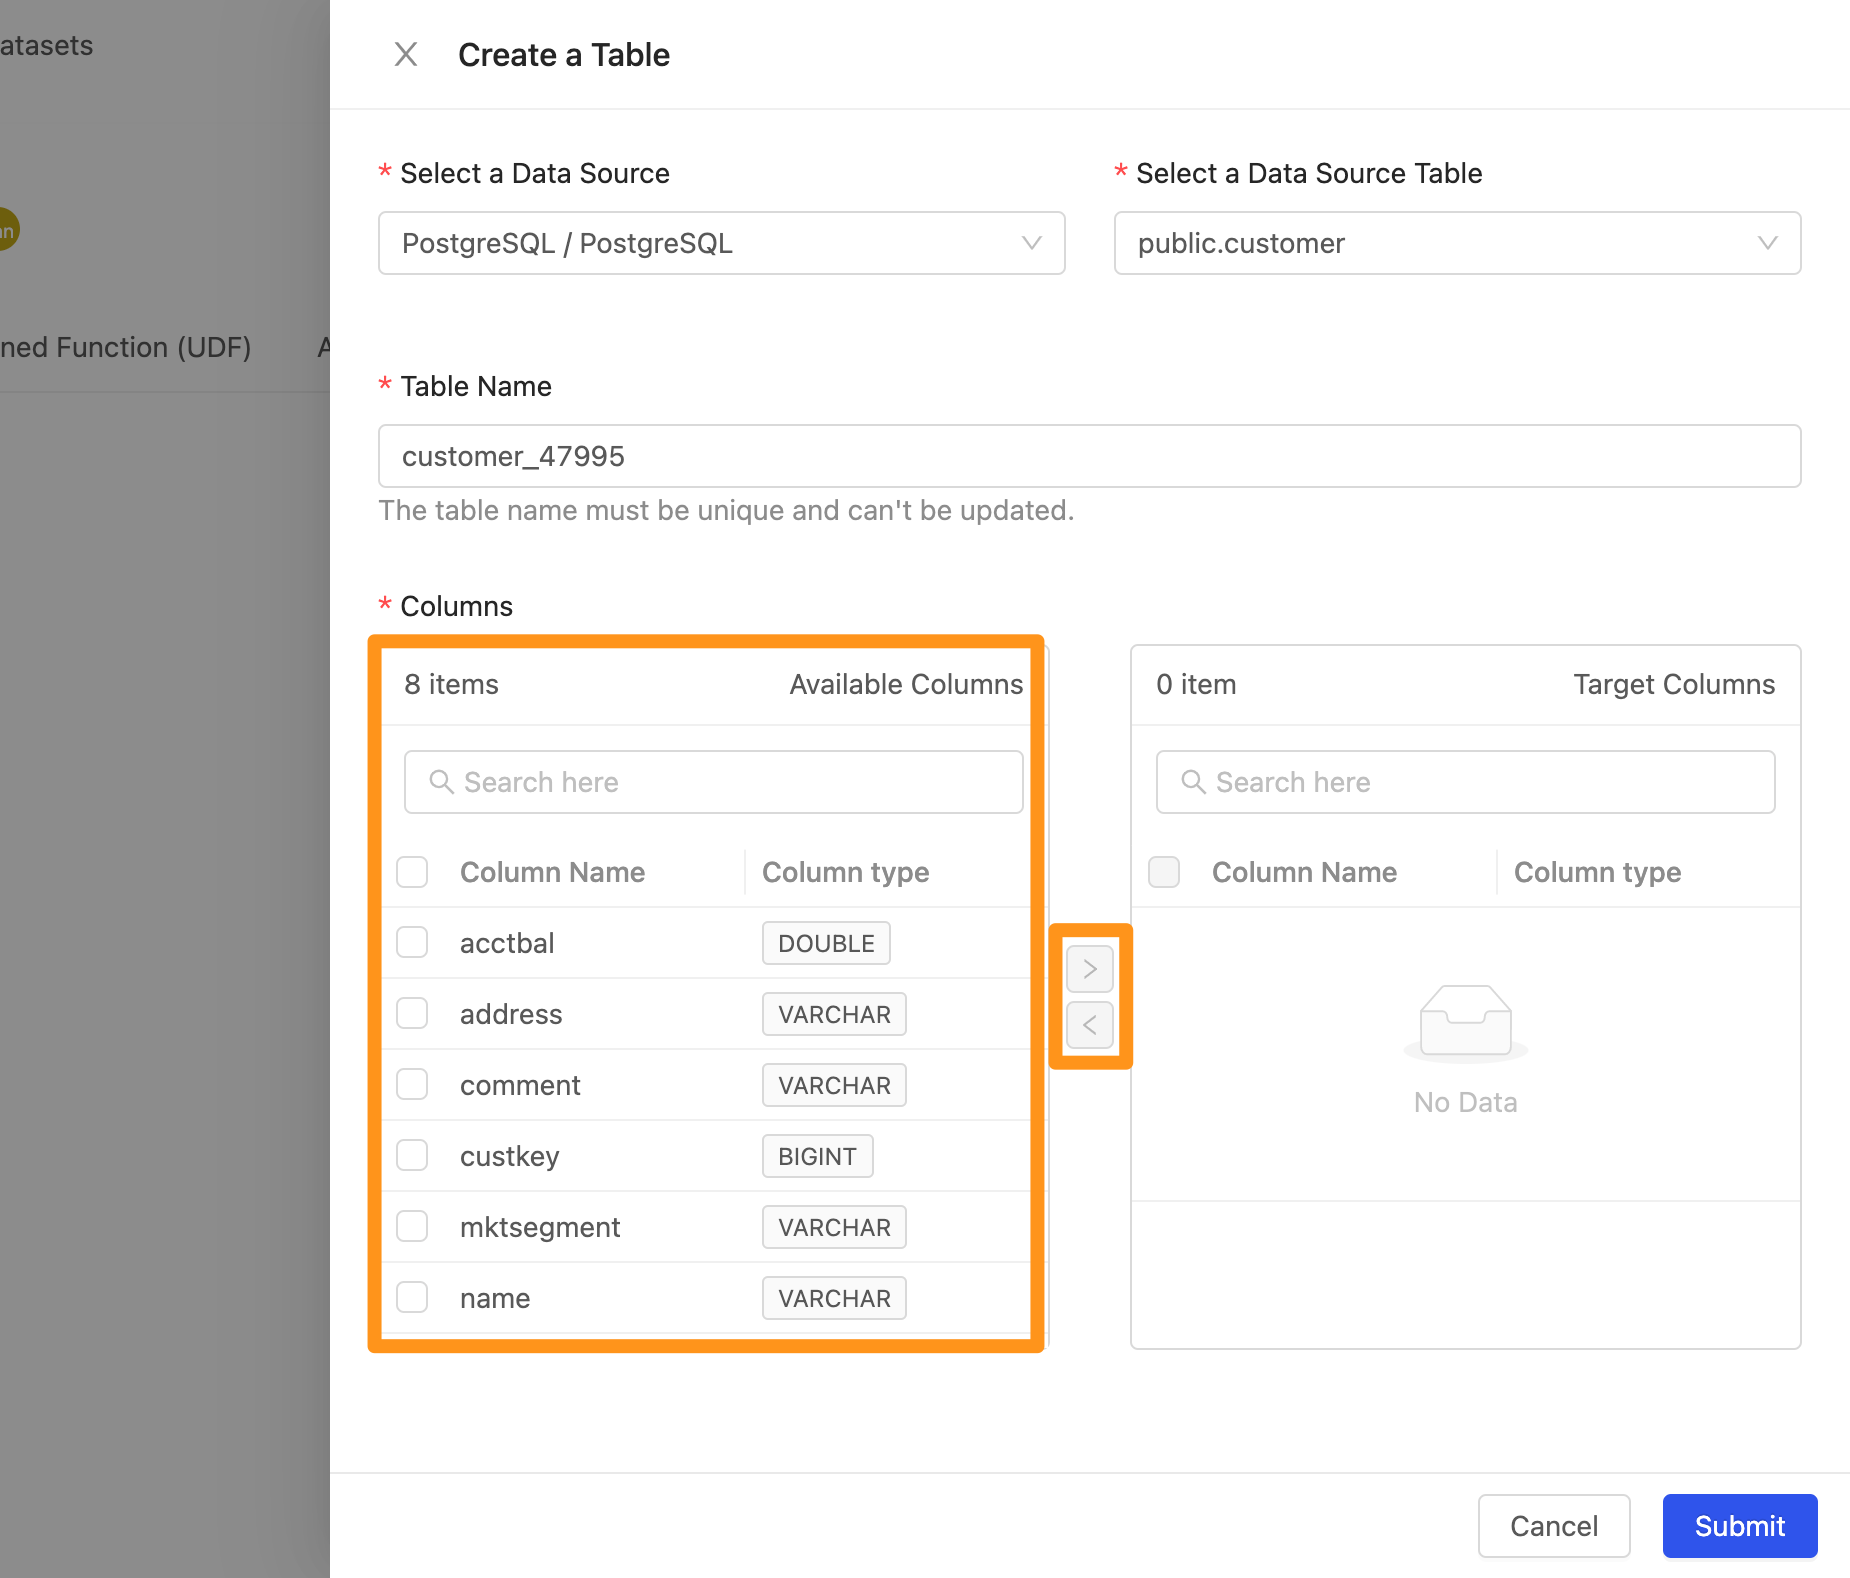
- Select a column, and click
>. The column will move to the right, indicating that this data column is imported into the workspace.
Step 3: Completion
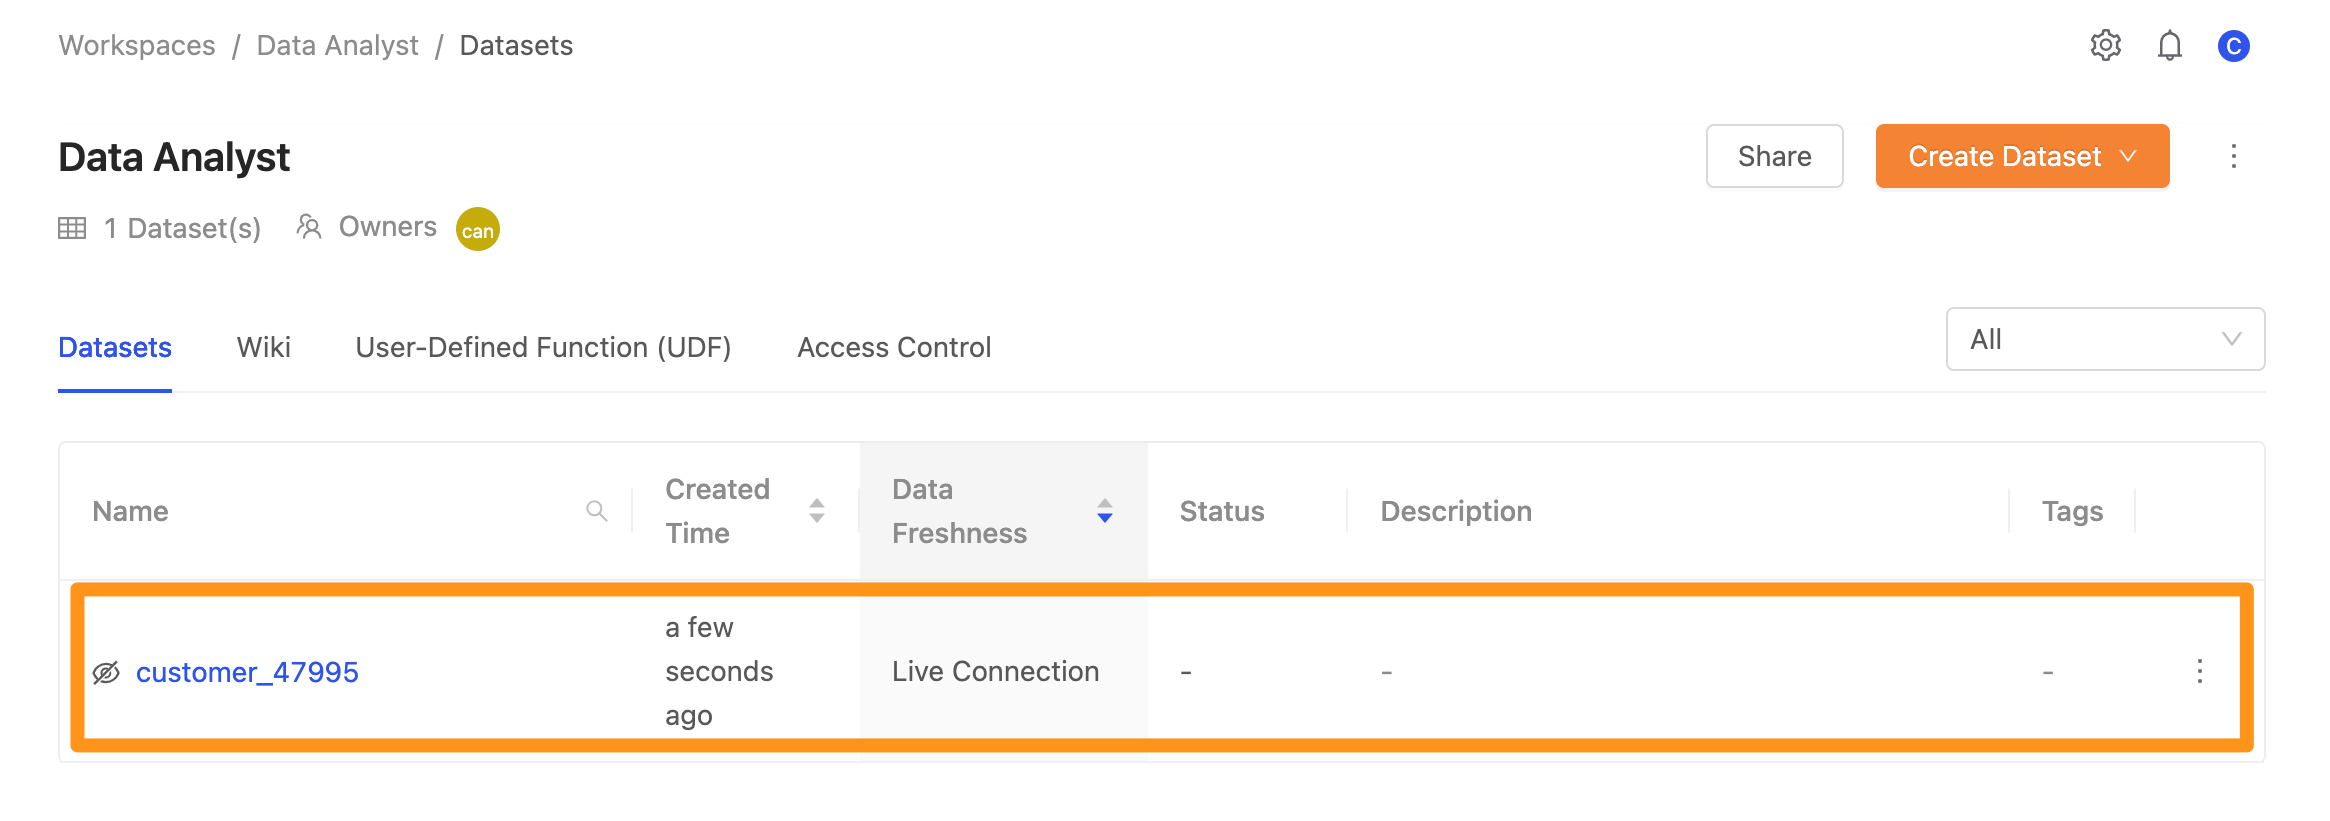
Click Submit to complete the creation, and you will see the imported data on the screen.
Method 2: Import from other workspaces
When using this method to import, the user must be permitted to use the two workspaces simultaneously.
Step 1: Enter the workspace page
In the Datasets tab, click the Create Dataset button. After clicking, a drop-down menu will appear; select the Create a Shared Table button.
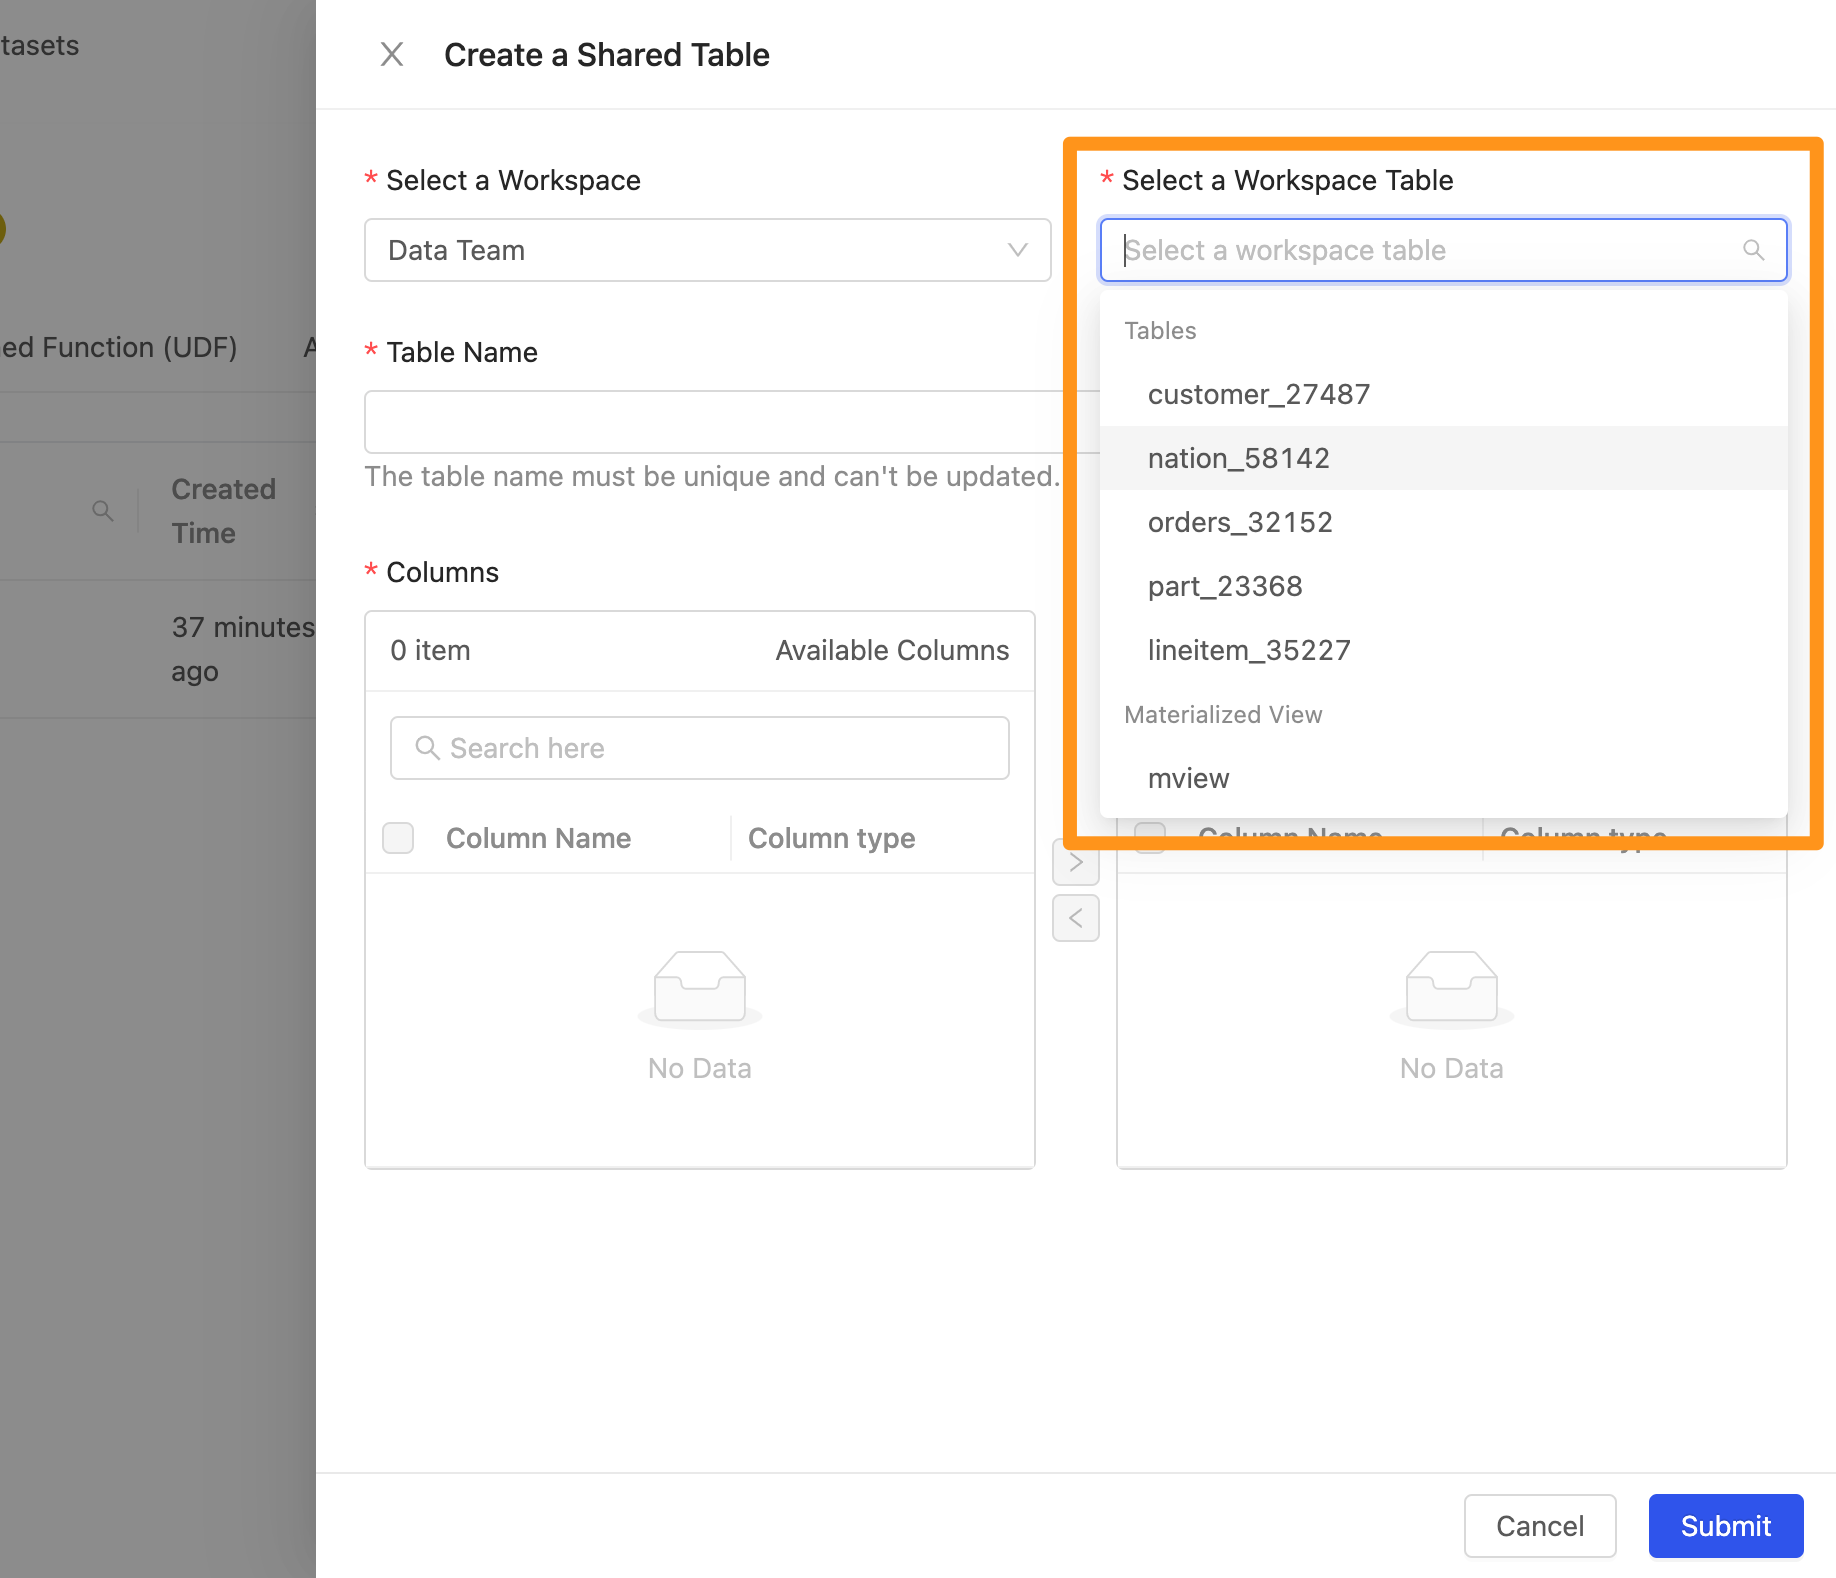
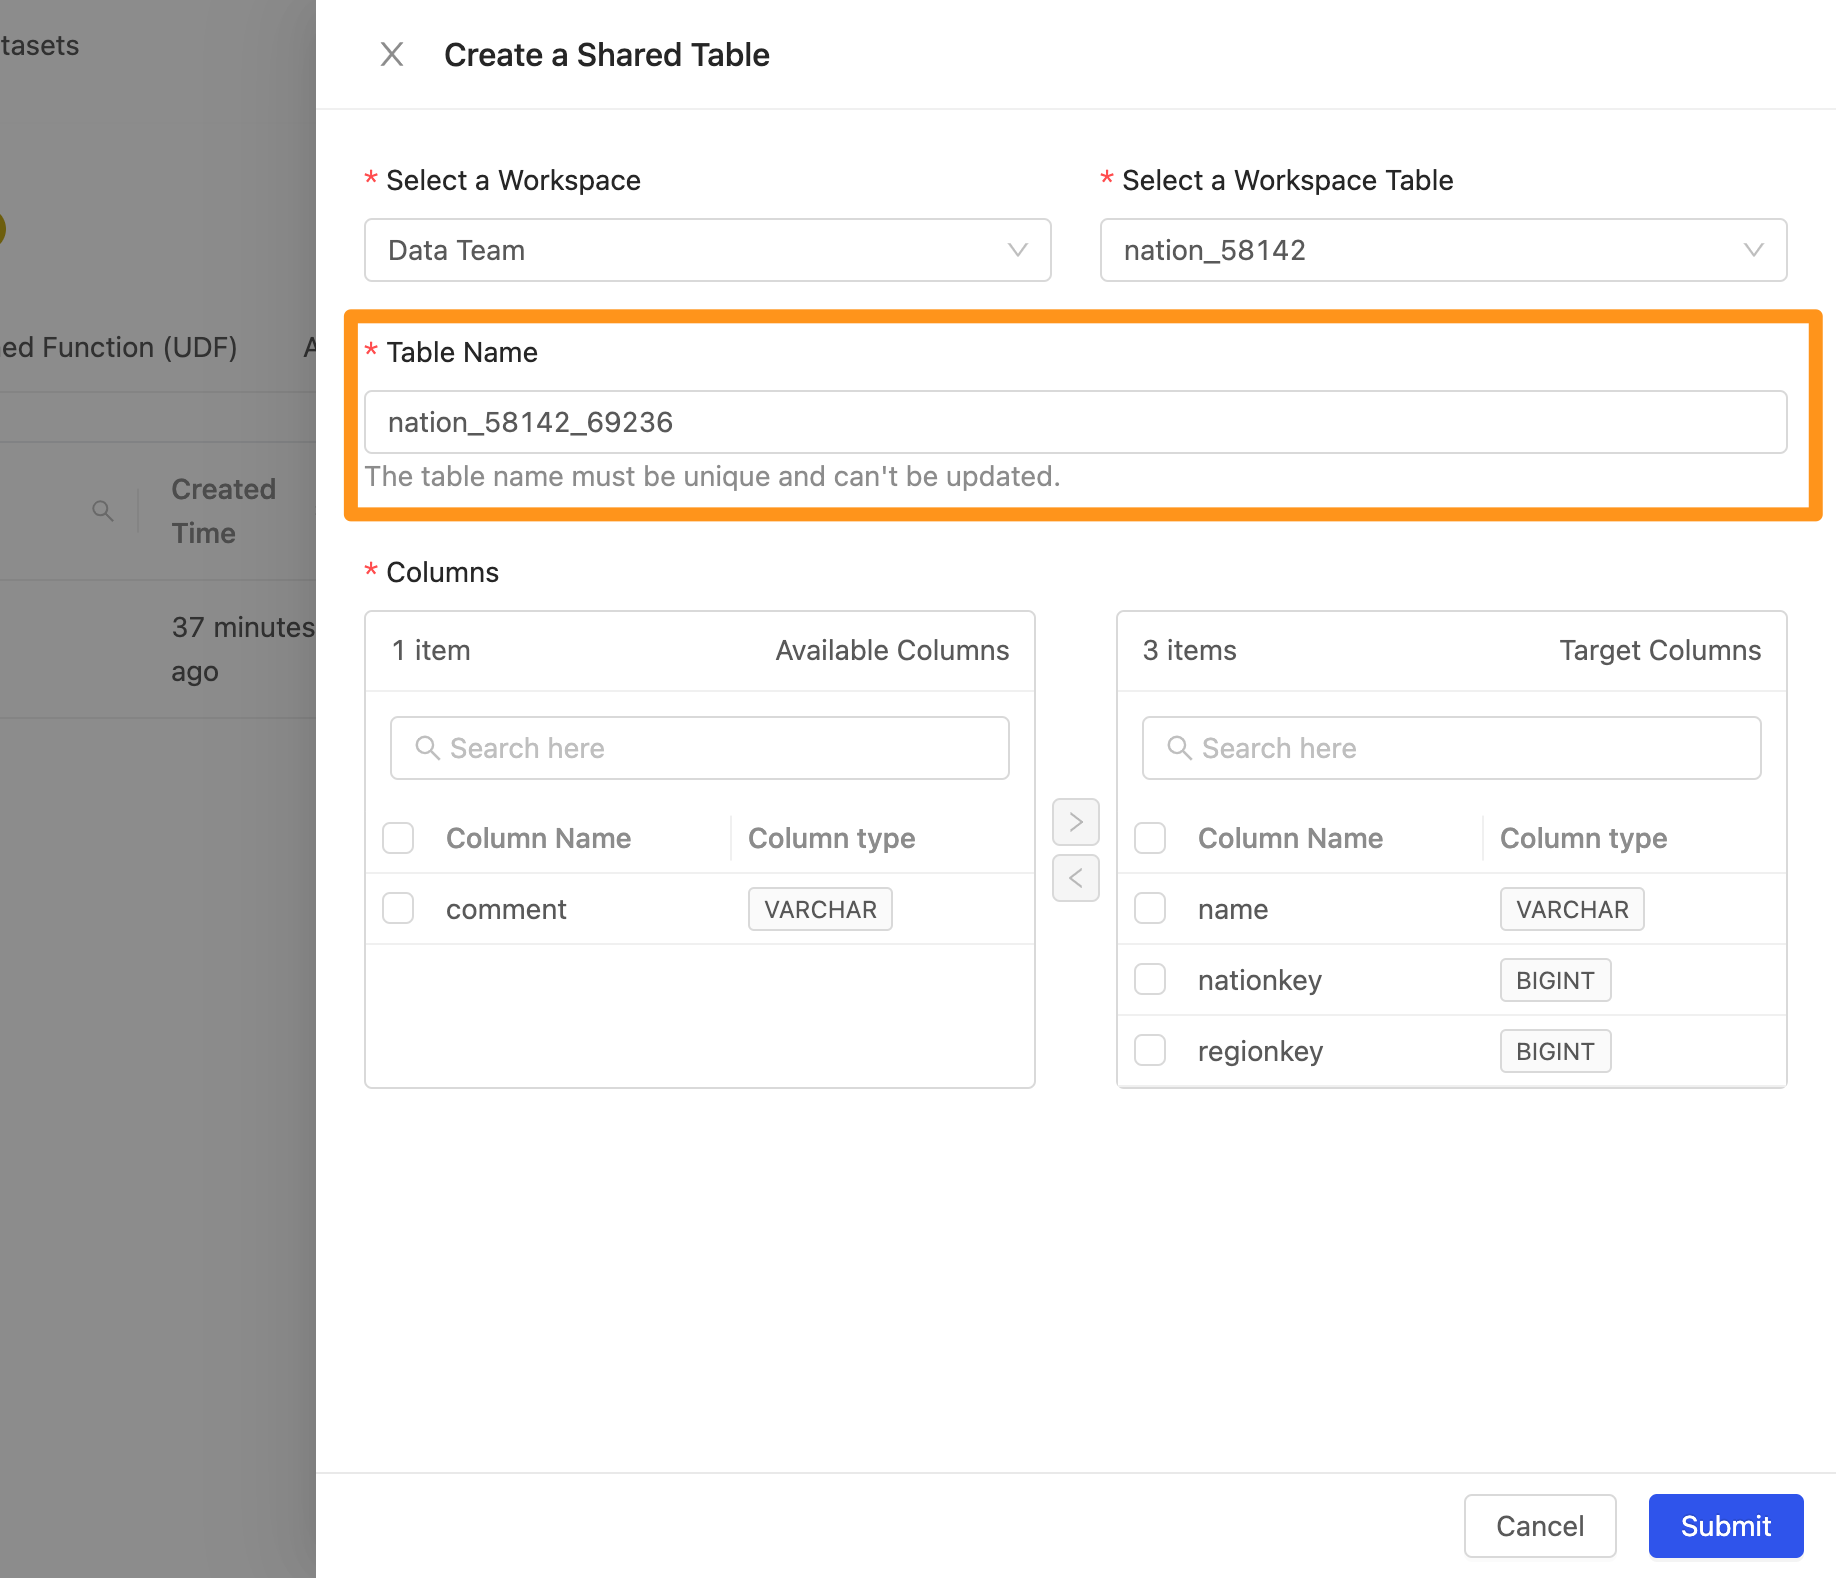
Step 2: Set import data from the workspace
Select which data source and its tables and fields to import from which workspace.
- Select a Workspace : Select a workspace

- Select a Workspace Table: Select the data in the workspace
- Table Name: When adding a Table, the system will automatically generate a unique value name based on the name of the data table to avoid duplication of table names with other table names.
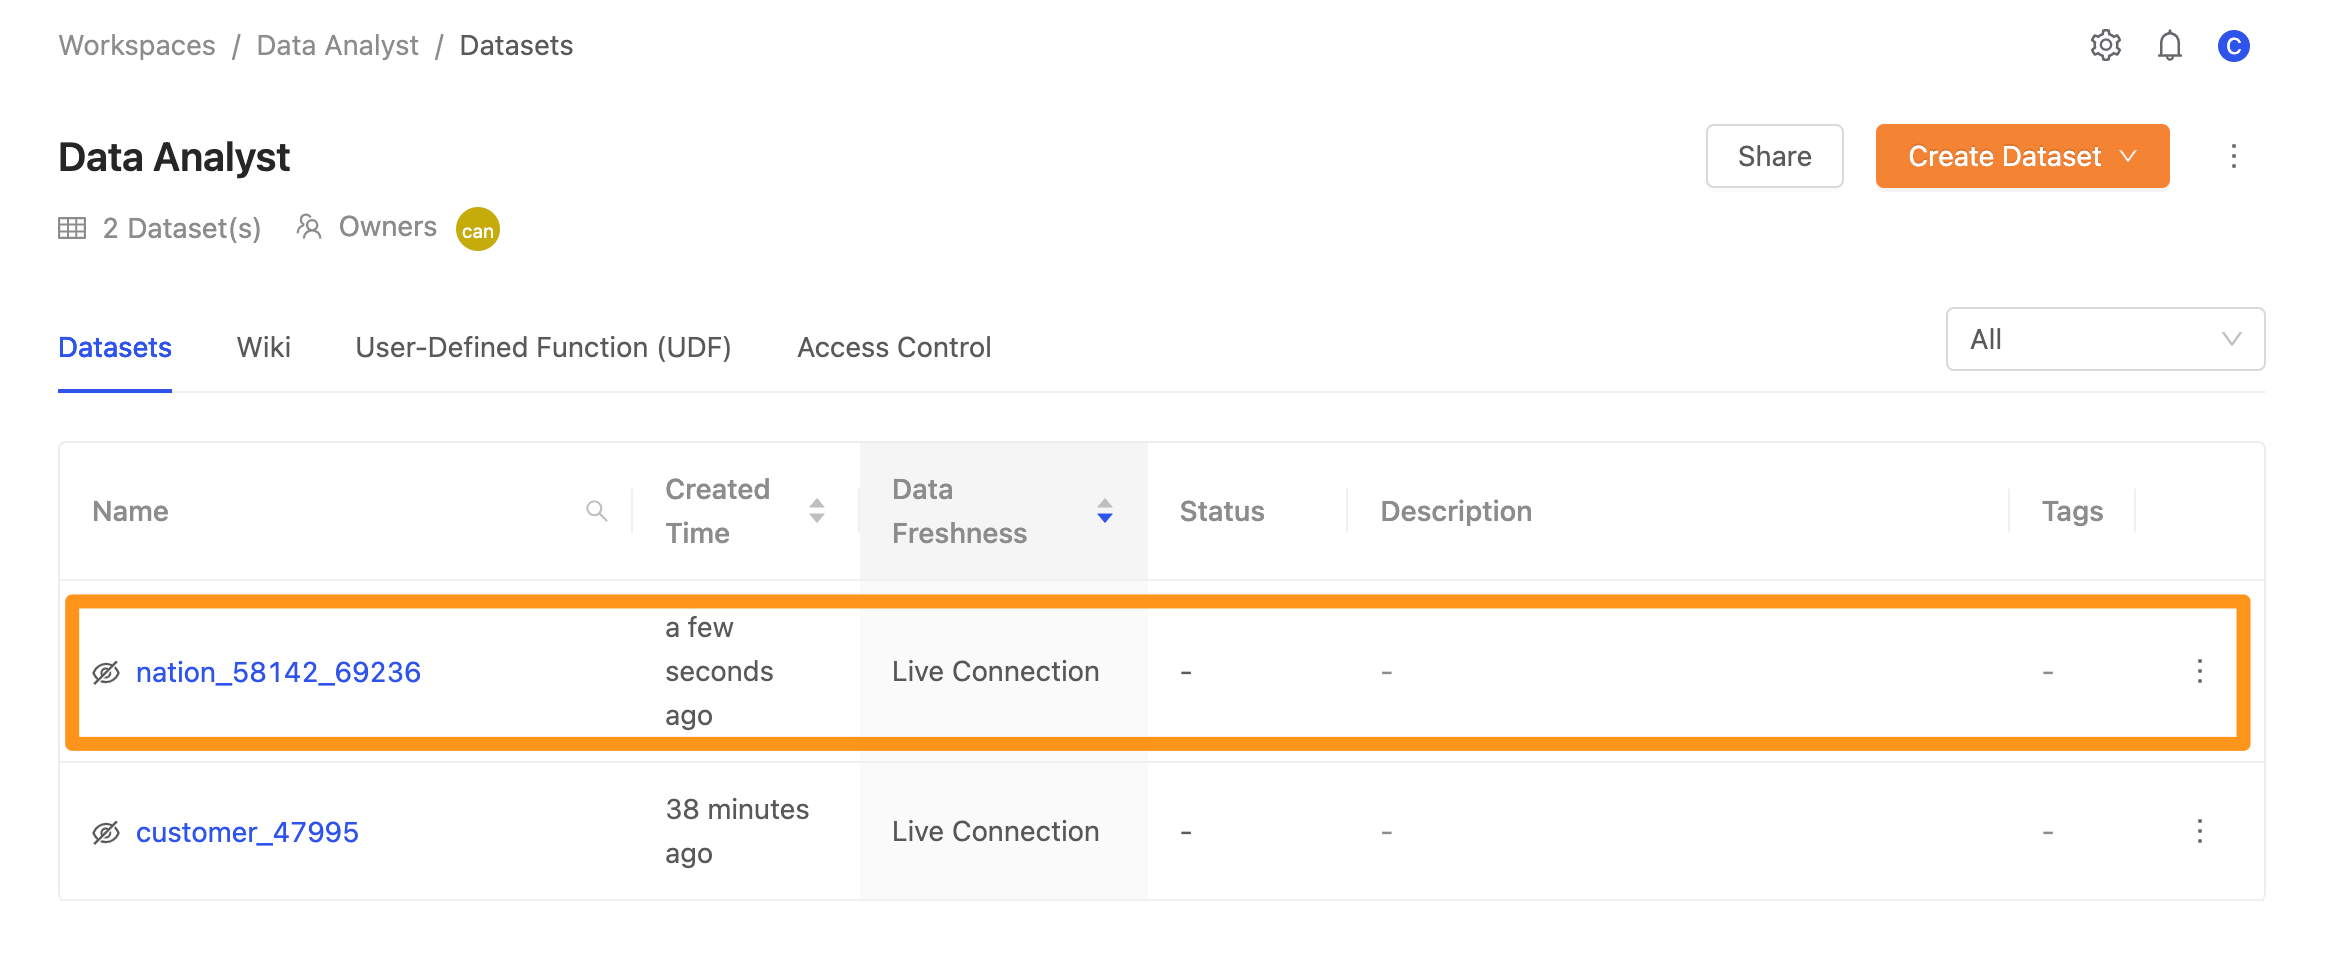
Step 3: Completion
Click Submit to complete the creation, and you will see the imported data on the screen.
Workspace datasets
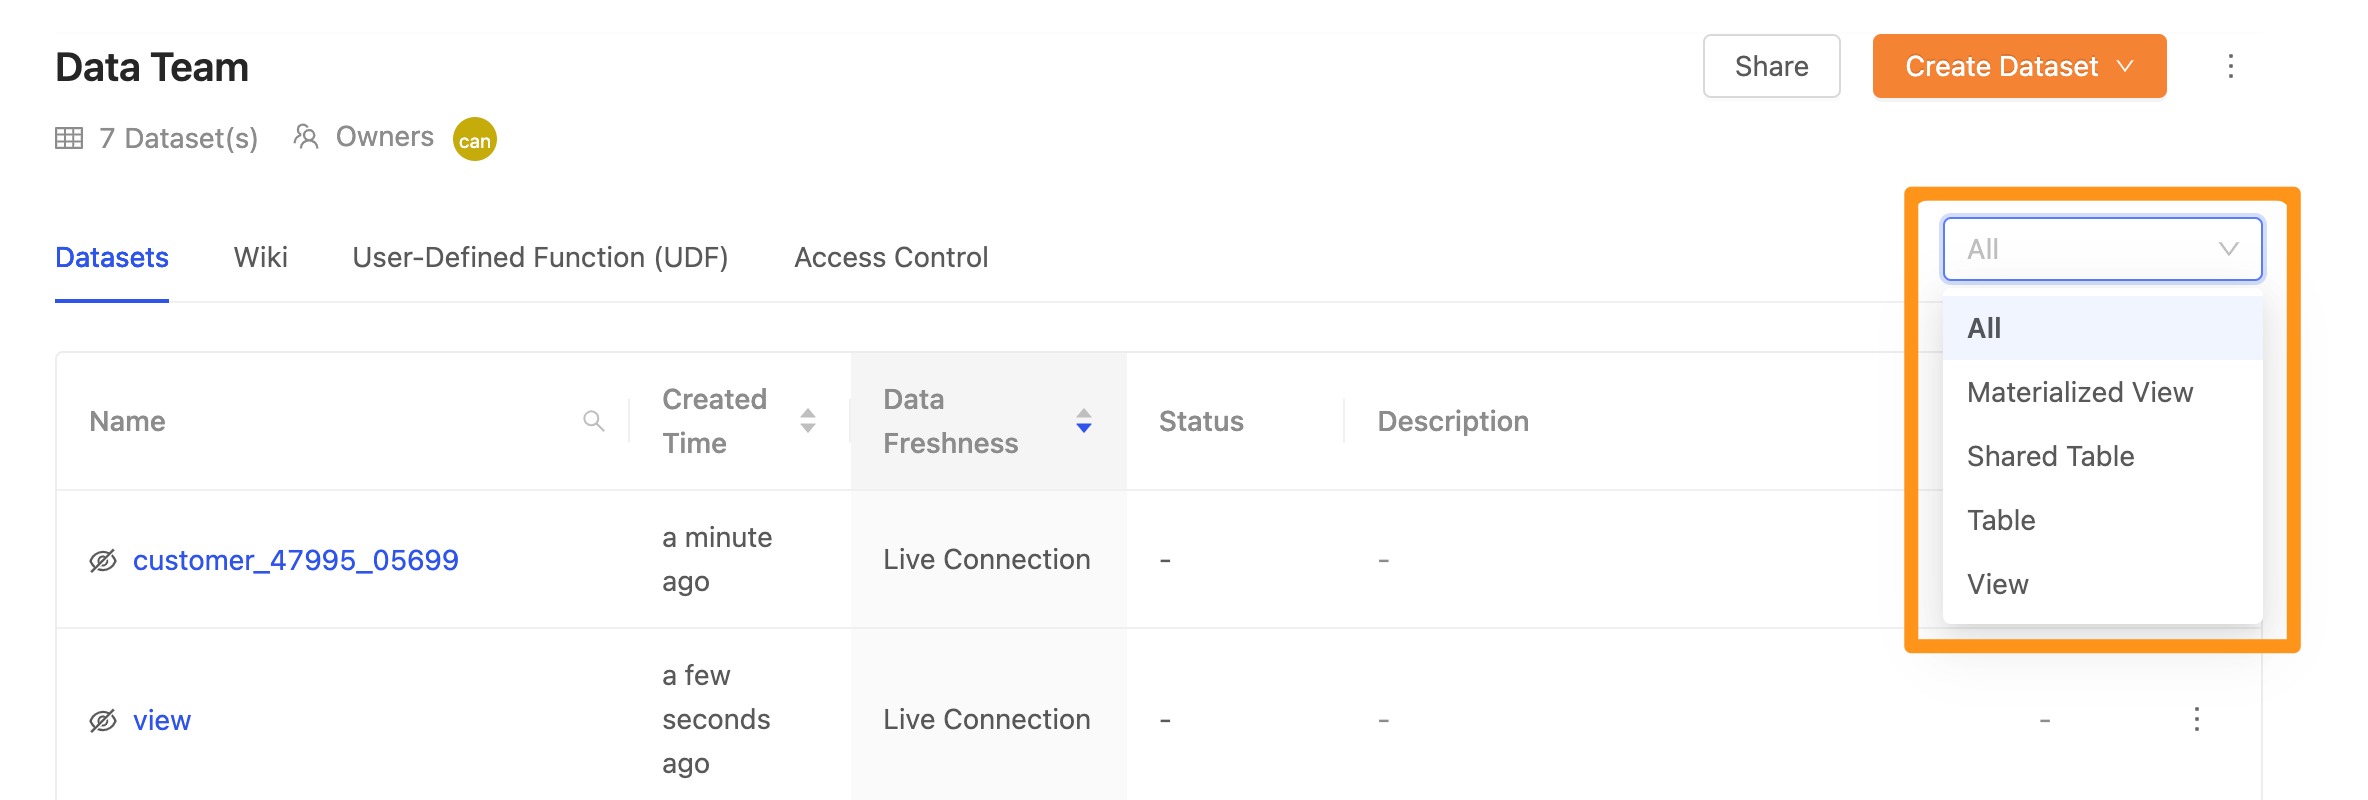
Filters
All the datasets in this workspace will be displayed in the data table under the Datasets page, including Table/ View/ Materialized/ Shared Table. All types of data are displayed by default. Click the drop-down menu to view different types of filters.
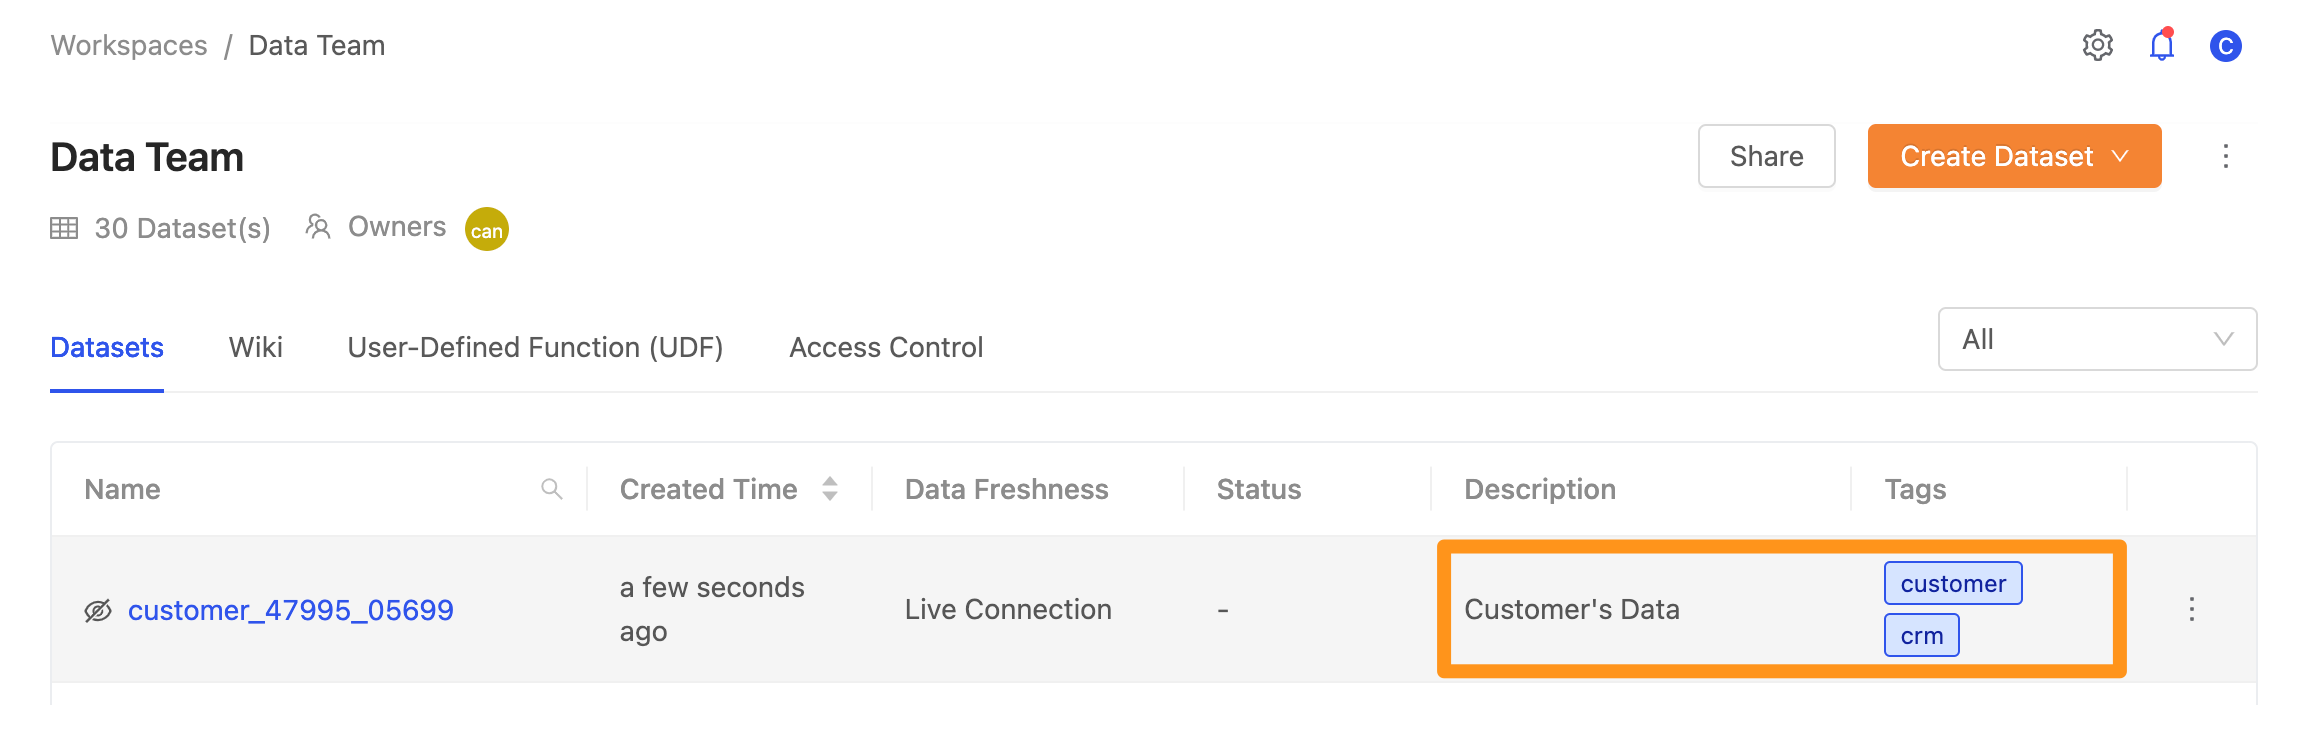
Column name introduction
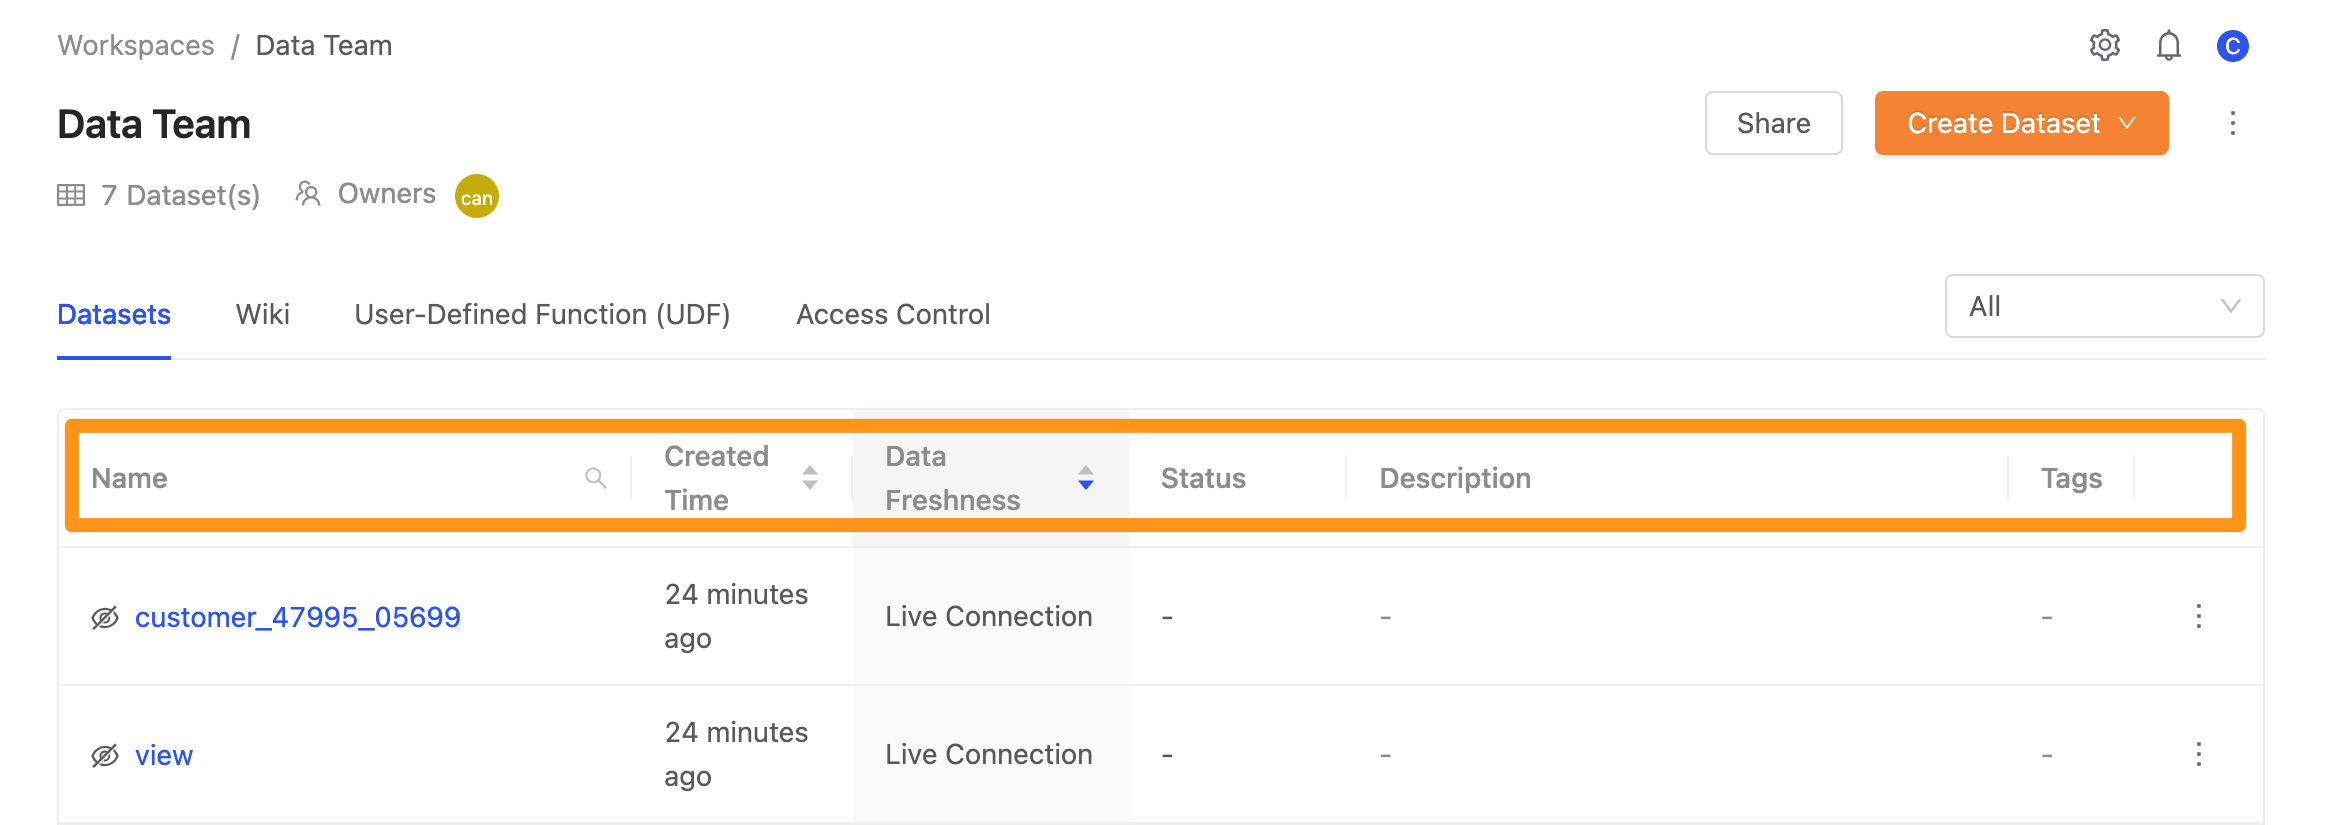
Name: the display name of the DatasetCreated Time: The time when this Dataset was createdData Freshness: When users upload their Dataset- Displaying Live Connection means that this Dataset is updated in real-time
- Display Refresh means that this Dataset is not updated immediately
Status: Represents the update status, and you will see four statuses in totalWaiting: Waiting for the updatePreparing: preparing for the updateSuccess: The update was successfulFail: update failed
Description: A description of this DatasetTags: Tags related to this Dataset
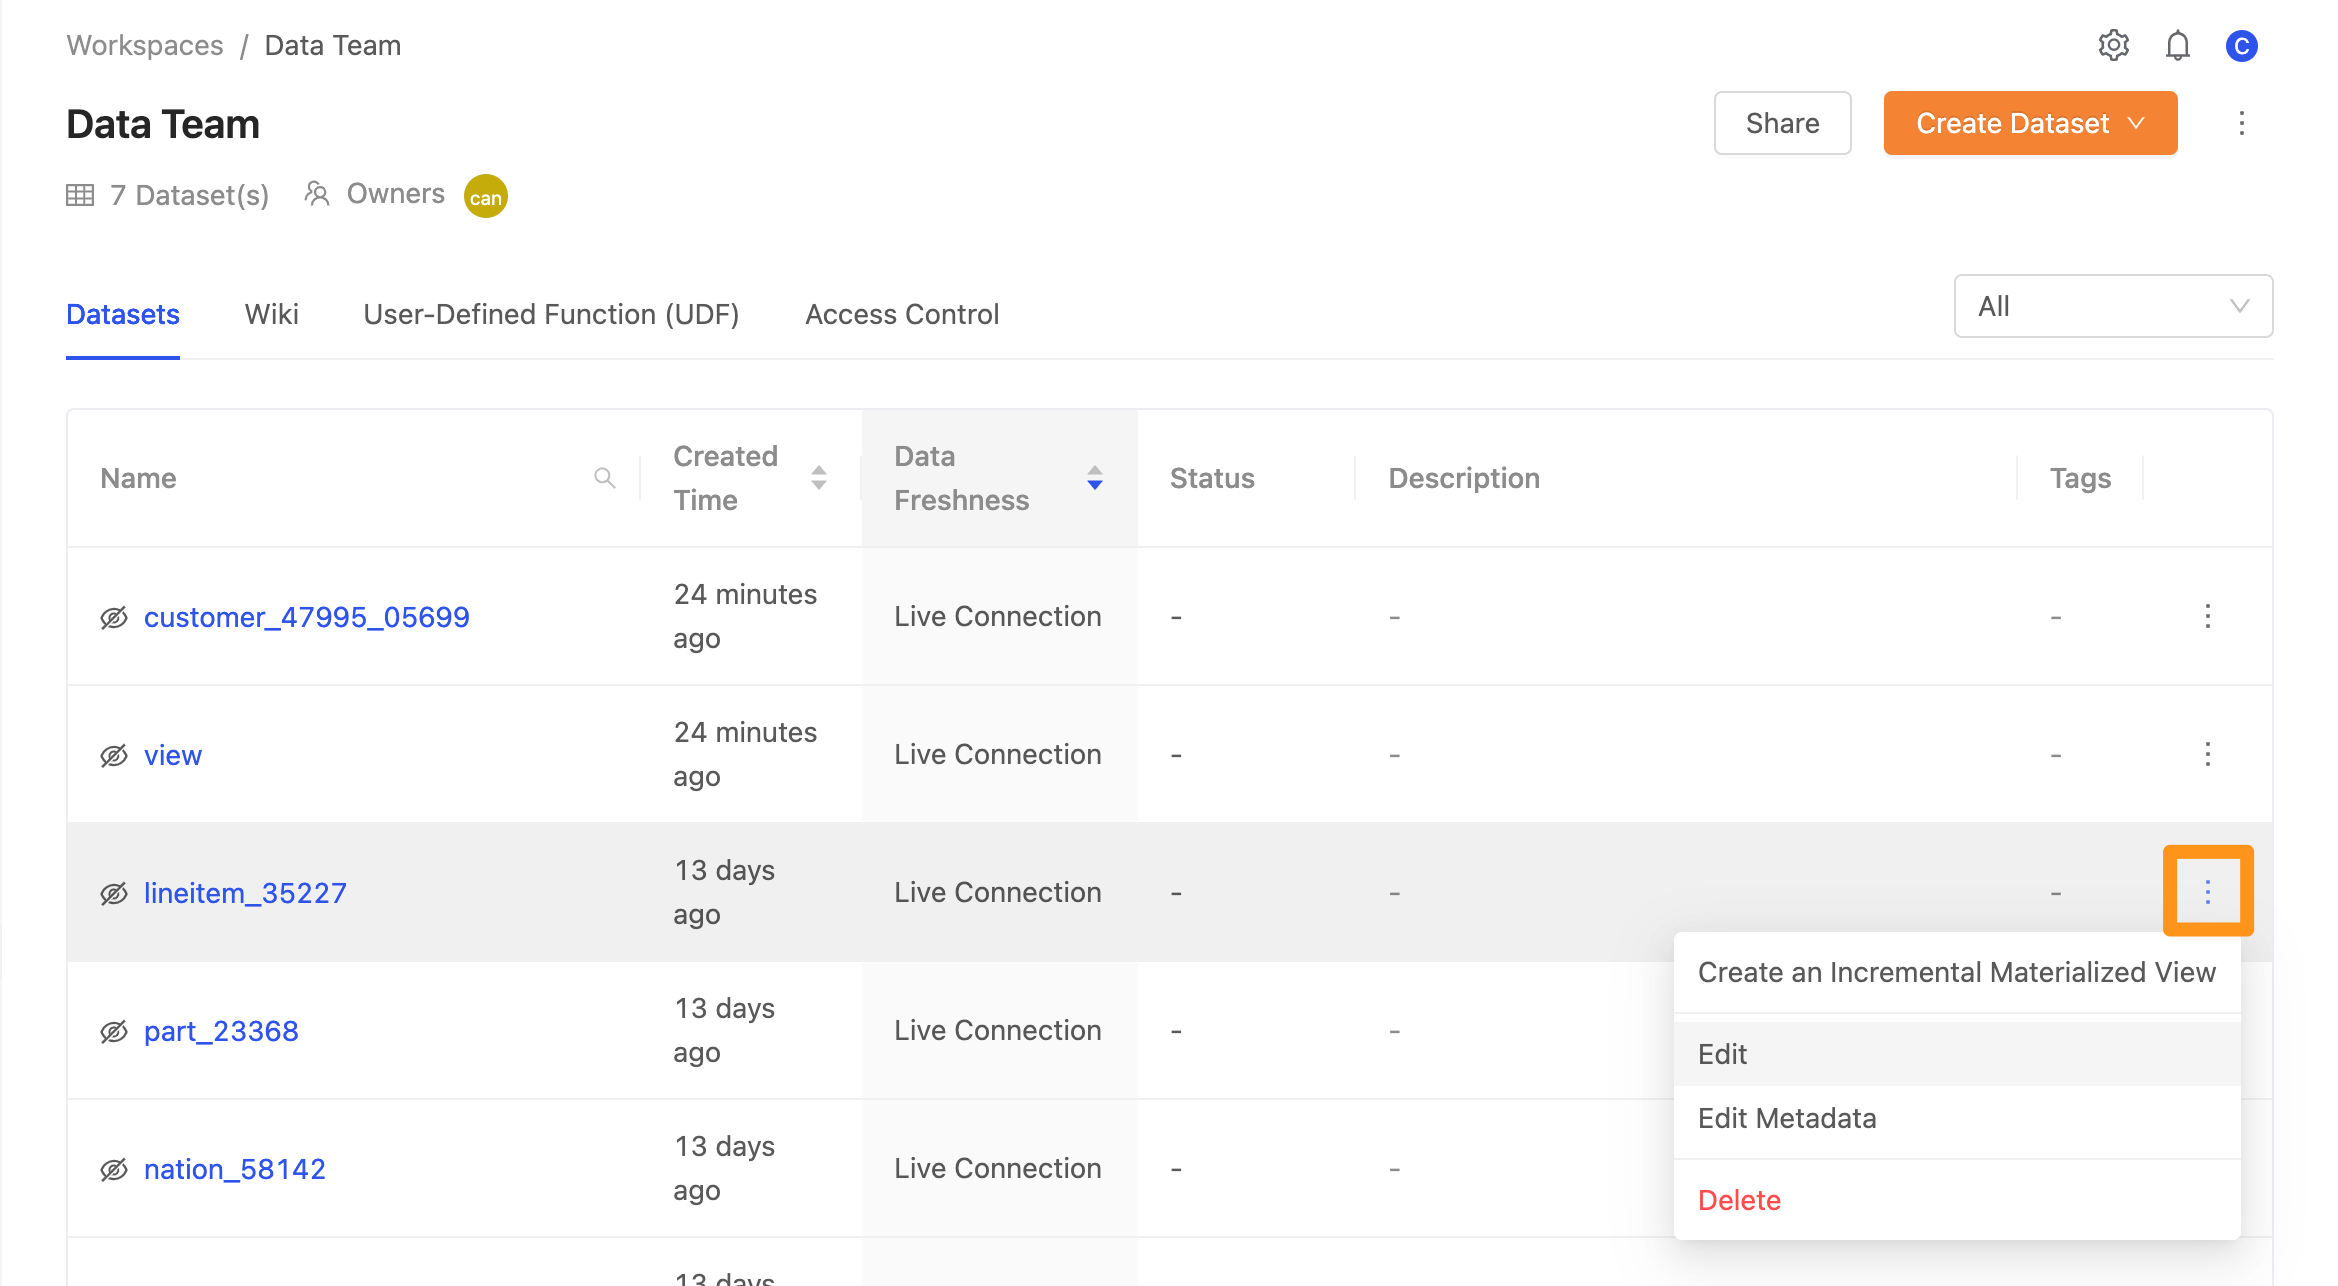
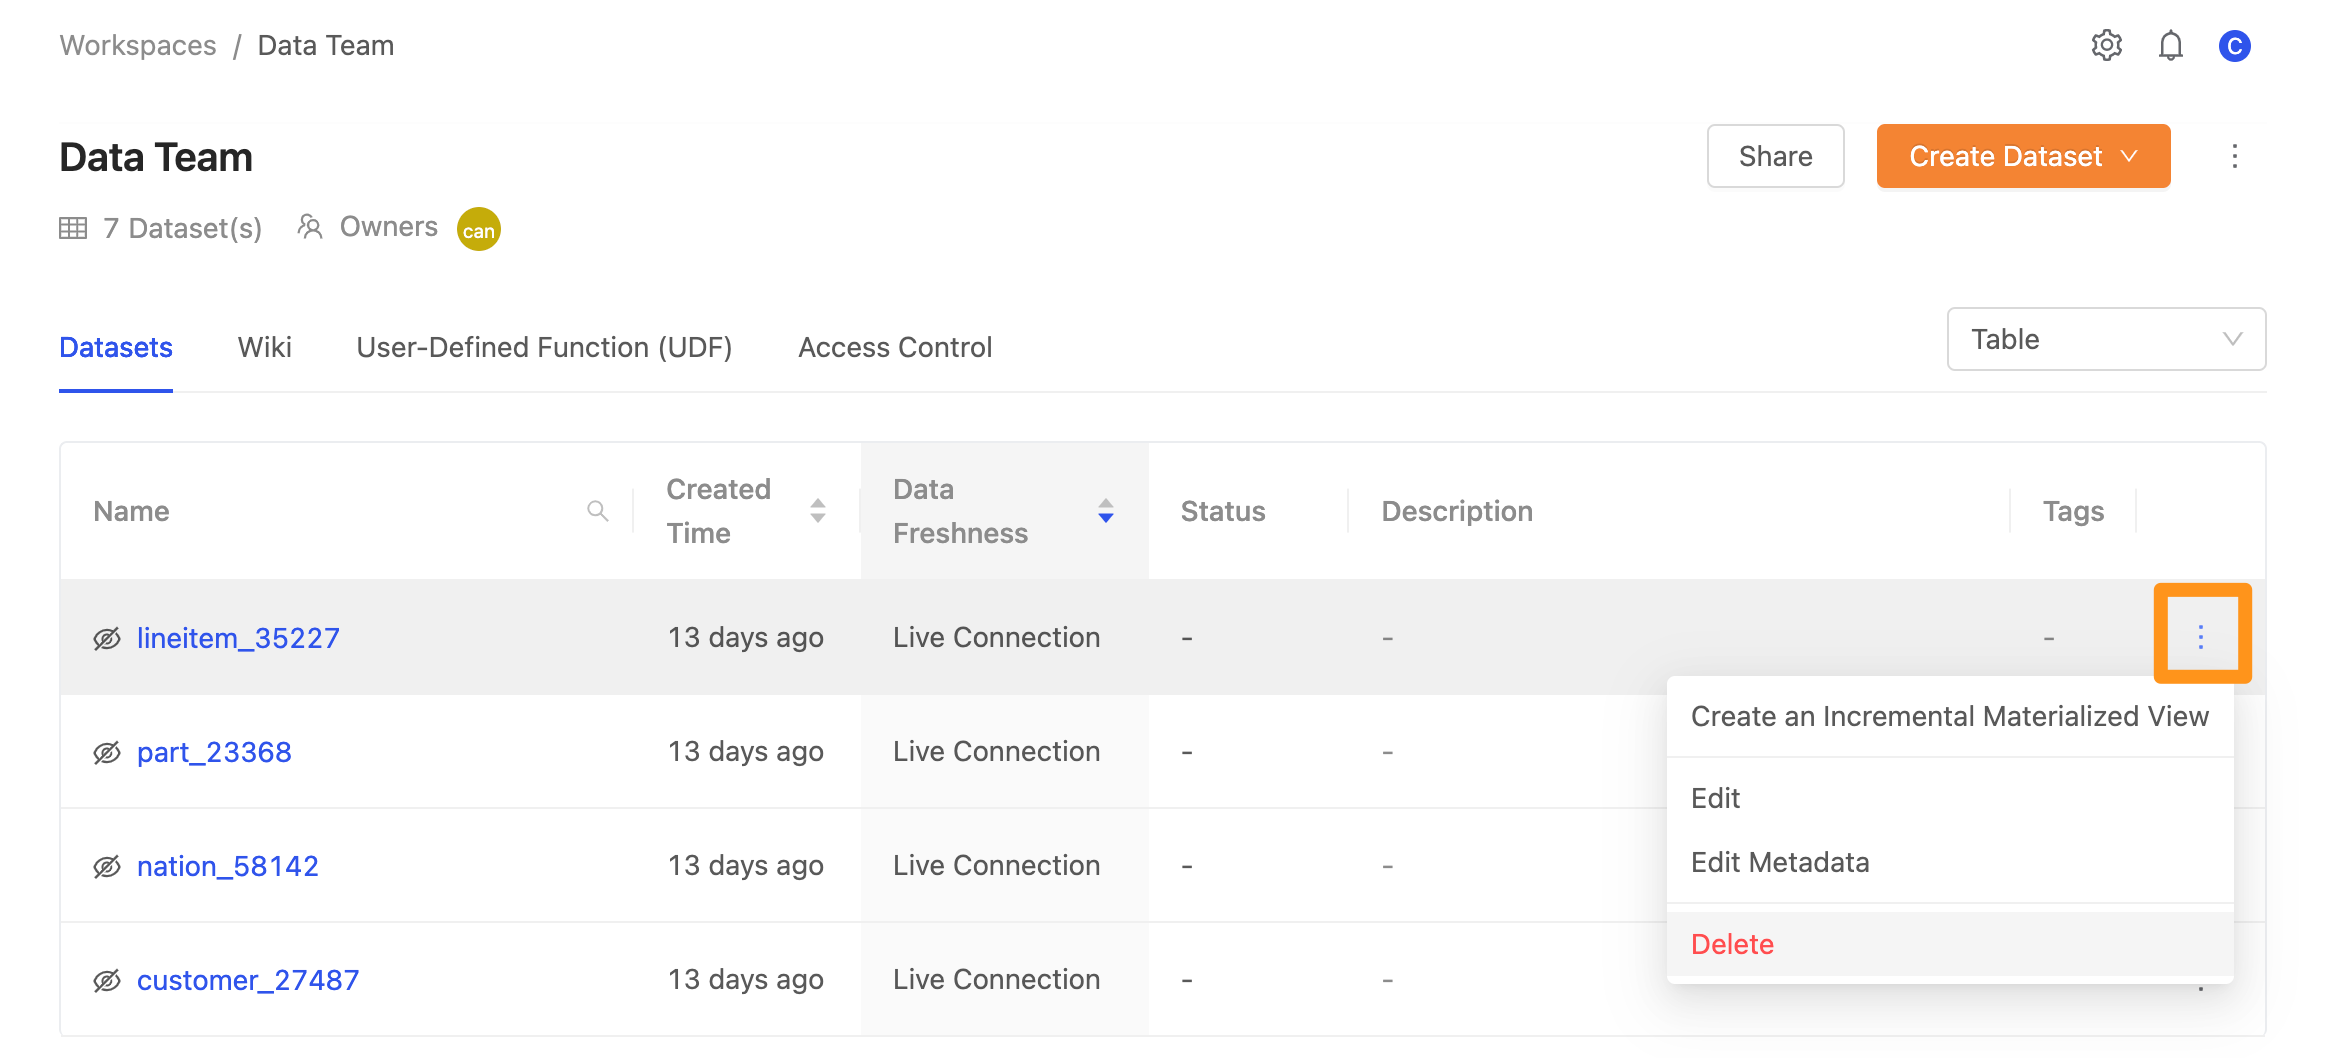
Edit Dataset
Add or delete fields for the data imported into the workspace from the data source. Click on the … symbol in the column and select the Edit option from the menu
In the window, you can see that the columns on the right are the columns that have been imported into the workspace, and the columns on the left are the columns in the data source.
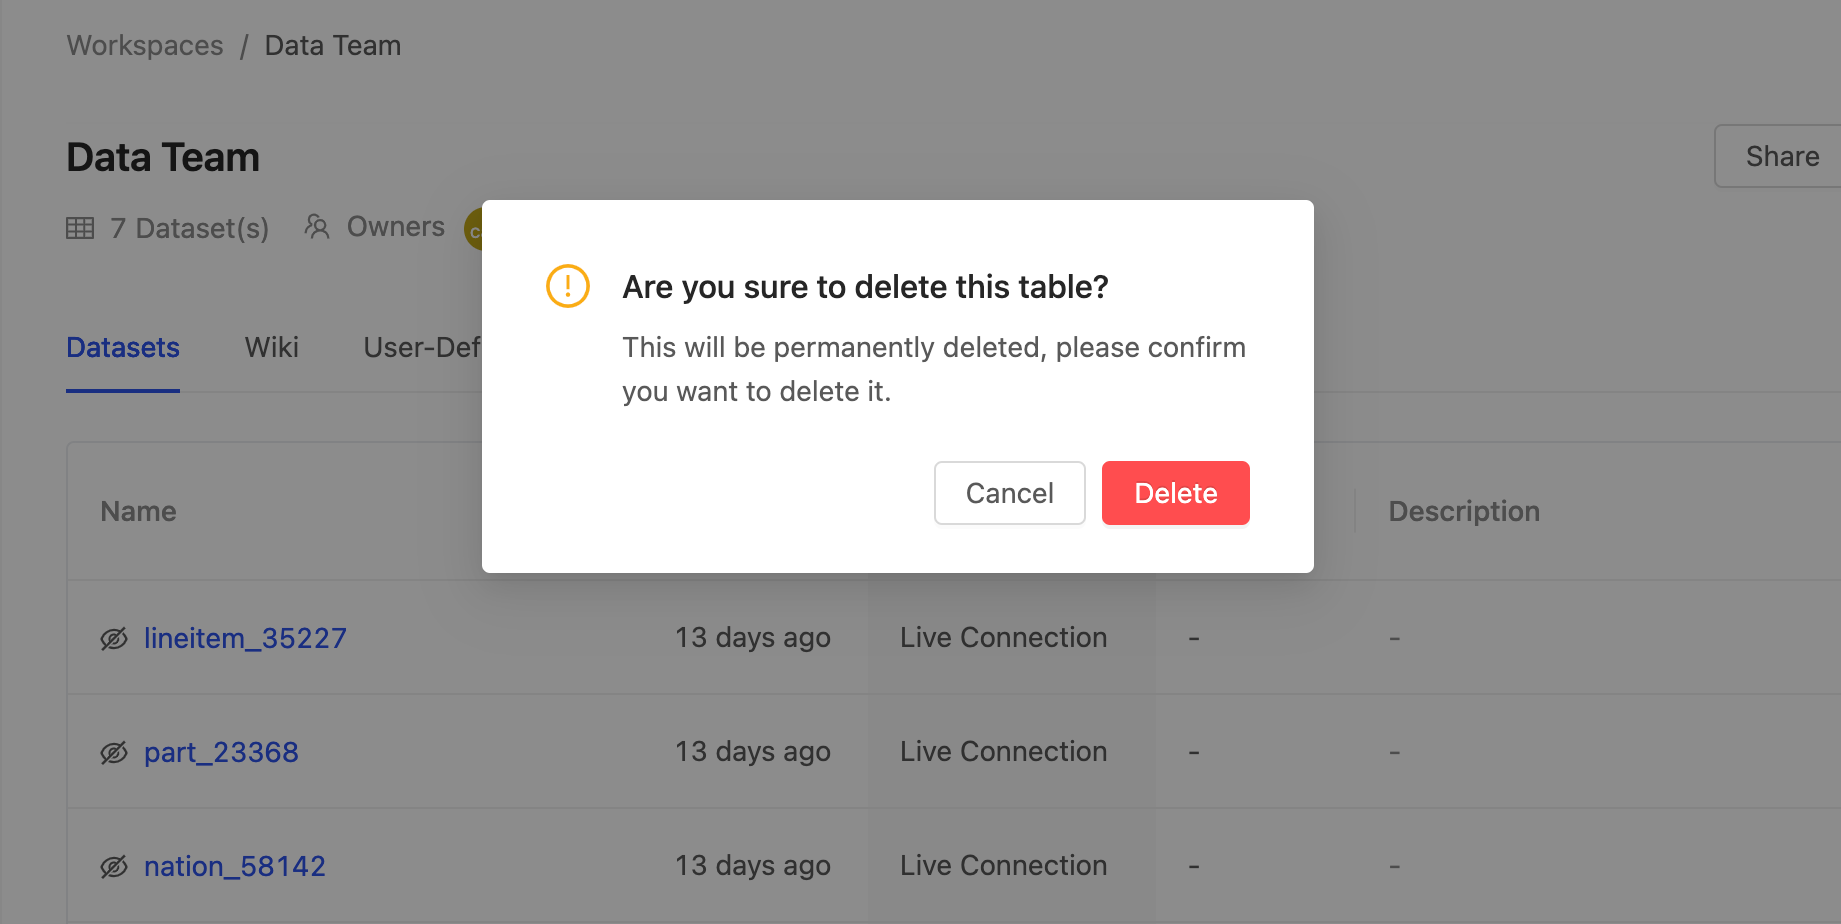
Delete Dataset
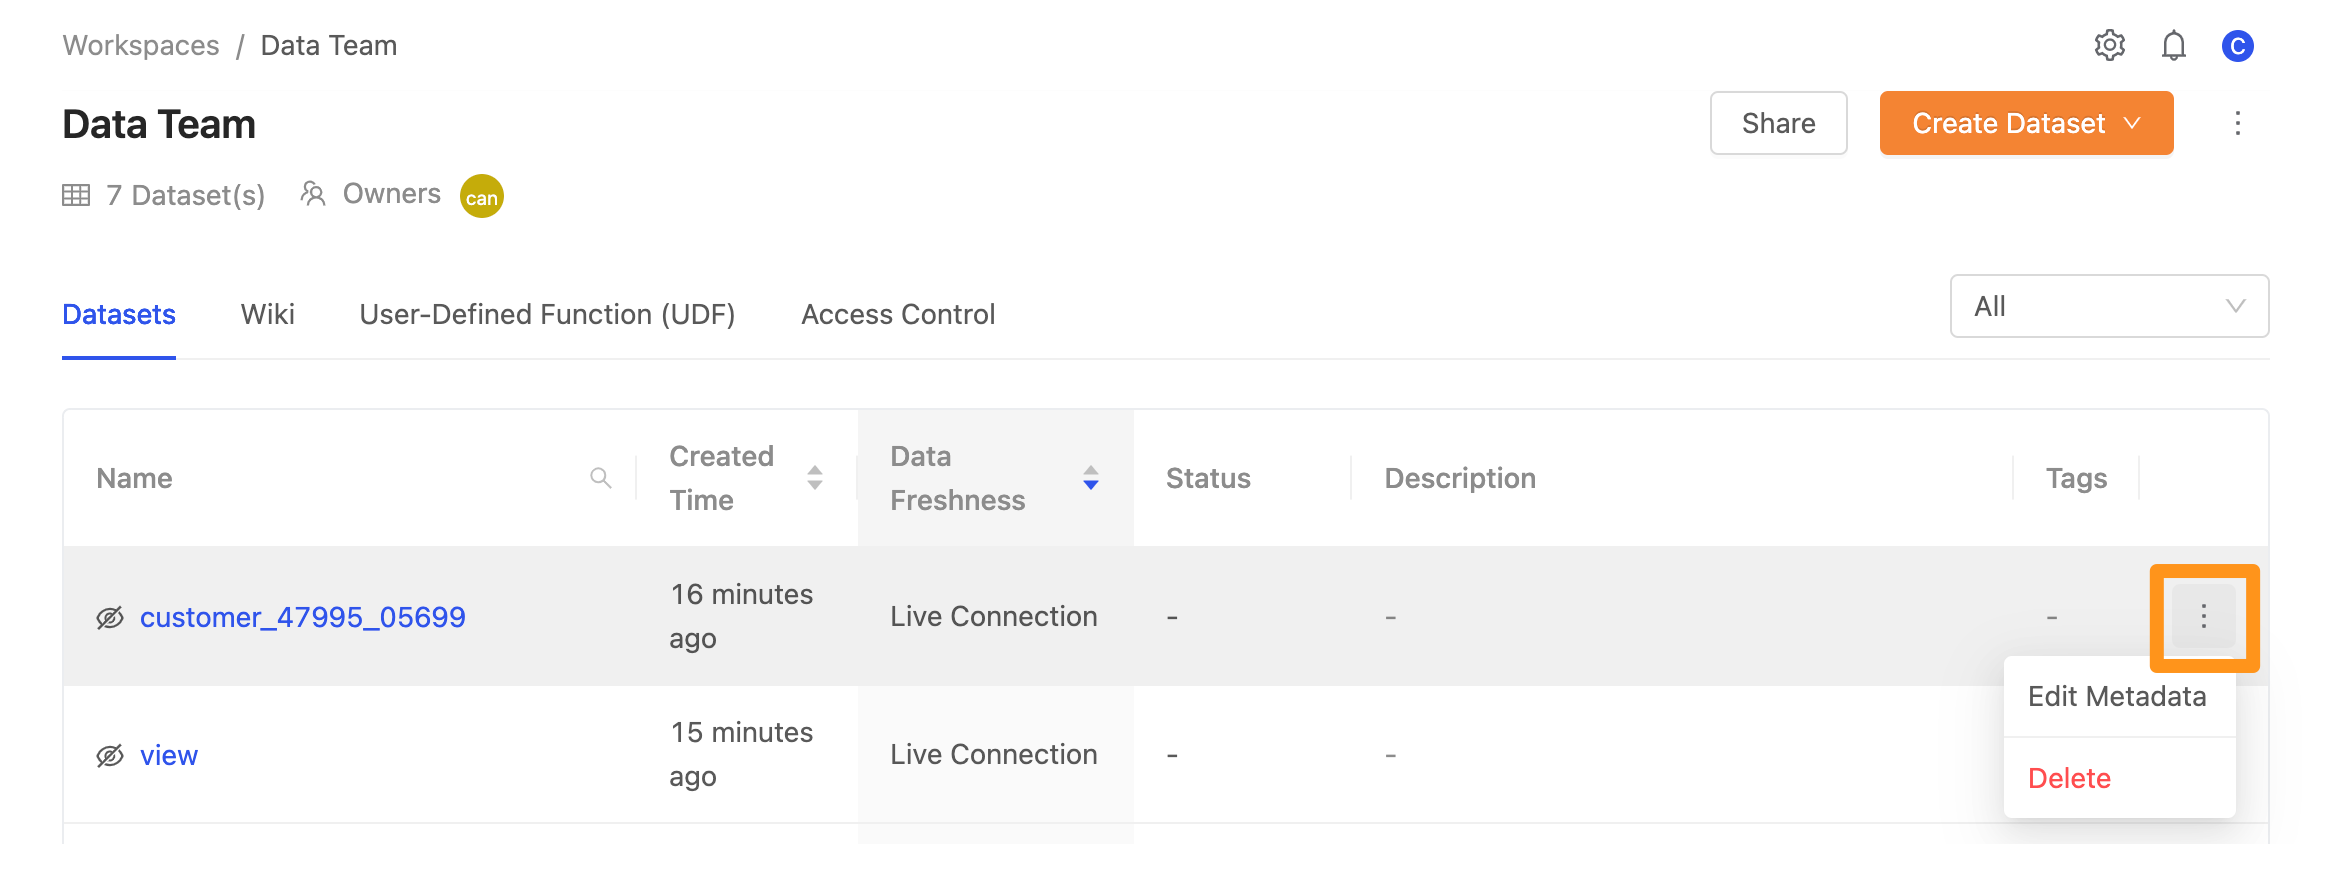
Click the … symbol in the field and select the Delete option from the menu.
After selecting Delete, another window will appear on the screen to confirm whether you want to delete.
Edit Metadata
Click the … symbol in the column and select the Edit Metadata option from the menu.
In the form, set the Metadata of the data, including label, description, semantics, and whether to allow public query.
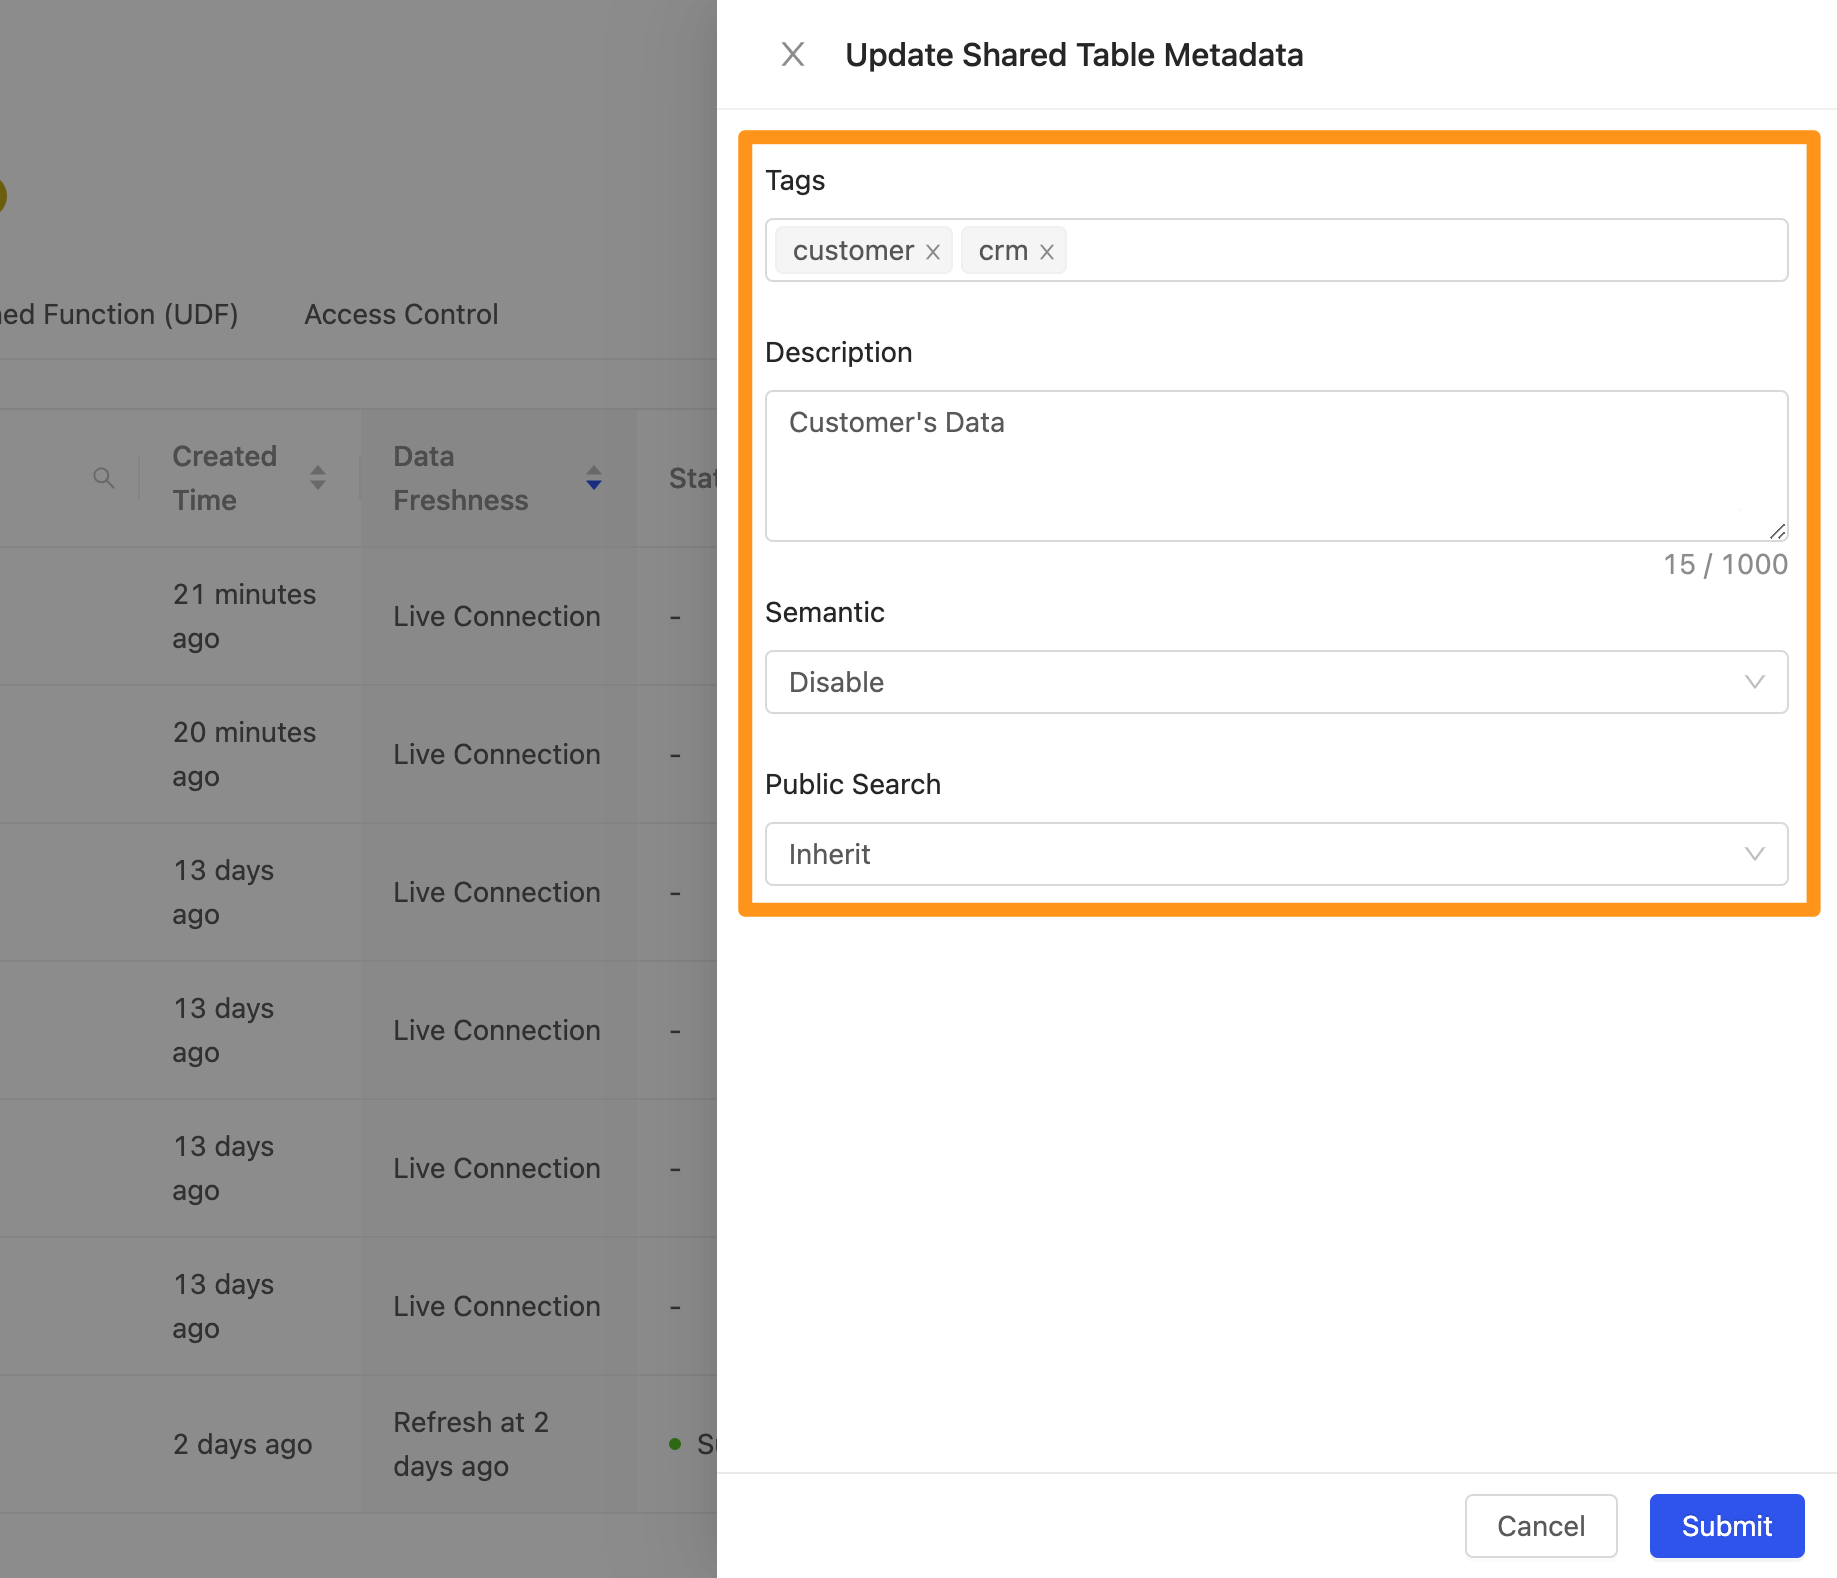
After the editing is complete, you can see the Metadata information after the setting is displayed in the table.