Query Impersonation
This feature is only available after version 2.4.3
The main concept of query impersonation is to allow users to behalf the operation of other user accounts in the system. In Canner Enterprise, the query impersonation feature can be applied to row-level security and column-level security to protect data security.
What is row-level security?
Row-level Security is a data security strategy that can define data permissions to filter data, allowing different users to read specific rows of data in a table. Currently, Canner Enterprise supports the formulation of row-level security for datasets in the workspace.
Example use cases
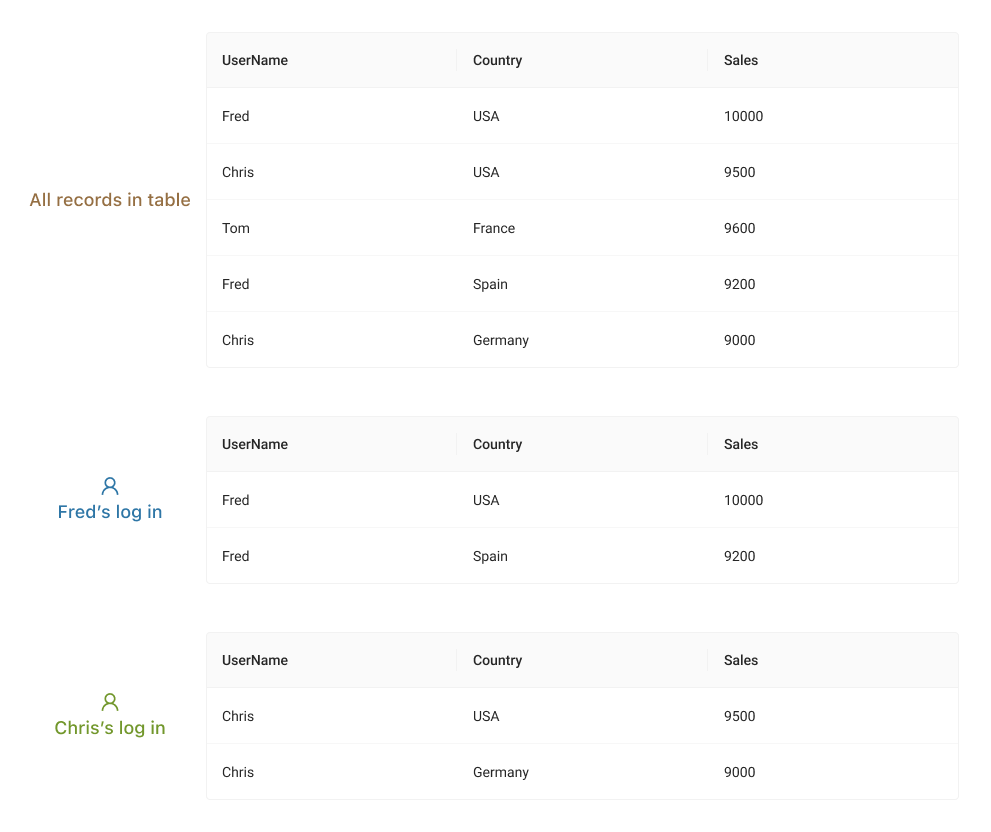
A table has been created that displays sales data for the diffedent country. When a specific user logs in, the row-level security blocks the view of data based on the column UserName. For example, when the user Fred logs in he can see only 2 records that belong to him. Similarly, when Chris logs in, he can only view data that is relevant to him.
What is column-level security?
Column-level security is a data security strategy that can define data permissions to control the column content seen by users under different conditions. Currently, Canner Enterprise supports the formulation of column-level security for datasets in the workspace.
Example use cases
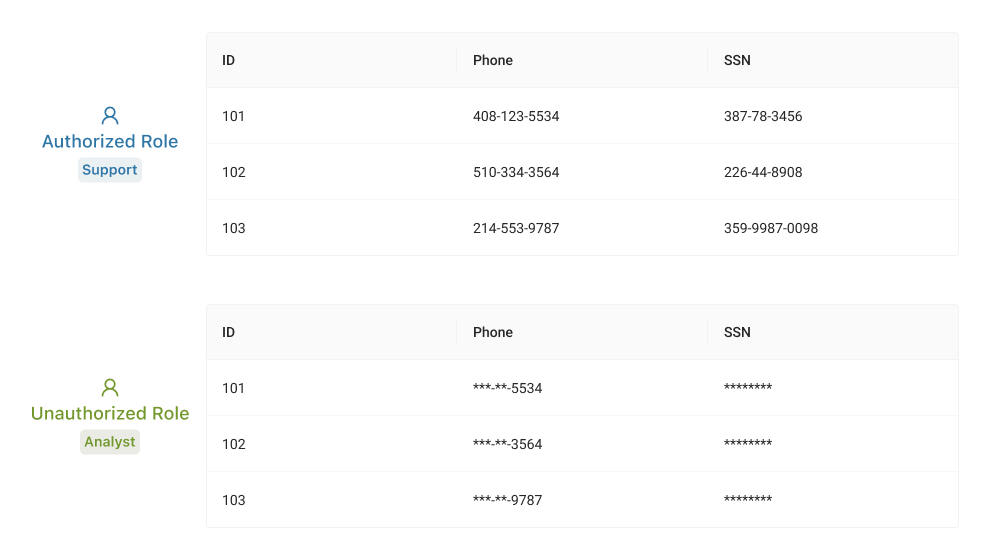
A table has been created to display customer data. When a specific user logs in, column-level security blocks the view of data based on the user's role. For example, when the user has authorized roles such as the Support unit, they can view all data. When the user has unauthorized roles such as the Analyst unit, the personal data they see is subject to data masking.
How row and column level security works?
Canner Enterprise's SQL Query Engine supports the following User_Context functions to help users establish data permissions and achieve row-level security and column-level security:
| Function | Alias | Parameters | Return type | Description |
|---|---|---|---|---|
| list_groups | N/A | N/A | list of string | list groups of the current_user |
| has_group | N/A | string | boolean | given a group name, returns true if the user is already in the group |
| list_token_roles | N/A | N/A | list of string | list roles of the current_user |
| has_token_role | N/A | string | boolean | given a role name, returns true if the user has assumed the role |
| get_account_role | N/A | N/A | string | get the current account role |
| get_workspace_role | N/A | N/A | string | get the current workspace role |
| list_attributes | list_attrs | N/A | list of string | list attributes of the current_user |
| has_attribute | has_attr | string | boolean | given an attribute name, returns true if the user has the attribute |
| get_attribute | get_attr | string | string | given an attribute name, returns the value of the attribute |
Example use cases
When users create a View or Materialized View in Canner Enterprise, they can define data permission by using the above functions in the SQL syntax.
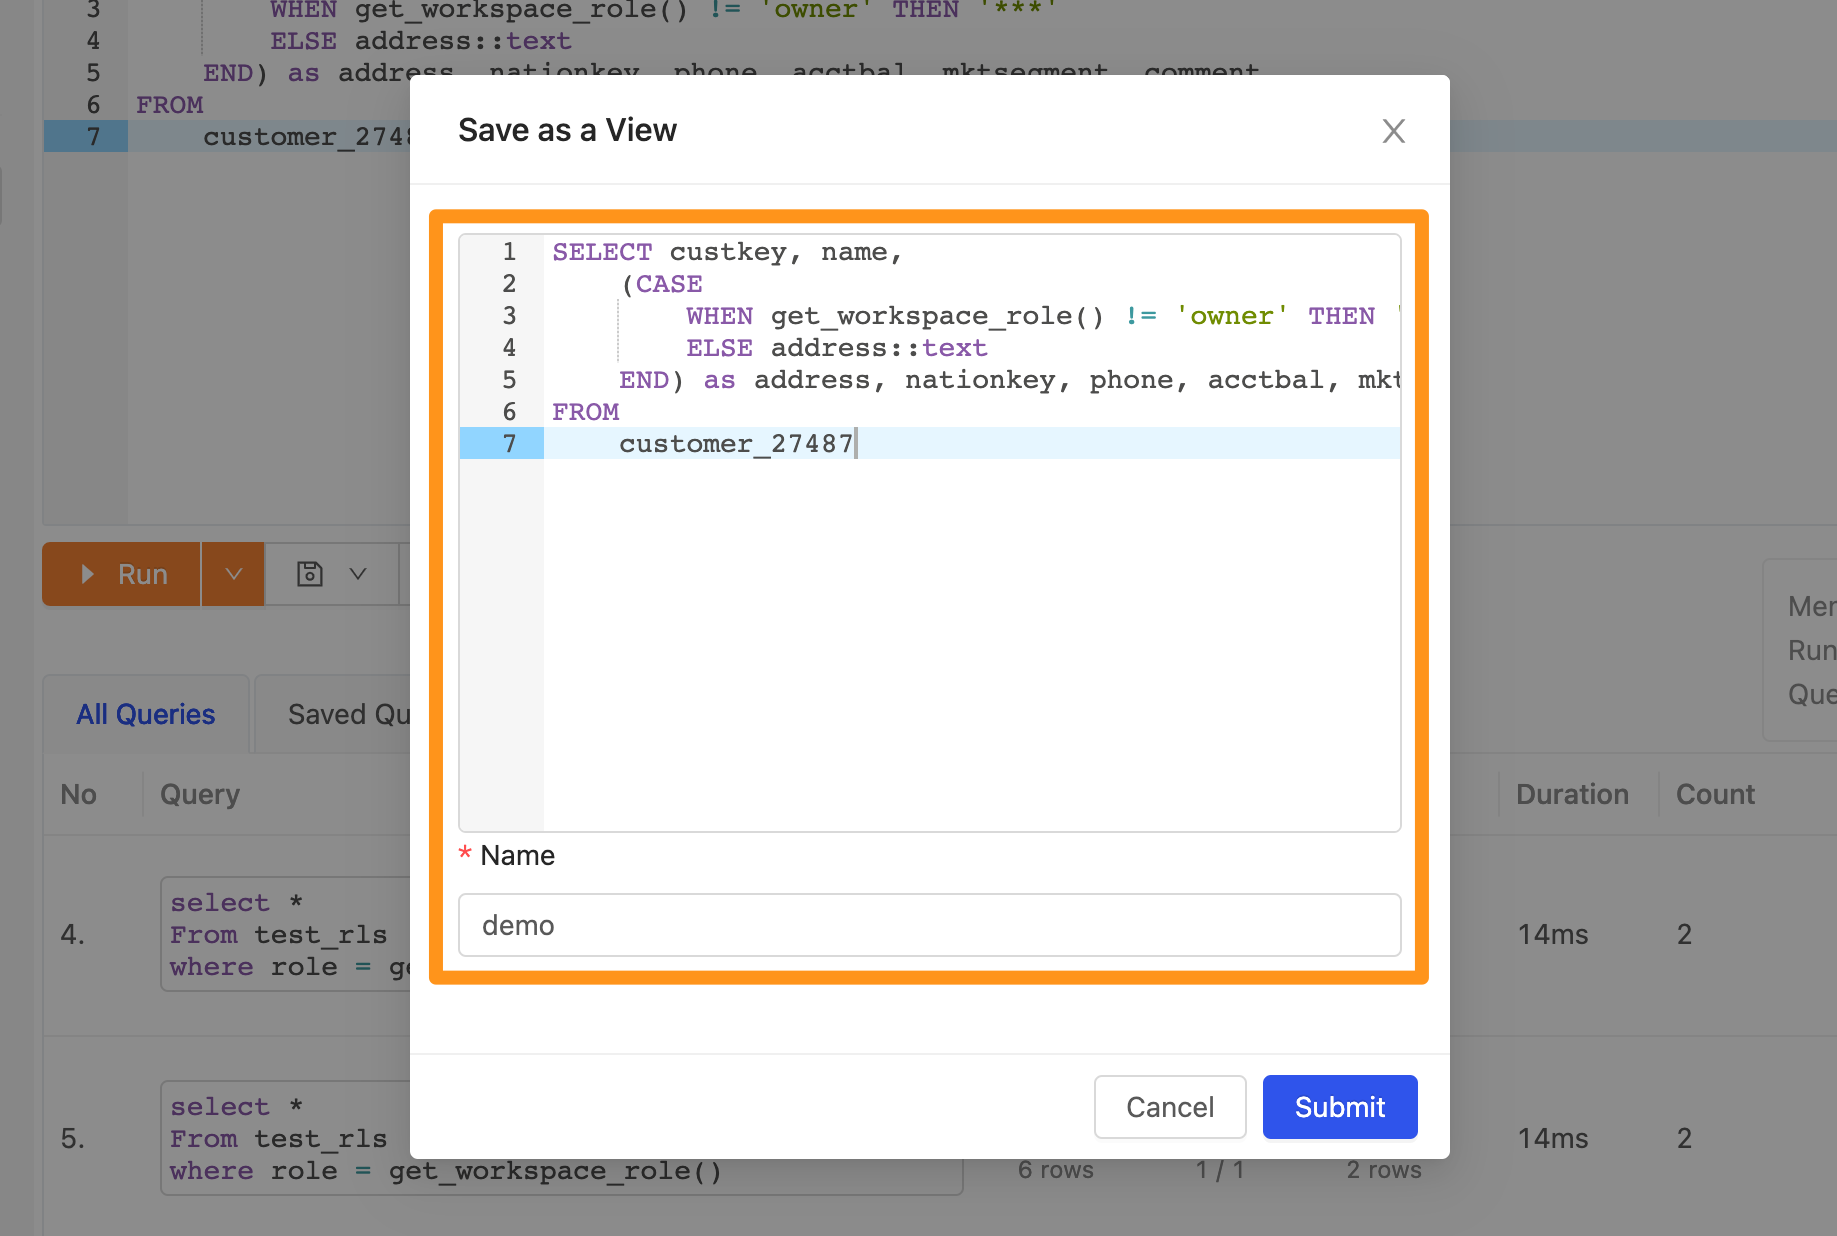
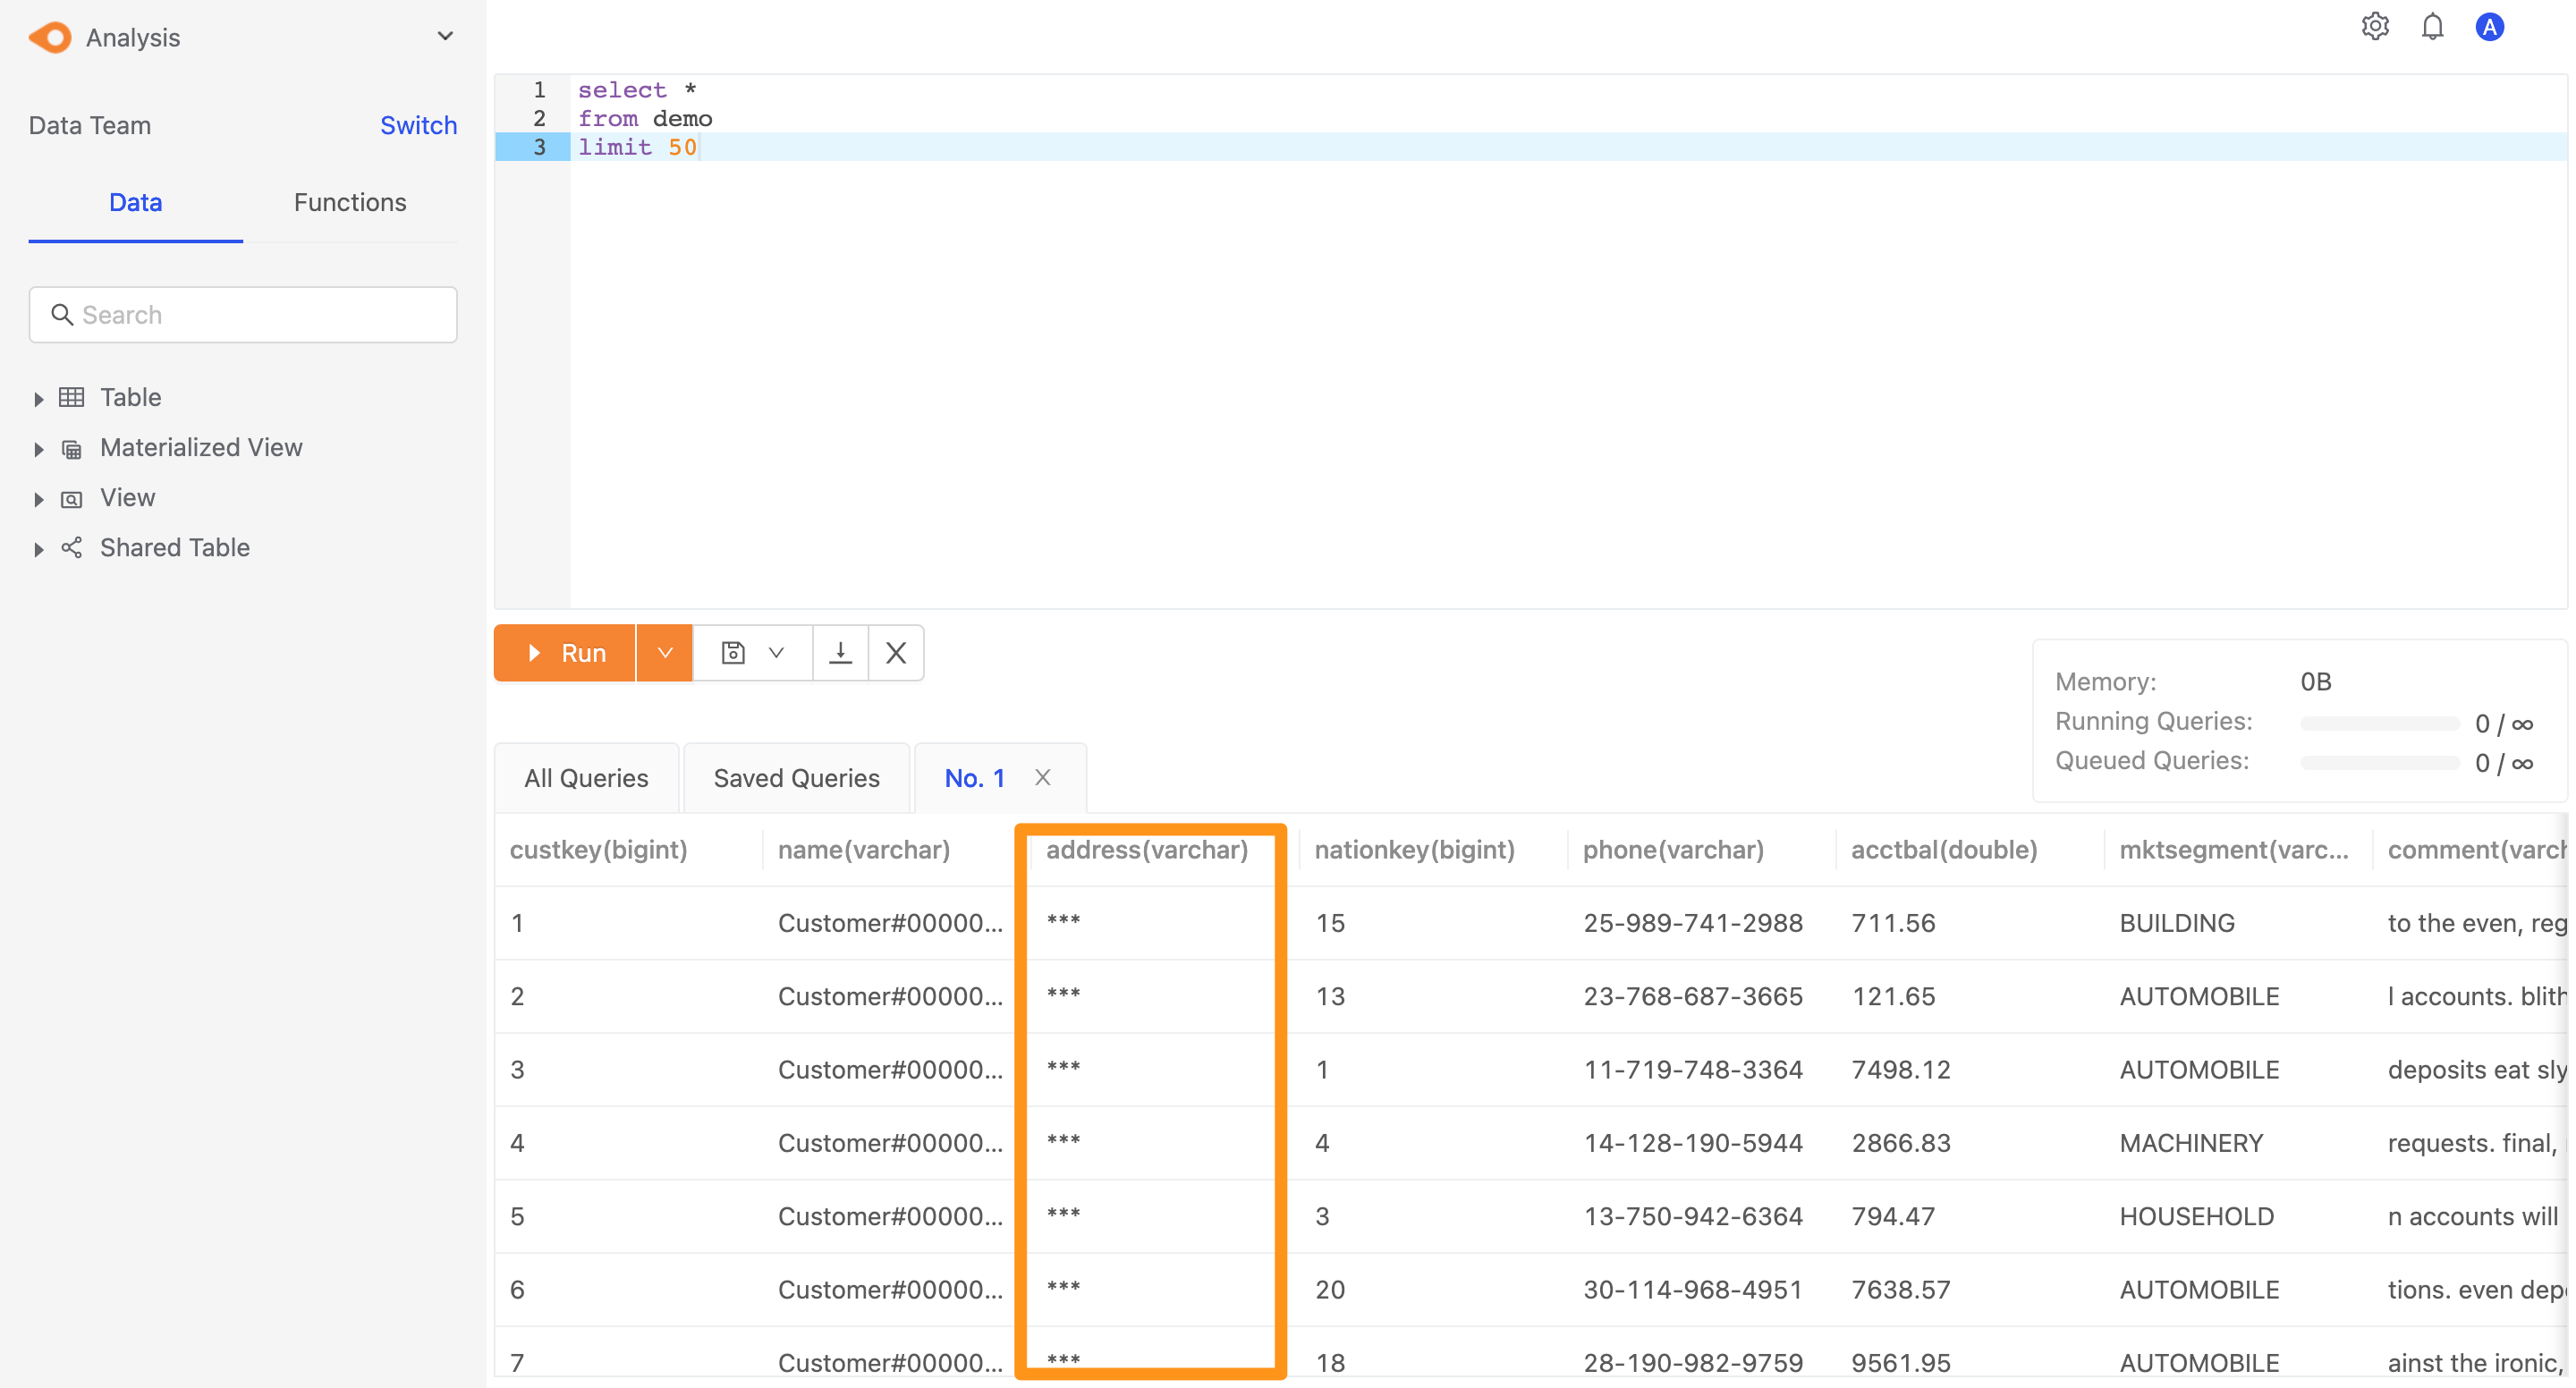
Permission : When the user in the workspace role is not Owner, the address column in the table will return *** to the user.
SELECT
    (CASE
        WHEN get_workspace_role() != 'owner' THEN '***'
        ELSE address::text
    END)
FROM
    customer_27487

Save as a view.
Switch to the login role of workspace role (Data Analyst) and query the view. Since this role is not the workspace owner, the address column in the table will be returned as *** according to the permission we defined.
How query impersonation works?
After understanding column-level and row-level security, we will now introduce how to execute query impersonation. In Canner Enterprise, users can impersonate the permission of other users in the workspace to execute queries. We will use psql to connect to Canner Enterprise and introduce the entire execution process.
Step 1: Set connection information
Please refer to psql (CLI) for the connection method. Here we use a personal access token with the admin role to log in.

Step 2: Enable the impersonation permission
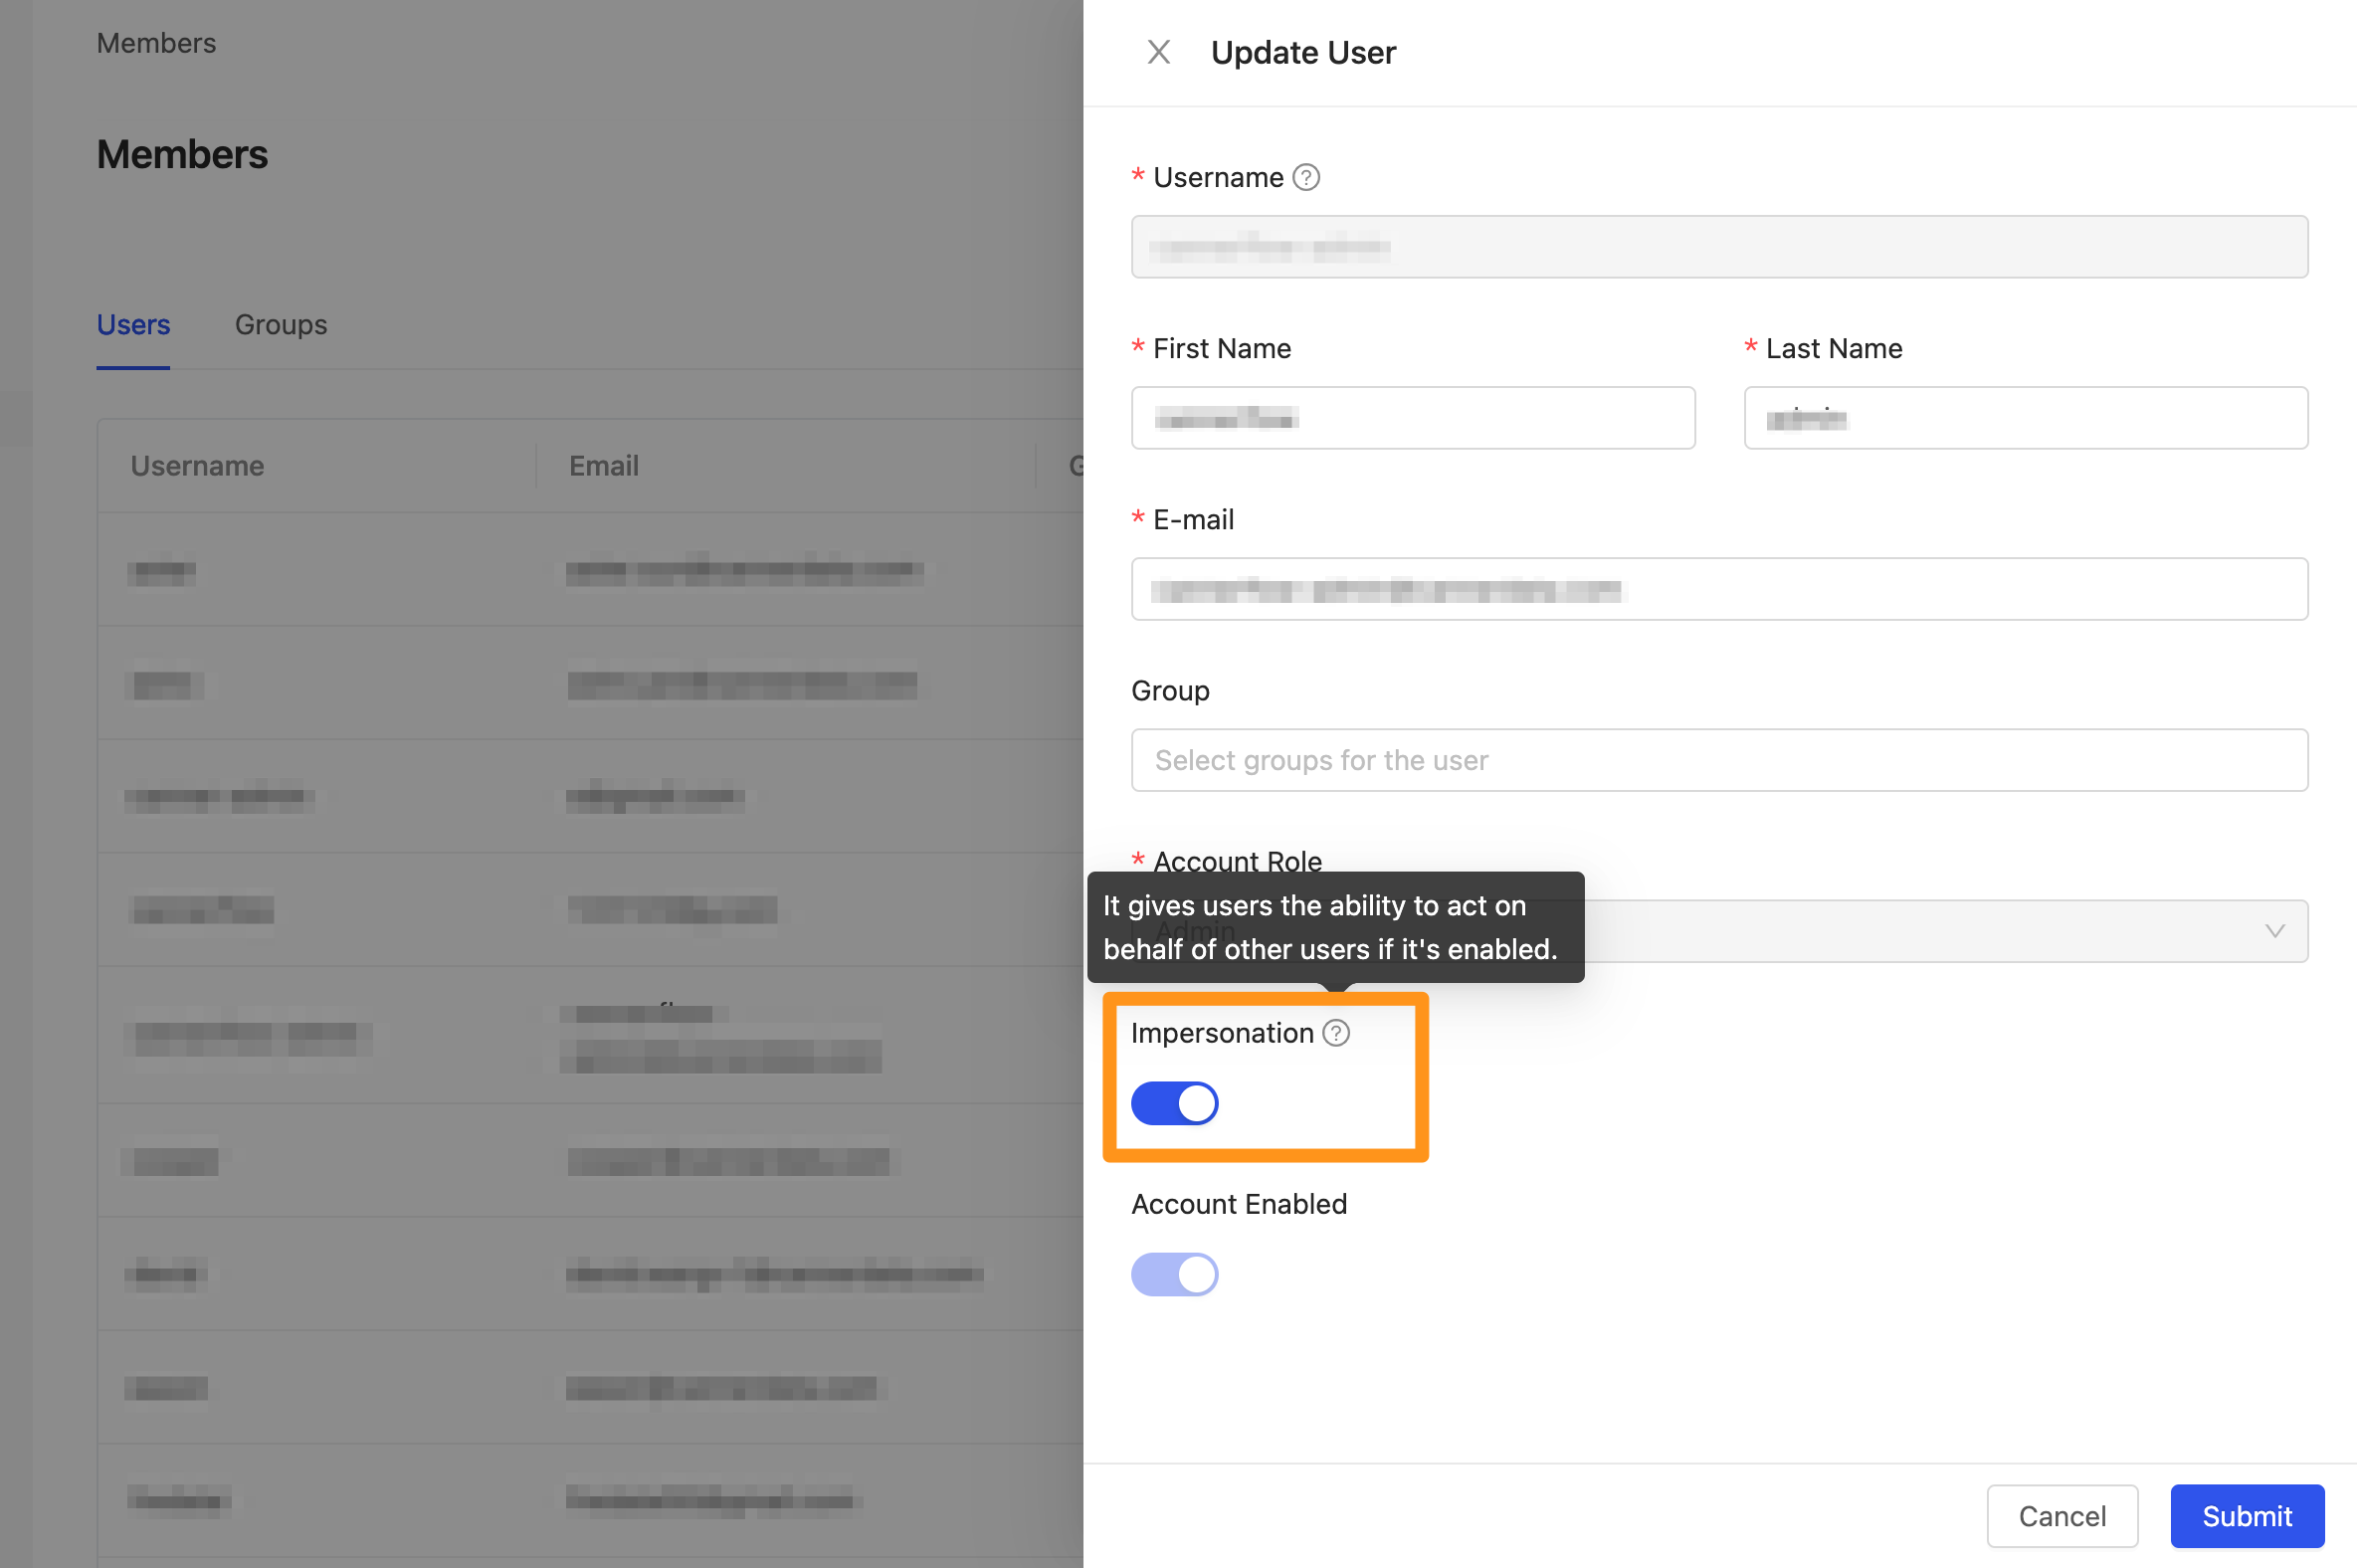
When executing Query Impersonation, the connecting role needs to have the impersonation permission in order to execute. The impersonation permission is disabled by default and needs to be enabled on the Members page.
Go to the Members page and click on the Edit option.

Turn on the toggle for Impersonation. Once enabled, the connecting role will have the permission to impersonate other roles.
Step 3: Impersonate user
Choose the user to impersonate in the connected workspace.
Currently, only impersonate user is supported.
Enter the syntax for executing impersonation.
IMPERSONATE "{CANNER USER NAME}"
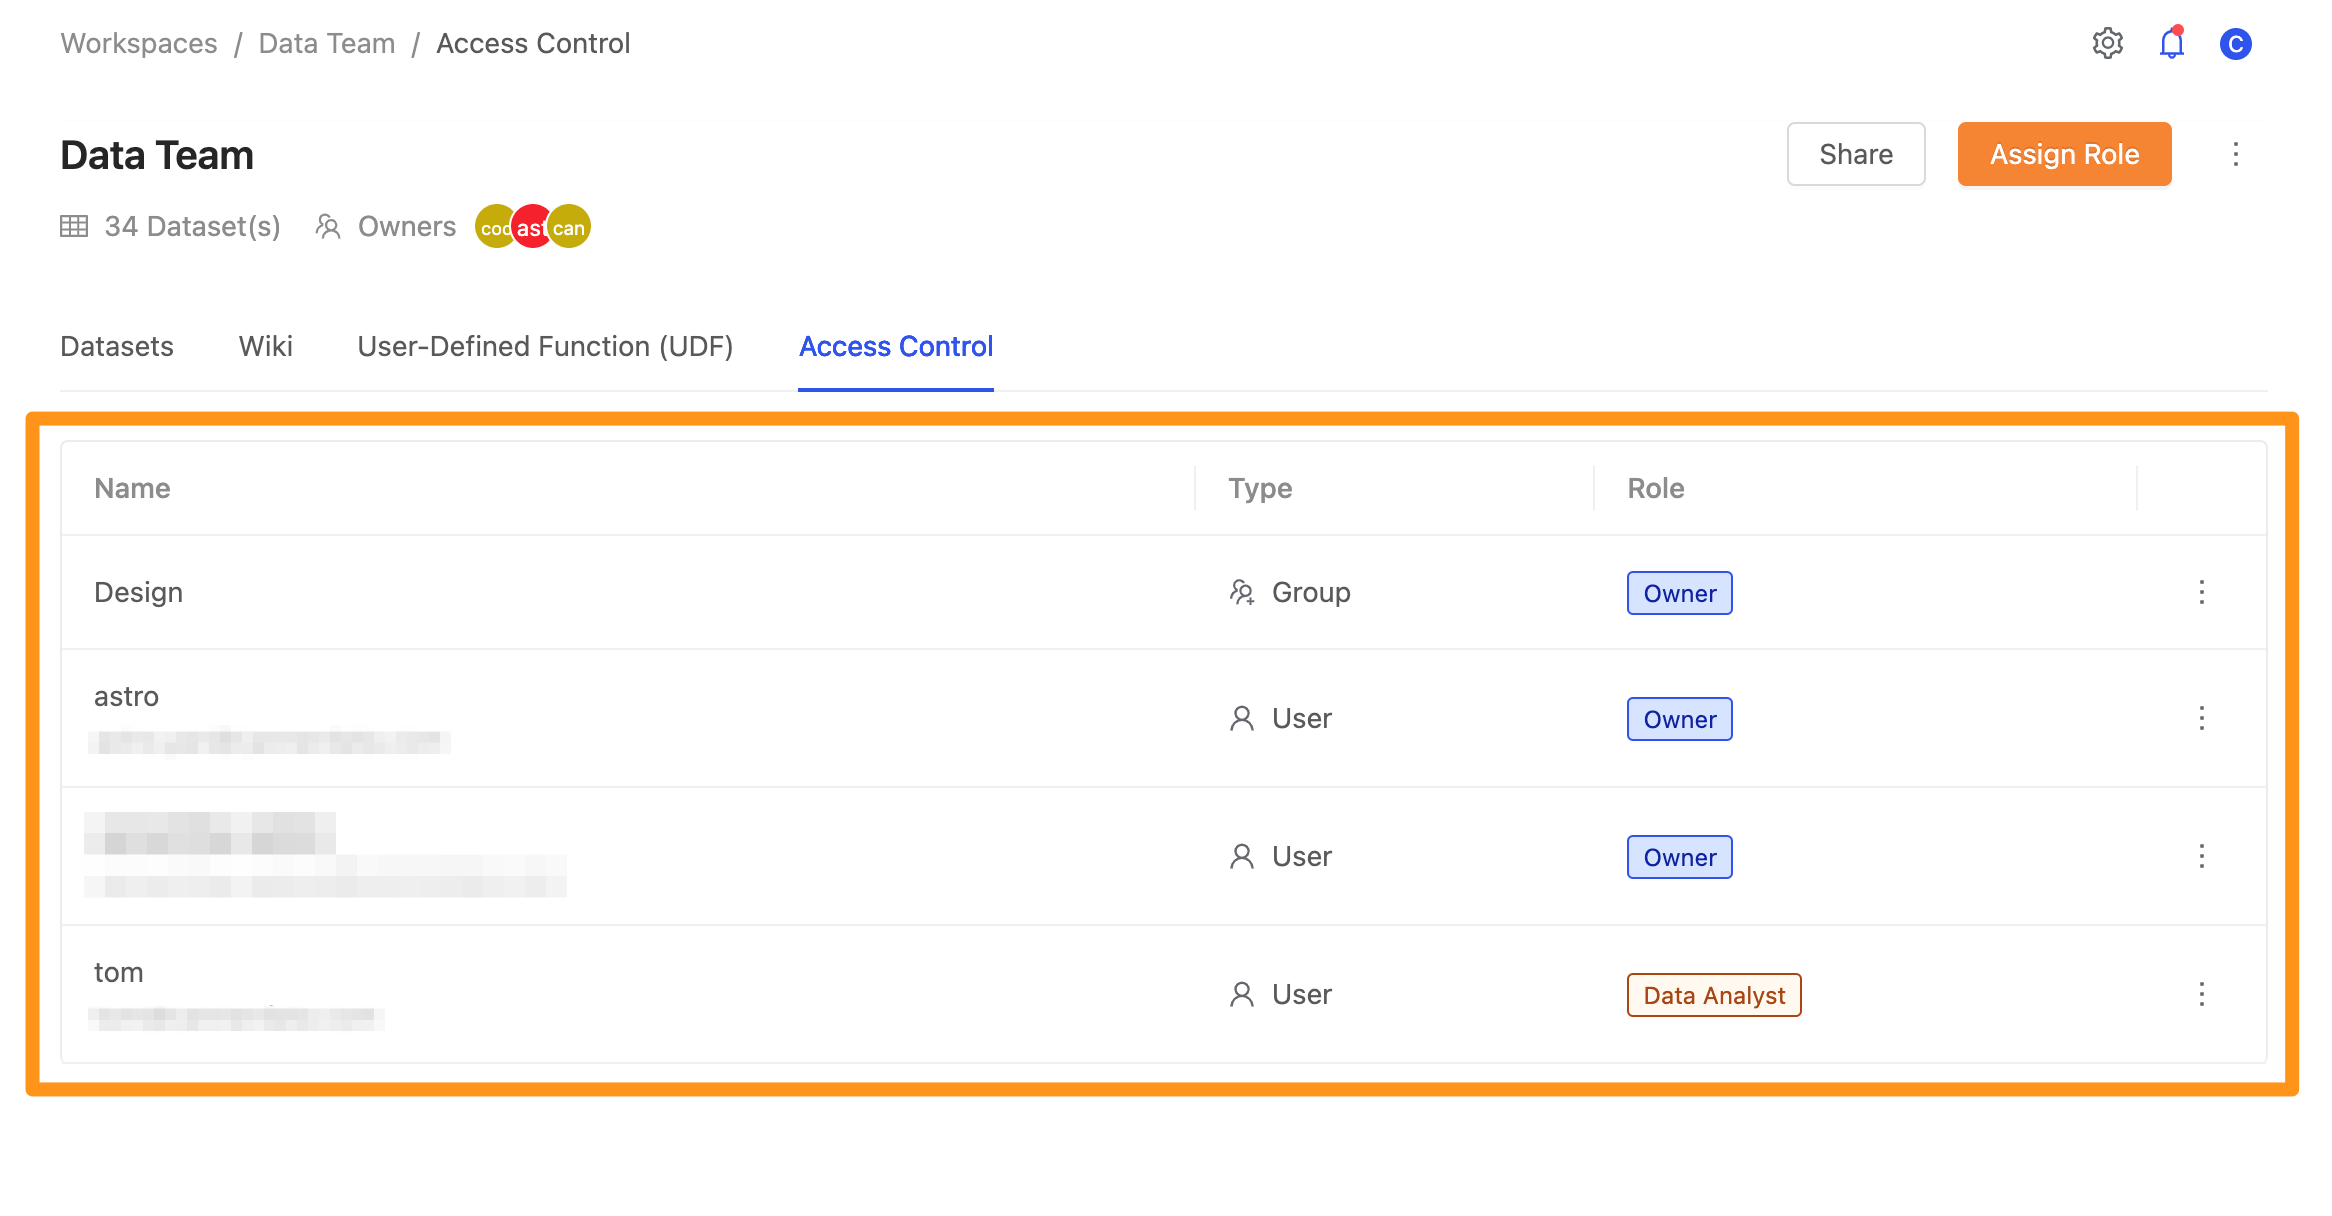
Assume we want to impersonate the user tom in the workspace. When the current user has permission to impersonate, the IMPERSONATE string will appear, and we can execute the query.

If the current user does not have the permission to execute query impersonation, an error message will be displayed. It needs to be enabled the permission on the Members page.

Step 4: Execute query impersonation
Use the view that we created earlier and impersonate different users to execute the query.
Impersonate the user tom with the role Data Analyst in the workspace, the value in the address column is returned as ***.
SELECT * FROM demo Limit 5 ;

Impersonate the user astro with the role Owner in the workspace, the value in the address column is returned as its original value.
SELECT * FROM demo Limit 5 ;

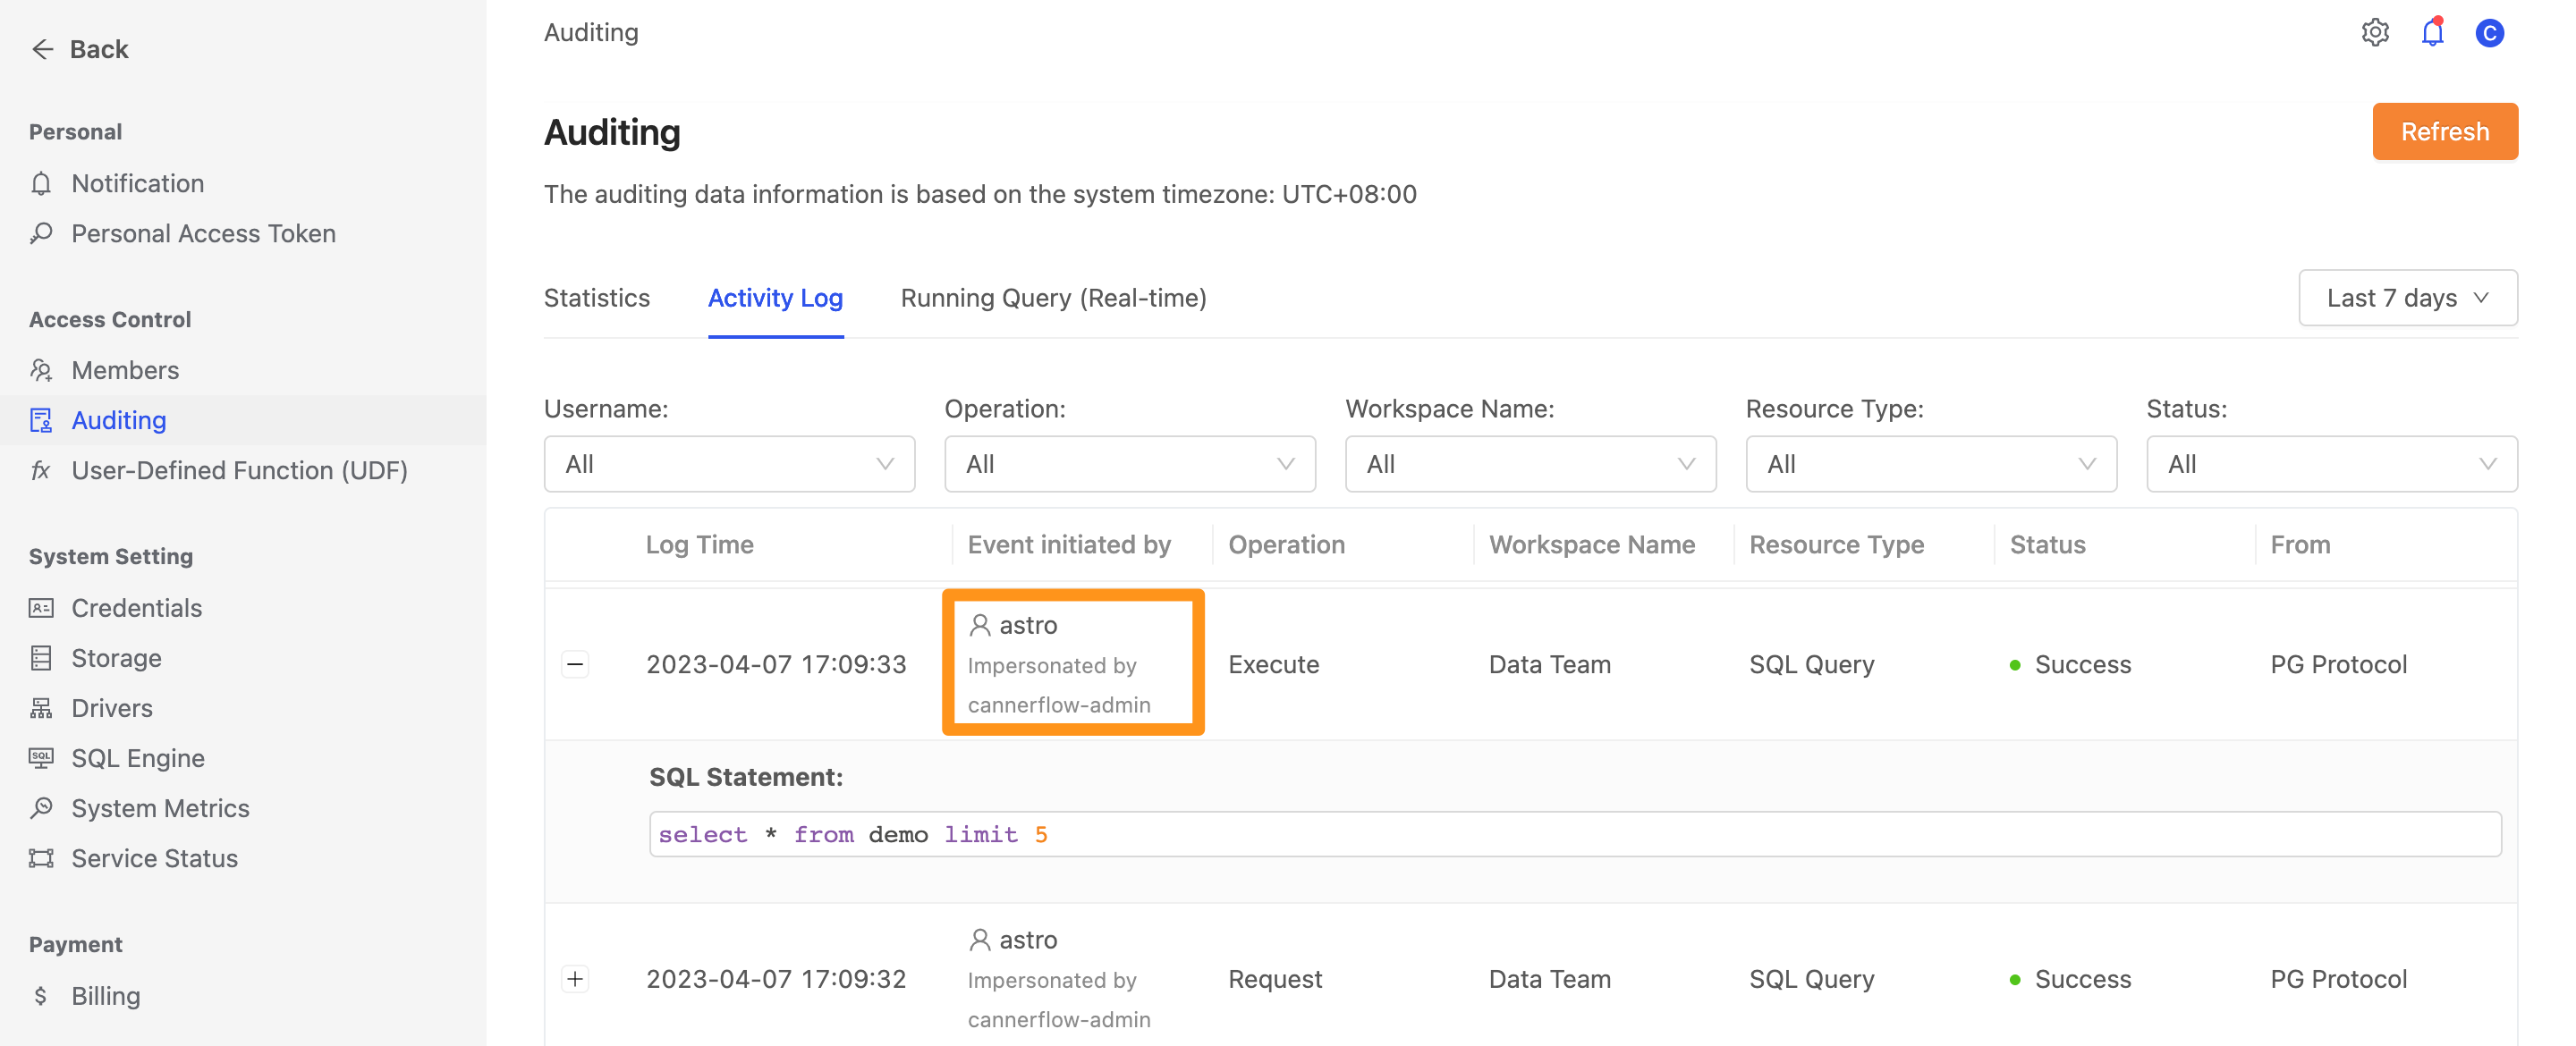
Auditing
When executing a query with impersonation, the Activity Log page will record the query for traceability. In the Event initiated by column, you can see the string Impersonated by indicating that the query was executed by another user through impersonation.