在 AWS 上購買
Usage Instructions
Prerequisites:
- An AWS account with administrative access
- A valid EC2 key pair
- An IAM role with the necessary permissions listed in step 9
Steps:
-
Open the Canner Enterprise Cloud page on AWS Marketplace.
-
Click the
Continue to Subscribebutton to subscribe to Canner Enterprise.
-
Click the
Continue to Configurationbutton.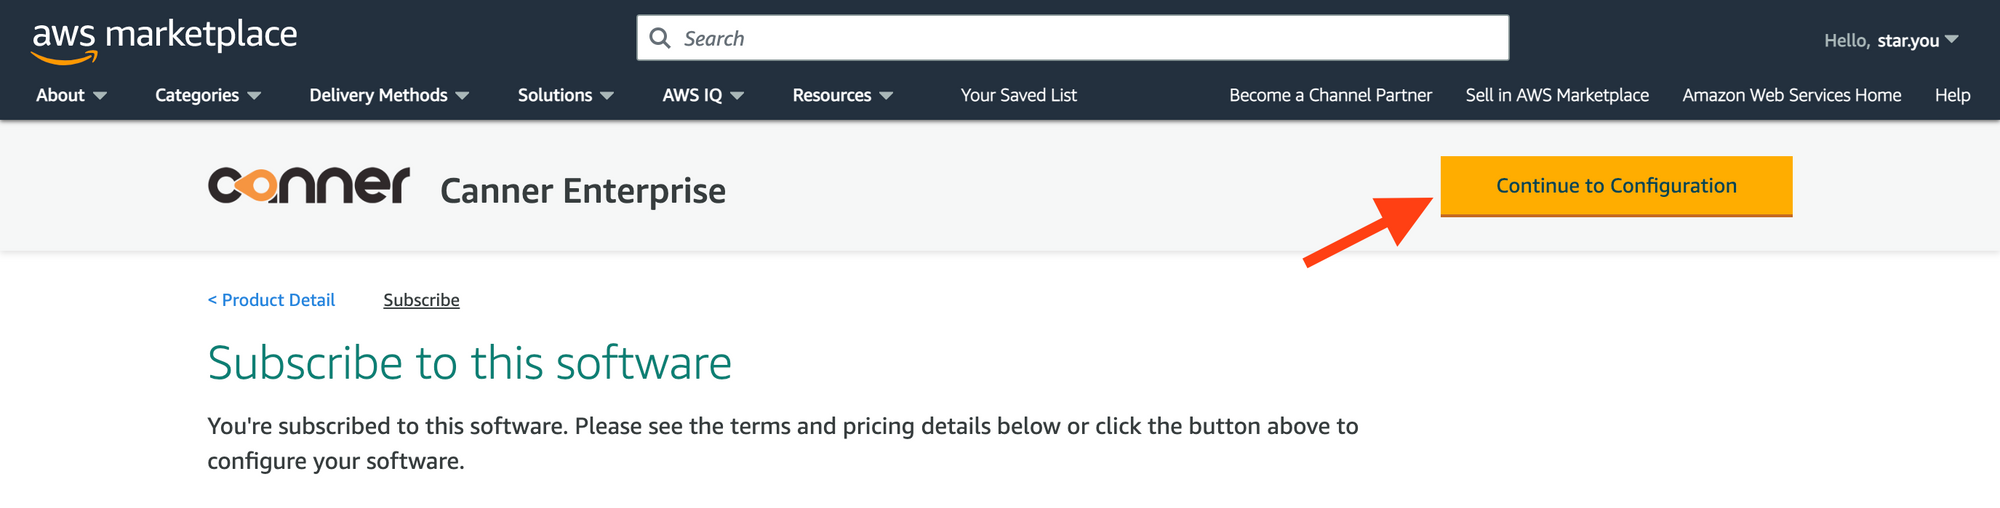
-
In the
Configure this softwaresection on the page, select the region where you want to install Canner Enterprise.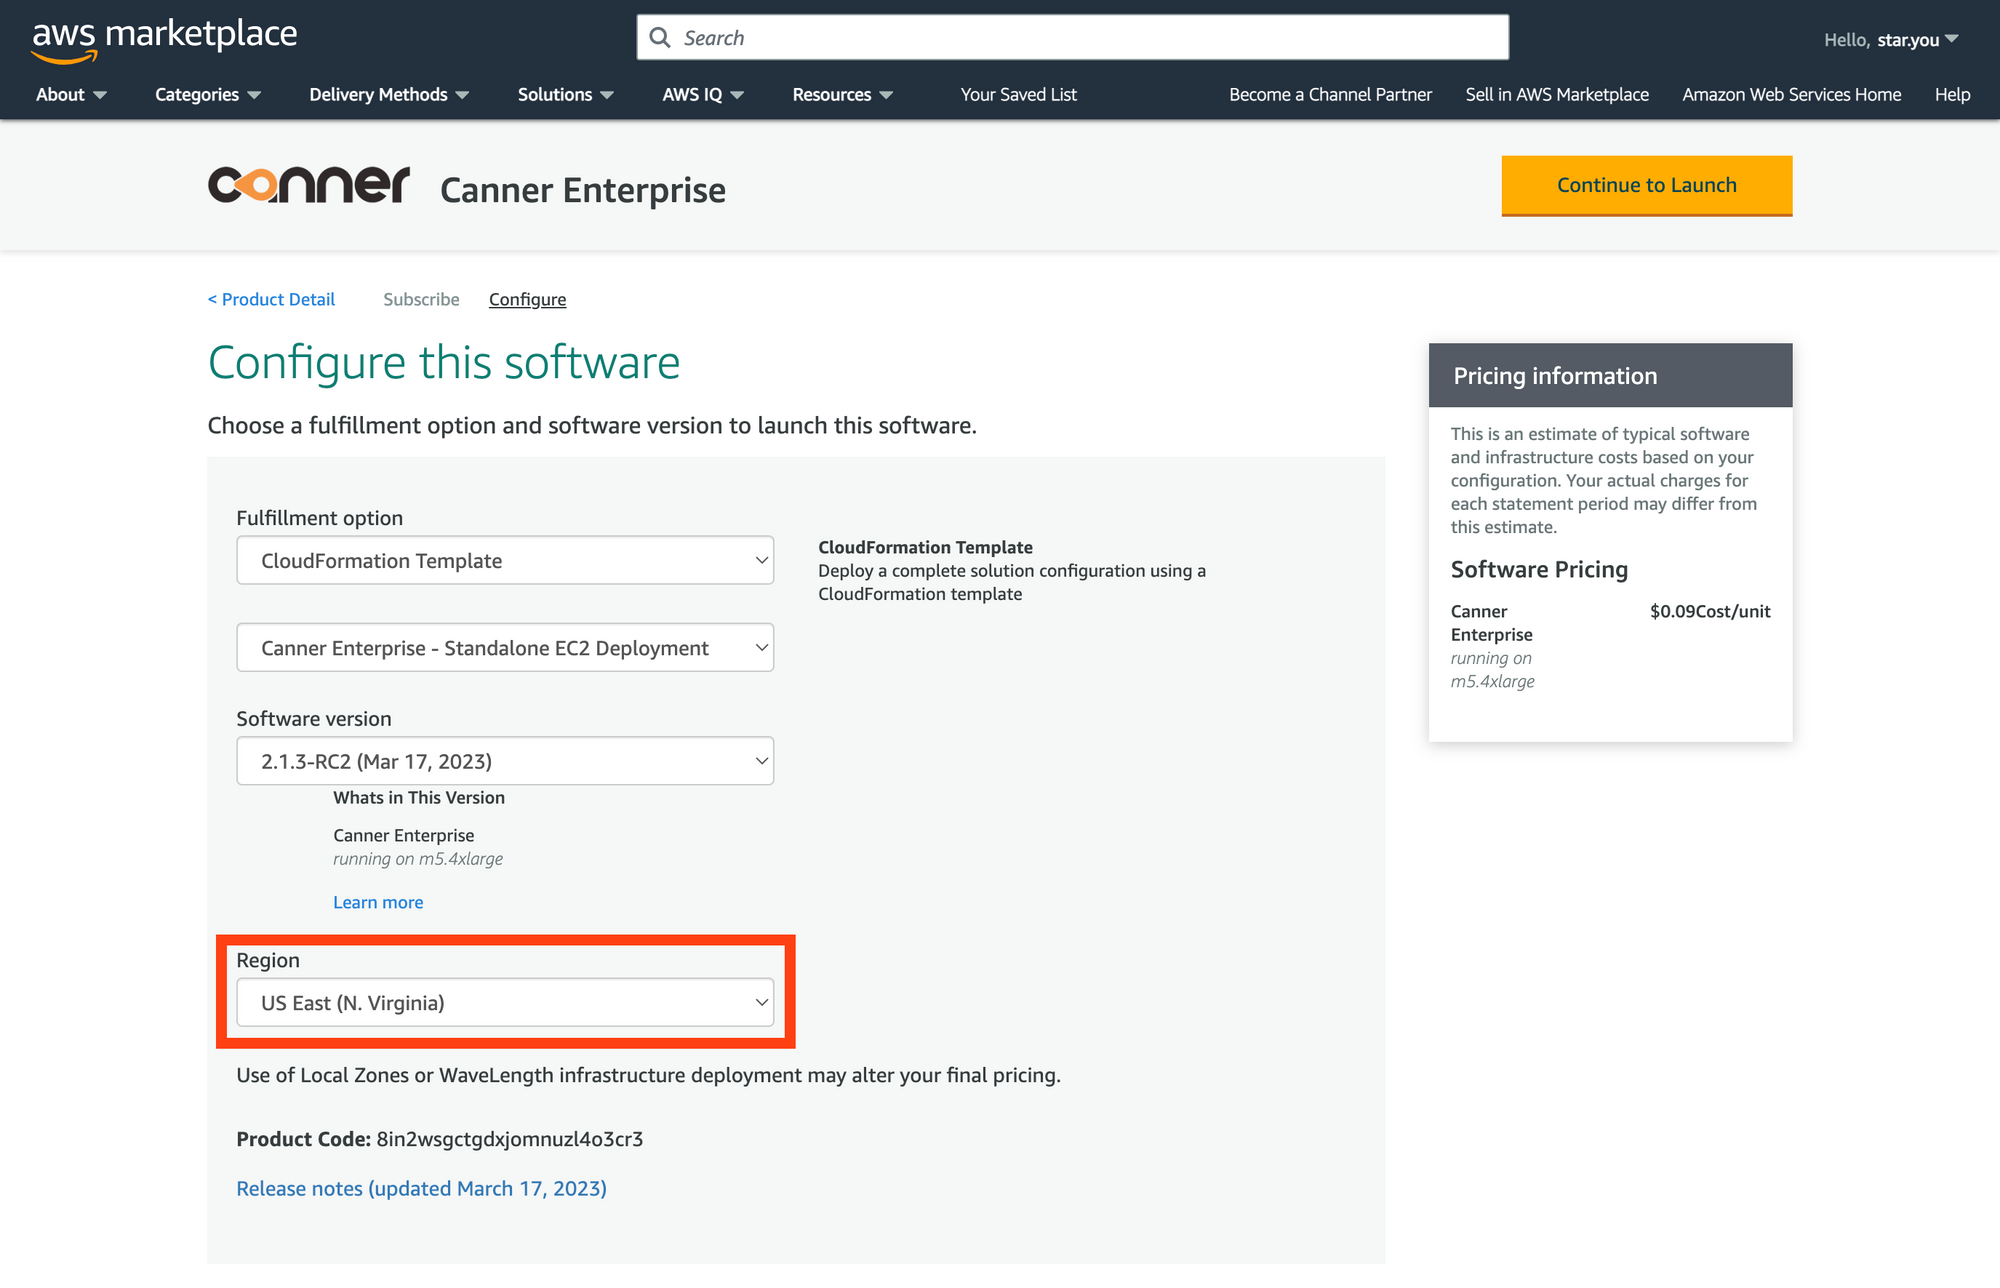
-
Click the
Continue to Launchbutton.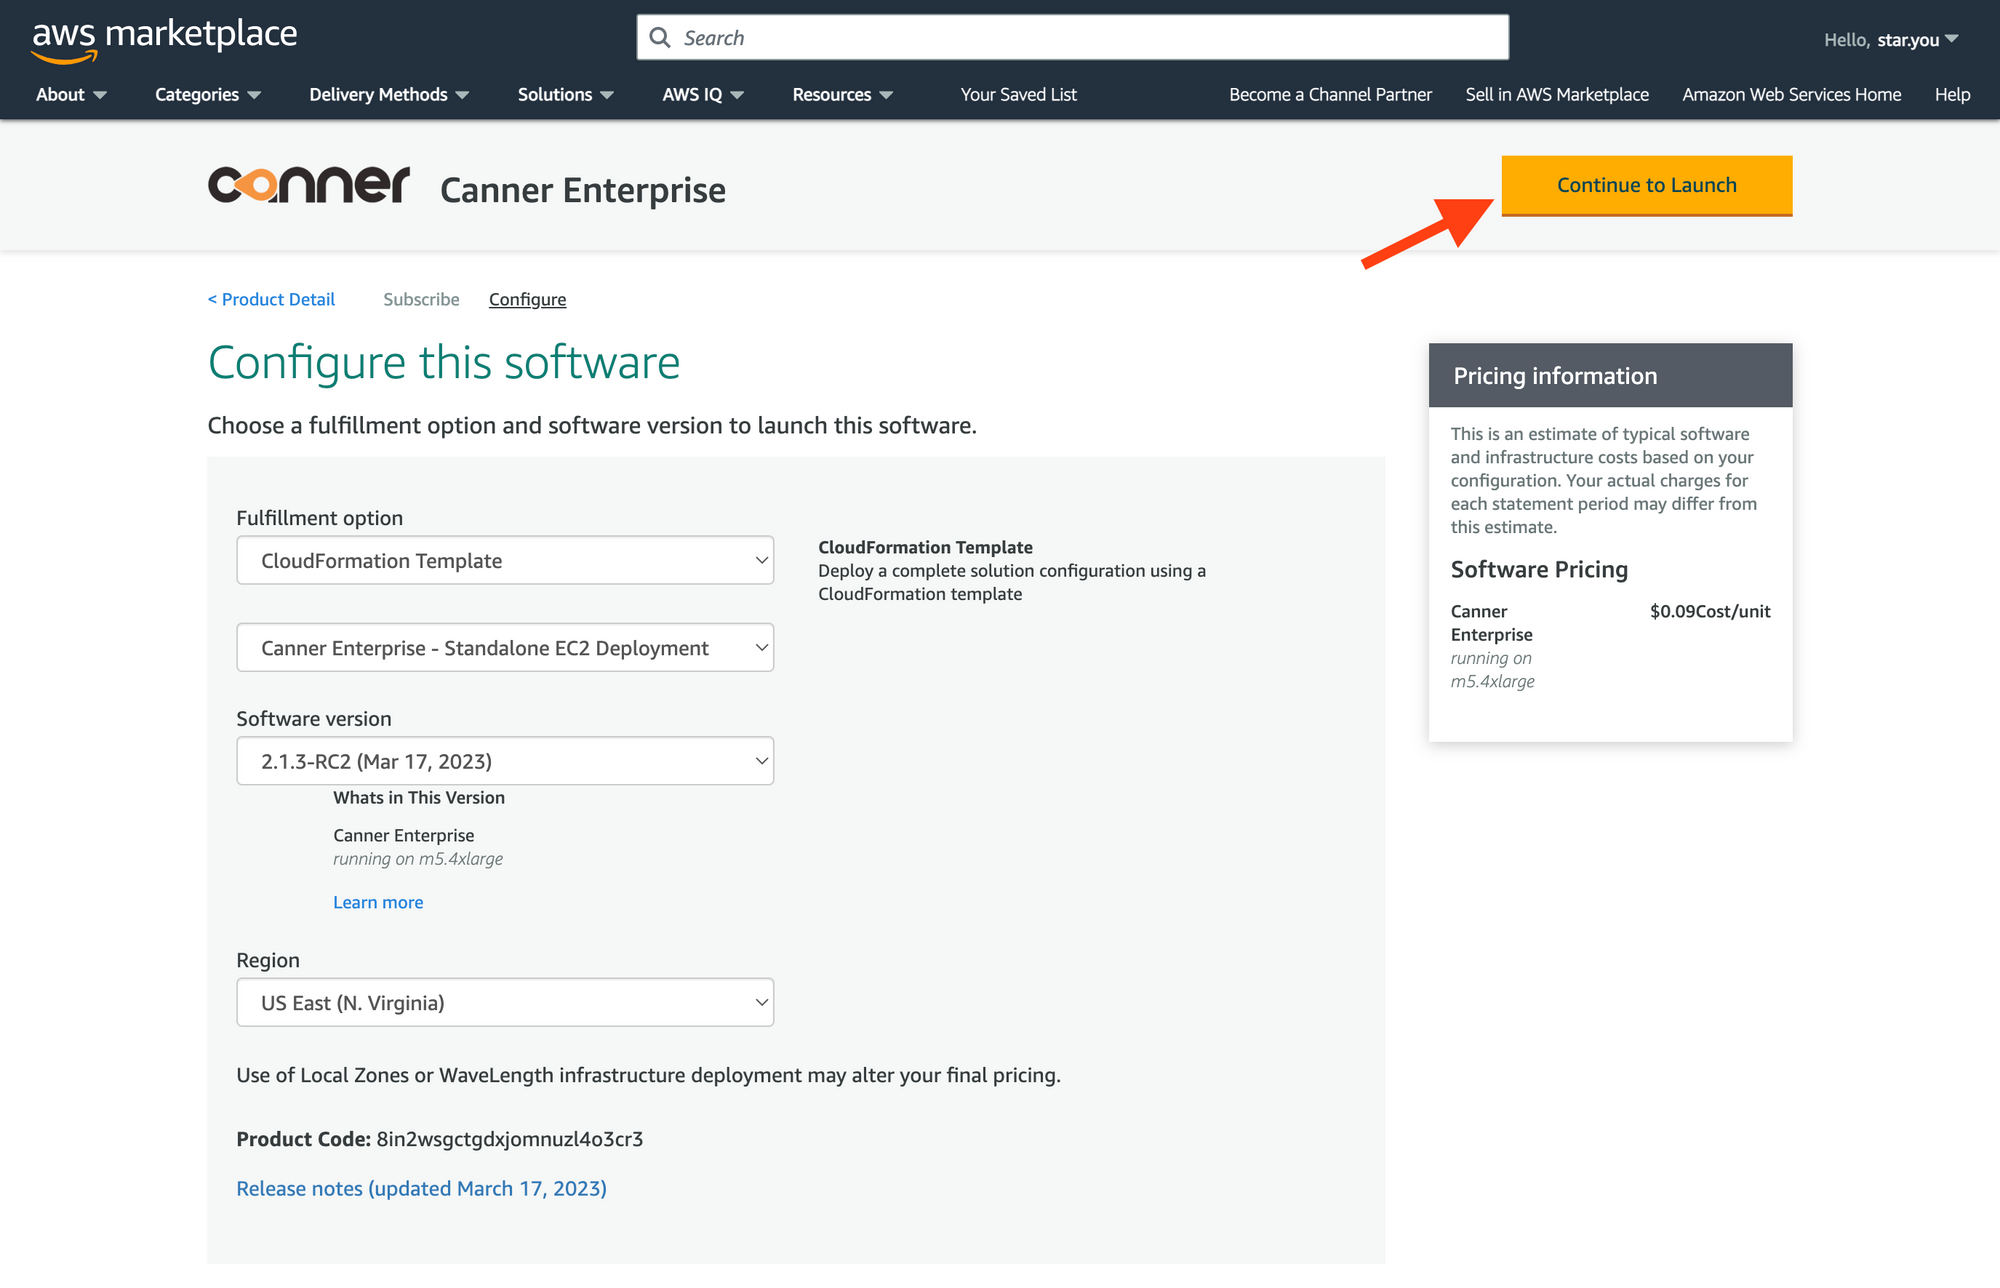
-
Review the information and click the
Launchbutton.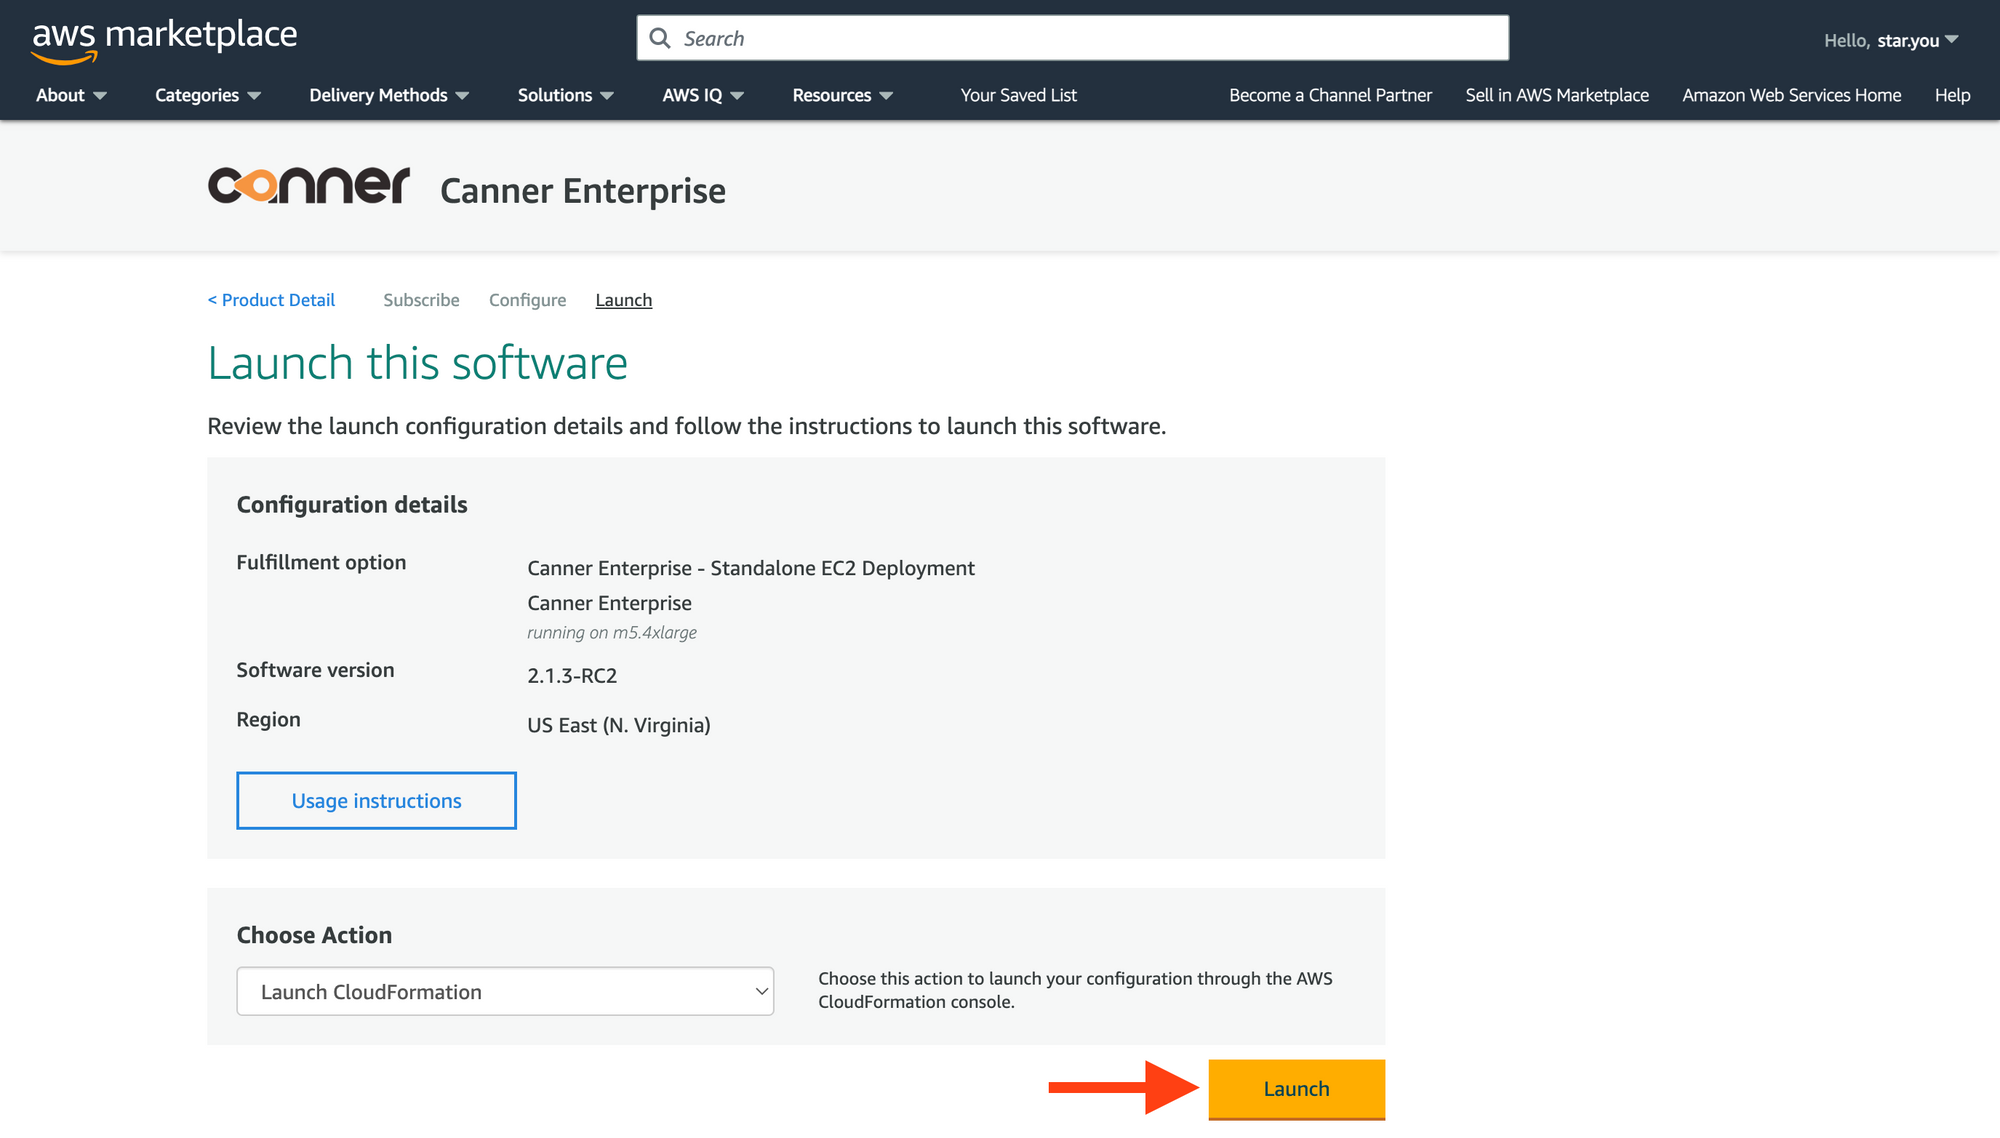
-
A new tab will open to the
Create stackpage. Leave the settings as they are and click theNextbutton.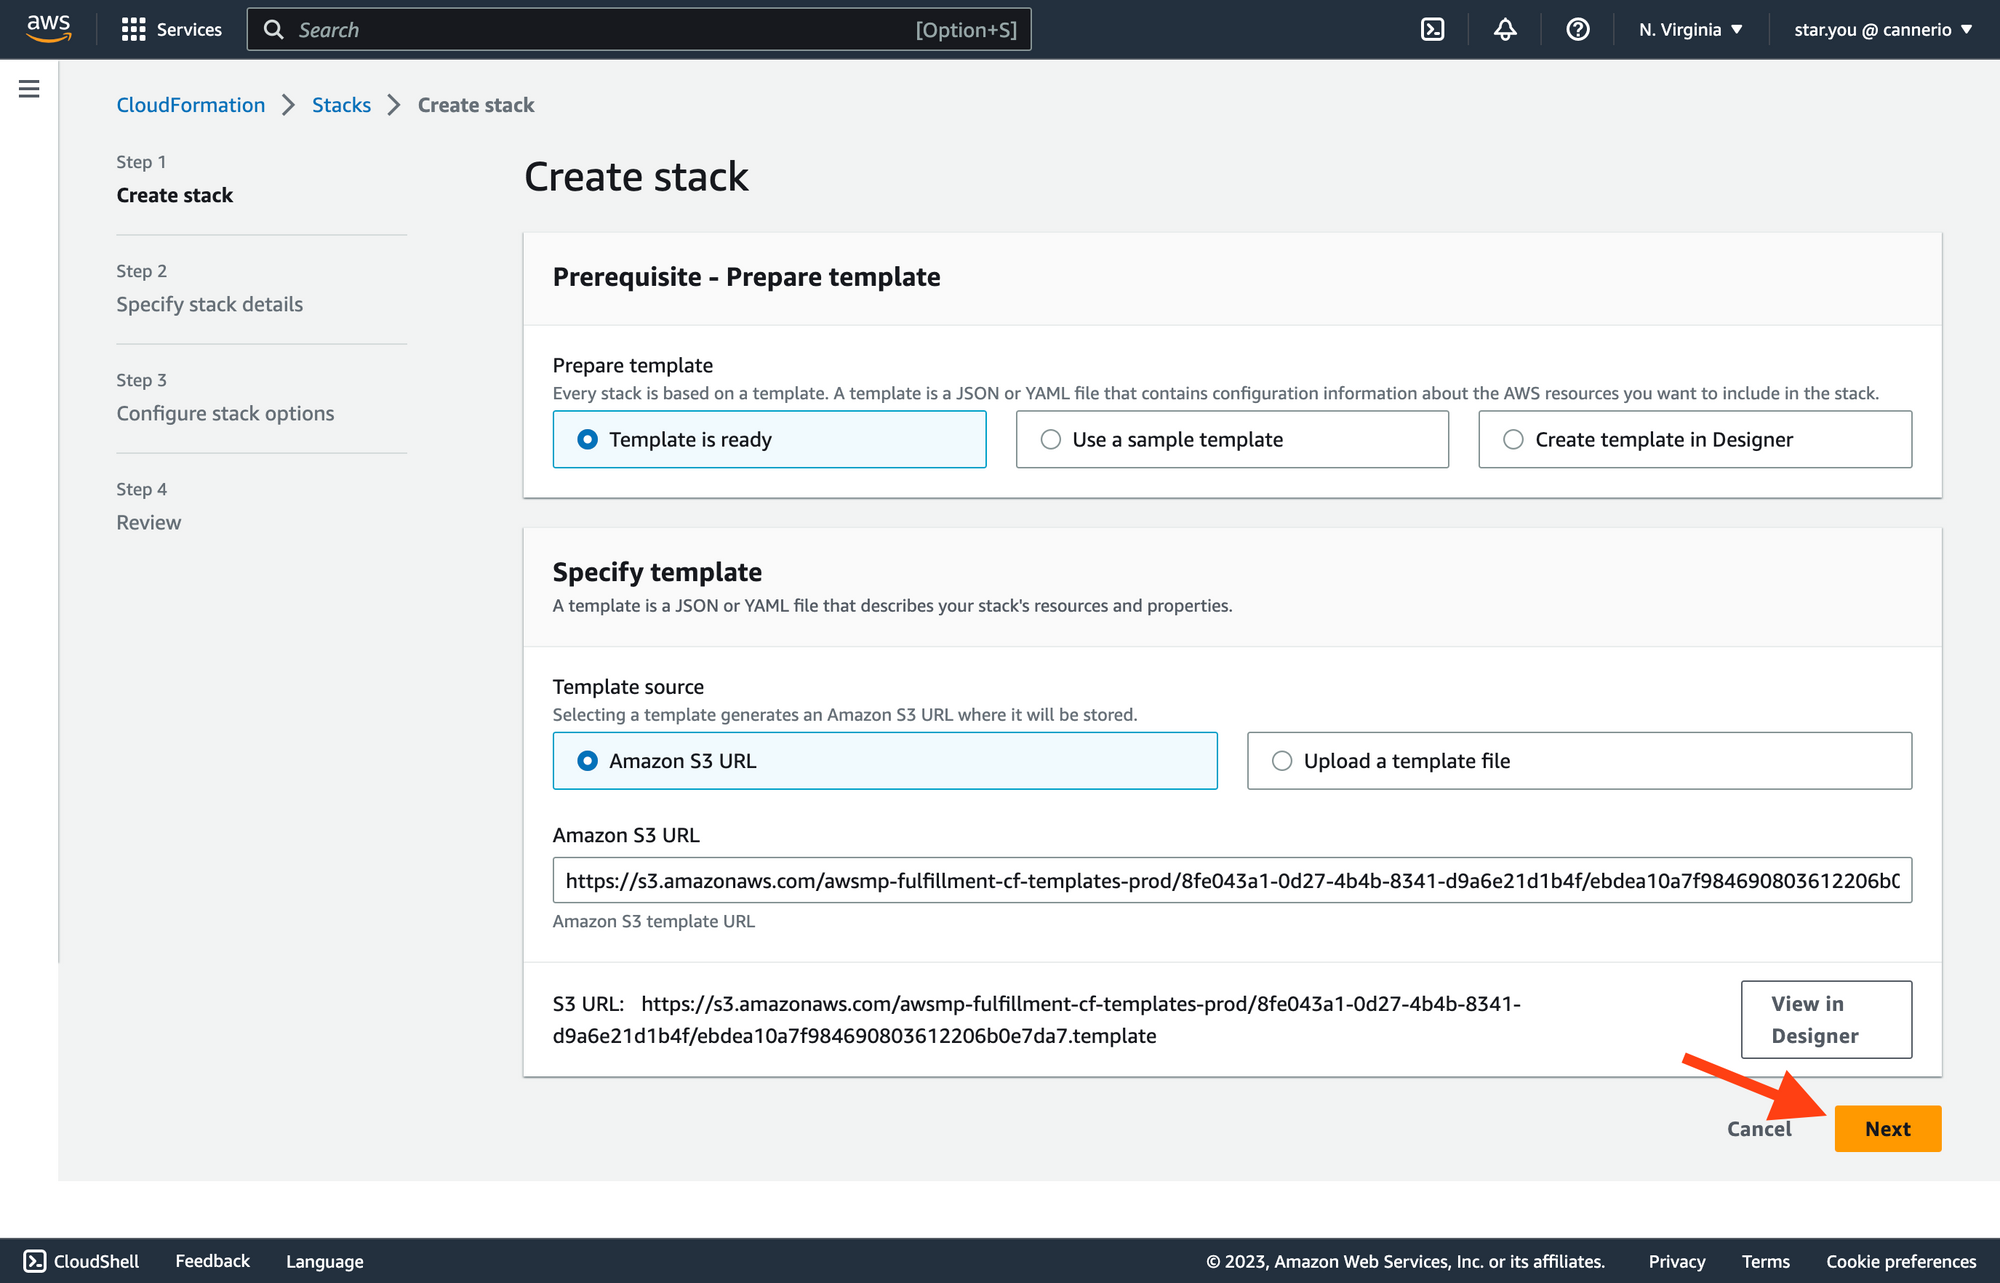
-
Fill out the necessary information on the
Specify stack detailspage and click theNextbutton. The required fields are: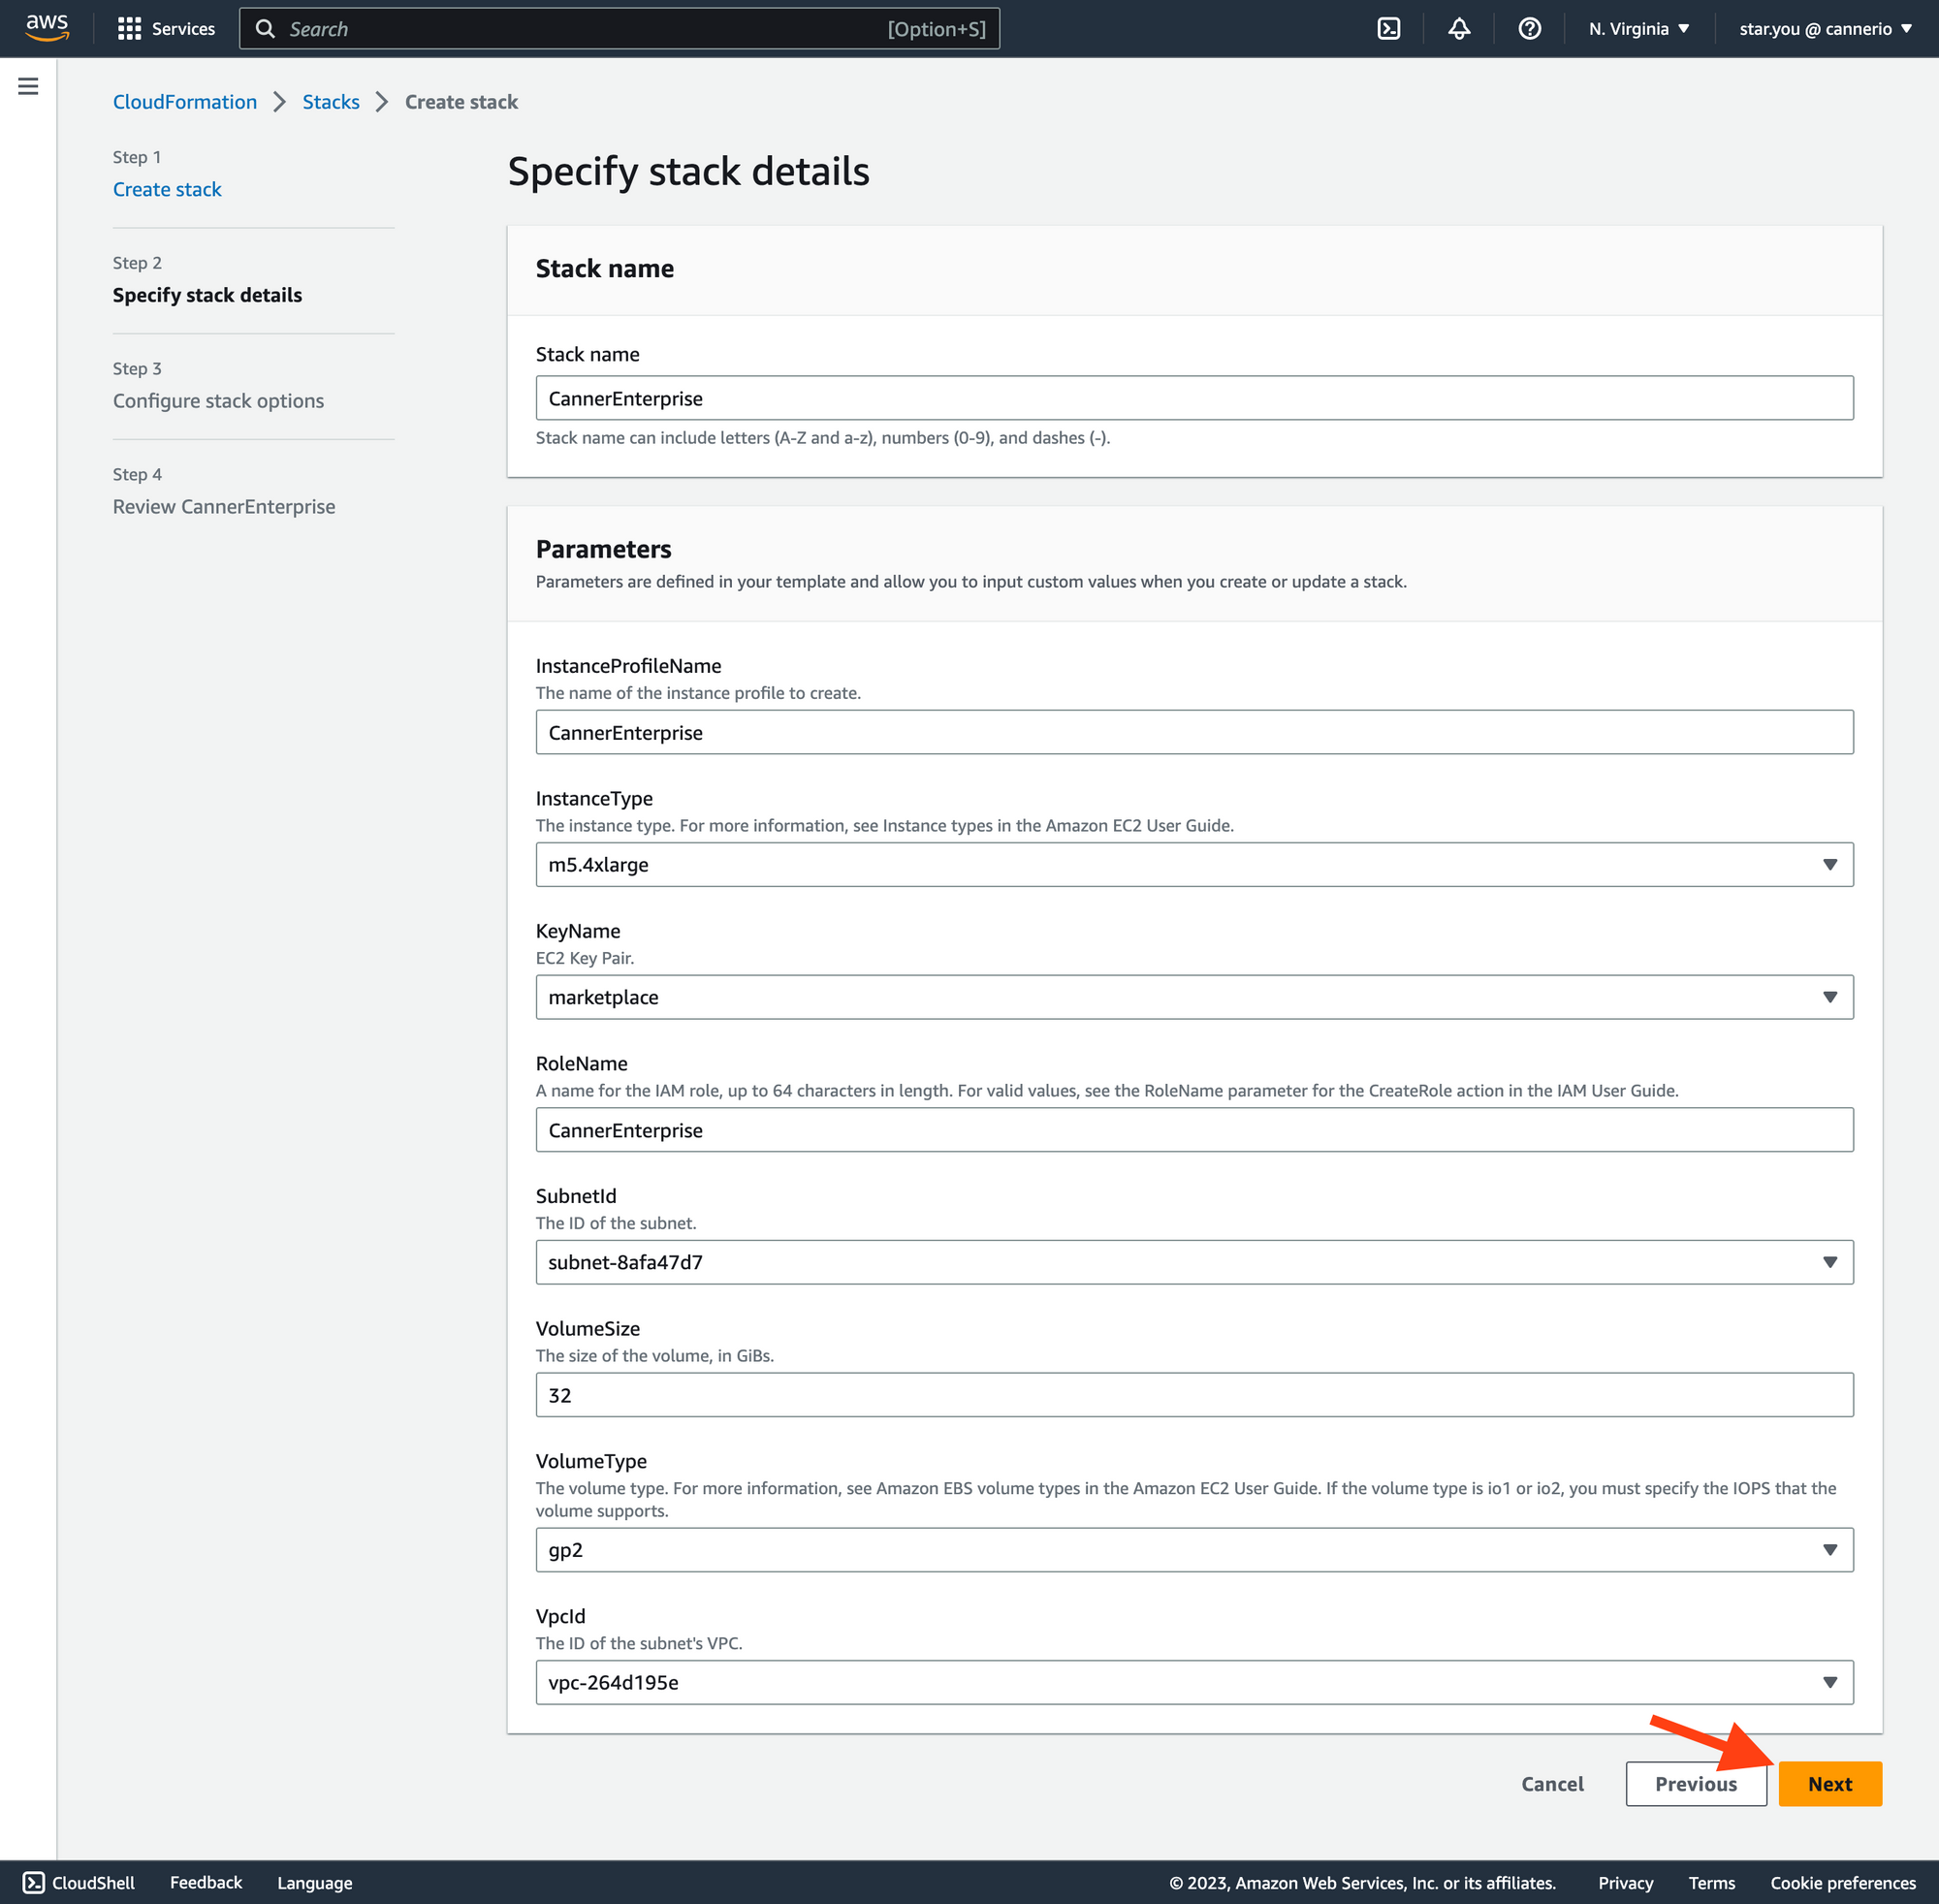
- Stack name: A user-defined name for the CloudFormation stack being created or updated.
- InstanceProfileName: The name of the IAM instance profile that will be assigned to the EC2 instances launched by the stack.
- InstanceType: The EC2 instance type to be launched by the stack, e.g., t2.micro, m5.large, etc.
- KeyName: The name of the EC2 key pair that will be used to SSH into the instances launched by the stack.
- RoleName: The name of the IAM role that will be assigned to the EC2 instances launched by the stack.
- VpcId: The ID of the VPC (Virtual Private Cloud) in which the EC2 instances launched by the stack will be deployed.
- SubnetId: The ID of the subnet within the VPC in which the EC2 instances launched by the stack will be deployed.
- VolumeSize: The size (in GiB) of the EBS (Elastic Block Store) volume to be attached to the EC2 instances launched by the stack.
- VolumeType: The type of EBS volume to be attached to the EC2 instances launched by the stack.
-
In the
Configure stack optionssection, select an IAM role to create Canner Enterprise and click theNextbutton. This IAM role must have the following permissions:{"Version": "2012-10-17","Statement": [{"Sid": "VisualEditor0","Effect": "Allow","Action": ["ec2:DescribeImages","ec2:AuthorizeSecurityGroupEgress","ec2:AuthorizeSecurityGroupIngress","ec2:DescribeInstances","ec2:DescribeVpcs","ec2:CreateSecurityGroup","ec2:CreateTags","ec2:DescribeInstanceTypes","ec2:RunInstances","ec2:DescribeSubnets","ec2:DescribeKeyPairs","ec2:DescribeSecurityGroups","ec2:DescribeSecurityGroupRules","ec2:DescribeTags","ec2:AuthorizeSecurityGroupIngress","ec2:RevokeSecurityGroupIngress","ec2:AuthorizeSecurityGroupEgress","ec2:RevokeSecurityGroupEgress","ec2:ModifySecurityGroupRules","ec2:UpdateSecurityGroupRuleDescriptionsIngress","ec2:UpdateSecurityGroupRuleDescriptionsEgress"],"Resource": "*"},{"Sid": "iam","Effect": "Allow","Action": ["iam:CreateRole","iam:CreateInstanceProfile","iam:GetRole","iam:GetInstanceProfile","iam:ListRoles","iam:AttachRolePolicy","iam:PutRolePolicy","iam:ListInstanceProfiles","iam:AddRoleToInstanceProfile","iam:ListInstanceProfilesForRole","iam:PassRole","iam:ListAttachedRolePolicies","iam:ListRolePolicies","iam:GetRolePolicy"],"Resource": "*"}]}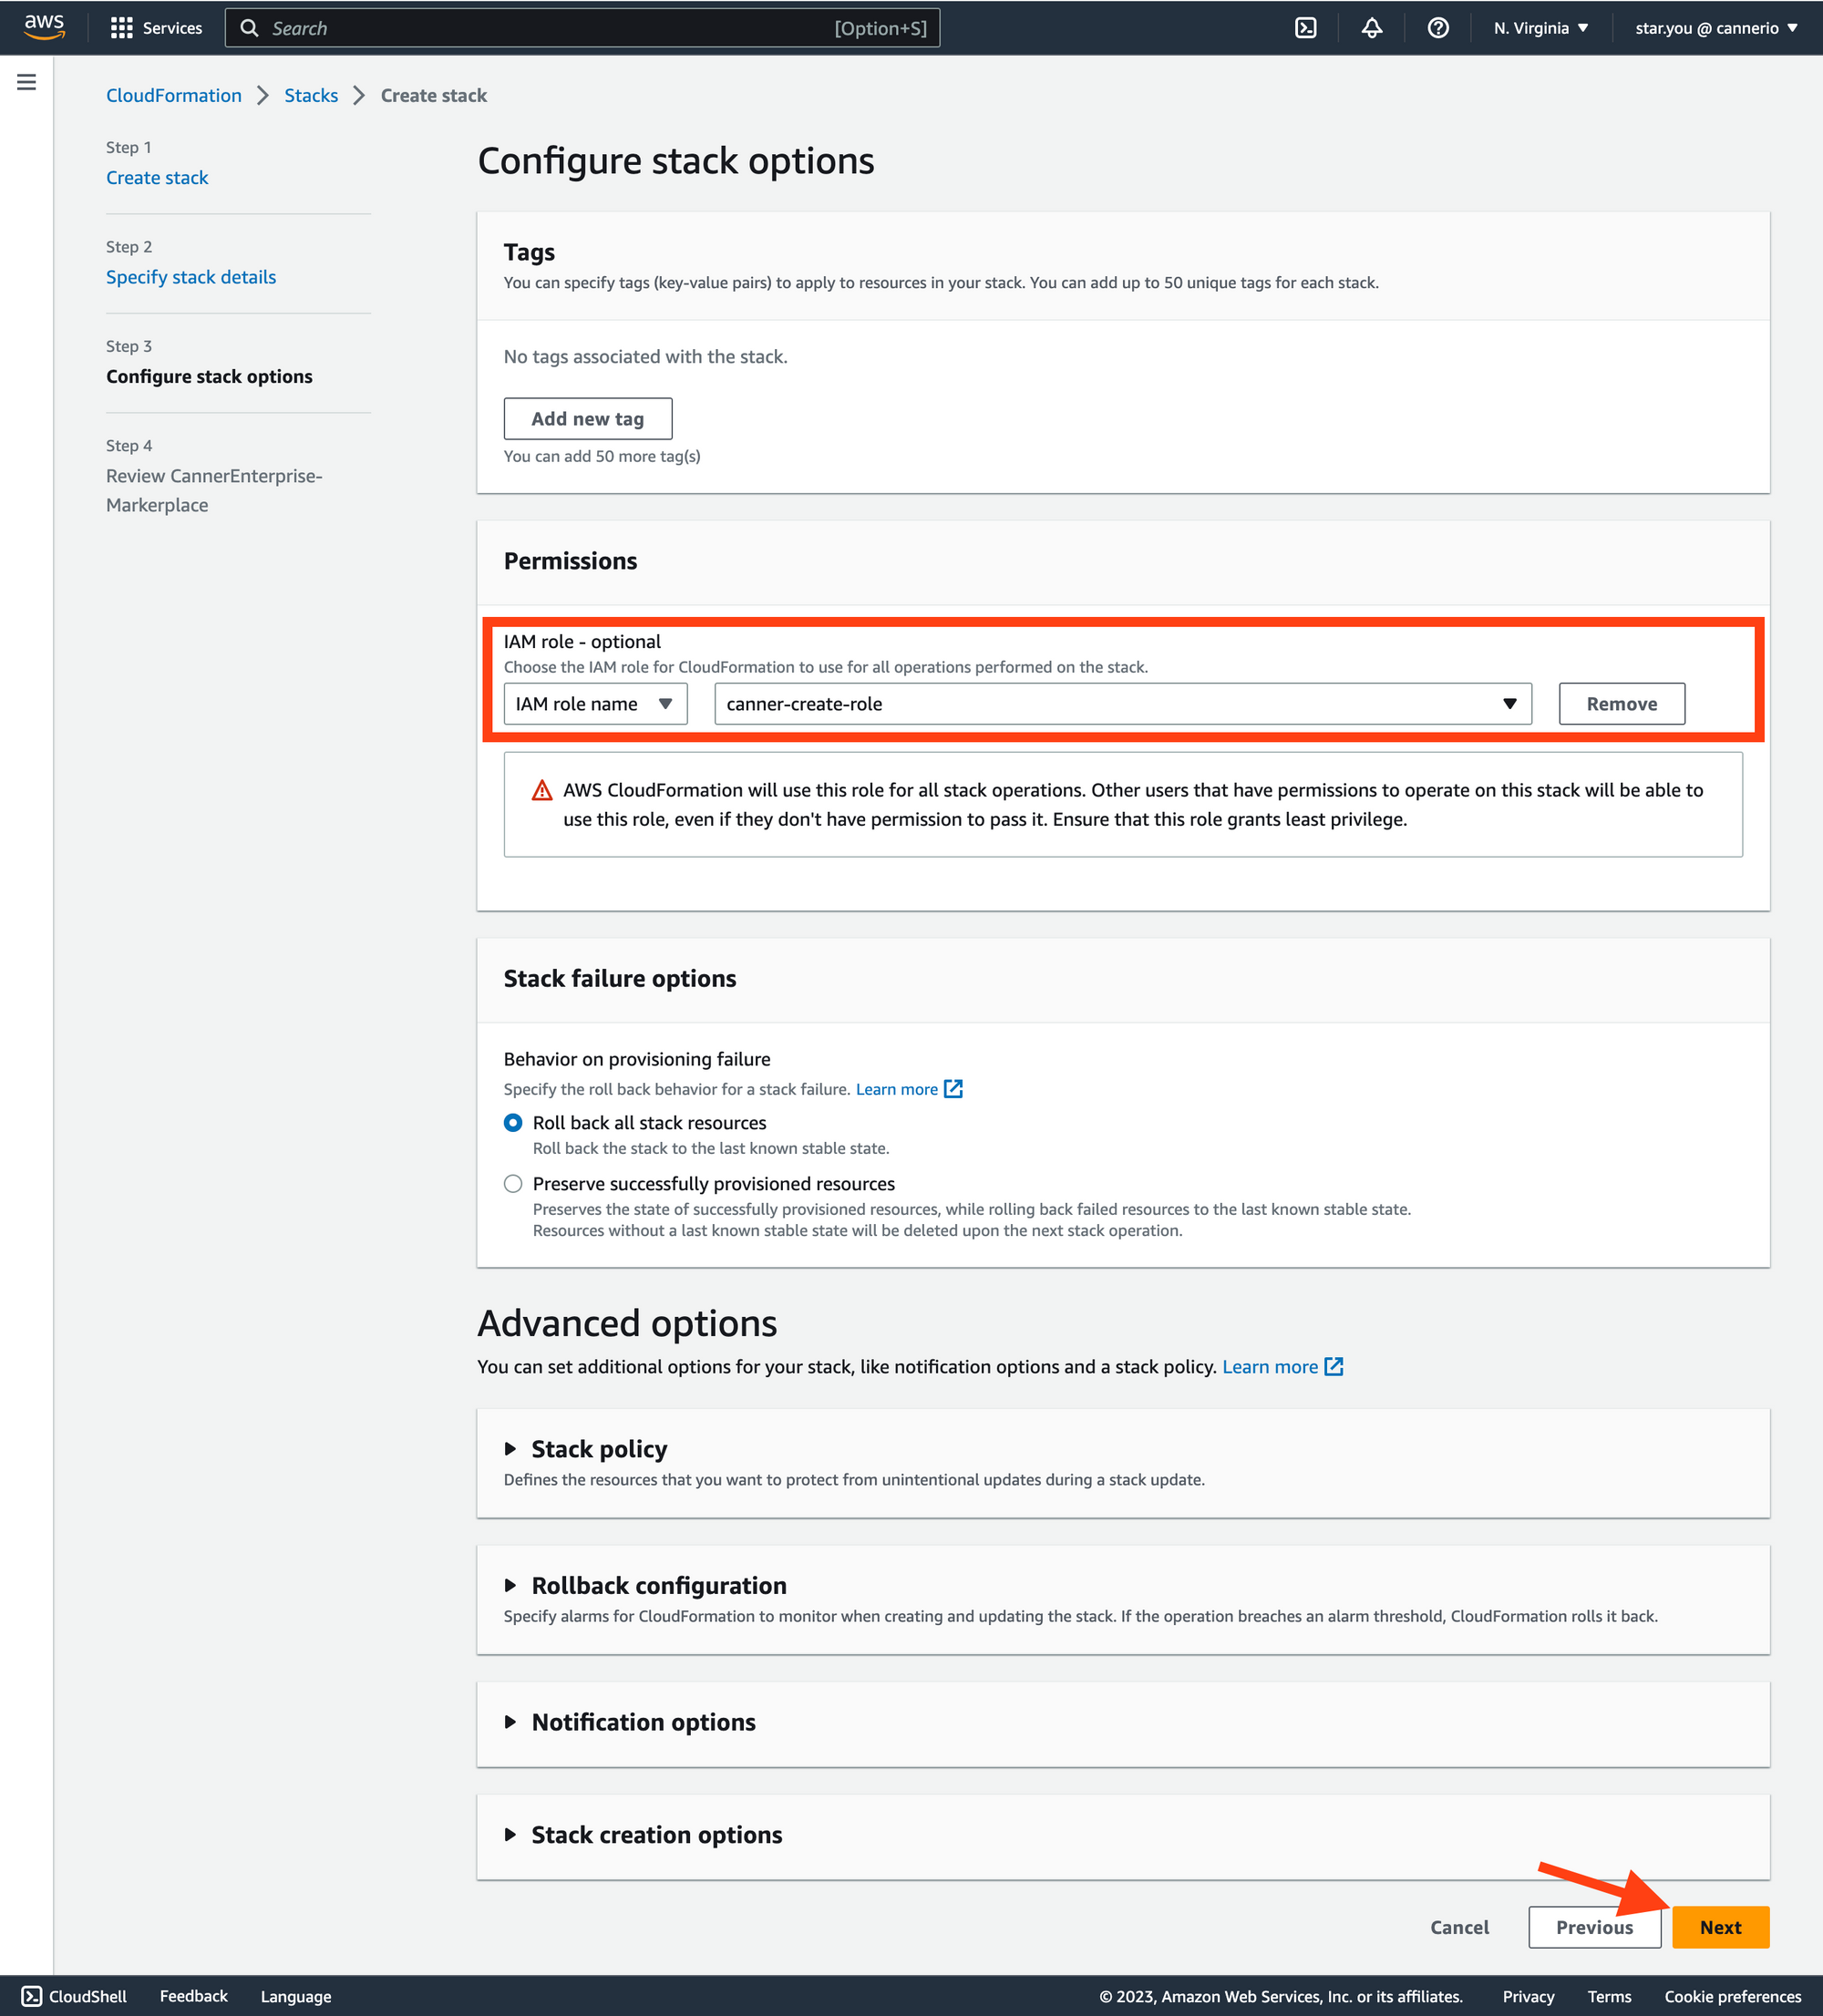
-
On the
Review CannerEnterprise-Markerplacepage, confirm the settings and selectI acknowledge that AWS CloudFormation might create IAM resources with custom names. Click theSubmitbutton.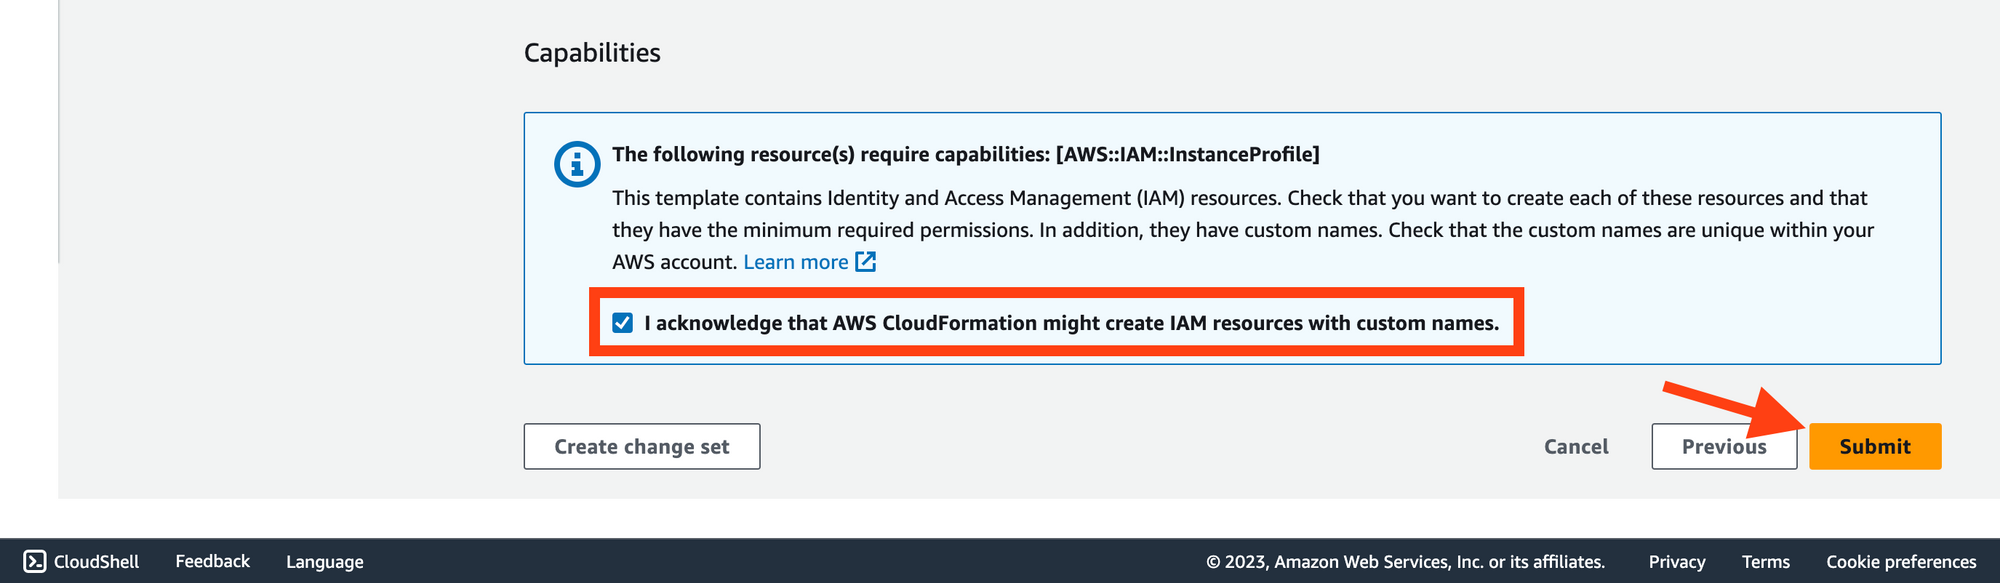
-
Wait for 5-10 minutes for the system to complete the setup.
Once the setup is complete, access the platform at
https://<public_dns>/web. Or if you have not set up DNS or SSL, usehttp://<public_ip>/webto log in.The default username & password:
username:canner-adminpassword:EC2 instance ID.