Deploying from the AWS Marketplace (with CFT)
Usage Instructions
Prerequisites:
- An AWS account with administrative access
- A valid EC2 key pair
- An IAM role with the necessary permissions listed in step 9
Steps:
Open the Canner Enterprise page on AWS Marketplace.
Click the
Continue to Subscribebutton to subscribe to Canner Enterprise.
Click the
Continue to Configurationbutton.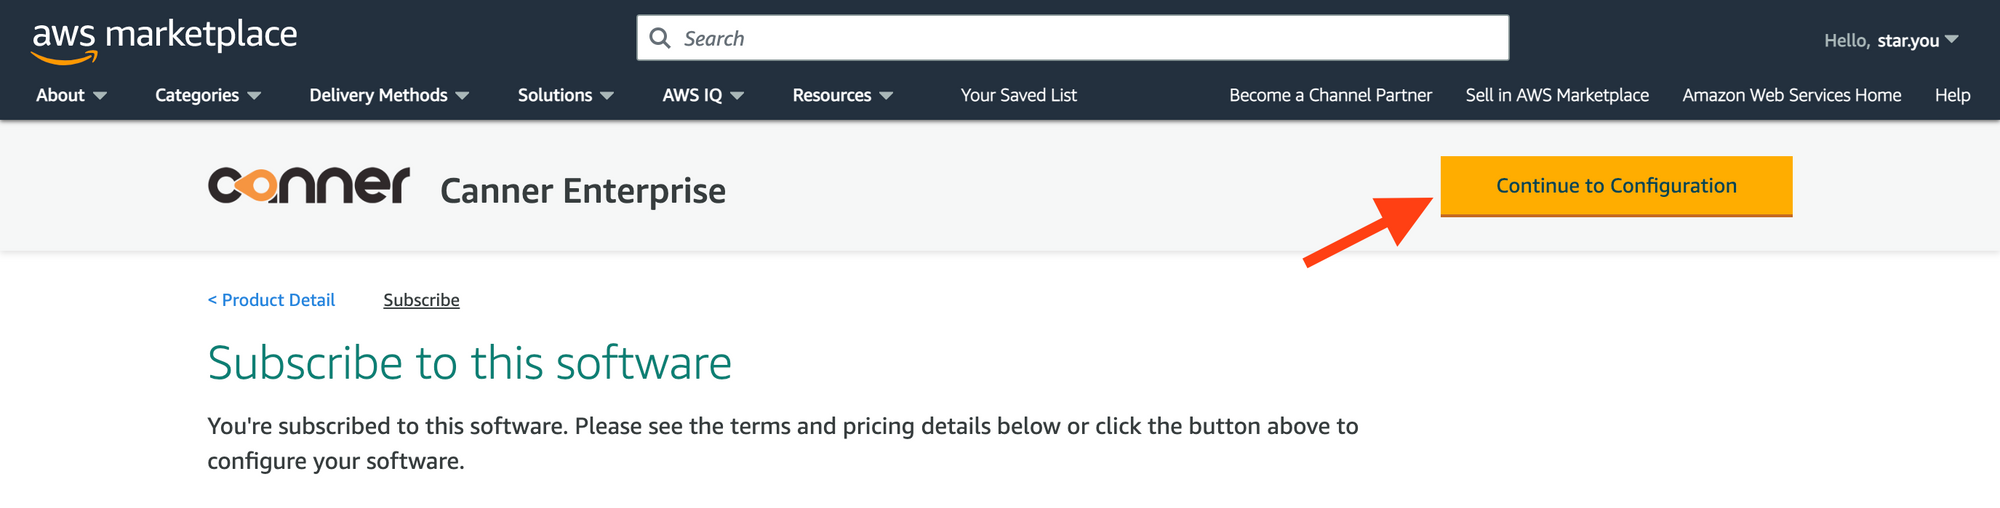
In the
Configure this softwaresection on the page, select the region where you want to install Canner Enterprise.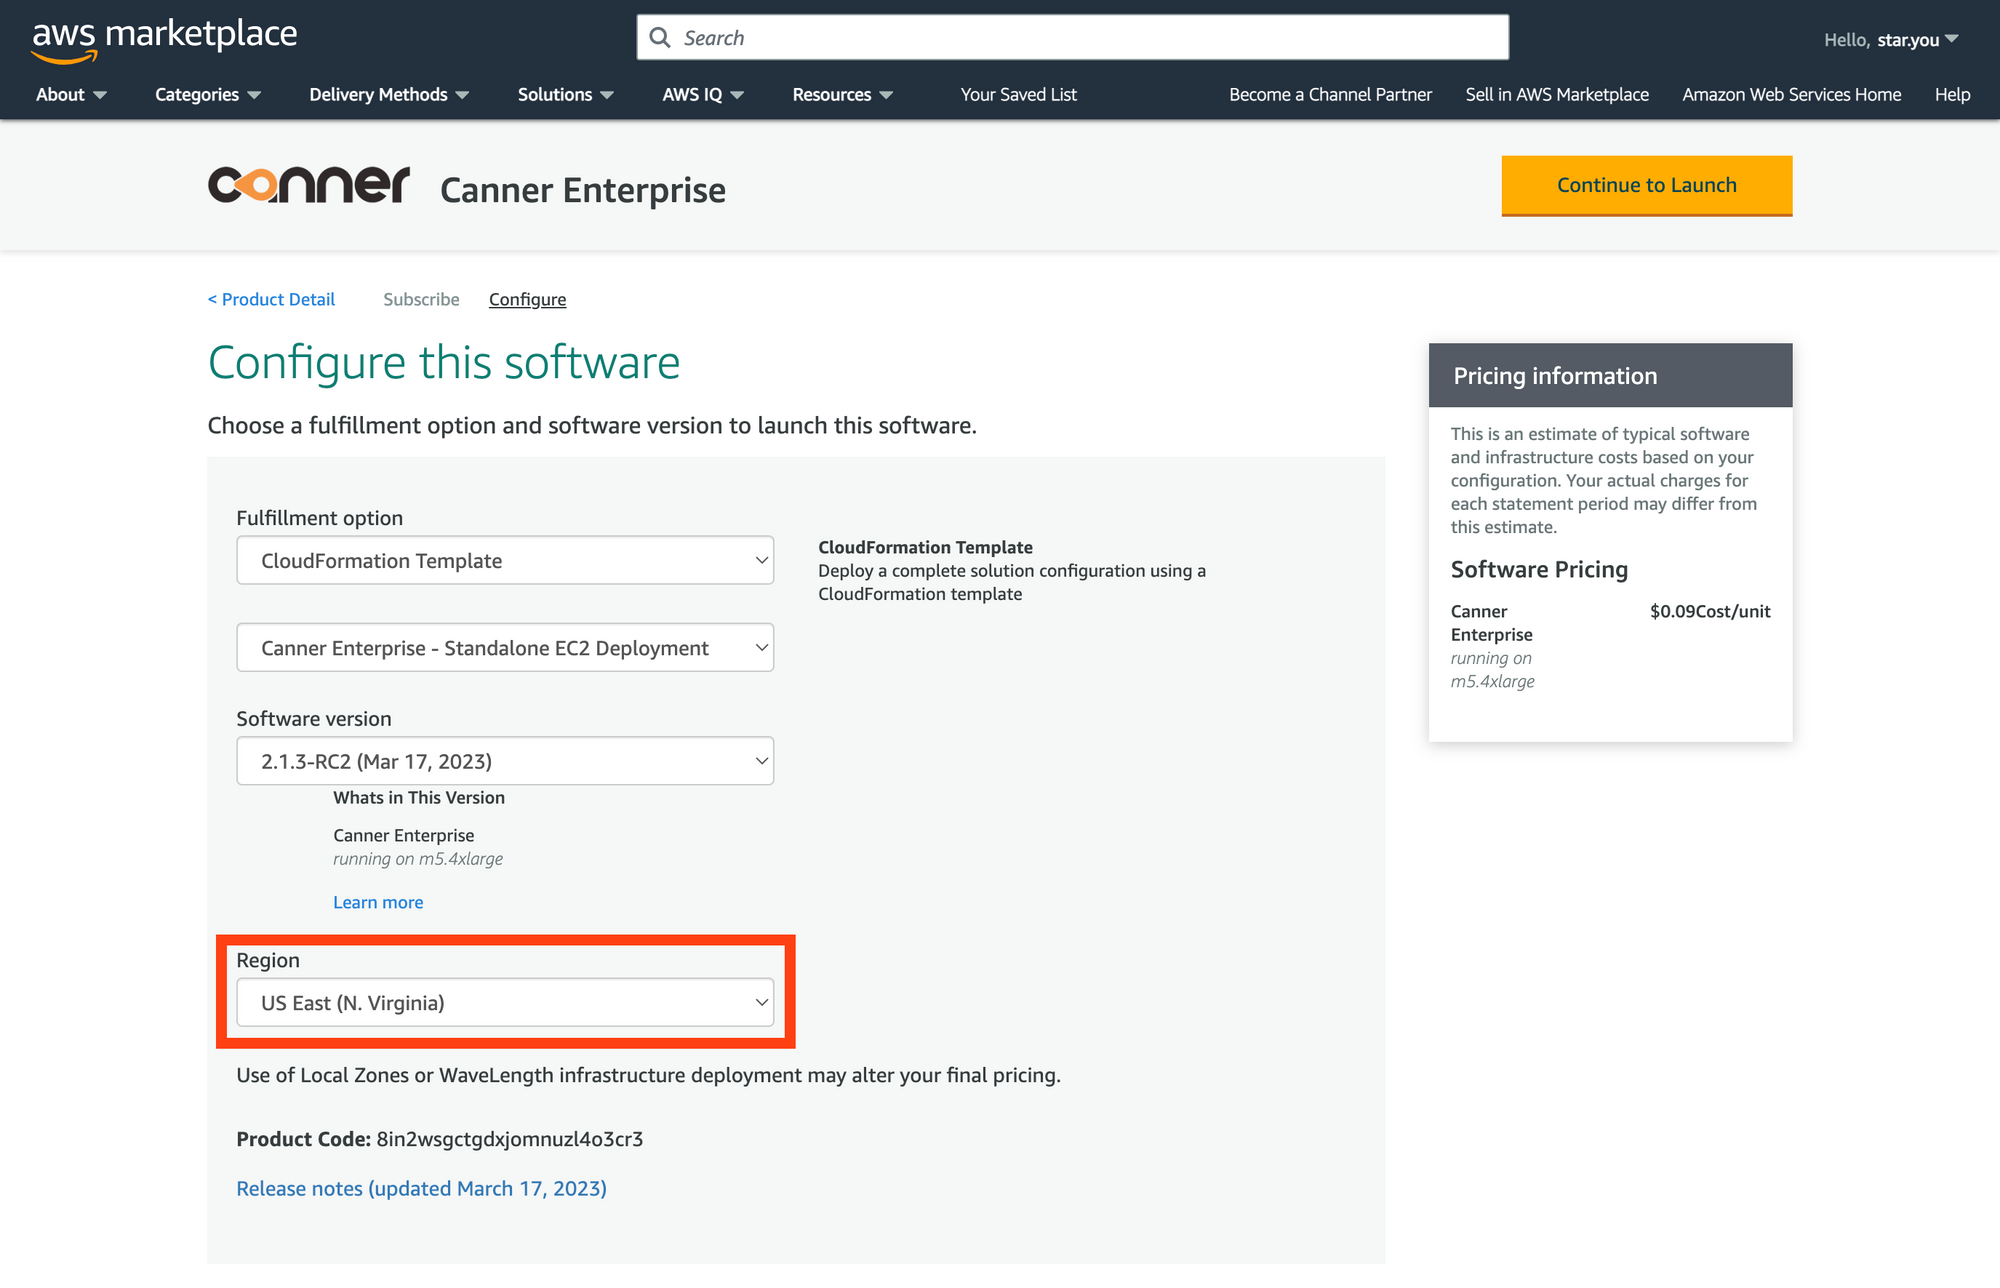
Click the
Continue to Launchbutton.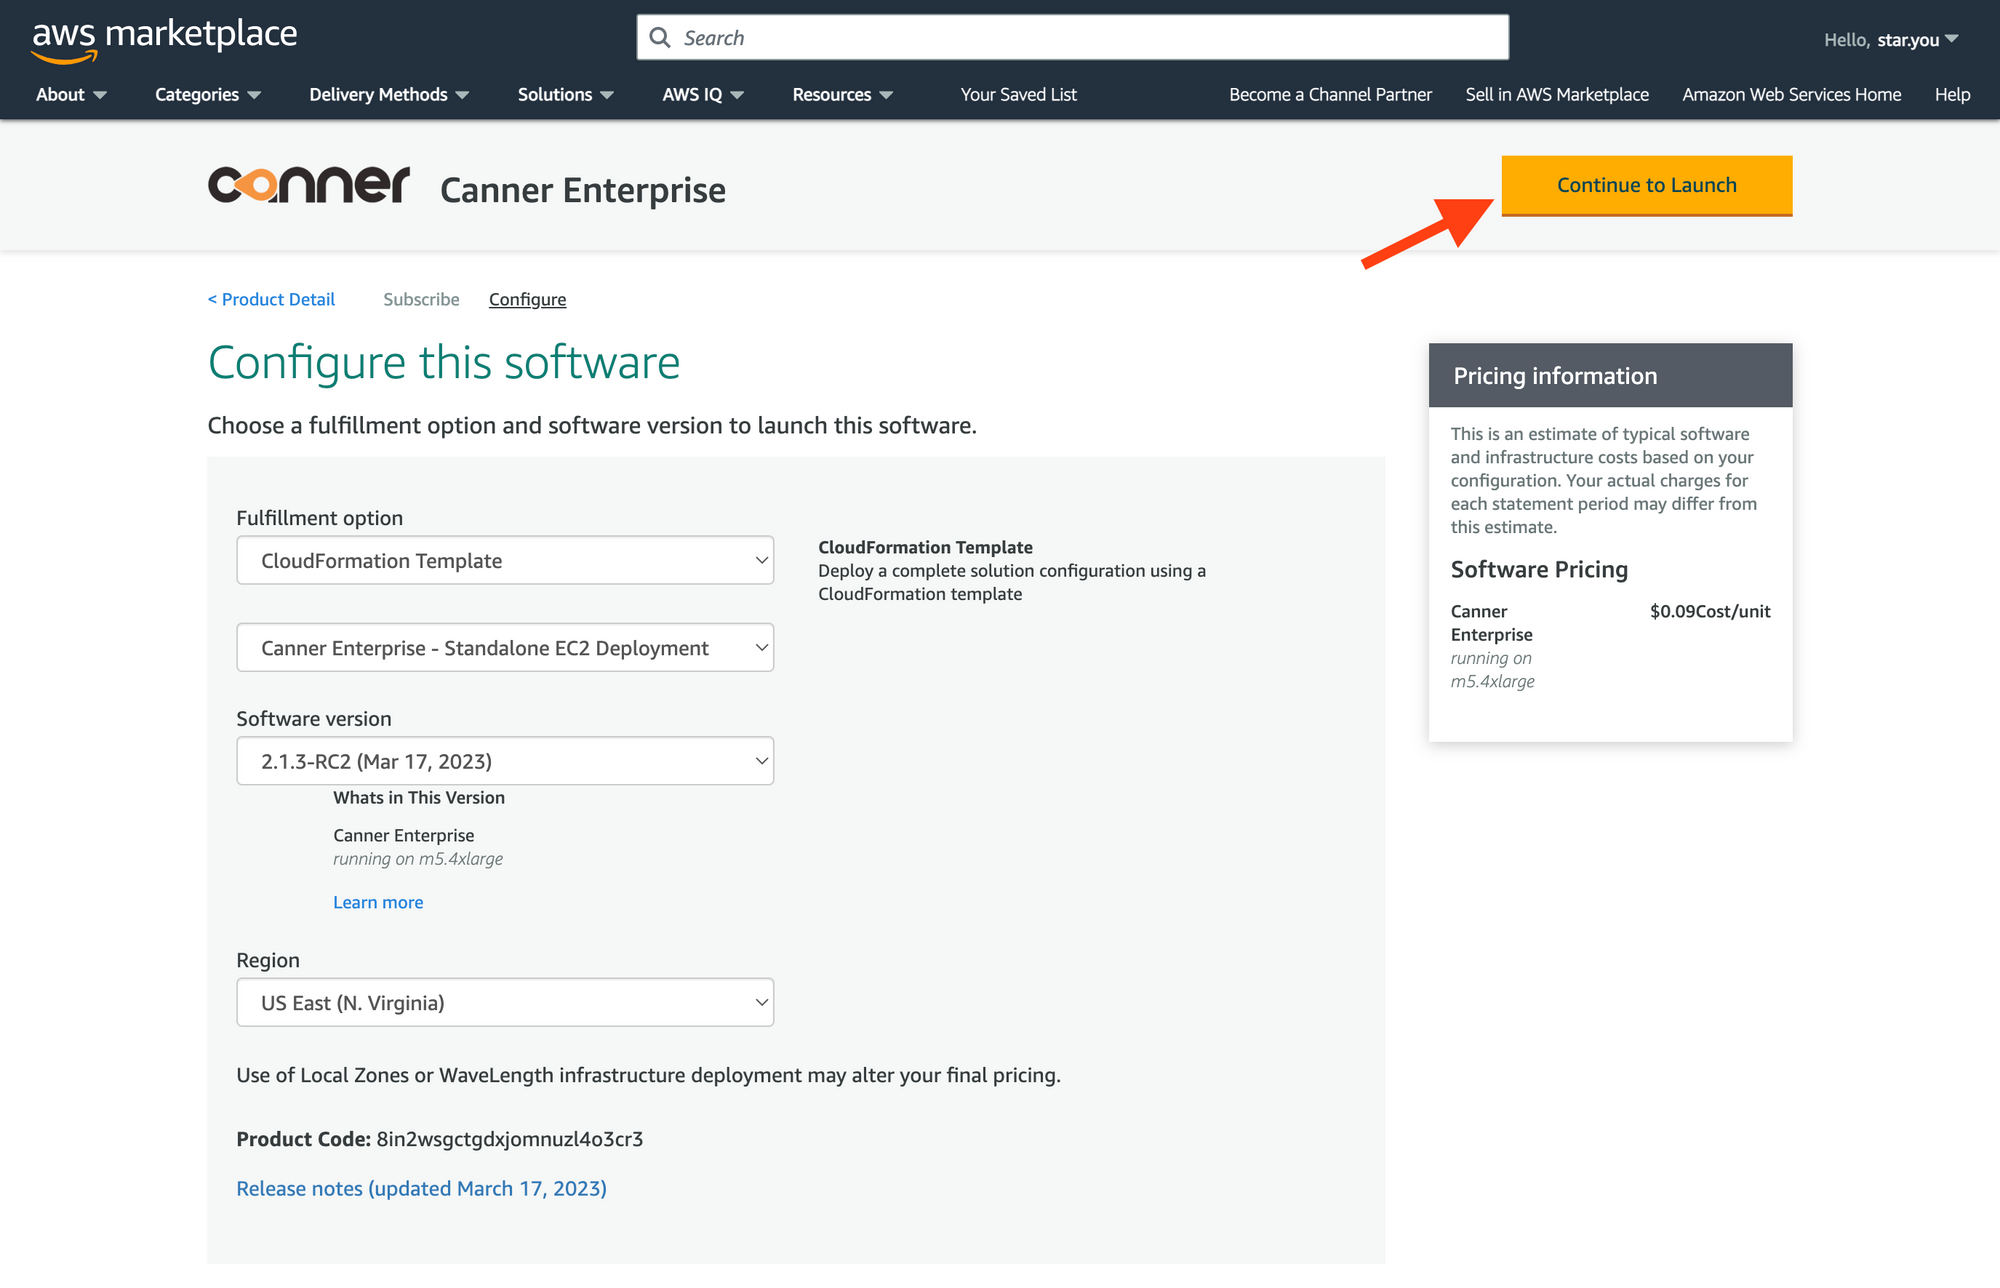
Review the information and click the
Launchbutton.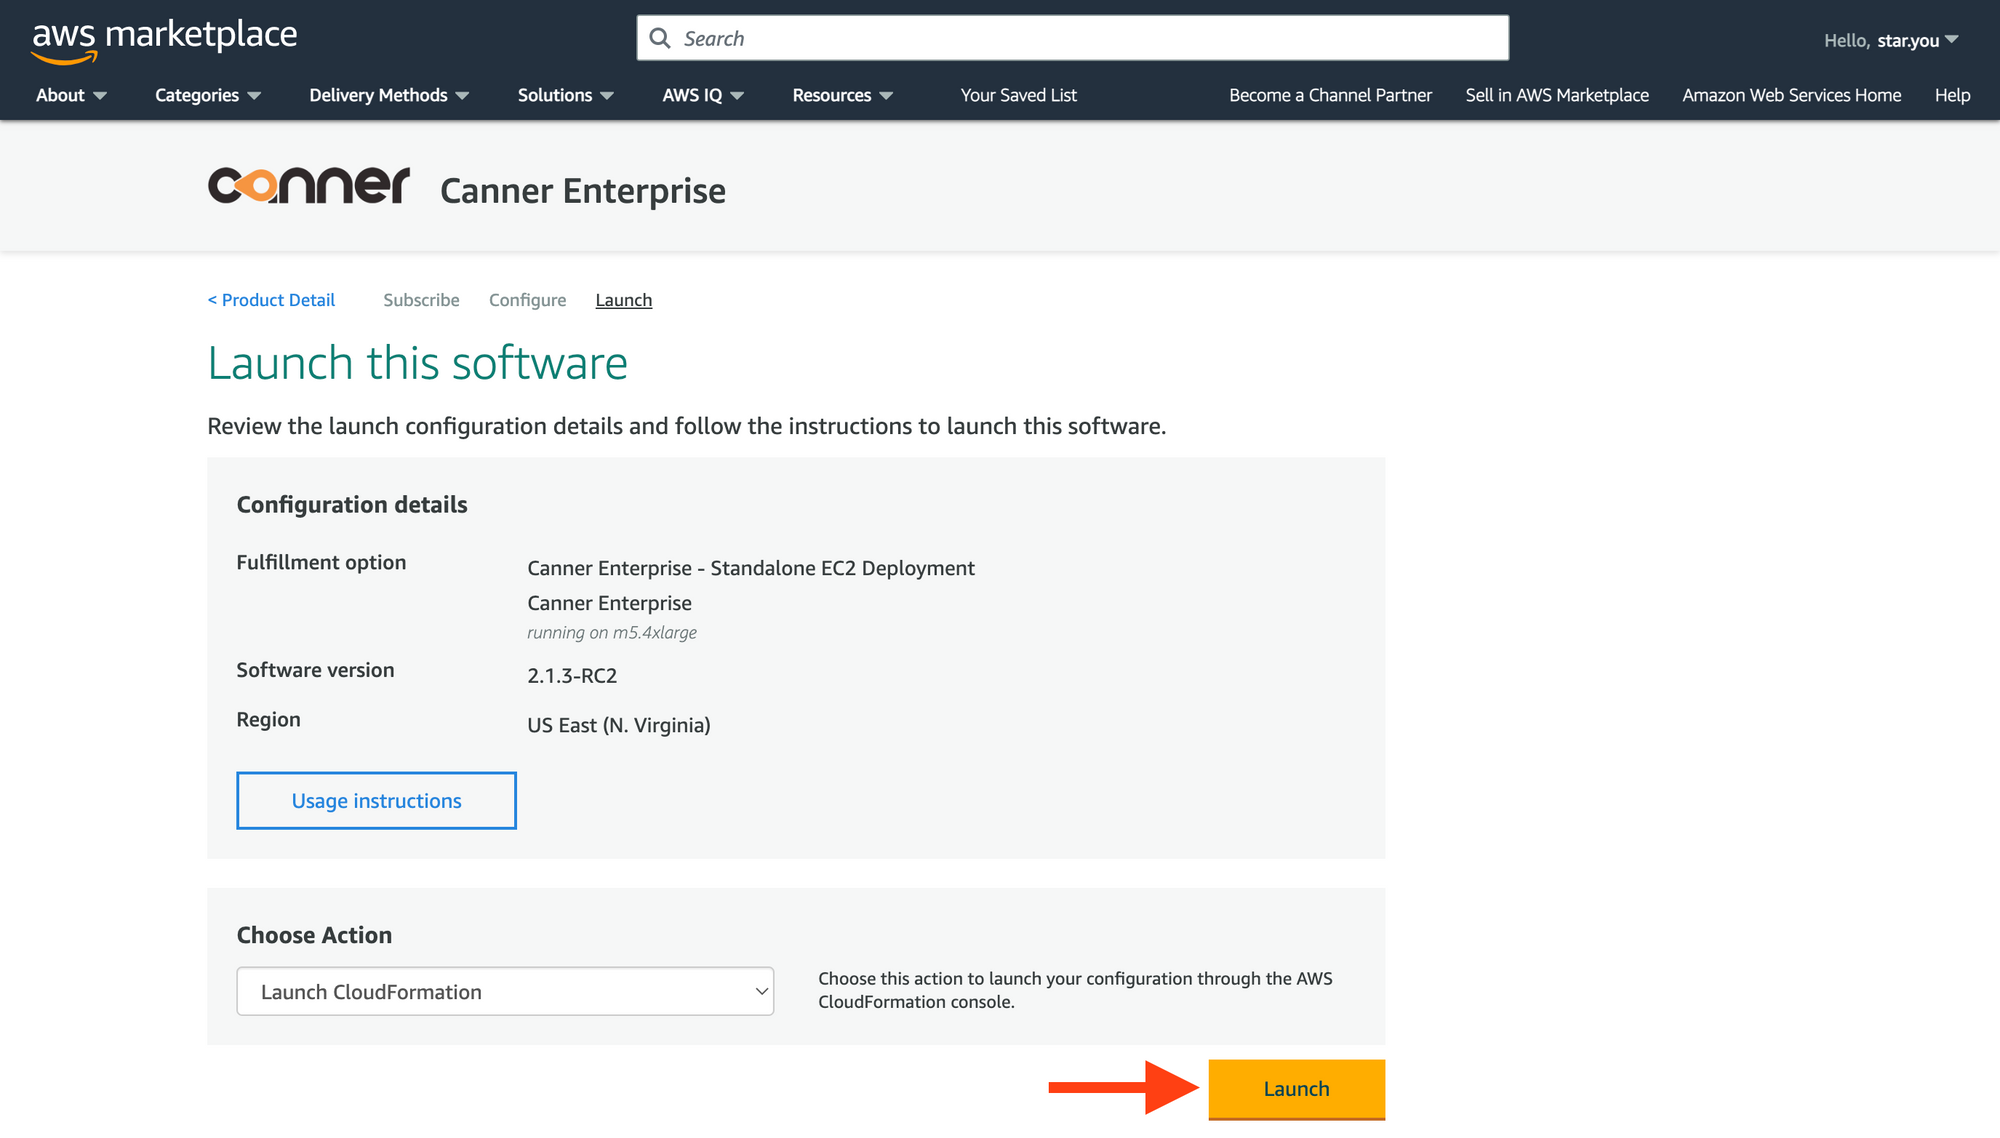
A new tab will open to the
Create stackpage. Leave the settings as they are and click theNextbutton.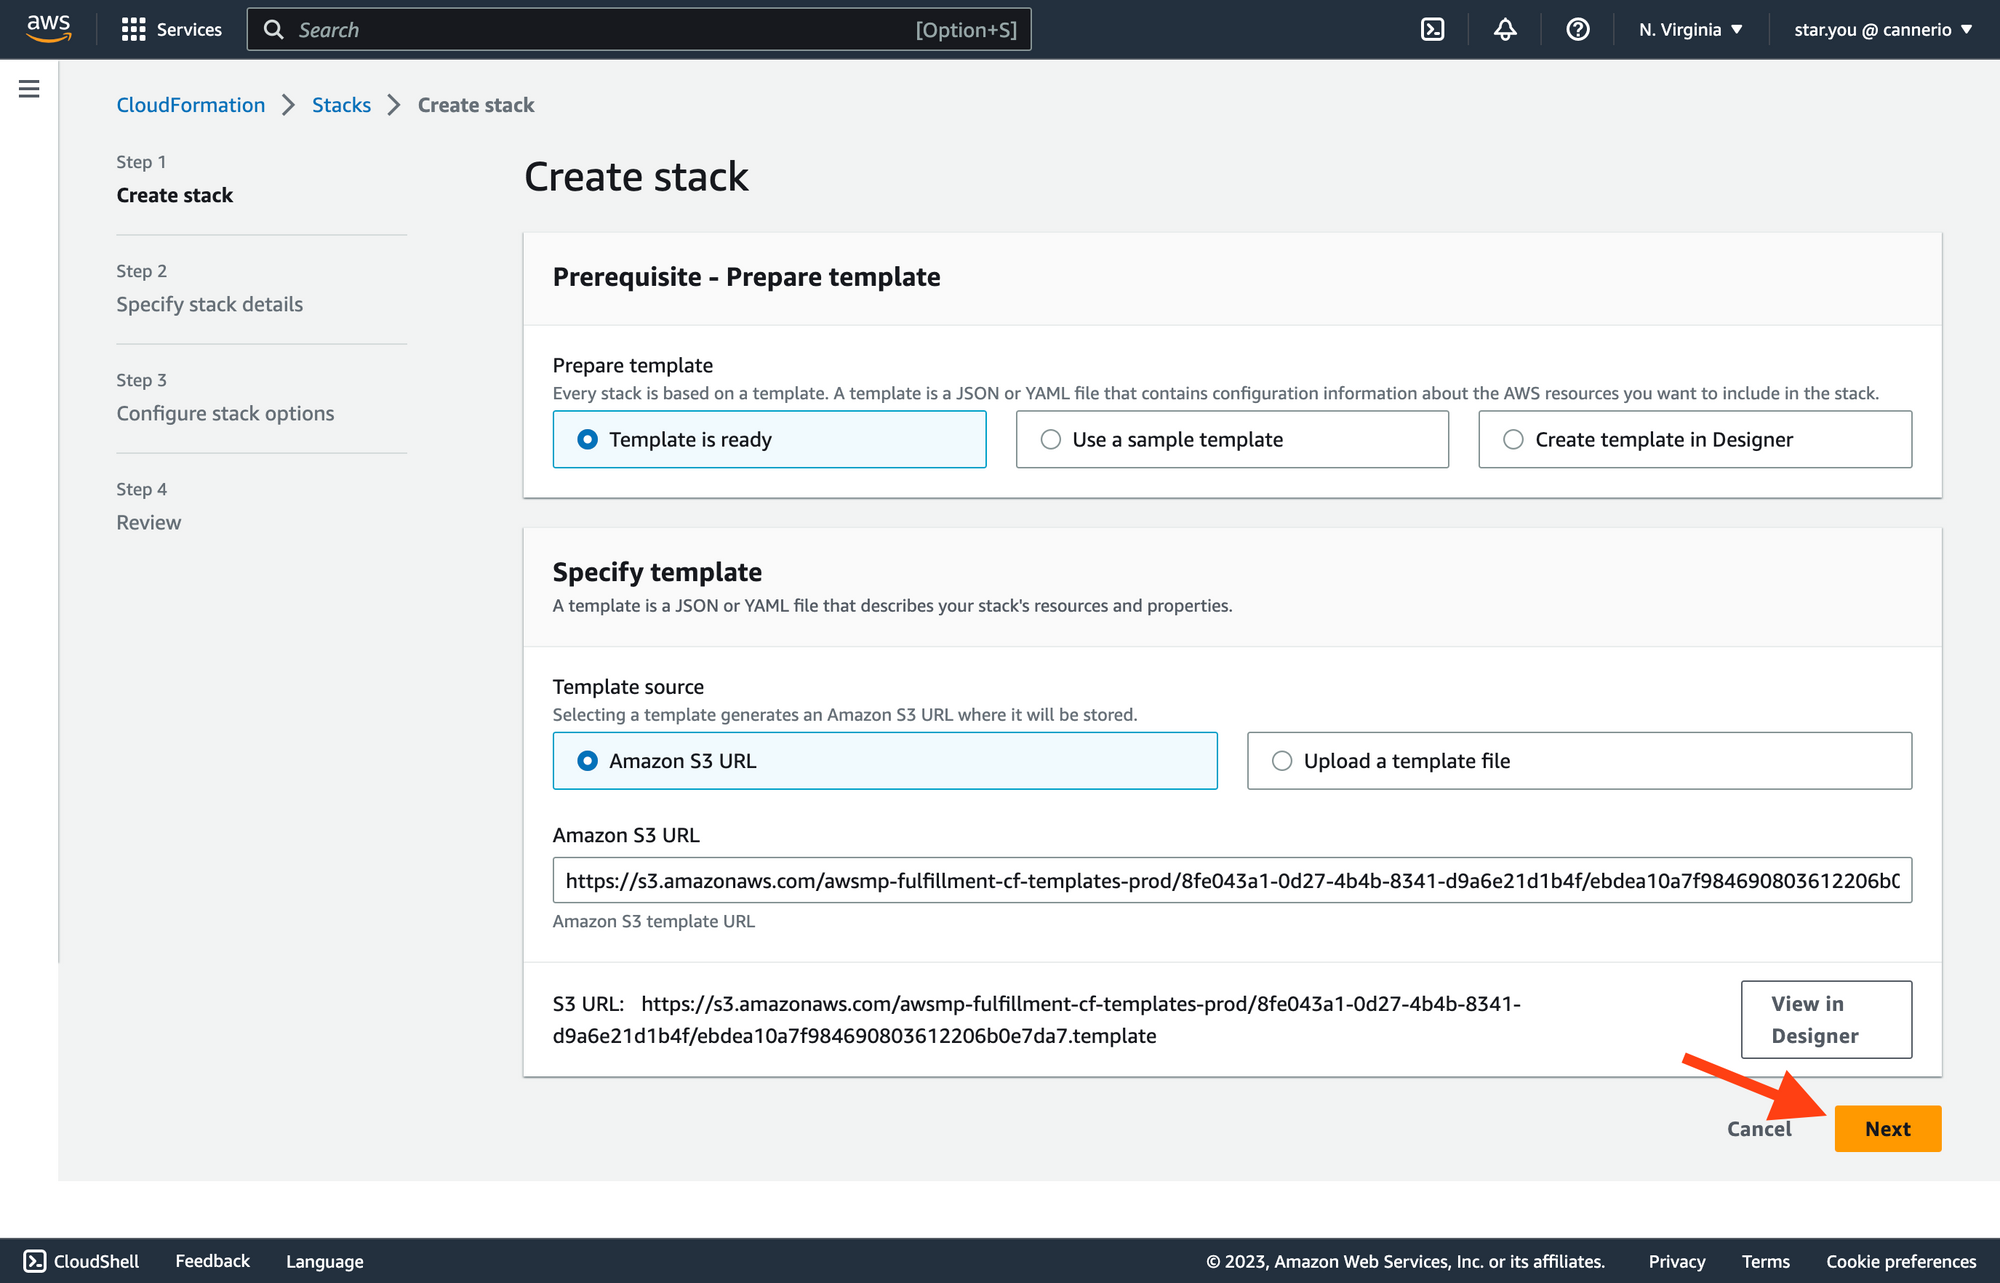
Fill out the necessary information on the
Specify stack detailspage and click theNextbutton. The required fields are: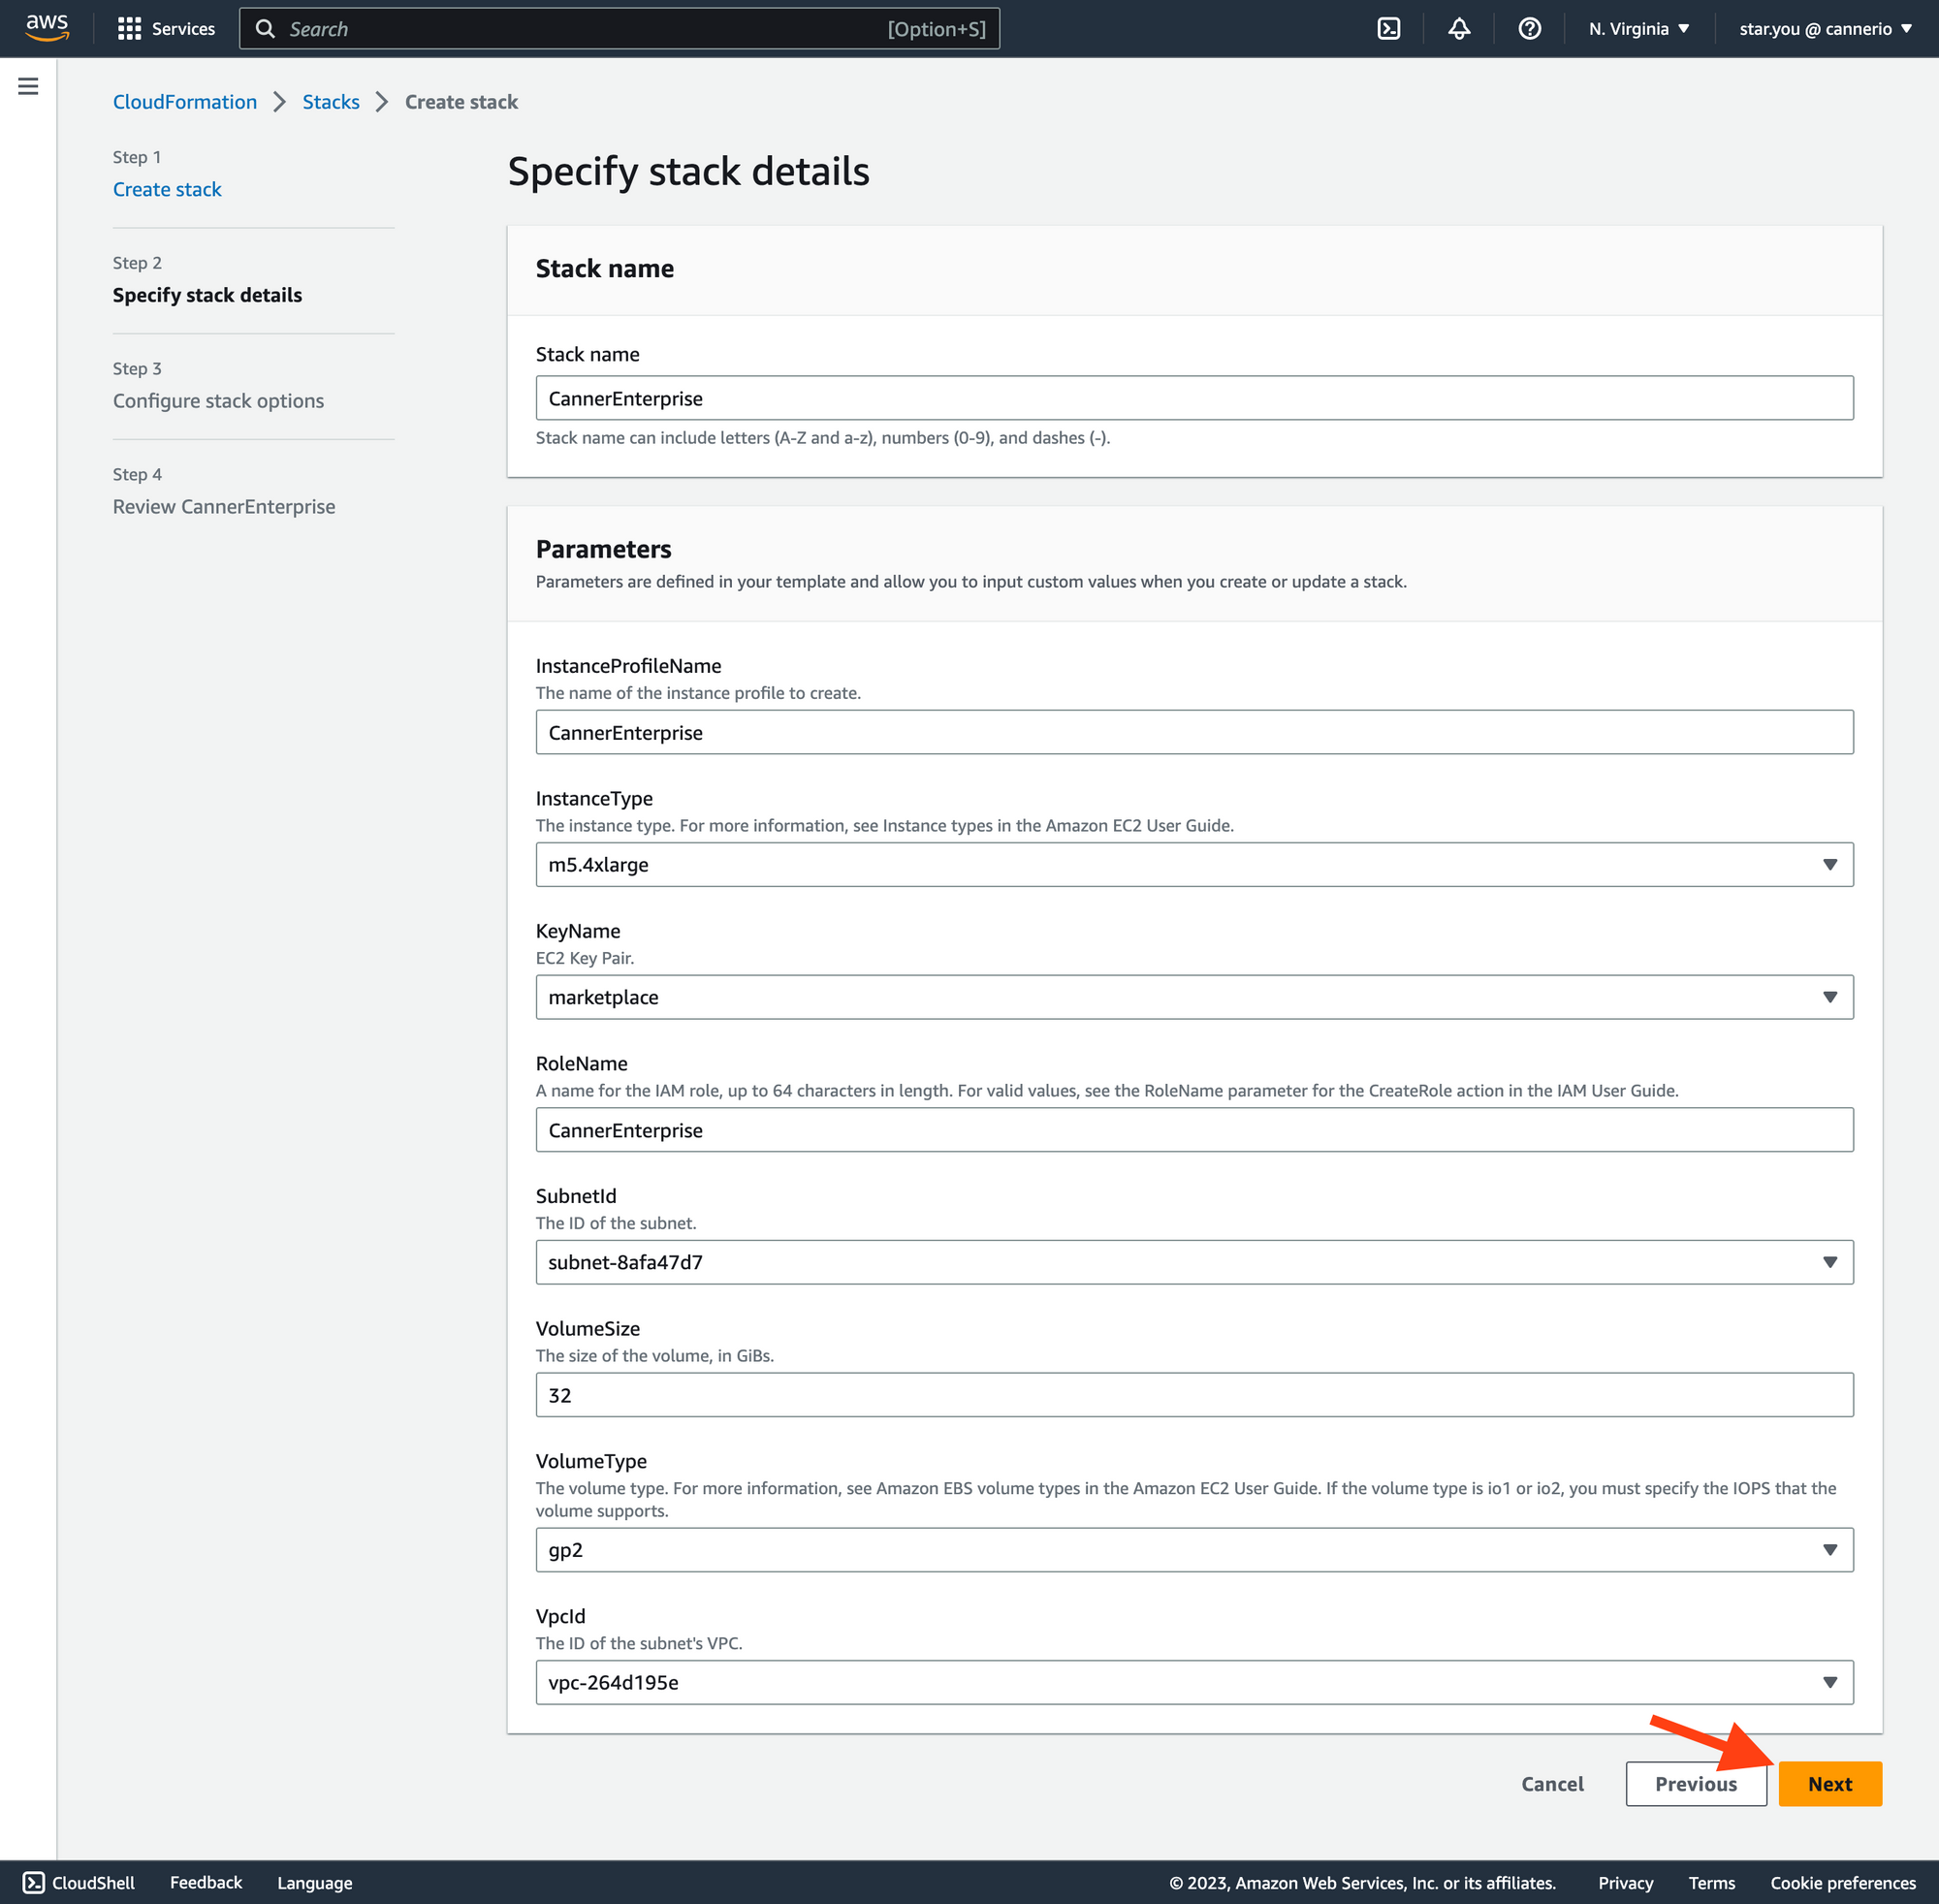
- Stack name: A user-defined name for the CloudFormation stack being created or updated.
- InstanceProfileName: The name of the IAM instance profile that will be assigned to the EC2 instances launched by the stack.
- InstanceType: The EC2 instance type to be launched by the stack, e.g., t2.micro, m5.large, etc.
- KeyName: The name of the EC2 key pair that will be used to SSH into the instances launched by the stack.
- RoleName: The name of the IAM role that will be assigned to the EC2 instances launched by the stack.
- VpcId: The ID of the VPC (Virtual Private Cloud) in which the EC2 instances launched by the stack will be deployed.
- SubnetId: The ID of the subnet within the VPC in which the EC2 instances launched by the stack will be deployed.
- VolumeSize: The size (in GiB) of the EBS (Elastic Block Store) volume to be attached to the EC2 instances launched by the stack.
- VolumeType: The type of EBS volume to be attached to the EC2 instances launched by the stack.
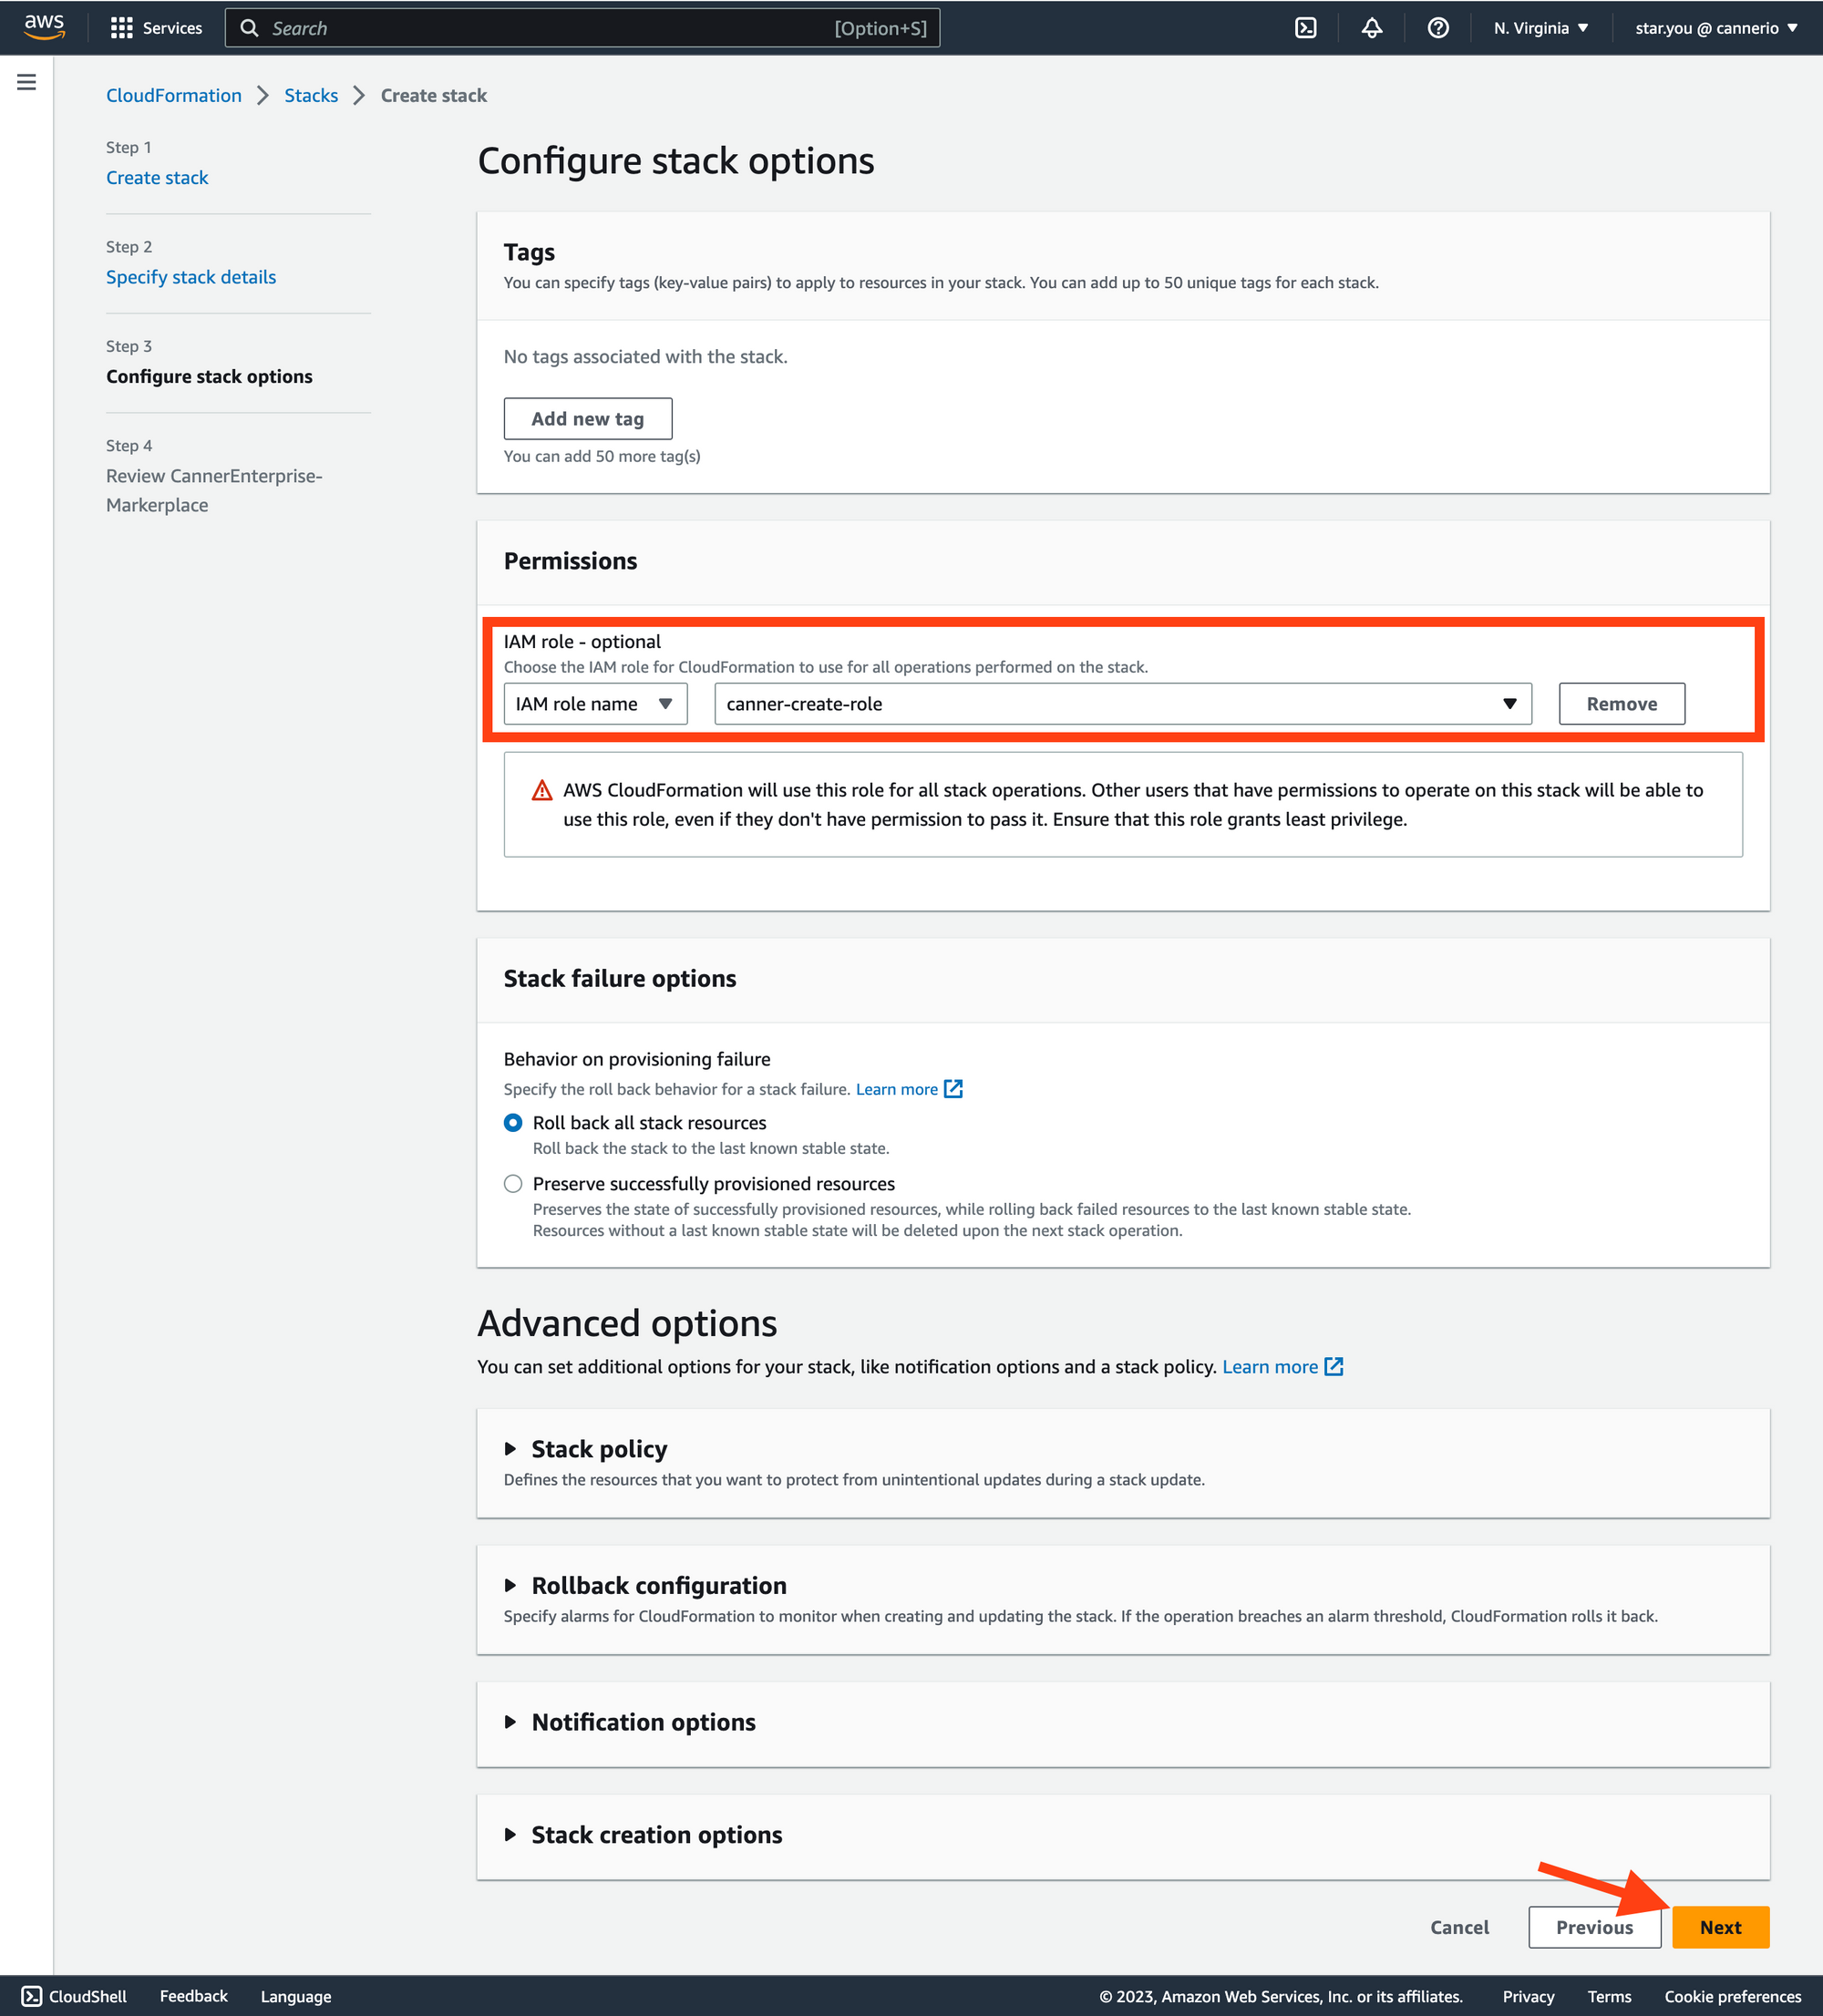
In the
Configure stack optionssection, select an IAM role to create Canner Enterprise and click theNextbutton. This IAM role must have the following permissions:{
"Version": "2012-10-17",
"Statement": [{
"Sid": "VisualEditor0",
"Effect": "Allow",
"Action": [
"ec2:DescribeImages",
"ec2:AuthorizeSecurityGroupEgress",
"ec2:AuthorizeSecurityGroupIngress",
"ec2:DescribeInstances",
"ec2:DescribeVpcs",
"ec2:CreateSecurityGroup",
"ec2:CreateTags",
"ec2:DescribeInstanceTypes",
"ec2:RunInstances",
"ec2:DescribeSubnets",
"ec2:DescribeKeyPairs",
"ec2:DescribeSecurityGroups",
"ec2:DescribeSecurityGroupRules",
"ec2:DescribeTags",
"ec2:AuthorizeSecurityGroupIngress",
"ec2:RevokeSecurityGroupIngress",
"ec2:AuthorizeSecurityGroupEgress",
"ec2:RevokeSecurityGroupEgress",
"ec2:ModifySecurityGroupRules",
"ec2:UpdateSecurityGroupRuleDescriptionsIngress",
"ec2:UpdateSecurityGroupRuleDescriptionsEgress"
],
"Resource": "*"
},
{
"Sid": "iam",
"Effect": "Allow",
"Action": [
"iam:CreateRole",
"iam:CreateInstanceProfile",
"iam:GetRole",
"iam:GetInstanceProfile",
"iam:ListRoles",
"iam:AttachRolePolicy",
"iam:PutRolePolicy",
"iam:ListInstanceProfiles",
"iam:AddRoleToInstanceProfile",
"iam:ListInstanceProfilesForRole",
"iam:PassRole",
"iam:ListAttachedRolePolicies",
"iam:ListRolePolicies",
"iam:GetRolePolicy"
],
"Resource": "*"
}
]
}
On the
Review CannerEnterprise-Markerplacepage, confirm the settings and selectI acknowledge that AWS CloudFormation might create IAM resources with custom names. Click theSubmitbutton.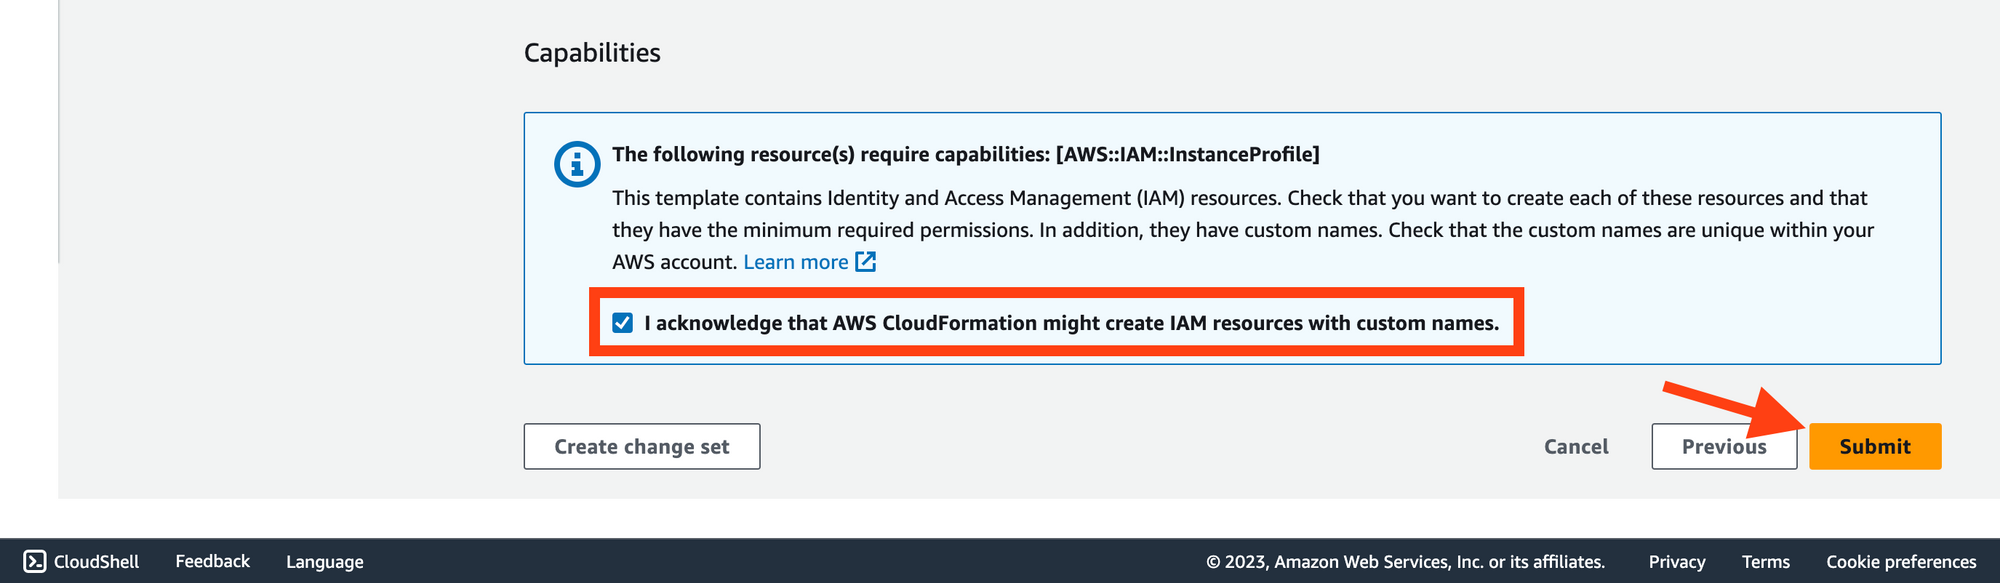
Wait for 5-10 minutes for the system to complete the setup.
Once the setup is complete, access the platform at
https://<public_dns>/web. Or if you have not set up DNS or SSL, usehttp://<public_ip>/webto log in.The default username & password:
username:canner-adminpassword:EC2 instance ID.